How to Clean a Greasy Floor in the Kitchen or Garage
You can strip grease quickly by sweeping first, blotting fresh spills, then applying an appropriate degreaser for your floor—mild detergent or vinegar mix for sealed kitchen floors, alkaline or solvent cleaners for concrete—let it sit, scrub with a stiff brush or floor machine, then rinse and dry thoroughly to prevent slipperiness. Wear gloves, ventilate, and spot-test cleaners on a hidden area. Follow with regular spot-cleaning and mats to prevent buildup, and keep going to learn practical tips and product choices.
Quick Answer How to Clean a Greasy Floor in the Kitchen or Garage
Need a quick fix? You can usually lift grease fast by sprinkling a degreasing powder or dish soap, scrubbing with a stiff brush, then rinsing with hot water.
For most kitchens and garages, a mix of hot water and a strong degreaser applied with a brush is the best-for-most method.
One-line solution
If you want a quick fix, mop the area with hot water and a few drops of dish soap, then rinse and dry.
For a one-line solution to how to clean greasy floor, scrub stubborn spots with a stiff brush and a bit more soap, blot until the film’s gone, then dry completely to prevent slipping and re-soiling.
Best-for-most cleaning method summary
For most kitchens and garages, the best method is simple: sweep or vacuum loose debris, apply a hot-water solution with a few drops of dish soap or a commercial degreaser, agitate greasy areas with a stiff brush, rinse with clean hot water, then dry thoroughly to prevent slipping and re-soiling.
You’ll tackle spots efficiently and avoid residue.
- Stubborn spots scrubbed with a stiff brush
- Rinse until water runs clear
- Dry with mop or towels to finish
Understanding Greasy Floors: Causes and Surface Differences
Grease sticks to floors because it’s oily and fills microscopic pores and cracks, making it stubborn on both smooth and rough surfaces.
You’ll encounter different challenges on tile, vinyl, linoleum, concrete, and sealed versus unsealed floors, since porosity and finish affect how grease bonds and how cleaners penetrate.
Knowing your surface lets you pick the right degreaser and method so you can remove grease without damaging the floor.
Why grease adheres to floors
Because oils and food residues bond differently to porous and smooth surfaces, you’ll find some floors hold onto grease much more stubbornly than others.
Grease sticks through adhesion, capillary action, and trapped particles. Heat and pressure spread oils into tiny crevices; detergents struggle when oil repels water.
Knowing these mechanisms helps you pick solvents, agitation, and dwell time to break bonds and lift grime.
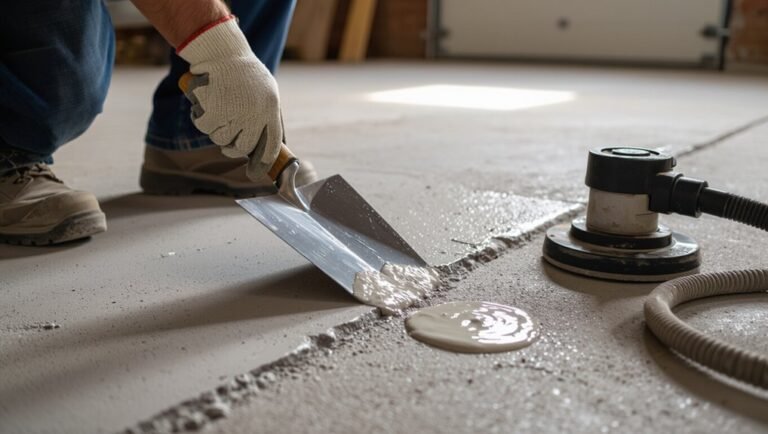
Common surfaces (tile, vinyl, linoleum, concrete, sealed/unsealed)
Surfaces vary in how they hold onto oil, so you’ll want to match your cleaning approach to the floor type.
Know common materials and their tendencies:
- Tile: glazed resists oil but grout traps grime.
- Vinyl/linoleum: smooth, can streak if cleaned with the wrong detergent.
- Concrete (sealed/unsealed): sealed sheds oil better; unsealed soaks it into pores and stains easily.
How surface type changes cleaning approach
While the basic goal—lift and remove oil—stays the same, you’ll change tactics based on what your floor’s made of and how it’s finished; porous materials need stronger, targeted treatments while smooth, sealed surfaces usually respond to milder cleaners and quicker agitation.
| Surface | Approach | Tip |
|---|---|---|
| Tile | Degreaser + scrub | Rinse well |
| Concrete | Degreaser + scrub/pressure | Seal after cleaning |
Safety and Preparation Before You Start
Before you start, put on gloves and eye protection, open windows or set up a fan for ventilation, and wear clothing you don’t mind getting dirty.
Check you have a broom, mop, scrub brush, and your choice of degreaser (commercial, citrus, or diluted dish soap) ready.
Spot-test any cleaner on an inconspicuous area and move or cover nearby items to protect them from splashes.
Personal protective equipment and ventilation
One essential step is equipping yourself with proper personal protective equipment and ensuring good ventilation so you stay safe and comfortable while cleaning a greasy floor.
Wear gloves and eye protection, open windows or run a fan, and avoid inhaling fumes from cleaners. Keep pets and kids away until fumes clear.
- Nitrile gloves and goggles
- Open windows and cross-ventilation
- Mask rated for chemical vapors
Tools and materials checklist (broom, mop, scrub brush, degreaser options)
When you’re ready to tackle a greasy floor, gather the right tools and materials so the job goes quickly and safely:
- Stiff broom, wet mop or microfiber mop, and a sturdy scrub brush for corners and textured surfaces.
- Degreaser options: citrus-based, enzymatic, or a heavy-duty commercial formula; choose based on grease severity.
- Bucket, hot water, gloves, and absorbent rags or cat litter for spills.
Spot-testing cleaners and protecting nearby items
Although you’re ready to clean, test any cleaner on a hidden spot and move or cover nearby items to prevent damage or fumes; this simple prep saves time and avoids ruined finishes or stained fabrics.
Wear gloves and ventilate the area. Check manufacturer labels for compatibility, wait the recommended dwell time, then rinse thoroughly.
Keep pets and children away until surfaces are dry and odor-free.
Step-by-Step Cleaning Process
Start by sweeping up loose dirt and crumbs.
Then blot fresh grease with paper towels, cat litter, or baking soda.
Pick a suitable degreaser—homemade or commercial—apply it, and scrub stubborn spots with the right brush and technique.
Finish by rinsing thoroughly and removing any residue so the floor is safe and non-slip.
Step 1 Remove loose debris and dry dirt
Kick up any loose debris by sweeping or vacuuming the floor thoroughly so dirt, crumbs, and pet hair don’t smear when you mop.
Focus on corners, under appliances, and along baseboards. Use a stiff broom or shop vacuum for garages.
Empty the vacuum or dustpan promptly. Removing dry particles first guarantees your degreasing step works on grease, not grit, for a cleaner finish.
Step 2 Absorb fresh grease (paper towels, cat litter, baking soda)
Now that dry dirt’s gone, tackle any fresh greasy spots before they spread. Blot with paper towels—don’t rub—to lift surface oil.
For larger spills, sprinkle cat litter to soak and sweep up after 15–30 minutes.
For smaller areas, dust baking soda, let it sit 10–20 minutes, then brush or vacuum.
Repeat absorption until residue’s minimized, then dispose properly.
Step 3 Choose and apply the right degreaser (homemade vs. commercial)
3 things matter when picking a degreaser: the grease type, the floor material, and how much elbow grease you’re willing to use.
For light kitchen grease, mix dish soap and hot water or vinegar solution.
For heavy garage oil, choose a commercial citrus or enzymatic degreaser labeled for your floor.
Test a small area, follow instructions, and rinse thoroughly after application.
Step 4 Agitate and scrub for embedded grease (brush types and techniques)
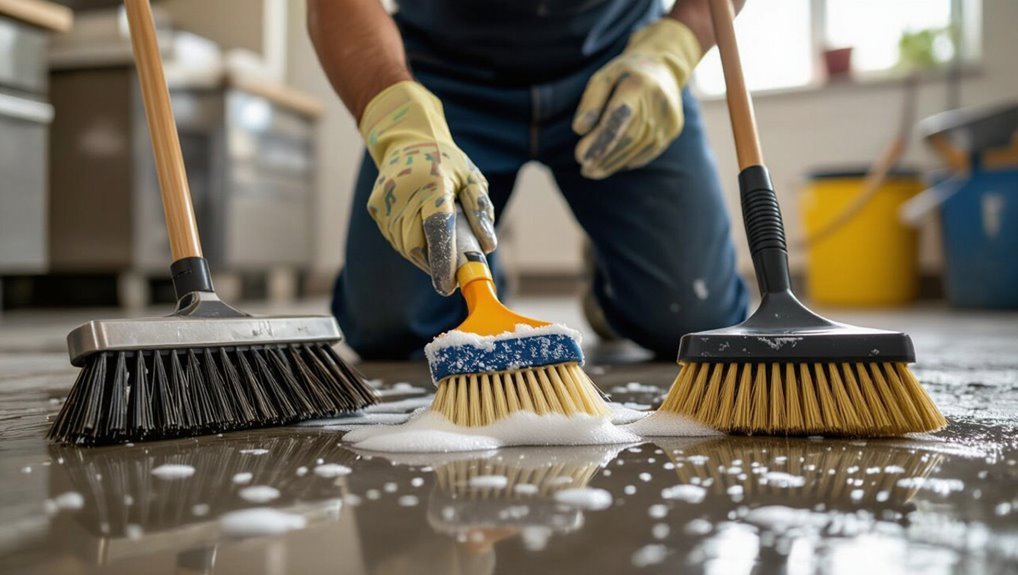
Grab the right brush and get to work: scrubbing is what lifts grease that’s soaked into pores and seams, so choose a brush that matches your floor and the job’s intensity.
Use stiff nylon for concrete, medium bristle for sealed tile, soft for delicate finishes.
Work in short, overlapping strokes, apply firm pressure, and reapply degreaser to stubborn spots until grease loosens.
Step 5 Rinse and remove residue
After scrubbing, rinse the area thoroughly to lift loosened grease and degreaser—use clean, warm water and a mop or hose, working from the cleanest edge toward a drain or collection point so you don’t spread residue back over cleaned sections.
Change rinse water as it clouds, blot stubborn spots with a damp microfiber pad, and flush the drain area until runoff looks clear and neutral.
Step 6 Drying and final inspection
Step 6 is about drying and inspecting the floor so you don’t trap moisture or miss lingering grease—use clean, absorbent towels or a dry microfiber mop to pull up water, working from the farthest point toward the exit or drain so you don’t recontaminate cleaned areas.
Feel for tacky spots, retouch with a damp cloth and mild detergent if needed, then let air circulate until fully dry.
Recipes and Product Recommendations
You can make effective homemade degreasers with simple ingredients like vinegar, baking soda, and a few drops of dish soap for everyday messes.
For tougher jobs, choose commercial degreasers matched to your floor type—stone, tile, or sealed wood—and follow the label.
If you’ve got pets or prefer greener options, I’ll point out eco-friendly, pet-safe products that still work.
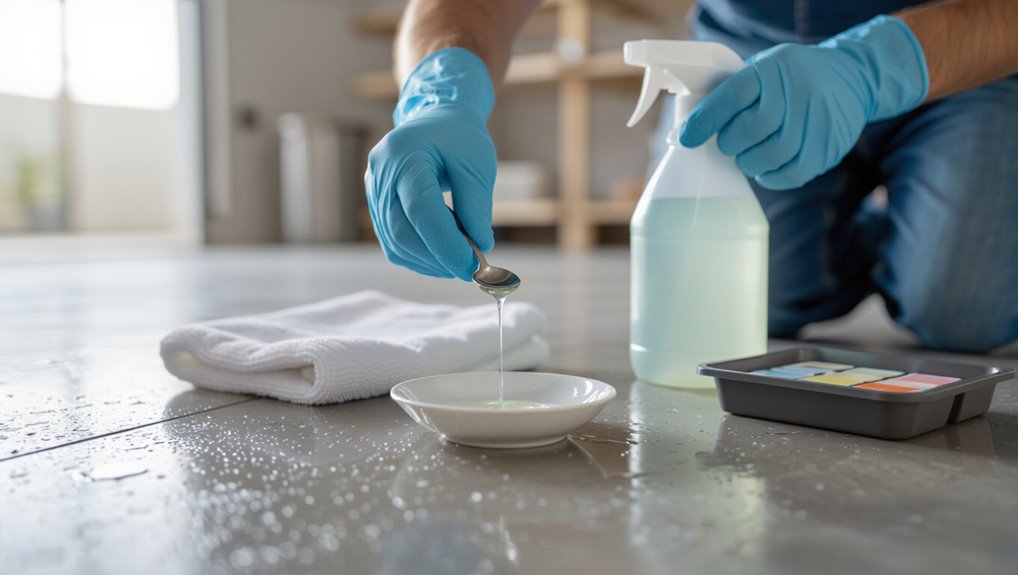
Homemade degreaser recipes (vinegar, baking soda, dish soap mixes)
While commercial cleaners work, homemade degreasers using vinegar, baking soda, and dish soap offer an inexpensive, effective alternative you can tailor to your floor type and grease level.
Mix 1 cup vinegar, 1 gallon warm water, and a tablespoon dish soap for general use. For heavy spots, sprinkle baking soda, spray the solution, scrub, then rinse.
- Kitchen tile: fizzy lift
- Garage concrete: scrub strong
- Sealed hardwood: dilute gently
Best commercial degreasers by surface type
Because different floors have different finishes and tolerances, choosing the right commercial degreaser matters—you’ll get better results and avoid damage by matching product strength and formulation to surface type. Pick pH-appropriate, manufacturer-approved cleaners: alkaline for concrete/garage, neutral for sealed wood/tile, solvent-based for heavy oil with ventilation. Test first in an inconspicuous spot.
| Surface | Recommended type |
|---|---|
| Concrete | Alkaline degreaser |
| Sealed wood | Neutral cleaner |
| Tile/grout | Enzymatic or alkaline |
| Oil stains | Solvent-based cleaner |
Eco-friendly and pet-safe options
When you need to remove grease without harsh chemicals, choose cleaners that break down oils but stay safe for pets and indoor air; simple DIY mixes and certified commercial products can both do the job.
Use a mix of warm water, baking soda, and castile soap or diluted white vinegar for tile/concrete.
Look for EPA Safer Choice or Green Seal degreasers and rinse thoroughly so pets can safely roam.
Dealing with Tough or Old Grease Stains
For stubborn or aged grease you’ll sometimes need heavy-duty methods like solvents, poultices, or a pressure washer on concrete to break the bond.
Use mechanical tools — a floor scrubber or rotary buffer — when degreasers won’t lift the stain or the area is large.
If the stain’s extensive, chemical-resistant, or on sensitive flooring, call a professional to avoid damage and guarantee proper cleanup.
Heavy-duty methods (solvents, poultices, pressure washer for concrete)
Tackle stubborn, set-in grease with heavy-duty options like solvents, poultices, or a pressure washer for concrete—each delivers more force than soap and water and should be chosen based on surface, safety, and environmental concerns.
Test solvents on hidden area, follow manufacturer PPE and ventilation guidance, apply poultices to draw oils from porous concrete, rinse thoroughly, and dispose of residues per local hazardous-waste rules.
When to use mechanical tools (floor scrubber, rotary buffer)
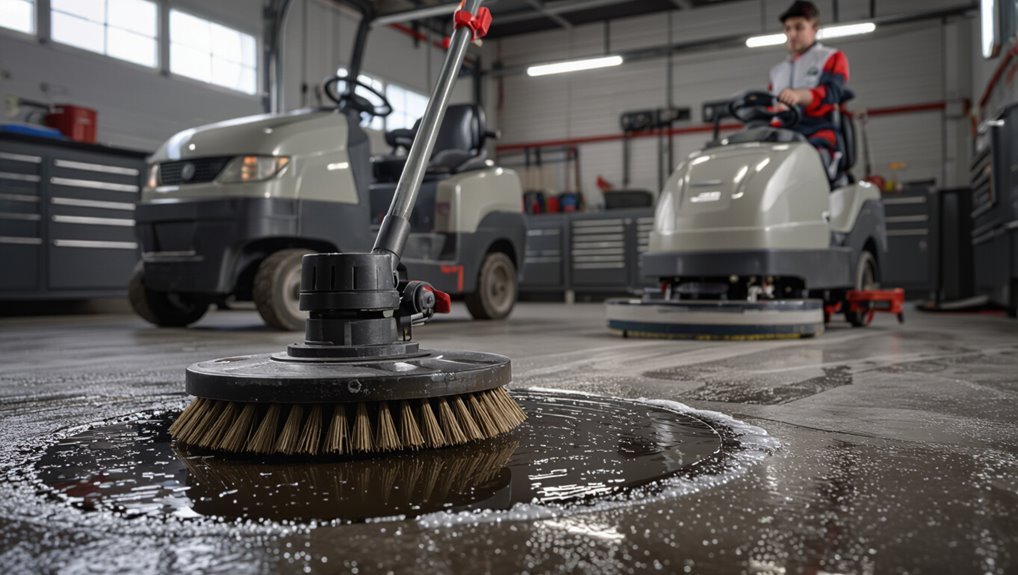
If grease stays after degreasing or the stained area’s large and compacted, bring in mechanical tools like a floor scrubber or rotary buffer to cut through residue faster than hand-scrubbing.
Use coarse pads for concrete, softer ones for sealed floors, and match cleaning solution to flooring.
Work in overlapping passes, keep machines moving to avoid gouging, and rinse thoroughly to remove loosened oil.
When to call a professional
When grease has soaked deep into porous concrete, covers a large area, or keeps coming back despite your best efforts, call a professional—these jobs often need specialized equipment, stronger solvents, or techniques that prevent surface damage.
You should hire pros if DIY methods fail, odor persists, or the stain risks structural harm. They’ll assess, use industrial cleaners or hot-water extraction, and protect surrounding surfaces.
Comparison: Kitchen vs Garage Grease Cleaning
In the kitchen you’ll deal mostly with cooking oils, sauces, and food particles, while the garage often has motor oil, grease, and dirt mixed with solvents.
You’ll choose different methods because tile or vinyl often tolerates hot water and degreasers, whereas concrete needs stronger emulsifiers, scrubbing, or pressure washing.
We’ll weigh the pros and cons of each approach so you can pick the safest, most effective option for your surface.
Typical grease sources and contaminants in each space
Although both kitchens and garages collect stubborn grease, they come from very different activities and carry distinct contaminants you’ll need to address. In the kitchen, cooking oils, butter, and food residues dominate; in the garage, motor oil, brake fluid, and road grime prevail. Tackle each with appropriate degreasers and disposal.
| Kitchen | Garage |
|---|---|
| Cooking oil | Motor oil |
| Food residue | Grease/grease splatter |
| Butter/shortening | Brake fluid |
| Sauces | Road salt/grit |
| Cooking fumes | Solvents/paints |
Surface-specific pros and cons of cleaning methods
You’ve seen how kitchen and garage greases differ, and that means you’ll need different cleaning methods for each surface.
You’ll choose milder, food-safe cleaners and microfiber for sealed kitchen floors, tougher degreasers and scrubbing for concrete, and avoid harsh acids on finished surfaces.
Consider safety, residue, and effort when picking a method:
- Kitchen: gentle, low-residue cleaners, quick wipe
- Garage: strong degreasers, elbow grease
- Both: rinse, ventilate, protect finishes
Common Mistakes and How to Avoid Them
Don’t grab a cleaner that’s harsh on your floor—match the product to the surface to avoid etching or residue.
Don’t soak porous floors, since excess water can warp or stain them.
And don’t ignore ventilation or safety gear, because fumes and slippery surfaces create real hazards.
Using the wrong cleaner for the surface
If you use a cleaner that’s not meant for your floor, you’ll often do more harm than good—residue, etching, or slippery film can appear even when the grease seems gone.
Check manufacturer recommendations, test any product in a hidden spot, and match cleaner pH to the surface.
Use degreasers designed for tile, sealed wood, or concrete to protect finish and guarantee safe traction.
Over-wetting porous floors and causing damage
One common mistake is soaking porous floors—like unsealed wood, natural stone, or certain concrete—because excess water soaks in, warps boards, lifts finishes, and can stain or promote mold.
You should use minimal liquid, mop with a damp (not dripping) cloth, blot spills quickly, and test cleaners on an inconspicuous spot.
Dry thoroughly and seal or repair porous surfaces to prevent recurrence.
Neglecting ventilation or safety precautions
When you skip proper ventilation or ignore basic safety steps, fumes from cleaners can build up and breathing them—or slipping on a wet patch—becomes a real risk.
Open windows, run fans, and wear a mask and gloves. Keep kids and pets away.
Post wet-floor signs and dry thoroughly to prevent falls and chemical exposure.
- Closed room with strong bleach smell
- Slippery suds trail
- Unattended mop bucket
Prevention and Best Practices to Keep Floors Grease-Free
To keep grease from coming back, establish simple daily and weekly cleaning routines that catch spills before they set.
Use protective measures like floor mats, drip trays, and appropriate sealants to shield high-risk areas.
Store and handle oils and greasy items carefully—use sealed containers and spill-proof dispensers—to cut down on future messes.
Daily and weekly maintenance routines
Daily habits cut grease buildup before it starts, so set a simple routine you’ll stick with:
- Sweep spills immediately, then spot-clean with a degreasing cleaner to prevent stains.
- Mop high-traffic zones twice weekly using warm water and mild detergent, rinsing residue thoroughly.
- Inspect under appliances and workbenches weekly; wipe up drips, tighten fittings, and address oil leaks promptly to avoid long-term buildup.
Protective measures (floor mats, trays, sealants)
Because small preventive steps pay off, using mats, trays, and sealants keeps grease from reaching and damaging your floors.
Place absorbent, non-slip mats under sinks, stoves, and workbenches. Use drip trays beneath machinery or cans.
Apply a compatible floor sealant on concrete or grout to create a wipeable surface.
Inspect and replace protective items regularly to maintain effectiveness and prevent trapped residue.
Storage and handling tips to reduce future spills
When you store liquids and greasy products thoughtfully and handle them with care, you’ll cut spill risks dramatically; keep heavy containers on low, stable shelves, label and cap every container tightly, and use sealed bins or drip trays for transfers.
Inspect containers regularly, replace damaged ones, group similar items, use pumps for frequent dispensing, and clean up small drips immediately to prevent buildup and slips.
Troubleshooting Guide: Problems and Quick Fixes
If grease keeps reappearing after you clean, check for missed spots, oily underlayers, or vents blowing grease back onto the floor.
If you notice persistent discoloration or etching, you may need a gentler cleaner or a professional resurfacing rather than more scrubbing.
And if a cleaner leaves a slippery residue, rinse thoroughly with clean water or switch to a non-film-forming product.
Grease reappearing after cleaning
Though you may think you’ve cleaned thoroughly, grease can come back for a few common reasons; this section helps you identify the cause quickly and apply the right fix.
Check for residue from mild cleaners, oily buildup in grout or seams, or contaminated mop water.
Reclean with a degreaser, rinse thoroughly, dry, and change cleaning solutions frequently to prevent redepositing oil.
Persistent discoloration or etching
Because some floors absorb oil and cleaners differently, you may see patches that look stained or etched even after degreasing; these spots often mean the finish or the stone itself has been harmed rather than just soiled.
Test a small area with a manufacturer-approved restorative product or poultice. If damage’s deep, consult a professional for refinishing or stone repair to avoid worsening the etch.
Cleaner leaving a slippery residue
Notice a slick film after mopping? You’re probably using too much detergent or a product not meant for your floor.
Rinse thoroughly with clean water, then mop again using a neutral-pH cleaner diluted per label.
For stubborn residue, mop with warm water and a splash of white vinegar, then dry completely.
Test a small area before full treatment to avoid damage.
Frequently Asked Questions
You probably have a few quick questions about cleaning greasy floors, and this FAQ will answer the most common ones.
We’ll cover whether dish soap is safe for different floor types, if bleach helps, how long to wait between degreaser applications, whether pressure washing can harm garage concrete, and if enzymatic cleaners are worth it.
If you need step-by-step guidance for any answer, ask and I’ll walk you through it.
Can I use dish soap on all floor types?
Curious whether dish soap works on every floor? You can use mild dish soap on sealed tile, vinyl, linoleum, and finished hardwood in small amounts, rinsing well.
Avoid undiluted soap on unsealed wood, waxed floors, and some natural stone—soap films can dull or penetrate.
Always test a hidden spot, dilute properly, and dry to prevent residue or damage.
Is bleach effective for greasy floors?
Is bleach effective for greasy floors?
Bleach can sanitize and remove some residue, but it isn’t a strong degreaser.
You should use a dedicated degreaser or dish soap to break down oil first, then apply diluted bleach only if the surface is bleach-safe and needs disinfection.
Never mix bleach with ammonia or other cleaners, and ventilate the area well.
How long should I wait between applications of degreaser?
How long you wait between degreaser applications depends on the product’s label, the floor’s grease level, and how well the first pass removed residue; typically wait 5–15 minutes to let the solution work, then rinse and repeat if grease remains.
If stubborn spots persist, agitate with a brush after the dwell time, then reapply once surface appears visibly cleaner and not overly saturated.
Will pressure washing damage garage concrete?
Will pressure washing harm your garage concrete? It can if you use too much pressure, wrong nozzle, or wash damaged slab.
Use 1500–3000 PSI cautiously, keep tip 12–18 inches away, and move steadily. Avoid high pressure on cracked or thin concrete; pre-treat stains and test a small area.
Seal afterward to protect the surface and prevent etching.
Are enzymatic cleaners worth using?
You can protect concrete after pressure washing, but choosing the right cleaning products matters just as much—especially for greasy floors.
Enzymatic cleaners break down organic residues—oil, food, grease—using natural enzymes. You’ll often see gentler, eco-friendly results on sealed surfaces and porous concrete.
They’re worth trying for persistent organic stains, though heavy petroleum may need degreasers first. Always follow label directions.