How to Clean Engineered Flooring Without Causing Warping or Dullness
You can keep engineered flooring looking like new by dusting daily, wiping spills immediately with a damp microfiber cloth, and mopping only with a well-wrung microfiber mop and a pH-neutral or manufacturer-approved cleaner. Never soak the floor, use steam cleaners, or abrasive products, and avoid ammonia, bleach, and oil-based cleaners. Control indoor humidity (30–50%) to prevent warping and use soft tools to avoid dulling the finish; follow these basics and you’ll find more tips for tougher problems.
How to Clean Engineered Flooring Without Warping or Dullness
To prevent warping and dullness, stick to a damp mop with a manufacturer-approved cleaner and never soak the floor.
Wipe up spills immediately and avoid harsh chemicals, steam cleaners, or abrasive pads.
Use felt pads on furniture and a microfiber mop for regular, gentle cleaning.
Direct, actionable summary (best method and immediate dos/don’ts)
When you want quick, safe results, sweep or vacuum loose grit, spot-clean spills immediately with a damp (not wet) microfiber cloth, then mop with a barely damp microfiber or flat mop and a pH-neutral cleaner formulated for engineered wood.
For how to clean engineered flooring: don’t flood, avoid steam mops and abrasive cleaners, use felt pads under furniture, dry promptly, and follow manufacturer care instructions.
Basic Understanding What Engineered Flooring Is and Why It Reacts to Cleaning
You’re working with a layered product: a real wood veneer bonded to plywood or HDF, and that structure reacts differently than solid hardwood.
If you use excess moisture, abrasive cleaners, or the wrong tools, the core can swell or the surface can scratch and lose its luster.
Also note common finishes—urethane, oil, and UV-cured coatings—each has specific vulnerabilities that dictate which cleaners and methods are safe.
Composition and layers of engineered wood
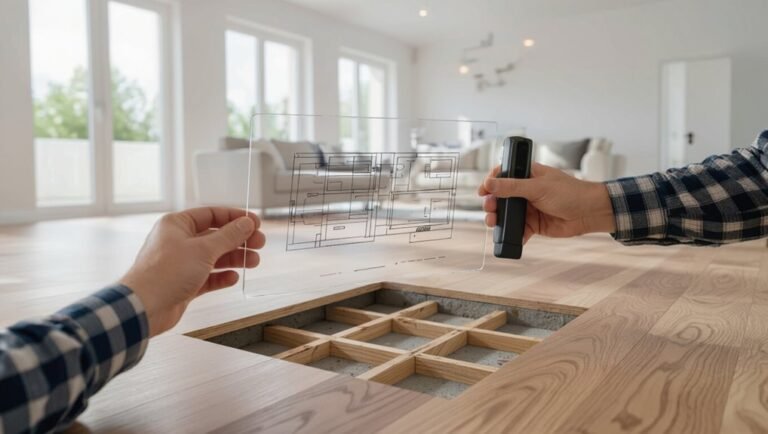
Engineered wood combines a real hardwood veneer over multiple stacked plywood or high-density fiberboard layers, so you get the look of solid wood with added stability.
The top veneer provides appearance and can be refinished a limited number of times. Beneath, cross‑grained core layers resist movement. A backing layer balances the plank.
Thicknesses and layer construction determine durability, stability, and finishing options.
How moisture, abrasive cleaners, and improper tools cause warping and dullness
Because engineered flooring pairs a thin real-wood veneer with layered cores, it reacts differently to cleaning than solid wood does. Excessive moisture, harsh abrasives, or the wrong tools can quickly cause warping, delamination, or a dulled finish.
You should avoid soaking, scrubbers with metal bristles, and gritty powders; they’ll lift layers, swell cores, and abrade the veneer, shortening lifespan and harming appearance.
Common finish types and their vulnerabilities (urethane, oil, UV-cured)
While the layered core affects structural behavior, the surface finish determines how the floor handles spills, cleaners, and wear.
Urethane finishes resist water and chemicals but can dull with harsh abrasives.
Oil finishes penetrate wood, offering warmth but need gentle oiling and can stain.
UV-cured coatings are hard and durable yet brittle; they chip with impact and require pH-neutral cleaners to maintain shine.
Tools and Products You Should Use and Avoid
You’ll want the right tools—microfiber mop, soft broom, and a vacuum on a hard-floor setting—to prevent scratches and pick up fine debris.
Use pH-neutral or manufacturer-recommended cleaners and always check labels for finish compatibility.
Avoid steam mops, abrasive pads, waxes, and harsh chemicals that can damage the wear layer.
Recommended tools (microfiber mop, soft broom, vacuum settings)
A few simple tools will keep engineered floors looking their best: a microfiber mop for regular dusting and damp cleans, a soft-bristled broom for corners and edges, and a vacuum with a hard-floor setting or brush-roll turned off to lift grit without scratching.
Keep mop heads clean, use a flat or spray microfiber for control, and empty the vacuum frequently to avoid redistributing particles.
Safe cleaning products (pH-neutral cleaners, manufacturer-recommended solutions)
Because engineered floors have a factory finish that can react to harsh chemicals, stick to pH-neutral cleaners and any solutions your flooring manufacturer recommends.
You’ll protect the finish and warranty. Test new products in an inconspicuous area first, dilute concentrates per directions, and apply sparingly with a damp microfiber mop.
Rinse residues and dry promptly to prevent streaking or moisture damage.
Products and tools to avoid
If you want your engineered floor to last, steer clear of abrasive tools and harsh chemicals that can strip the finish or force moisture into the core layers.
Avoid these common offenders and behaviors:
- Steel wool or scouring pads
- Wet mops left soaking
- Ammonia, bleach, or oil-based cleaners
- Steam cleaners or high-heat machines
How to read product labels and finish compatibility
1 clear step to protect your floor is learning how to read product labels so you can match cleaners to your finish.
Check for “safe for engineered” or “sealed hardwood” claims, pH level (neutral is best), and avoid solvents or ammonia.
Test in a hidden area, follow dilution instructions, and verify finish type—urethane, aluminum oxide, or oil—before using any product.
Step-by-Step Cleaning Routine (Daily to Deep Cleaning)
Start with quick daily dusting and spot-cleaning to keep grit and spills from scratching the finish.
Once a week you’ll use a lightly damp microfiber mop and a gentle technique to remove soil without over-wetting.
Each month do a deeper clean with a diluted manufacturer-approved cleaner, and schedule seasonal or annual buffing, re-coating, or professional care as needed.
Step 1: Daily maintenance quick dusting and spot cleaning
Sweeping or dry-mopping your engineered floor every day keeps dirt and grit from scratching the finish, and quick spot cleaning removes spills before they stain.
Use a microfiber broom or dust mop, lift debris instead of pushing it, and blot spills immediately with a soft cloth.
For sticky spots, dampen the cloth slightly with a pH-neutral cleaner and dry the area thoroughly.
Step 2: Weekly light cleaning damp mopping technique
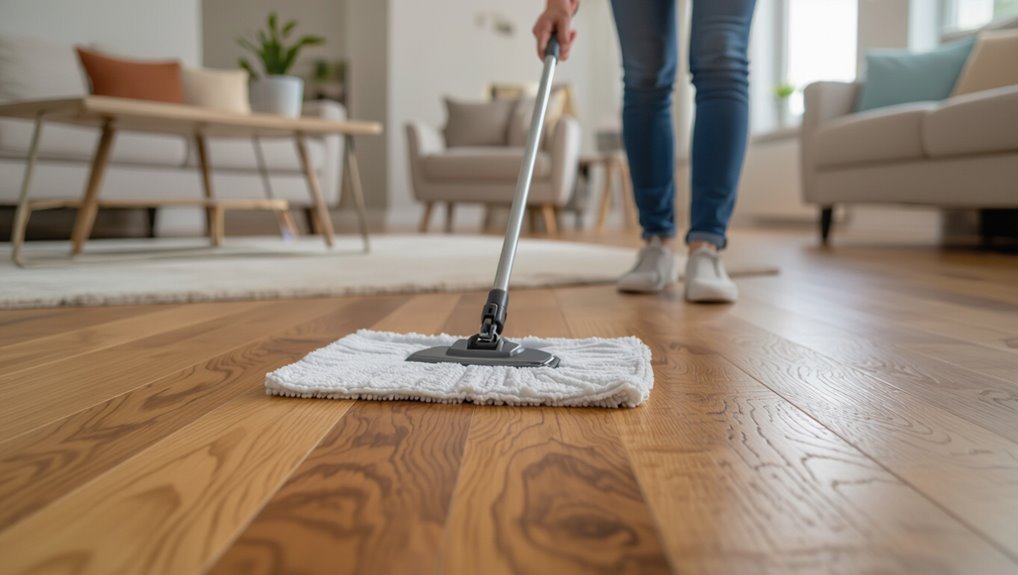
After your daily dusting and spot checks, plan a once-a-week damp-mop session to remove fine grime and restore the floor’s sheen without over-wetting the boards.
Use a well-wrung microfiber mop, damp not dripping. Work with the grain, rinse the mop frequently, and change water when cloudy.
Dry any streaks immediately with a clean, soft towel to prevent moisture damage.
Step 3: Monthly deeper clean diluted cleaner and microfiber method
Mix a manufacturer-approved hardwood or engineered-floor cleaner with water according to the label, then use a well-wrung microfiber mop to work small sections across the grain—this monthly deeper clean lifts embedded dirt without saturating the boards.
Rinse the mop frequently, change solution when visibly soiled, and dry each area promptly with a clean microfiber cloth to prevent moisture damage and streaking.
Step 4: Seasonal or annual maintenance buffing, re-coating, professional care
Schedule seasonal or annual maintenance to keep your engineered floor looking and performing its best: every few months to once a year (depending on traffic and manufacturer guidance) you’ll buff to restore luster, apply a compatible recoat when finish wear appears, and call a pro for deep restorations or damage beyond DIY repair.
You should test products, follow manufacturer specs, and address scratches promptly to prevent moisture intrusion.
Techniques to Prevent Warping
To prevent warping, you should keep indoor humidity between about 35–55% and use a hygrometer to monitor levels.
Wipe spills immediately with an absorbent cloth and keep a dry mop or microfiber towel on hand, and never use steam cleaners or soak the floor.
Place entry mats, use pet pads and elevation for plant pots to stop excess moisture at the room level.
Controlling moisture and humidity (ideal ranges and monitoring)
When you control indoor humidity and moisture, you vastly reduce the risk of engineered flooring warping or cupping; aim to keep relative humidity between about 30–50% and indoor temperatures stable, and monitor both with a reliable hygrometer and periodic moisture readings of the subfloor.
Use humidifiers or dehumidifiers as needed, ventilate rooms, seal plumbing leaks, and address condensation sources promptly to maintain consistent conditions.
Drying spills quickly best practices and tools
Controlling humidity helps prevent moisture problems, but fast action on spills keeps a small incident from becoming a big one.
Blot liquids immediately with absorbent towels, then use a microfiber mop to lift residue. Air-dry with fans or a dehumidifier positioned toward the damp area.
For edges and seams, gently lift and dry with a soft cloth to prevent trapped moisture and warping.
Avoiding steam cleaners and wet-mopping pitfalls
Although steam cleaners and soaking mops promise deep clean, they can force moisture into seams and cores and cause engineered flooring to swell or delaminate; avoid them and use lightly dampened microfiber mops instead, wiping up any excess moisture immediately.
You should wring mops thoroughly, clean in the direction of the grain, and air-dry floors quickly.
Never leave standing water or use abrasive scrubbing.
Room-level actions (entry mats, pet care, plant trays)
If you want to keep engineered floors stable, take simple room-level steps like placing durable entry mats, managing pets’ nails and accidents, and using watertight plant trays under all pots.
Wipe spills immediately, keep a pet cleanup kit handy, trim nails regularly to prevent scratches, and position trays to catch overflow.
Rotate plant pots to avoid prolonged moisture in one spot.
Techniques to Prevent Dullness and Preserve Finish
To keep your engineered flooring looking fresh, use protective pads on furniture, rugs in high-traffic zones, and strategically placed mats at entries.
Gently buff or use manufacturer-approved polishes or refinishers when sheen fades, following product instructions to avoid overworking the surface.
Remember that heavy foot traffic and abrasive furniture can dull finishes, so rotate rugs and check pads regularly.
Use of protective pads, rugs, and mat placement
Place felt or rubber pads under furniture legs and use area rugs or mats in high-traffic zones to stop grit and chair movement from dulling your engineered flooring.
Rotate rugs periodically to even wear, choose nonstaining, breathable rug pads to prevent moisture buildup, and keep entry mats outside and inside to trap dirt.
Clean pads and rugs regularly to maintain protection and appearance.
Gentle buffing and restoration techniques
Once you’ve protected high-traffic areas with pads and rugs, you’ll want to keep the finish looking fresh with gentle buffing and spot restoration.
Use a soft microfiber cloth or a low-speed buffing pad to lift light scuffs. Test any method in an inconspicuous spot first.
For stubborn marks, dampen the cloth slightly—never soak—and rub gently along the grain until the gloss returns.
When to use manufacturer-approved polish or refinisher
Knowing when to use a manufacturer-approved polish or refinisher helps you protect the warranty and get predictable results.
Use approved products when finish wear is uniform, dullness resists gentle cleaning, or the maker’s instructions recommend refreshes.
Avoid DIY or unknown brands that can react with factory coatings.
Test in an inconspicuous area, follow application steps, and allow full cure before normal use.
How foot traffic and furniture affect sheen
Because everyday movement and heavy furniture concentrate wear in specific spots, your engineered floor’s sheen can fade unevenly over time.
Rotate rugs and move furniture occasionally to distribute wear. Use felt pads under legs, avoid dragging items, and place runners in high-traffic zones.
Clean gently with manufacturer-approved products to maintain finish, and reseal or refinish only when sheen loss becomes noticeable.
Troubleshooting Common Problems
If you spot minor warping or cupping, act quickly with moisture control and temporary weights to prevent permanent damage.
For stains, scratches, scuffs, and dull patches you’ll use different cleaners, spot treatments, or DIY repair kits—or call a pro when repairs exceed surface level.
I’ll walk you through specific fixes for each issue so you can choose the safest, most effective option.
Minor warping or cupping quick fixes and when to act
When small sections of your engineered floor start to cup or show slight edge lift, you can often fix them yourself before they worsen; quick checks and targeted steps usually stop minor warping from spreading.
Assess humidity, tighten loose boards, reduce moisture sources, and use a dehumidifier or fans to flatten cupped planks.
Act within days for best results; consult a pro if gaps or cracking persist.
Stains and spots tailored removal methods by stain type
Minor warping often signals moisture problems, but stains and spots need a different approach: identify the stain type, then use targeted cleaners and techniques to avoid damaging the finish.
For common stains, act quickly, test cleaners in an inconspicuous spot, and blot—don’t rub. Use gentle, pH-neutral solutions for organic stains; solvent wipes for ink or oil; and paste poultices for dried residue.
- Organic stains: vinegar solution
- Ink/oil: rubbing alcohol
- Dye: peroxide spot test
- Gum/adhesive: ice then scraper
Scratches and scuffs DIY repair vs professional repair
1 clear rule helps decide whether to DIY or call a pro: assess the depth and finish damage.
If scratches are superficial, you can buff, use a matching touch‑up marker, or apply a blending filler.
Deep gouges, finish breaches, or widespread damage need a professional to refinish or replace planks.
Protect repaired areas and monitor for color mismatch or finish failure.
Dull areas restore sheen without damaging finish
If dull spots have dulled the overall look, you can often restore sheen without harming the finish by using the right cleaner and a gentle polishing method.
Test a manufacturer-approved, pH-neutral cleaner in an inconspicuous area. Use microfibre, circular motions and minimal moisture.
Avoid waxes, oil soaps, or abrasive pads. Repeat sparingly until sheen returns; stop if finish changes.
Comparison: Engineered Wood vs. Solid Wood vs. Laminate Cleaning (Quick Table)
You’ll want to compare how each floor type handles cleaning sensitivity, moisture tolerance, and which cleaners are safe to use.
Engineered wood is generally more moisture-tolerant than solid wood but less so than laminate, and each needs different pH-safe or manufacturer-approved products.
Use the quick table below to match floor type with best practices and avoid damage.
Cleaning sensitivity, moisture tolerance, recommended cleaners
Because engineered flooring combines a real hardwood veneer over a stable core, it reacts differently to cleaning and moisture than solid wood or laminate, and you’ll want to adjust your routine accordingly. You should use minimal moisture, pH-neutral cleaners, and avoid abrasive tools to prevent warping or dullness.
| Type | Moisture Tolerance | Recommended Cleaner |
|---|---|---|
| Engineered | Moderate | pH-neutral, damp mop |
| Solid | Low | Wood-specific, very dry |
| Laminate | High | Gentle multi-surface, minimal water |
Common Mistakes That Cause Warping or Dullness
Don’t soak engineered floors or use steam cleaners — excess moisture is a top cause of warping.
Avoid abrasive tools, harsh chemicals, and the wrong polishes or waxes, which can strip the finish and leave floors dull.
Also keep humidity in check and wipe spills promptly to prevent both cupping and surface damage.
Over-wetting and steam cleaning
If you soak engineered flooring or use a steam cleaner, moisture can seep into the core and cause swelling, warping, or a dulled finish.
Don’t drench the floor: mop with a well-wrung microfiber or spray lightly, then dry immediately.
Wipe spills promptly and avoid prolonged dampness near seams or edges.
Use manufacturer-approved cleaners and minimal water.
Using abrasive tools or harsh chemicals
1 common mistake is reaching for abrasive pads, steel wool, or powerful chemical strippers to tackle scuffs and stains; those tools and cleaners can abrade the finish, strip protective coatings, and penetrate the veneer, leaving the floor dull or prone to warping.
Instead, use soft microfiber mops, pH-neutral cleaners, spot-test products, and gently buff with a soft cloth to preserve finish and appearance.
Ignoring humidity control or delayed spill response
When you skip humidity control or let spills sit, engineered flooring can swell, warp, or lose its finish because moisture seeps into the veneer and stabilizing layers; act quickly by wiping up liquids immediately and keep indoor humidity between about 35–55% to prevent cupping, gaps, or dulling of the surface.
Use a dehumidifier or humidifier as needed, monitor with a hygrometer, and dry wet areas fast.
Applying wrong polishes or waxes
Because engineered flooring has a thin real-wood veneer over composite layers, using the wrong polish or wax can clog the finish, attract dirt, and even cause swelling or dullness.
Don’t apply oil-based or silicone products; they leave residues and alter sheen.
Use manufacturer-approved cleaners and finishes, test in an inconspicuous spot, and recoat only with recommended products to preserve appearance and stability.
Best Practices Checklist (At-a-Glance)
Keep a simple routine so your engineered floors stay clean and damage-free over time.
Below is a quick, at-a-glance checklist you can follow on different schedules to prevent buildup and wear. Use these checkpoints to build a habit that fits your home.
- Daily: sweep or dry-mop to remove grit and spills.
- Weekly: damp-mop with a manufacturer-approved cleaner.
- Monthly: check for scratches, loose boards, and deep-clean high-traffic areas.
- Yearly: inspect seals, recoat if recommended, and address any moisture issues.
Daily, weekly, monthly, and yearly checklist items
1 simple checklist can keep your engineered flooring looking great and lasting longer: follow clear daily, weekly, monthly, and yearly tasks that address dirt, spills, wear areas, and protective maintenance.
Daily: sweep/vacuum and wipe spills immediately.
Weekly: damp-mop with manufacturer-approved cleaner.
Monthly: deep-clean high-traffic zones, inspect finishes.
Yearly: reseal edges, check underlays, touch up scratches and replace worn pads.
When to Call a Professional
If your engineered floor has deep scratches, warping, persistent stains, or a finish that’s peeling, you’ll want a pro to assess whether restoration or replacement is needed.
A professional can explain the scope of work, typical costs, and the timeframe so you know what to expect.
Before hiring, ask about their experience with engineered flooring, warranties, materials they’ll use, and whether they’re insured and licensed.
Signs your floor needs professional restoration
Wondering whether your engineered floor needs professional restoration? Look for deep scratches, cupping or warping across boards, persistent stains that home cleaners won’t lift, loose or squeaky planks, and finish wear revealing bare wood.
If water damage caused buckling, mold, or persistent odor, call a pro. Early intervention prevents worse damage and preserves your floor’s lifespan and appearance.
What to expect from professional services and typical costs
Curious what happens when you call a flooring pro and how much it’ll cost? You’ll get an on-site assessment, tailored cleaning or repair plan, and safe techniques for engineered boards—light sanding, recoating, or deep-cleaning finishes.
Expect hourly or flat rates: $60–$120/hour or $150–$800 per room depending on scope.
Professionals warranty work and fix warping, water damage, or finish dullness efficiently.
Questions to ask a flooring pro before hiring
When should you call a flooring pro—and what should you ask once they’re on site?
Ask about their experience with engineered flooring, cleaning methods they recommend, and products they’ll use.
Confirm warranty impacts, moisture testing, and anticipated costs.
Request references, proof of insurance, and a written estimate.
Clarify scheduling, follow-up care, and guarantees so you avoid damage or voided warranties.
FAQ Common Questions About Cleaning Engineered Flooring
You probably have a few quick questions about cleaning and protecting your engineered floors, like whether vinegar works, if steam mops are safe, or how often to recoat.
You’ll also want to know the best way to handle pet urine or water damage and whether rugs can trap moisture.
I’ll answer each point with clear, practical guidance.
Can I use vinegar and water to clean engineered wood?
Can vinegar and water safely clean your engineered wood?
You can use a diluted mix (about 1/2 cup white vinegar per gallon of water) sparingly for spot cleaning, but avoid soaking floors.
Test a hidden area first, wring the mop tightly, and dry immediately.
Frequent or strong vinegar solutions can dull finish over time, so stick to mild cleaners recommended by the manufacturer.
Is it safe to use a steam mop on engineered flooring?
Curious whether a steam mop will harm your engineered flooring? You should avoid regular steam-mopping: high heat and moisture can delaminate layers, warp boards, and damage factory finishes.
Occasional, very cautious use on high-quality, well-sealed engineered floors might be acceptable if manufacturer permits.
Prefer low-moisture methods and consult your floor’s warranty and care guidelines before trying steam cleaning.
How often should I refinish or recoat engineered floors?
How often should you refinish or recoat engineered floors depends on traffic, wear, and the thickness of the top veneer.
Generally, recoating every 3–10 years suits light to moderate use; sanding and refinishing (if veneer is thick enough) may be needed less often, perhaps every 10–20 years.
Inspect finish regularly, address scratches promptly, and follow manufacturer guidelines to avoid overworking the veneer.
What’s the best way to remove pet urine or water damage?
Got pet urine or standing water on your engineered floor? Act fast: blot liquids with absorbent towels, then clean the area with a pH-neutral hardwood cleaner diluted per instructions.
Rinse with minimal dampness and dry thoroughly with fans and a dehumidifier.
For stains or odor, use an enzyme cleaner safe for finished wood.
If cupping or persistent damage appears, consult a pro promptly.
Will rugs or mats trap moisture and harm the floor?
After you’ve blotted up pet urine or standing water and treated the spot, check any rugs or mats you use—improper ones can trap moisture against the finish and promote staining, cupping, or mold.
Use breathable, moisture-wicking pads and lift rugs periodically to dry the floor. Avoid rubber-backed or nonporous mats in damp areas, and replace or wash wet rugs promptly to protect your engineered flooring.