How to Install a Floor Outlet Safely in Any Room
You can safely install a floor outlet if you plan, shut power, and follow code. Turn off and lock the breaker, verify zero volts with testers, and confirm circuit capacity, grounding, and GFCI/AFCI needs. Pick a rated floor box for your subfloor, route cable in conduit or NM as allowed, secure connections, and seal the trim for moisture. Test the outlet before use. Continue for a full step‑by‑step guide, safety checks, and alternatives.
Quick Answer Can You Safely Install a Floor Outlet in Any Room?
You can install a floor outlet in many rooms, but it needs proper wiring, a rated floor box, moisture protection, and placement clear of traffic paths.
If the job requires cutting main wiring, moving circuits, or meeting code complexities (like AFCI/GFCI or concrete floors), call a licensed electrician.
For simple, code-compliant installs in accessible subfloors you’re comfortable working on, a careful DIY approach can be safe.
Short summary of key requirements and safety considerations
Although floor outlets can be convenient, you can only install them where local codes, wiring capacity, and floor type allow it; verify code requirements, guarantee a GFCI or AFCI as required, confirm there’s adequate clearance from moisture and combustible materials, and plan for a protected junction box and proper grounding before cutting into the floor.
When learning how to install a floor outlet, prioritize outlet location, wire routing, box depth, cover type, and secure grounding.
When to call a licensed electrician vs. DIY
If local code, wiring complexity, or structural obstacles are in play, call a licensed electrician—otherwise a straightforward floor outlet in a dry, accessible room can be a reasonable DIY job if you have basic electrical skills and the right tools.
Call a pro if circuits are shared, knob-and-tube or aluminum wiring exists, GFCI/AFCI upgrades are needed, or permits and inspections apply.
Basic Understanding What Is a Floor Outlet and Why Install One?
A floor outlet is a power receptacle installed in the floor and comes in recessed, surface-mounted, or pop-up styles to suit different looks and needs.
You’ll find them handy in living rooms for lamps, offices for desks, kitchens for islands, and garages for tools.
Before you install one, check local electrical code requirements and safety rules to guarantee proper grounding, box type, and placement.
Definition and common types (recessed, surface-mounted, pop-up)
Think of a floor outlet as a convenient power source built into the floor so you can plug in lamps, TVs, or tools without running cords across walkways.
You’ll encounter recessed units that sit flush for safety, surface-mounted boxes that attach atop the floor for easy installation, and pop-up outlets that stay hidden until you press them.
Choose by durability, aesthetics, and wiring access.
Typical use cases by room (living room, office, kitchen, garage)
After picking the right type—recessed for safety, surface-mounted for easy install, or pop-up for a clean look—you’ll want to match the outlet to each room’s needs.
In the living room, place outlets for lamps and media consoles.
In an office, prioritize desk power and chargers.
In the kitchen, use durable, appliance-ready locations.
In the garage, fit outlets for tools and workbenches.
Electrical code and safety overview
Because floor outlets sit where people walk and furniture goes, you’ll want to know exactly what they’re and why you might install one.
You must follow code and safety: use GFCI or AFCI where required, secure boxes to structure, maintain clearance, use rated covers, and hire a licensed electrician for permanent wiring.
- GFCI/AFCI protection
- Box depth and type
- Mounting strength
- Cover rating
- Professional installation
Pre-Installation Planning
Before you cut any flooring, assess the exact outlet location, expected load, and whether nearby joists, concrete, or radiant heating will block the run.
Check local electrical codes and permit requirements so your plan meets inspections.
Make a concise tools-and-materials checklist to confirm you have the right box, conduit, wire, and fittings on hand.
Assessing location and load requirements
When planning where to put a floor outlet, think about the room’s traffic patterns, furniture layout, and the devices you’ll plug in so you don’t create tripping hazards or overload a circuit.
Determine expected load by listing device wattages, consider future needs, and group high-draw items to dedicated circuits.
Verify nearby circuit capacity and location to minimize cable runs and avoid interference.
Checking local electrical codes and permit needs
If you’re installing a floor outlet, check local electrical codes and permit requirements early so you don’t hit delays or fail an inspection.
You’ll need to verify rules, obtain permits, and plan inspections. Contact the local building department, confirm permitted locations and wiring methods, and document approvals.
- Contact building department
- Ask about permits
- Confirm wiring methods
- Schedule inspections
- Keep documentation
Tools and materials checklist
Grab the right tools and materials so the job goes smoothly and meets code. You’ll need safety gear and quality components; double-check sizes and ratings before starting.
- Voltage tester and non-contact pen
- Junction box or floor box rated for floor use
- Romex/MC cable and appropriate conduit
- Outlet receptacle and cover plate kit
- Screwdrivers, hole saw, and wire stripper
Evaluating floor construction and obstructions (concrete, joists, radiant heat)
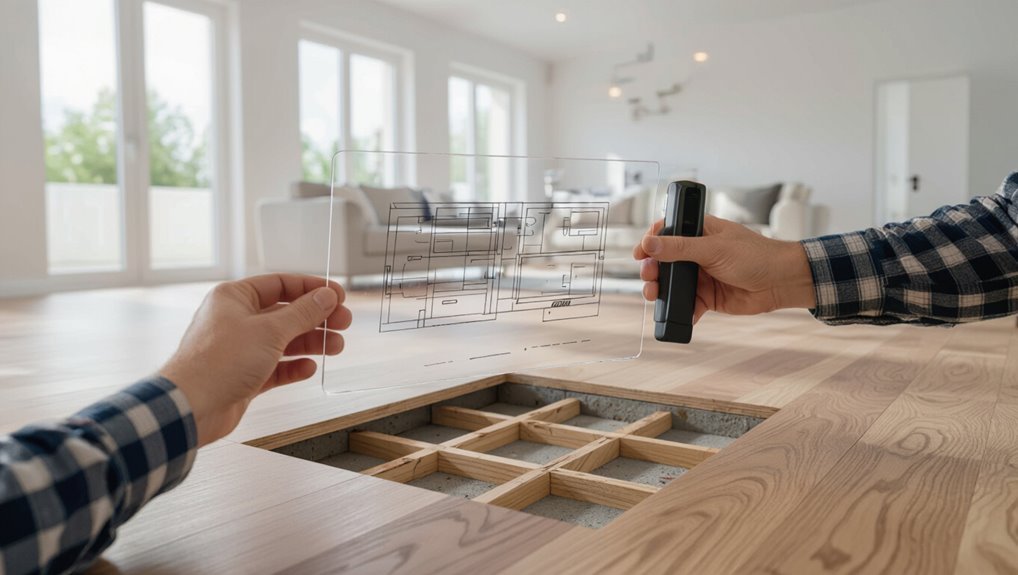
Before you cut or chase into the floor, assess what’s beneath—concrete slabs, joist bays, and radiant-heat tubing all change how you route cable and install a floor box.
Probe with a stud finder and scanner, check plans for tubing or conduit, and measure joist spacing.
On concrete, use surface-mounted or core-drilled boxes; over radiant heat, maintain clearance and avoid damaging tubing.
Quick Compliance Check What You Must Confirm Before Cutting the Floor
Before you cut the floor, make sure the circuit can handle the added load and whether GFCI or AFCI protection is required.
Confirm there’s adequate clearance from water sources and HVAC ducts to prevent hazards or code violations.
Also check which outlet box types are permitted and how cables must be routed and protected.
Circuit capacity and GFCI/AFCI requirements
1 quick check you must do is confirm the circuit can handle a new outlet and whether GFCI or AFCI protection is required; the wrong circuit or missing protection could create hazards or code violations once you cut the floor.
Verify circuit amperage, existing load, and dedicated-run requirements.
Confirm required GFCI for damp areas and AFCI for living spaces, then plan connections or upgrades before cutting.
Clearance from water sources and HVAC ducts
When you’re placing a floor outlet, confirm there’s adequate clearance from plumbing fixtures and HVAC ducts so you don’t risk water exposure, thermal stress, or accidental damage during installation.
Locate pipes, risers, and supply lines beneath and around the floor; avoid cutting into return or supply ducts.
Maintain manufacturer and code clearances, mark safe zones, and reroute or relocate the outlet if conflicts appear.
Required box types and cable routing rules
Having confirmed safe clearances from plumbing and ducts, next check which floor box and cable routing options meet code and manufacturer specs so you can cut accurately. Choose listed floor boxes, use conduit or NM per local code, maintain minimum burial depth, avoid bends near box, and secure supports.
| Item | Requirement |
|---|---|
| Box type | Listed floor box |
| Cable | Conduit/NM per code |
| Depth | Minimum burial depth |
| Bends | Radius limits |
| Support | Secured within cavity |
Step-by-Step Installation Guide
Before you cut, you’ll follow a clear sequence: shut off and verify power, mark the exact location and locate joists or slab, then prepare the subfloor or core-drill the concrete.
Next you’ll install the proper floor box and secure it to the structure, and run cable or conduit from the source circuit to the box—adapting in-wall or underfloor routing as needed.
I’ll walk you through each step so you can complete the job safely and correctly.
Step 1 Turn off power and verify with a tester
1. Before cutting or drilling, turn off the circuit breaker supplying the area and lock it out if possible.
Use a non-contact voltage tester, then a multimeter to confirm zero volts at the outlet or junction box.
Test both hot and neutral conductors and re-test the tester on a live source.
Never proceed until you’ve positively verified power is off.
Step 2 Marking the exact location and tracing joists or concrete slab
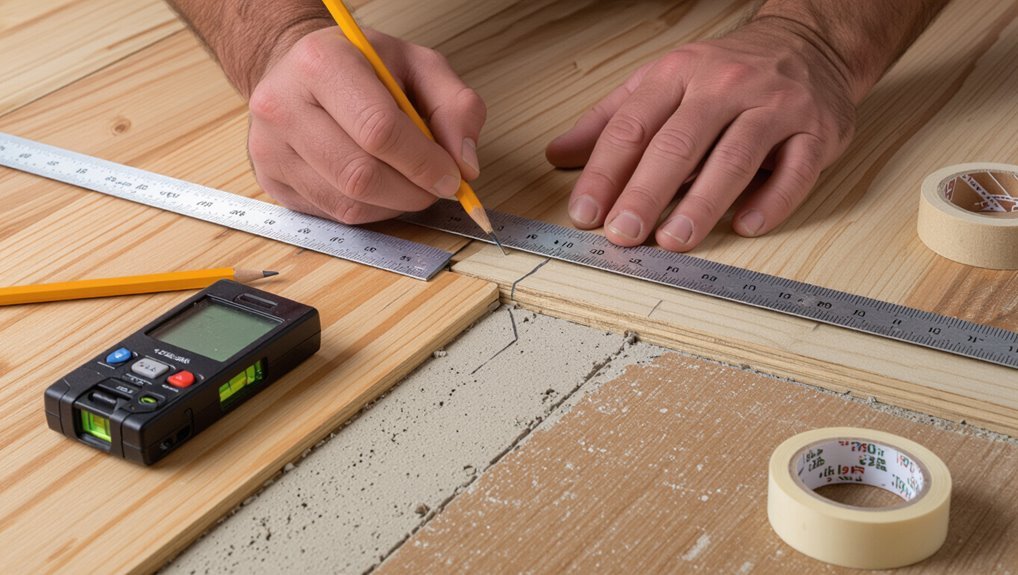
Pick the exact spot for the floor outlet and mark it clearly, then trace joists or the slab lines so you know where to cut and route wiring without hitting structural members.
Measure distances from walls and existing fixtures, snap chalk lines, and locate joist centers with a stud finder.
Note pipe, duct, and conduit paths on your sketch before cutting to avoid surprises.
Step 3 Preparing the subfloor or concrete (cutting, core drilling)

Start by confirming your substrate—wood subfloor or concrete slab—then gather the right tools: a jigsaw or reciprocating saw with a fine-tooth blade for wood, a hole saw or core drill with masonry bits for concrete, a plunge router and chisel for clean box edges, and proper PPE.
Cut or core along your marked outline, keep edges square, remove debris, and check fit before proceeding.
Step 4 Installing appropriate floor box and securing it to structure
Set the floor box into the prepared opening and orient it so the device openings face the room and align with any conduit runs; you’ll then fasten it to the subfloor or concrete using the manufacturer’s hardware and appropriate anchors.
Level the box, check flush fit with finished flooring height, tighten fasteners evenly, and seal gaps per instructions to prevent movement, moisture, and debris intrusion.
Step 5 Running cable or conduit from source circuit to box (in-wall vs. underfloor)
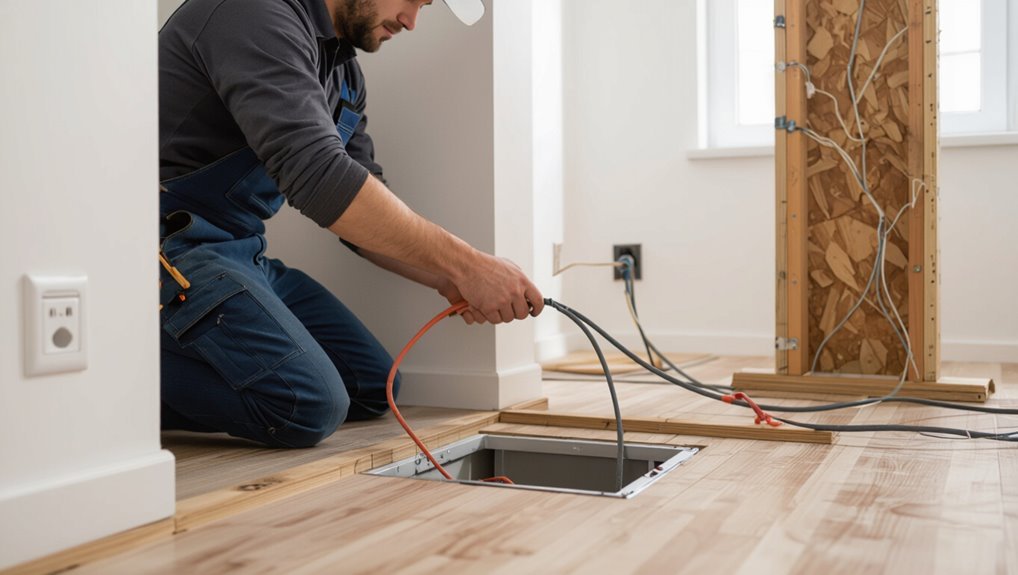
Decide whether you’ll run cable through the wall studs or under the floor and plan the route to minimize bends and crossings with other systems; this choice affects what type of cable or conduit you’ll use, where you need protection plates or bushings, and which local code requirements apply.
Use appropriate NM or conduit, staple or secure per code, drill tidy holes, and avoid sharp bends or interference with plumbing.
Step 6 Making electrical connections and grounding
Prepare to make clean, code-compliant connections and guarantee a solid ground before you close the box: turn off power at the breaker and verify it’s dead with a non-contact tester.
Strip conductors properly, twist and secure with listed wire connectors, and tighten terminal screws.
Connect the equipment grounding conductor to the outlet green screw and to the box if metal, using a pigtail as needed.
Step 7 Installing outlet cover and weatherproofing/finish trim
Finish the job by installing the outlet cover and weatherproof trim so the floor outlet looks neat and stays protected from moisture and dirt.
Fit the gasket, seat the cover plate flush, and secure screws without over-tightening.
Apply silicone sealant where trim meets flooring if recommended.
Check trim alignment and allow sealant to cure before replacing furniture or exposing the area to foot traffic.
Step 8 Testing the outlet and restoring power
With the cover and trim in place, you’re ready to test the outlet and restore power.
Turn the circuit breaker on, then use a non-contact voltage tester to confirm live power at the outlet.
Plug in a lamp or tester to verify hot, neutral, and ground function.
Check for firm fit, no sparks, and that any GFCI trips/reset properly before regular use.
Special Situations and Room-Specific Guidance
When planning floor outlets, you’ll want to take into account room-specific needs like living room cable management and keeping kitchen outlets within NEC spacing and away from counters.
Don’t install floor outlets in bathroom or laundry wet zones—look to wall or waterproof alternatives—and guarantee basements, garages, and exterior-adjacent floors have proper moisture protection and GFCI.
These factors will shape placement, cover type, and wiring methods for a safe, code-compliant installation.
Living room and home office aesthetics and cable management
Because your living room or home office is where people notice outlets most, plan the floor outlet’s placement and cable routing to keep lines tidy and the room balanced.
Use low-profile covers, run cables under rugs or raceways, and match finishes to decor. Consider access for cleaning and furniture.
- Conceal with slim raceways
- Match cover finish
- Route to furniture legs
- Use surge protection
- Keep cords short
Kitchen and dining NEC restrictions and counter proximity
If you’re installing a floor outlet in a kitchen or dining area, follow NEC rules closely and keep it a safe distance from counters and sinks to prevent shock hazards and code violations.
Place outlets away from appliance work zones, maintain required clearances from countertops, and avoid under-cabinet locations where spills concentrate.
Use GFCI protection and consult local code for spacing and receptacle height limits.
Bathrooms and laundry ban on floor outlets in wet zones; alternatives
Although bathrooms and laundry rooms may seem like logical spots for floor outlets, the NEC bars fixed floor receptacles in defined wet zones because of the high risk of water exposure and shock.
You should avoid floor outlets there and choose safer options:
- Wall outlets above splash lines
- GFCI-protected circuits
- Ceiling-mounted fixtures
- Cord management kits
- Dedicated appliance outlet locations
Basements, garages, and exterior-adjacent floors moisture and GFCI concerns
When installing floor outlets in basements, garages, or areas next to exterior doors, you’ll need to account for higher moisture levels and the stricter GFCI requirements those locations demand; plan for raised boxes, weather-resistant covers, and GFCI protection on the circuit to reduce shock risk and corrosion.
You should also use sealed conduit, stainless or coated hardware, slope the box for drainage, and test GFCI regularly.
Tools, Materials, and Product Selection Guide
You’ll want to pick a floor box and cover finish that matches load, traffic, and room style while ensuring the box is rated for your flooring type.
Consider cable choices, conduit routes, and protective fittings to keep conductors safe and accessible.
I’ll also list the recommended tools for simple DIY installs and for when you should hire a pro.
Choosing the right floor box and cover finish
Picking the right floor box and cover finish guarantees your outlet looks good, stays safe, and matches how you’ll use the space.
Choose box depth, material, and mounting type for load and wiring. Match cover finish to decor and traffic.
- recessed vs surface
- metal vs plastic
- flush vs flip lid
- weather-rated options
- tamper-resistant designs
Cable types, conduit options, and protective fittings
After selecting the right floor box and cover finish, turn your attention to the cables, conduit, and fittings that will protect and route the wiring. Use NM-B for short runs, THHN in conduit for exposed runs, and flexible metal conduit where movement occurs. Choose corrosion-resistant fittings and grommets at entry points.
| Cable Type | Best Use |
|---|---|
| NM-B | Short, concealed |
| THHN | Exposed in conduit |
| FMC | Flexible runs |
| Grommets/Fittings | Protection at entries |
Recommended tools for DIY vs professional jobs
A clear toolkit makes the job safer and faster, whether you’re tackling a weekend DIY or hiring a pro; know which items are essential for each scenario.
For DIY, pack a voltage tester, fish tape, conduit bender, adjustable wrench, rotary saw, and quality screwdriver set.
Pros will add conduit crimpers, punch tools, thermal camera, junction box templates, and commercial-grade wire pullers.
Common Mistakes and How to Avoid Them
When installing a floor outlet, you’ll want to watch for unsafe cable routing and make certain cables are protected so they don’t get pinched or damaged.
Don’t ignore load calculations—overloading a circuit can cause tripped breakers or fires.
Also make sure the outlet box is mounted and finished to prevent moisture entrapment, and get the required permits and inspections so the work meets code.
Unsafe cable routing and lack of protection
If you run cables under rugs, along baseboards, or through open floor channels without proper conduit or protection, you’re inviting damage, tripping hazards, and potential electrical fires.
Route wires through approved conduit or raceways, secure connections in junction boxes, and use cable clamps where cables enter outlets.
Inspect for wear, replace damaged cords, and follow local code or hire an electrician to guarantee safe, durable installations.
Ignoring load calculations and overloading circuits
Because you might be focused on placement and appearance, it’s easy to skip load calculations—but overloading a circuit can trip breakers, damage equipment, or start fires.
You should calculate combined device loads, account for continuous vs. intermittent draw, and avoid daisy-chaining high-draw appliances.
If capacity’s marginal, install a dedicated circuit or upgrade wiring and breaker.
When unsure, consult an electrician.
Improper box mounting and finishing that traps moisture
While installing the box, make sure you mount it flush and seal all gaps—poorly seated boxes or backfilled finishing that traps moisture lead to corrosion, mold, and compromised connections.
You should use a watertight box or gasket, maintain a small air gap behind trim, and avoid burying edges in wet compound.
Inspect and caulk joints so moisture can’t reach wiring or contacts.
Failing inspections or permits
Moisture problems and improper sealing are one thing, but paperwork and inspections are another risk that can stop your project cold.
You can avoid failed inspections by being proactive and following code.
- Pull required permits before work starts
- Use code-compliant boxes and covers
- Follow wiring and grounding rules
- Keep clear, accessible installations
- Schedule inspections promptly and fix issues quickly
Best Practices, Safety Tips, and Maintenance
You should keep a simple inspection checklist to spot wear, loose connections, or moisture around floor outlets before they become hazards.
Manage loads by not overloading circuits, using proper-rated cords, and unplugging heavy devices when not in use.
Seasonally check seals and covers and clean contacts to extend service life and prevent problems.
Regular inspection checklist for floor outlets
A simple, regular inspection routine keeps floor outlets safe and reliable; check them every 3–6 months and after spills or heavy use.
You should:
- Look for cracks, loose covers, or damaged screws.
- Test sockets with a plug tester for proper grounding.
- Confirm gaskets and seals are intact and dry.
- Verify outlet sits flush with the floor.
- Replace corroded or burnt components immediately.
Safe use and load management tips
When using floor outlets, manage loads and placement carefully to prevent overloads and hazards: plug high-draw devices into dedicated circuits, avoid daisy-chaining power strips, and keep cords routed to prevent tripping or moisture exposure.
You should label circuits for heavy appliances, balance loads across phases, unplug unused devices, use GFCI protection where required, and monitor for heat, burning smells, or frequent breaker trips.
Seasonal and long-term maintenance (seals, covers, cleaning)
Because floor outlets sit at ground level, seasonal checks and routine maintenance keep them safe and functional over the long term.
Inspect seals and gaskets for cracks, replace worn covers, and tighten mounting screws. Clean debris and moisture with a dry cloth, avoid solvents, and vacuum nearby vents.
Test ground and GFCI monthly, and address corrosion or damage promptly to prevent hazards.
Cost, Timeframe, and When to Hire a Pro
You’ll want to compare typical DIY vs. professional costs so you know what to expect before starting.
Estimate the time based on project complexity—from a simple surface-mounted outlet to cutting into flooring and rerouting wiring.
If you hit unclear wiring, need permits, or aren’t comfortable with electrical work, hire a licensed electrician.
Typical DIY vs professional cost breakdown
Cost is the biggest deciding factor for most DIYers, but time and risk matter too—doing the job yourself can save a few hundred dollars if your layout’s simple and you already have tools, while hiring an electrician typically runs considerably higher but buys safety, code compliance, and faster completion.
| DIY | Pro |
|---|---|
| Low parts cost | Higher labor cost |
| Longer time | Faster completion |
| Higher risk | Lower risk |
| Permit issues possible | Handles permits |
| Saves money | Guaranteed compliance |
Estimated time per project complexity
When weighing DIY versus hiring a pro, it’s helpful to match project complexity with realistic time and cost expectations so you can decide which route fits your schedule and comfort level.
Simple installations (surface raceway, single outlet) take 1–3 hours.
Moderate jobs (cut floor, route conduit, patching) take 4–8 hours.
Complex tasks (multiple outlets, joist rerouting) can span a day or more; plan accordingly.
Signs you should hire a licensed electrician
If your home’s wiring is old, the circuit’s overloaded, or the job requires running wires through joists or behind walls, call a licensed electrician—these situations bring safety risks, potential code violations, and often higher costs if DIY mistakes force rework.
You should hire a pro when permits are needed, AFCI/GFCI integration is required, outlets must be ganged into existing circuits, or you lack tools, time, or confidence.
Alternatives to Installing a Floor Outlet
If you don’t want to cut into the floor, you can use surface-mounted raceways or cord covers to route power cleanly across a room.
Wall outlets paired with in-floor cable management boxes give a low-profile solution that keeps cords tucked away.
For less wiring, consider wireless or low-voltage options and portable power distribution units to meet your needs without new floor wiring.
Surface-mounted raceways and cord covers
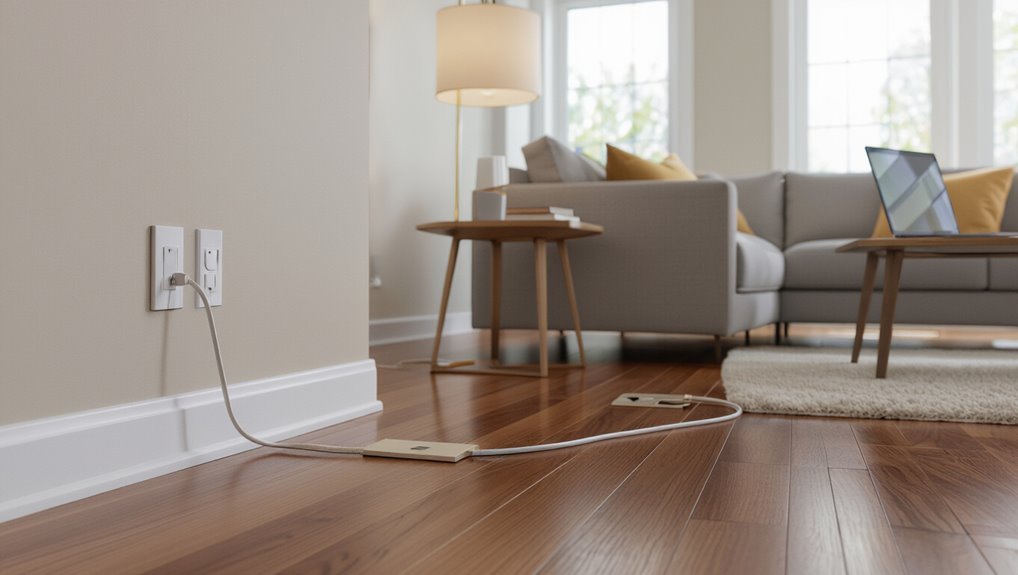
Although they don’t require cutting into your floor, surface-mounted raceways and cord covers give you a fast, low-cost way to route power across a room without installing a recessed floor outlet.
You can run cables along baseboards or carpet seams, clip covers down, and hide wiring neatly. Choose durable, paintable raceways, secure connections, and avoid trip hazards by keeping paths straight and tight to walls.
Wall outlets with in-floor cable management solutions
Wall outlets paired with in-floor cable management let you keep cords tidy and out of the way without cutting a new box into the floor.
You run cables from a wall receptacle into a slim channel routed between floorboards or under trim, then access them via low-profile floor boxes or recessed covers.
This preserves structure, meets code, and simplifies future changes.
Wireless/low-voltage options and power distribution units
When you want to avoid cutting into floors, wireless and low‑voltage solutions plus power distribution units (PDUs) offer practical alternatives that keep rooms flexible and safe.
You can use Wi‑Fi, Bluetooth speakers, and battery chargers to eliminate cords. Low‑voltage runs serve lamps or data, while a PDU supplies multiple devices from a single, code‑compliant outlet without invasive floor work.
Frequently Asked Questions
You’ll likely have questions about permits, child- and pet-safety, and how deep to cut the subfloor for a floor box.
You’ll also want to know if a concealed cable works under tile or hardwood and which cover suits carpeted floors.
I’ll answer each of these clearly so you can decide what’s safe and legal for your project.
Can I install a floor outlet myself without a permit?
Can you install a floor outlet yourself without a permit?
It depends on local codes and scope. Simple replacements may not need permits, but new wiring, altering circuits, or work in multifamily or commercial buildings usually does.
Check local building department rules, pull required permits, and schedule inspections.
If you’re unsure, hire a licensed electrician to verify compliance and safety.
Are floor outlets safe around children and pets?
Although floor outlets can be convenient, they introduce specific hazards for kids and pets that you should address proactively.
You should use tamper-resistant or childproof covers, secure cords to avoid tripping and chewing, and place outlets away from play areas.
Regularly inspect covers and wiring for damage, teach kids not to poke outlets, and consider protective furniture placement to minimize access and accidents.
How deep must I cut into the subfloor for a floor box?
How deep should you cut into the subfloor for a floor box?
Typically cut to match the box depth plus insulation and wiring clearance — usually 1 to 2 inches for shallow boxes, 2 to 3-1/2 inches for standard or remodel boxes.
Verify box dimensions and local code, allow space for conduit or cable, and test-fit before final trimming to avoid weakening the floor.
Can you put a floor outlet on a concealed cable under tile or hardwood?
Wondering if you can run a concealed cable to a floor outlet under tile or hardwood? Yes, but you must follow code, use conduit or NM rated for concealed use, and maintain proper depth and protection beneath finish flooring.
Avoid sharp bends, keep separation from moisture sources, and secure connections in an accessible junction box. When in doubt, hire a licensed electrician.
What type of cover is best for carpeted floors?
If you ran a concealed cable beneath tile or hardwood, you’ll still need a floor box and cover that work with carpeted surfaces — carpet changes how the cover sits and how flush the receptacle is.
Pick an adjustable-height, carpet-compatible floor box with a trim plate that accommodates pile thickness.
Choose a low-profile, spring-loaded or flip cover rated for foot traffic and compatible with your outlet type.