What Is the Best Cleaner for Vinyl Flooring?
You should use a mild, pH-neutral cleaner (commercial or DIY) to protect vinyl finishes and avoid dulling or residue; for everyday cleaning, dilute a gentle vinyl cleaner or mix warm water, a little mild dish soap and 1/2 cup vinegar per gallon for light dirt, and reserve vinyl-safe degreasers or enzyme cleaners for deep stains; avoid abrasives, strong solvents, and excess water to prevent warping or buildup — keep going to learn specific products and step-by-step care.
Quick Answer Best Cleaners for Vinyl Flooring
For a quick answer, use a mild pH-neutral cleaner for everyday care, a stronger vinyl-safe degreaser for deep cleaning, and a plant-based solution for eco-friendly maintenance.
You’ll find the top picks are:
- Method Daily Clean for everyday use,
- Rejuvenate Deep Cleaner for heavy grime,
- Better Life Floor Cleaner for a green option.
Keep each on hand so you can match the product to the job and protect your vinyl.
One-sentence summary of top recommended cleaner types
When you want fast, reliable results, choose a pH-neutral vinyl floor cleaner for routine mopping.
Use a diluted white-vinegar solution for budget-friendly deep cleans, and a mild dish soap or purpose-made restorative product for stubborn grime or scuffs.
For clarity on what’s the best cleaner for vinyl flooring, pick pH-neutral for upkeep, vinegar for deep degreasing, and gentle restorers for scuff removal.
Top 3 product recommendations by use-case (everyday, deep clean, eco-friendly)
Here are three standout cleaners tailored to specific needs:
You’ll want: a gentle daily spray, a powerful deep-clean solution, and a plant-based eco option.
Use the daily for routine dust and spills, the deep cleaner for stubborn grime and periodic maintenance, and the eco-friendly product for pets, kids, and sustainability without residue.
- Daily spray
- Deep-clean solution
- Eco-friendly cleaner
- Microfiber mop
What Is Vinyl Flooring and Why Cleaner Choice Matters
Vinyl flooring comes in sheet, plank, and luxury vinyl tile formats, each with different layers and surface finishes that affect cleaning needs.
You’ll want to know whether your floor has a wear layer, textured finish, or protective coating because some cleaners can strip finishes or leave sticky residue.
Using the wrong product can cause fading, warping, or buildup, so choosing a cleaner made for your vinyl type matters.
Types of vinyl flooring (sheet, plank, luxury vinyl tile)
Think of vinyl flooring as a family of related products—sheet, plank, and luxury vinyl tile (LVT)—each with different construction and maintenance needs, so the cleaner you pick should match the type you’ve got.
- Sheet: seamless, often in bathrooms, needs gentle cleaners.
- Plank (LVP): thicker, click or glue-down joints, moderate cleaners.
- LVT: tile look, grout seams, targeted cleaners for edges.
- Test cleaners in a hidden spot first.
Surface characteristics and common finishes
After you know which type of vinyl you have, pay attention to the surface and finish — they’re what actually meet your mop and determine which cleaners will work.
Smooth, embossed, or textured surfaces and wear layers affect dirt trapping and shine. Finishes range from matte to high-gloss and may include protective urethane coats.
Match cleaner strength to finish recommendations to preserve appearance.
How improper cleaners damage vinyl (fading, warping, residue)
Because cleaners interact directly with the wear layer and seams, choosing the wrong product can quickly ruin your floors: harsh solvents strip finishes and cause fading, excess water seeps into seams and warps the core, and sticky residues attract dirt and dull the surface.
You should rinse thoroughly, use pH-neutral cleaners, avoid oil-based or abrasive products, and dry promptly to prevent long-term damage.
How to Choose the Best Cleaner for Your Vinyl Floor
When choosing a cleaner for your vinyl floor, check the pH, abrasiveness, solvent content, residue, and scent to avoid damage or build-up.
Make sure the product is labeled compatible with your specific vinyl type and finish.
Also consider safety for pets, kids, and allergy sufferers by avoiding high VOCs and harsh chemicals.
Key selection criteria (pH, abrasiveness, solvent content, residue, scent)
Choosing the right cleaner starts with understanding five key factors—pH, abrasiveness, solvent content, residue, and scent—because each affects your vinyl’s finish and longevity.
Pick a neutral-to-mild pH to avoid dulling, avoid abrasive scrubs that scratch, skip strong solvents that strip coatings, choose low-residue formulas to prevent buildup, and select a mild scent or fragrance-free option for indoor comfort.
Compatibility with different vinyl types and finishes
Different vinyl floors need different care, so check your flooring’s type and finish before you buy a cleaner.
Sheet, plank, and luxury vinyl tile respond differently: wear-layered or urethane finishes tolerate mild cleaners, while older or no-wear coatings need ultra-gentle solutions.
Avoid solvents or wax-based products on matte or textured surfaces.
Test any cleaner in an inconspicuous spot first to confirm compatibility.
Safety considerations (pets, kids, allergies, VOCs)
Because you’ll likely share your home with kids, pets, or visitors with sensitivities, pick a vinyl cleaner that minimizes health risks: opt for low-VOC, fragrance-free formulas, avoid bleach or strong solvents, and check labels for allergy-triggering ingredients.
Use mild, pH-neutral solutions, rinse residues, ventilate during cleaning, store products securely, and choose pet-safe certifications when available to reduce exposure and reactions.
Recommended Cleaner Types and When to Use Them
You’ll want to match the cleaner to the task: pH-neutral commercial formulas are safe for regular use and include brands like Bona and Armstrong, while mild dish soap and water work fine for light dirt.
For tougher grime, properly diluted vinegar can help but use it sparingly to avoid dulling seals. Enzyme or biodegradable cleaners offer an eco-friendly alternative for organic stains.
Reserve specialized deep-cleaners and floor restorers for stubborn build-up or worn finishes that need professional-strength treatment.
pH-neutral commercial cleaners benefits and examples
When you want a safe, effective daily cleaner for vinyl, pH-neutral commercial formulas are the best choice: they clean grime without dulling finishes or degrading the plasticizers that keep vinyl flexible.
You’ll get streak-free shine, gentle stain lifting, and reduced residue.
Look for labeled vinyl or luxury vinyl cleaners—brands like Rejuvenate, Armstrong, and Bona offer pH-neutral options formulated for vinyl.
Mild dish soap and water when it’s appropriate
If your vinyl floor just needs light upkeep or you’ve tracked in dirt, a few drops of mild dish soap mixed with warm water will clean effectively without harming the finish.
Use a soft mop or microfiber cloth, wring it well to avoid excess water, and spot-test first.
Rinse with clean water to remove residue, then dry to prevent slips and water damage.
Vinegar solutions pros, cons, and proper dilution
For routine cleanups you can stick with mild dish soap, but vinegar solutions offer a stronger, budget-friendly option for cutting grease and disinfecting vinyl without harsh chemicals.
Use one cup white vinegar per gallon of warm water; test a hidden spot first.
Pros: inexpensive, deodorizes, antimicrobial.
Cons: overuse can dull finish and damage seals, so don’t soak seams or use undiluted vinegar.
Enzyme-based and biodegradable cleaners eco-friendly option
Because they break down stains biologically, enzyme-based and biodegradable cleaners give you an eco-friendly way to clean vinyl without harsh chemicals.
You’ll find they tackle organic soils, pet messes, and odors effectively. Use them for routine spot cleaning and light maintenance.
Always follow label directions, test a small area first, and avoid over-wetting seams to protect the flooring adhesive.
Specialized deep-cleaners and floor restorers when to use
When deep-set dirt, stubborn scuffs, or a dulled finish won’t respond to regular cleaners, you’ll want a specialized deep-cleaner or floor restorer to revive your vinyl; these products are formulated to lift embedded grime, strip old finish layers, or rebuild surface luster without damaging the vinyl itself.
Use them sparingly: deep-clean before recoating, when wear shows, or after heavy traffic, following manufacturer directions.
Products to avoid (ammonia, bleach, abrasive powders, steam cleaners)
After using a deep-cleaner or restorer, you’ll want to avoid products that can damage vinyl and undo your work.
Don’t use ammonia or bleach—they strip finish and discolor.
Skip abrasive powders and scrub brushes that scratch.
Avoid steam cleaners; heat can warp seams and loosen adhesive.
Stick to pH-neutral, nonabrasive solutions and microfiber mops to preserve appearance and longevity.
Step-by-Step Cleaning Guide (Daily to Deep Clean)
Start with simple daily habits—sweep or dry-mop and vacuum any grit to prevent scratches.
Once a week, you’ll wet-clean with a mild vinyl-friendly solution and a damp mop.
For monthly deep cleaning and stubborn stains like ink, oil, scuffs, or adhesive, follow specific step-by-step removal techniques using appropriate cleaners and gentle scrapers.
Daily/regular cleaning routine tools and method (broom, dry mop, vacuum)
Though regular sweeping can feel small, it’s the single habit that keeps vinyl floors looking fresh and prevents grit from scratching the surface.
Use a soft broom or microfiber dry mop daily, and vacuum with a hard-floor setting or soft-brush attachment for edges. Work toward exits, overlap strokes, and empty debris frequently.
These quick steps stop damage and cut down on deeper cleaning.
Weekly wet-clean method
1 time each week, give your vinyl floor a wet clean to lift trapped dirt and refresh its finish without causing harm.
Fill a bucket with warm water and a pH-neutral vinyl cleaner diluted per label.
Mop with a microfiber flat mop, wringing often to avoid puddles.
Rinse with clean water if residue remains, then dry with a clean towel to prevent streaks.
Monthly/seasonal deep clean
When the seasons change or buildup shows despite your weekly care, schedule a monthly or seasonal deep clean to strip embedded grime, refresh grout lines and seams, and protect the vinyl’s finish for months ahead.
Start by vacuuming, then mop with a pH-neutral cleaner diluted per instructions. Rinse with clean water, dry thoroughly, inspect seams, and apply a restorative maintenance product if recommended by the flooring manufacturer.
Removing stubborn stains Step-by-step for ink, oil, scuff marks, adhesive
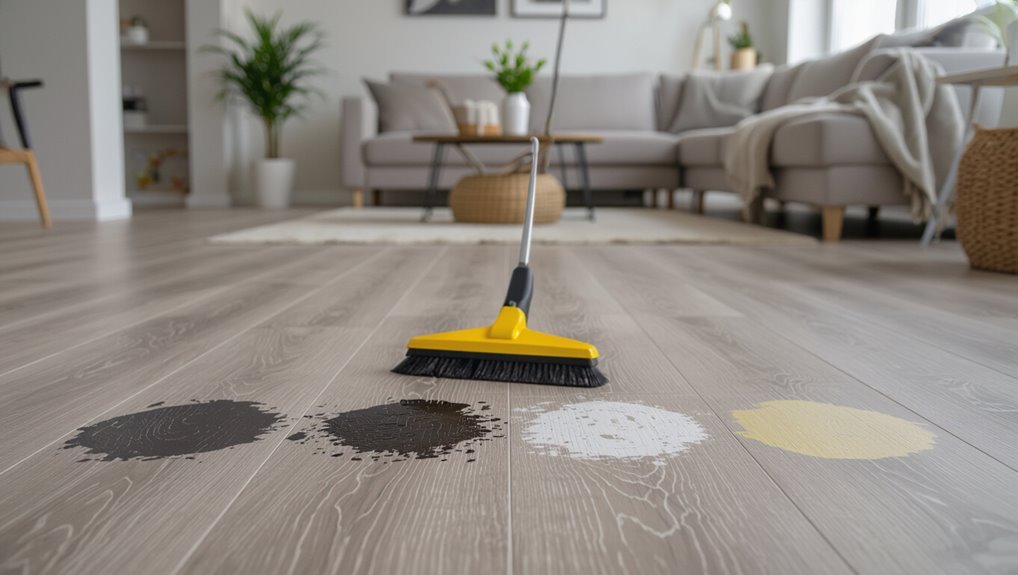
If stubborn stains like ink, oil, scuff marks, or adhesive won’t come up with your regular routine, tackle them methodically using the right cleaners and tools for each type.
Use ink remover or rubbing alcohol, blotting gently; absorb oil with dish soap and warm water; erase scuffs with a melamine sponge; soften adhesive with citrus solvent, then wipe clean and rinse.
- Ink: alcohol
- Oil: dish soap
- Scuffs: melamine sponge
- Adhesive: citrus solvent
Comparison Table of Top Cleaners
Now we’ll compare top vinyl cleaners side-by-side so you can pick what’s best for your floors.
You’ll see how they stack up on effectiveness, safety, cost, eco-friendliness, and ideal use.
This quick table will help you match a cleaner to your cleaning routine and priorities.
Comparison by effectiveness, safety, cost, eco-friendliness, ideal use
Because choosing the right cleaner depends on what you value most—stain removal, safety, price, or environmental impact—this comparison breaks down top options across effectiveness, safety, cost, eco-friendliness, and ideal uses so you can match a product to your needs quickly. Use the table to visualize choices, then pick based on your priorities.
| Cleaner | Strengths |
|---|---|
| Mild soap | Safe, cheap |
| Vinegar mix | Eco, streak-free |
| Commercial vinyl | Highly effective |
| Steam (low) | Chemical-free |
| Wood polish | Avoid on vinyl |
Common Cleaning Mistakes and How to Avoid Them
Don’t use high-pH or solvent cleaners, since they can strip the wear layer and damage vinyl.
Avoid over-wetting and make sure floors dry quickly, and don’t reach for abrasive scrubbers that’ll scratch the surface.
Always follow the manufacturer’s instructions to keep your floor looking its best.
Using high-pH or solvent cleaners
If you reach for a high-pH detergent or solvent-based cleaner thinking it’ll blast away grime, you could strip the wear layer, discolor seams, or leave a hazy residue that attracts dirt.
You should use pH-neutral products labeled safe for vinyl, test cleaners in an inconspicuous spot, dilute concentrated solutions per instructions, and avoid solvents that degrade finish or adhesives.
Over-wetting and improper drying
When you soak vinyl floors or leave them damp for too long, water can seep into seams and under the wear layer, causing swelling, adhesive failure, or mold growth; always wring mop heads well and use a damp — not dripping — mop.
Dry floors promptly with microfiber cloths or a fan, avoid puddles near edges, and ventilate rooms to speed drying and prevent damage.
Abrasive tools and scrubbers
Reach for soft cleaning tools instead of abrasive scrubbers, because harsh pads, steel wool, or stiff brushes can scratch vinyl’s wear layer and leave it dull or permanently damaged.
Use microfiber mops, soft-bristled brushes, or non-abrasive sponges for routine cleaning.
For stubborn spots, apply a gentle cleaner and let it soak, then wipe—never scrub aggressively—to protect finish and longevity.
Ignoring manufacturer instructions
Although your vinyl may look tough, ignoring the manufacturer’s cleaning instructions can void warranties and cause irreversible damage.
You should follow recommended cleaners, dilutions, and tools to protect finishes. Don’t use harsh solvents, abrasive pads, or excessive water if they’re prohibited.
Keep the manual, register products if required, and when unsure, contact the manufacturer for guidance to avoid costly mistakes.
Maintenance Tips and Best Practices to Keep Vinyl Floors Looking New
To keep your vinyl looking new, start with prevention: use entry mats, add felt pads to furniture, and monitor humidity to avoid warping.
Set a simple routine—daily sweep, weekly mop, and monthly deeper clean—to prevent buildup and protect finish.
Store cleaners sealed in a cool, dry place and handle them according to labels so products work effectively and safely.
Preventive measures (mats, felt pads, humidity control)
When you focus on preventing damage, your vinyl floor will stay cleaner and last longer; simple steps like using entry mats, adding felt pads to furniture, and keeping indoor humidity steady go a long way.
Place durable mats at doors, use felt or rubber pads under legs, lift heavy items instead of dragging, and maintain 30–50% humidity to prevent buckling and seams separating.
Routine care calendar and frequency recommendations
Those preventive steps set the stage for a simple routine that keeps vinyl looking new; here’s how often to do each task so you won’t overclean or let dirt build up.
Sweep or vacuum high-traffic areas daily.
Damp-mop weekly with a recommended cleaner.
Spot-clean spills immediately.
Deep-clean every 3–6 months.
Replace mats and check pads seasonally to prevent scuffs.
Storage and handling of cleaning products
Keep your cleaners organized and handled safely so they work effectively and don’t harm your vinyl or indoor air.
Store products in original, labeled containers away from heat, sunlight, and moisture.
Keep lids tight and out of reach of children and pets.
Avoid mixing cleaners.
Use dosing tools and wipe spills promptly.
Recycle or dispose of empties per local regulations.
Buying Guide How to Pick a Commercial Cleaner
When choosing a commercial cleaner for vinyl, check labels and ingredient lists so you can avoid harsh solvents and see if pH-balanced formulas are specified.
Look for recognized certifications or eco-labels if you want verified low-toxicity and environmental claims.
And weigh budget options against premium formulations—cheaper products may clean fine but premium ones often protect finish and last longer.
Labels and ingredients to look for
Because the label tells you what’s actually in the bottle, you should scan it carefully before buying a commercial vinyl cleaner.
Look for pH-neutral formulas, mild surfactants, and biodegradable solvents that cut grime without dulling finish.
Avoid harsh alkalis, bleach, ammonia, or solvent-heavy ingredients that can warp or discolor vinyl.
Check dilution instructions and any residue or fragrance additives.
Certifications and eco-labels that matter
Labels tell you what’s in the bottle, but certifications and eco-labels give independent verification that those claims hold up.
Look for Green Seal, EPA Safer Choice, and EU Ecolabel logos—you’ll get proven low-toxicity, biodegradability, and limited VOCs.
Also check certification scopes and ingredient lists; some labels cover health but not full environmental impact.
Certifications reduce guesswork when choosing safer vinyl cleaners.
Budget options vs. premium formulations
Although you can save up front with generic concentrates and store brands, weigh that initial price against dilution rates, cleaning power, and potential long-term damage to your vinyl; cheap formulas often need higher use concentrations, may leave residues, or strip finish layers, forcing more frequent recoating or replacement.
- Test small area first.
- Compare dilution and coverage.
- Check pH and ingredients.
- Factor lifespan cost.
Troubleshooting Guide Problems and Solutions
If your vinyl feels tacky or leaves a residue after cleaning, check the cleaner concentration and rinse with plain water to remove buildup.
For discoloration or dulling, try a gentle polish or a pH-neutral restorer to bring back shine without stripping the wear layer.
If planks are warping or lifting, stop using the floor and call a professional—those issues often signal moisture or installation problems that need expert repair.
Tackiness or residue after cleaning causes and fixes
When your vinyl still feels tacky or leaves a filmy residue after cleaning, it’s usually due to leftover detergent, wax buildup, or improper rinsing — and you can fix it with a few targeted steps.
Rinse with clean water, mop with a vinegar-water mix (1 cup per gallon) to cut soap, then buff dry.
For wax, use a manufacturer-safe stripper and rinse thoroughly.
Discoloration or dulling restoration tips
Because vinyl can lose its shine from sun exposure, harsh cleaners, or abrasive scrubbing, you’ll want targeted steps to restore color and gloss without damaging the surface.
Start with a gentle pH-neutral vinyl cleaner, rinse thoroughly, then buff with a microfiber pad.
For faded areas, apply a manufacturer-approved restorative polish sparingly.
Test any product in an unseen spot first to guarantee color match.
Warping or lifting planks when to call a professional
Restoring shine won’t fix structural problems, so watch for warped or lifting vinyl planks that signal moisture, subfloor issues, or poor installation.
If gaps, buckling, or persistent cupping appear, stop cleaning and assess.
Call a professional when damage spreads, adhesive fails, or you smell mold.
A pro will diagnose moisture sources, repair subflooring, and refit or replace planks safely to prevent recurrence.
FAQs
You probably have quick questions like whether vinegar or steam cleaning will harm your vinyl, how often to deep-clean, and if green cleaners work as well as commercial products.
I’ll also cover the safest DIY cleaner recipe you can use at home.
Read on for concise, practical answers you can use right away.
Can I use vinegar on vinyl floors?
Wondering if vinegar’s a safe, effective cleaner for vinyl floors?
You can use diluted white vinegar (about 1 cup per gallon of warm water) for occasional cleaning; it removes grime and disinfects.
Avoid undiluted vinegar, abrasive scrubs, or prolonged soaking, which can dull or damage the wear layer.
Test a hidden spot first and dry floors thoroughly after mopping.
Is steam cleaning safe for vinyl flooring?
Curious whether steam cleaning will harm your vinyl floors? You can use steam cautiously: low-heat settings and a steam mop designed for vinyl are safer.
Avoid prolonged heat, high-pressure steam, and standing moisture, which can warp or delaminate planks.
Test a hidden spot first, follow manufacturer guidelines, and dry surfaces promptly to protect seams and the wear layer from damage.
How often should I deep-clean my vinyl floors?
If you followed safe steam-cleaning practices, you’ll be less likely to need deep cleans as often; how frequently you should deep-clean vinyl depends on foot traffic, pets, and spills.
For most homes, deep-cleaning every 3–6 months works. High-traffic areas or homes with pets may need monthly attention.
Always spot-clean spills immediately and adjust your schedule based on appearance and odor.
Are green cleaners as effective as commercial ones?
While green cleaners can match the cleaning power of commercial formulas for everyday vinyl maintenance, their effectiveness depends on the ingredients and how you use them.
Enzyme- and surfactant-based eco products remove dirt, oils, and pet messes well, but you may need stronger commercial degreasers for stubborn adhesive or heavy buildup.
Choose certified brands, test a small area, and follow manufacturer directions for best results.
What is the safest DIY cleaner recipe for vinyl?
Since green cleaners can handle most routine vinyl cleaning, you might want a simple DIY recipe that’s both safe and effective for regular use.
Mix 1 gallon warm water with 1/2 cup white vinegar and a few drops of mild dish soap.
Mop with a microfiber pad, rinse with clean water, and dry.
Avoid abrasive scrubbers and undiluted bleach.
Visual Guides and Resources
Keep a printable cleaning tool checklist handy so you know exactly what to grab before you start.
Use a quick-reference dilution chart for homemade solutions to mix cleaners safely and consistently.
These simple visual resources will save time and prevent mistakes.
Cleaning tool checklist printable
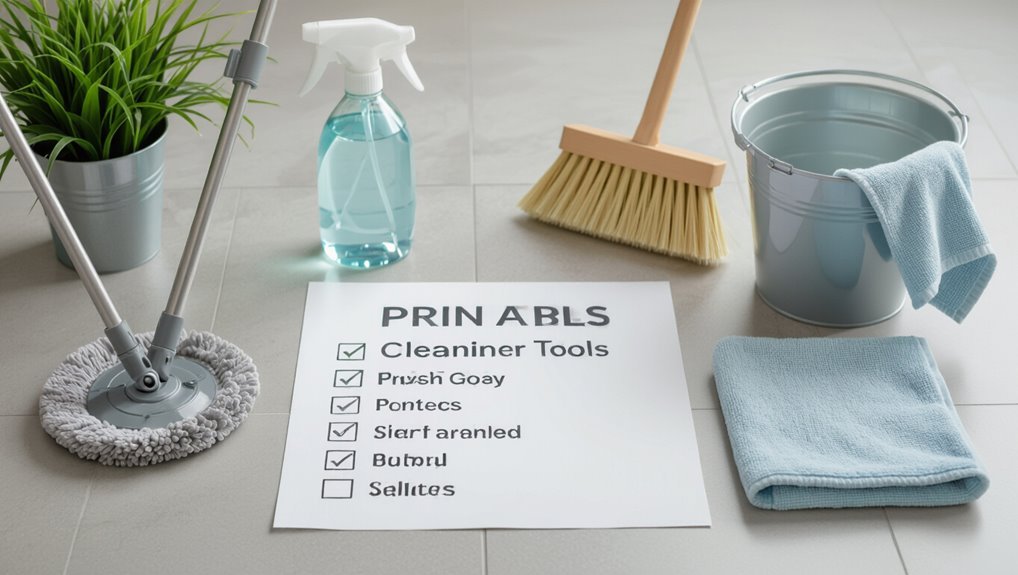
A simple, printable cleaning-tool checklist helps you grab exactly what you need for vinyl floors without wasting time or buying duplicates.
Include microfiber mop and pads, soft-bristle broom, dustpan, vacuum with hard-floor setting, spray bottle, pH-neutral cleaner, bucket, microfiber cloths, rubber gloves, and felt furniture pads.
Laminate a copy for quick access and tick items as you restock.
Quick-reference dilution chart for homemade solutions
You can tape a small dilution chart near your cleaning checklist so you’ll mix homemade cleaners correctly every time. Keep measurements simple, label purpose (daily, heavy soil), and note safety (ventilation, spot-test). Use this quick table for reference.
| Solution | Ratio |
|---|---|
| Mild soap | 1 tsp : 1 gal |
| Vinegar | 1/2 cup : 1 gal |
| Rinse water | 1 gal : plain |