How to Install Carpet Tiles Without Glue: Peel-Free Method That Works
You can install peel-free carpet tiles without glue by choosing interlocking or loose‑lay tiles or using reusable adhesive squares, prepping a clean, dry, level subfloor, and acclimating tiles for 24–48 hours. Measure and chalk a center reference, dry‑lay tiles to check fit, then work outward, aligning pile direction and snugging seams with a tapping block. Trim edges with a utility knife and leave expansion gaps. Keep tools and spares on hand and you’ll learn tips for maintenance and troubleshooting.
How to Install Carpet Tiles Without Glue: and Overview
Yes—you can install carpet tiles without glue using peel-and-stick backing, loose-lay tiles, or reusable adhesive squares, but each method has specific uses and limits.
You’ll want glue-free options for temporary spaces, rentals, or areas where you may need to replace tiles often, and avoid them in high-traffic or moisture-prone rooms where strong bonding is required.
We’ll cover when each approach works best and the main benefits and trade-offs so you can pick the right method.
Direct Answer Can you install carpet tiles without glue?
Wondering if you can install carpet tiles without glue? Yes — you can.
Learning how to install carpet tiles without glue means using peel-and-stick backing, interlocking tiles, double-sided tape, or adhesive-free grid systems.
You’ll prepare a clean, flat subfloor, plan layout, and secure edges for traffic.
These methods let you avoid permanent adhesives while keeping tiles stable and removable.
When peel-free installation is appropriate and when it’s not
If you’re considering a glue-free method, know there are clear situations where peel-and-stick, interlocking, or tape-down installations work well—and others where they won’t.
Use peel-free options for low-traffic rooms, smooth level subfloors, rentals, or temporary layouts.
Avoid them over uneven, damp, high-moisture, or heavily trafficked commercial areas, and when long-term durability or permanent bonding is required.
Benefits and limitations of glue-free carpet tile installation
Although you’re skipping adhesive, glue-free carpet tiles still give you quick installation, easy replacement, and minimal floor damage—so they’re ideal for rentals, DIY projects, and short-term or low-traffic spaces.
You’ll enjoy lower cost, reusable tiles, and less surface prep.
But expect reduced stability on uneven or high-traffic floors, limited sound insulation, and possible edge lifting in humid conditions.
Understanding Peel-Free Carpet Tile Options
You’ll find several carpet tile types made for glue-free installation, like interlocking planks and tiles with heavy-duty PVC or rubber backings.
These products use materials and backing systems—such as recycled rubber, felt, or low-profile gripper underlayers—to hold tiles in place without adhesive.
Make sure your subfloor is clean, flat, and dry (concrete, plywood, or existing resilient flooring usually work best) before you start.
Types of carpet tiles designed for glue-free installation
When you want a fast, low-mess floor upgrade, peel-and-stick carpet tiles, interlocking tiles, and loose-lay tiles offer glue-free options that suit different needs and spaces.
You’ll choose peel-and-stick for simple, small areas; interlocking for secure, puzzle-like joins in active rooms; and loose-lay for heavy-traffic zones where weight and friction keep tiles in place without adhesives.
Materials and backing systems that enable peel-free laying
If peel-and-stick, interlocking, and loose-lay tiles offered glue-free choices based on installation style, the backing and face materials determine how well those systems perform without adhesive.
You’ll prefer dense PVC or rubber backings for grip, textured thermoplastic for interlocks, and cushioned foam for comfort.
Low-pile, tightly tufted faces resist movement and trim neatly, improving stability and durability in glue-free installs.
Suitable subfloors for peel-free installations
Because peel-free carpet tiles rely on surface contact rather than adhesive, the subfloor you choose makes a huge difference in grip and longevity.
You should use clean, dry, level surfaces like sealed concrete, low-pile commercial vinyl, hardwood with minimal gaps, or properly installed plywood.
Avoid damp, oily, or uneven floors.
Test small areas first and address irregularities before laying tiles.
Tools and Materials You’ll Need
You’ll want a compact checklist of essential tools—utility knife, straightedge, tape measure, and a knee pad—to make clean cuts and accurate layouts.
I’ll also point out recommended peel-free carpet tile types and a few trusted brands that work well without adhesive.
Finally, we’ll cover optional accessories like threshold strips and double-sided tape that can improve fit and finish.
Essential tools checklist
Gathering the right tools before you start will save time and prevent mistakes; you’ll need a few basics plus some optional items for a cleaner, faster installation.
- Utility knife with extra blades
- Straightedge or T-square for accurate cuts
- Measuring tape and chalk line
- Rubber mallet and floor roller for snug seams
Recommended carpet tile types and brands
When choosing carpet tiles for a glue-free installation, pick products designed for peel-and-stick or interlocking systems so they’ll stay put and be easy to replace.
Look for durable materials like nylon or polyester with a low-profile backing to reduce movement and height differences.
- Traffic-grade nylon tiles (modular, resilient)
- Low-profile polyester tiles (budget-friendly)
- Interlocking rubber-backed tiles (stable)
- Commercial loop-pile brands (wear-resistant)
Optional accessories for improved results
After picking tiles suited for a glue-free floor, collect a few accessories that’ll make installation faster, neater, and longer-lasting.
Grab a stiff broom, seam roller, straightedge, utility knife with extra blades, measuring tape, chalk line, double-sided carpet tape (for edges), threshold strips, and non-slip underlay pads.
Optional: floor cleaner and a rubber mallet for snug seams.
Preparation Before Installation
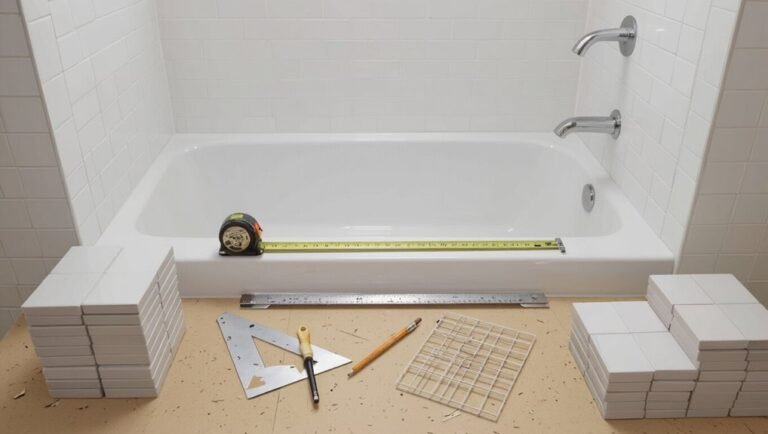
Before you lay a single tile, measure the room carefully and calculate how many tiles you’ll need including a waste allowance for cuts and mistakes.
Check and prepare the subfloor—clean thoroughly, level any low spots, and test for moisture to make sure the tiles will sit flat and last.
Let the tiles acclimate in the room, plan your pattern and direction, and choose a focal point so your layout looks intentional.
Measuring the room and calculating tiles needed (waste allowance)
Start by measuring the length and width of the room in feet (or meters) and multiply to get the total square footage; you’ll use that number to calculate how many carpet tiles you need.
Divide the total by a single tile’s area, round up, then add 5–10% for cutting waste and future repairs.
Note odd layouts and subtract fixed cabinetry.
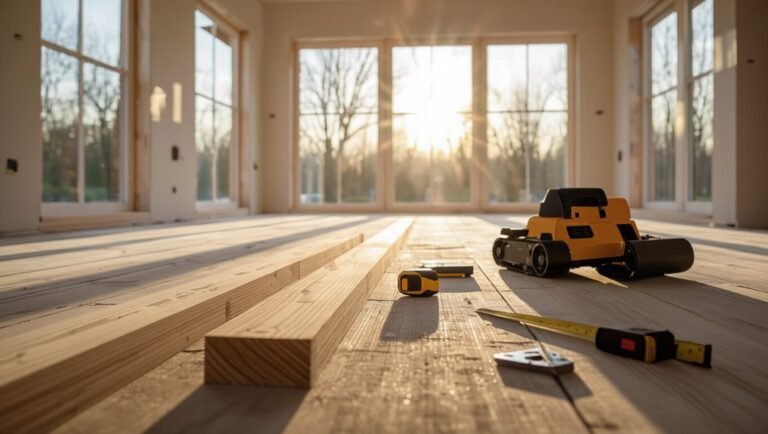
Inspecting and preparing the subfloor (cleaning, leveling, moisture check)
Now that you’ve measured and accounted for waste, it’s time to inspect and prepare the subfloor so your glue-free carpet tiles will lay flat and last.
Remove debris, vacuum thoroughly, and repair cracks or loose boards.
Use a long level to find low spots; self-leveling compound fixes minor dips.
Check moisture with a meter; address dampness before installing to prevent buckling and mold.
Acclimating tiles and layout planning (pattern, direction, focal point)

Let the carpet tiles sit in the room for 24–48 hours so they acclimate to the temperature and humidity; this prevents gaps, buckling, and uneven seams once you lay them.
Meanwhile, plan your layout: choose a pattern and tile direction, find a focal point or center line, dry-fit tiles from that point, and mark reference lines so installation stays straight and balanced.
Step-by-Step Peel-Free Installation Process
Start by dry-laying a test area and snapping layout lines so you can see how tiles fit before committing.
You’ll choose a starting point—center or along a wall—then interlock and align tiles tightly, cutting around edges, vents, and doorways as needed.
Finish by trimming exposed edges and installing joining strips or thresholds for a clean, secure perimeter.
Step 1 Dry-lay a test area and mark layout lines

Lay out a small section of tiles across the room to test fit and pattern before committing — you’ll spot alignment issues, color variation, and edge gaps quickly this way.
Walk the area, adjust tiles until seams align. Use a chalk line or straightedge to mark reference lines on the floor.
Photograph the test layout for reference before you begin full installation.
Step 2 Starting from the center or wall: placement strategies
Whether you choose the center of the room or a straight wall, pick a clear reference line and work outward so each tile aligns with your chalk lines and adjacent seams.
Start with full tiles in high-visibility zones, then plan edge cuts to land under trim.
Stagger patterns if needed for appearance, and keep tiles tight against your line as you progress across the floor.
Step 3 Interlocking and aligning tiles for tight seams
With your reference lines set and full tiles placed in sightlines, it’s time to interlock and align each tile so seams sit tight and invisible.
Press tiles together at the edges, matching pile direction and pattern. Use a tapping block and mallet to snug joints without stretching.
Check alignment frequently, adjust before pressure-sensitive backing sets, and maintain consistent seam offsets for a seamless finish.
Step 4 Cutting tiles around edges, vents, and doorways

4. Measure carefully from the last full tile to walls, vents, and doorways. Transfer measurements to a tile, marking cut lines with a straightedge.
Use a utility knife with a fresh blade, scoring repeatedly until the tile snaps cleanly. For vents and irregular shapes, cut a template from paper first.
Dry-fit each trimmed piece, adjusting for tight, even seams before continuing.
Step 5 Finishing edges with trim, transition strips, or thresholds
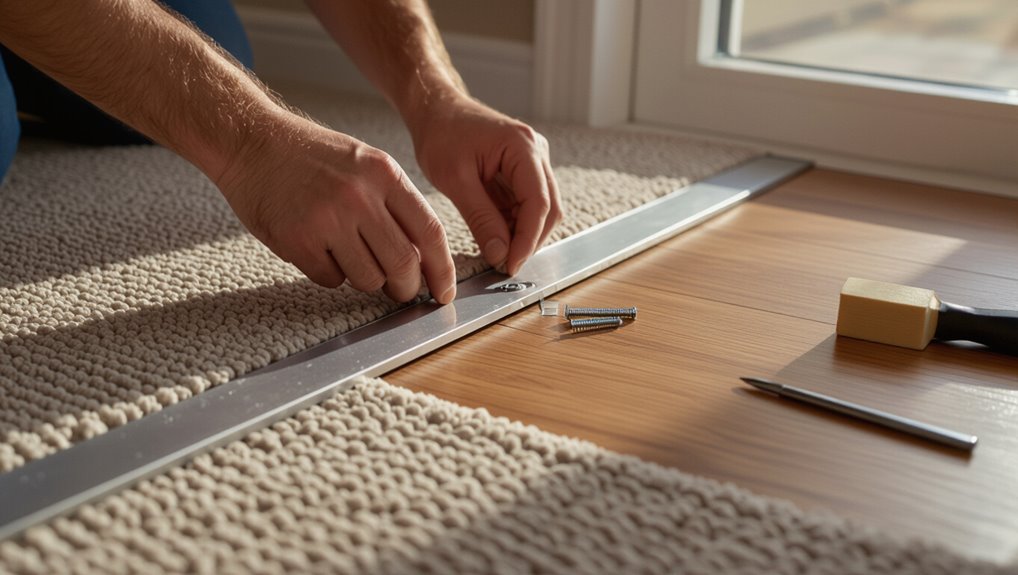
5. Finish edges by fitting trim, junction strips, or thresholds where tiles meet walls, different flooring, or doorways.
Measure gaps, cut strips to size, and secure them per manufacturer instructions—usually screws or adhesive to the subfloor, not the tiles.
Leave a small expansion gap, tuck tile edges neatly, and test door clearance.
Proper trims protect edges and create a clean, durable junction.
Step 6 Rolling or weighting the floor for adhesion-free stability
After you’ve trimmed and secured the perimeter, it’s time to stabilize the field of carpet tiles so they stay flat and resist shifting.
Use a 100–150 lb roller or evenly spaced heavy weights to press tiles into contact with the underlayment. Roll perpendicular and parallel to seams, making two passes each.
Check edges, re-roll any lifted tiles, and let the floor settle before foot traffic.
Alternatives to Glue for Securing Tiles
You can secure carpet tiles without glue using several options depending on your floor and whether you want permanence or easy removal.
Use double-sided or carpet tile tape for edges or light-traffic rooms, modular interlocking systems or connectors for a more stable fit, and non-slip underlays or gripper pads where you need extra grip.
Compare each method for longevity versus removability to pick the best balance for your space.
Double-sided carpet tape and carpet tile tape (when to use)
Double-sided carpet tape and specialized carpet tile tape give you a quick, low-mess way to hold tiles in place without adhesive, and they’re best used when you need a semi-permanent installation or plan to remove or replace tiles later.
Use tape on clean, dry subfloors, along edges and seams, and choose low-residue products.
Test a small area to verify tack and easy removal.
Modular interlocking systems and connectors
When you want a durable, glue-free floor that’s easy to install and reconfigure, modular interlocking systems lock carpet tiles together using tongue-and-groove edges, snaps, or plastic connectors.
You align tiles, press edges to engage, and connectors hold seams tight for high-traffic areas. These systems let you replace single tiles, adjust layouts, and avoid adhesive residue while maintaining a stable, flush surface.
Non-slip underlays and gripper pads
One simple option is a non-slip underlay or gripper pad that sits beneath carpet tiles to prevent shifting without adhesive.
You’ll cut pads to fit tile arrays, lay them over clean, dry subfloors, then position tiles on top. They add traction, reduce movement and protect floors.
Choose breathable, low-profile materials to keep tiles flat and make future removal straightforward.
Comparison of securement methods for longevity and removability
Although you can skip adhesive entirely, choosing the right securement method affects how long tiles stay put and how easily you can remove them later. You’ll weigh durability versus removability: double-sided tape holds tight but can residue; interlocking edges last without glue; underlays prevent slipping and lift cleanly.
| Method | Longevity | Removability |
|---|---|---|
| Double-sided tape | High | Low |
| Interlock | Medium-high | High |
| Underlay/gripper | Medium | High |
Common Problems and How to Fix Them
You’ll run into a few common issues—gaps or misaligned seams, buckling or lifting, and trouble from uneven subfloors—but most are fixable without glue.
I’ll show how to troubleshoot seams, secure tiles to prevent movement, correct subfloor problems after installation, and remove or replace damaged tiles quickly.
Follow these tips and you’ll keep a neat, stable floor without adhesive.
Gaps and misaligned seams troubleshooting
When seams don’t line up or you see gaps between carpet tiles, the room instantly looks unfinished and can snag or trap dirt—so fix it promptly.
Lift affected tiles, realign using adjoining edges as guides, and trim any tongue or backing that blocks a flush fit.
Replace tiles onto a clean, flat subfloor, apply pressure to lock seams, and check alignment before finishing.
Buckling, lifting, and movement prevention
If tiles start to buckle, lift, or shift, you’ll want to stop the problem before it worsens by pinpointing the cause—uneven subflooring, moisture, temperature changes, or heavy traffic are the usual suspects.
Check humidity and room temperature, secure edges with low-profile threshold strips, add weighted furniture pads, rotate tiles in high-traffic zones, and replace damaged tiles promptly to keep the layout stable.
Dealing with uneven subfloors after installation
Because subfloor irregularities can show up only after tiles settle and foot traffic begins, you’ll need to assess and address them quickly to prevent further damage.
Walk the area, mark high or low spots, and use a straightedge to pinpoint gaps. For minor dips, add thin underlayment shims or a leveling compound; for small humps, sand or plane the subfloor before re-laying adjacent tiles.
Removing and replacing damaged tiles without glue
One simple damaged tile doesn’t mean you have to replace the whole floor; you can remove and swap out tiles quickly without glue by following a few careful steps.
Lift the damaged tile at a corner, slide a thin putty knife under it, and peel gently.
Clean the subfloor, align the replacement, press firmly, and blend seams.
Trim if needed for a snug fit.
Best Practices, Maintenance, and Longevity Tips
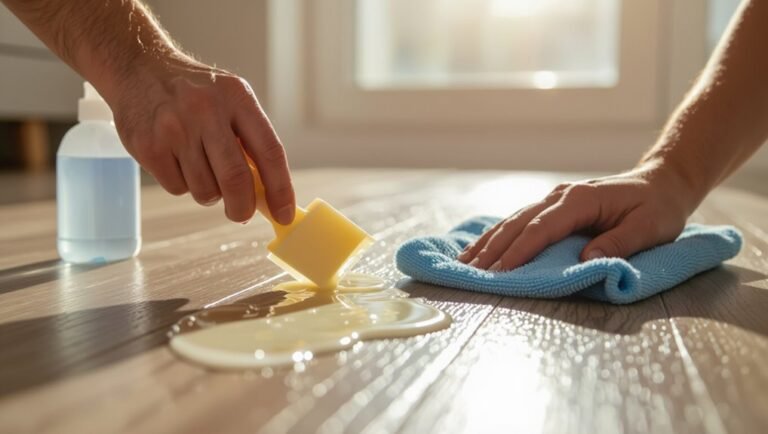
Keep a regular cleaning routine and treat spills fast to protect loose-laid tiles from stains and wear.
Mind furniture weight and use pads or plates to stop tiles from shifting or crushing, and check and re-seat tiles each season to maintain a flat, secure surface.
If problems persist or you need heavy-duty durability, consider professional installation or switching to adhesive.
Cleaning routines and stain prevention for loose-laid tiles
If you stick to a simple, regular cleaning routine and tackle spills immediately, loose-laid carpet tiles will stay fresh and last longer.
Vacuum weekly, spot-clean stains with a mild detergent and damp cloth, and blot—don’t rub.
Use absorbent mats in high-traffic areas and address pet accidents promptly with enzyme cleaners.
Rotate tiles periodically to even wear and prevent permanent soiling.
Weight distribution and furniture placement to prevent shifting
When you place heavy furniture on loose-laid carpet tiles, distribute weight evenly by using wide, flat bases or furniture coasters so tiles don’t compress or shift under concentrated loads.
Center legs on tile seams when possible, add plywood or hardboard panels beneath very heavy pieces, and use non-slip pads to prevent sliding.
Reposition occasionally to avoid permanent indentation.
Seasonal checks and re-seating tiles
After you’ve handled heavy furniture and prevented shifting, plan seasonal checks to catch loose or uneven tiles before they cause trips or wear.
Inspect seams and edges, pressing down any lifted corners. Rotate high-traffic tiles if patterns allow.
Replace or re-seat compressed or warped pieces, cleaning the subfloor first.
Keep a small toolkit and spare tiles handy for quick fixes and longevity.
When to consider professional installation or using adhesive
Although many DIYers can lay carpet tiles successfully, you should consider a pro or adhesive whenever subfloor imperfections, unusually large rooms, high-traffic zones, or permanent installations are involved.
A professional guarantees proper leveling, seam alignment, and edge fastening; adhesive prevents shifting, cupping, and premature wear.
Hire help if you lack tools, experience, or need warranty-backed, long-lasting results.
Cost, Time, and Performance Comparison
You’ll want to compare typical DIY time estimates to professional labor so you can decide if it’s worth doing yourself.
Consider the cost differences between glue-installed tiles and peel-and-stick or loose-lay options.
Finally, weigh expected performance and lifespan for each method to match your budget and usage.
Typical DIY time estimates vs. professional labor
Tackling carpet tile installation yourself can save money, but expect it to take longer than a pro—what might be a weekend for a DIYer could be a single workday for an experienced crew.
You’ll spend extra time measuring, cutting, and adjusting tiles, plus prep and cleanup.
Professionals work faster with tools, skills, and teamwork, reducing disruption and ensuring uniform results, though at higher labor cost.
Cost comparison: glue vs. peel-free methods
When you compare costs, peel-and-stick or loose-lay carpet tiles usually cut material and labor expenses but can shift costs into preparation and replacement, while glue-down installations demand higher upfront adhesive and professional installation but often last longer before replacement. You’ll weigh lower install cost vs. potential prep/replace needs; glue costs more now but can reduce turnover.
| Item | Typical cost impact |
|---|---|
| Peel-free | Lower install, possible prep/replace |
| Glue-down | Higher install, less frequent replacement |
Performance and lifespan expectations
Now that you’ve weighed upfront and ongoing costs, it helps to look at how each method performs over time and what lifespan you can expect.
Peel-free installations let you replace damaged tiles quickly and avoid adhesive breakdown, but may shift in high-traffic areas without proper underlay.
Glue-down offers longer stability and edge hold, though removal is messier and may shorten reuse potential.
Mistakes to Avoid
Don’t skip proper subfloor prep—you’ll end up with uneven tiles and premature wear.
Measure and plan your layout carefully to avoid awkward cuts and misaligned seams.
Also pick tiles suited for traffic and moisture, and don’t rely on temporary fixes to solve long-term problems.
Skipping subfloor preparation
If you skip preparing the subfloor, you’ll likely end up with uneven, shifting tiles and a job that won’t last.
You must clean, dry, and repair cracks or bumps before laying tiles. Remove debris, sand high spots, and fill low areas so tiles sit flat.
Skipping these steps causes gaps, tripping hazards, and premature wear, forcing costly fixes later.
Improper layout planning and measurement errors
After you’ve prepped the subfloor, take time to plan your tile layout and measure carefully; poor planning leads to uneven patterns, awkward edge cuts, and wasted material.
You should snap chalk lines, dry-fit tiles from the center out, and double-check room dimensions. Misreads or rushed layouts force extra seams, mismatched patterns, and costly re-cuts—measure twice, cut once.
Using wrong tile types for high-traffic or moisture-prone areas
Carpet tiles come in a variety of constructions, and choosing the wrong type for busy rooms or damp spaces will shorten their life and create maintenance headaches.
Pick commercial-grade, low-pile tiles for high-traffic zones and moisture-resistant or indoor/outdoor tiles where spills or humidity occur.
Inspect backing and drainage compatibility, and avoid plush residential tiles in entryways or basements to prevent premature wear and mold.
Overreliance on temporary fixes
When you rely on temporary fixes—like double-sided tape, loose-fitting adhesive strips, or patching damaged tiles—you’ll only delay the real problems and often make them worse.
These quick solutions can shift, curl, trap moisture, or damage adjacent tiles, leading to uneven seams and faster wear.
Instead, inspect subfloor, replace damaged tiles, use proper edge restraints, and choose a secure peel-free installation method for lasting results.
FAQ
You’ll likely have questions about surfaces, moisture, quantity, reusability, and changes when laying peel-free carpet tiles.
Can you put them over hardwood or laminate, use them in basements or bathrooms, buy enough for cuts, reuse tiles after removal, and blend them with other flooring?
I’ll answer each so you can plan and avoid surprises.
Can I install carpet tiles directly over hardwood or laminate?
Curious whether carpet tiles can go straight over your hardwood or laminate? Yes—if the floor is smooth, clean, dry, and level.
Use peel-free tiles with a compatible non-slip backing or add a thin rug pad made for hard floors to prevent slipping and protect finish.
Test a small area first, avoid trapping moisture, and follow manufacturer’s weight and traffic guidelines.
Will peel-free carpet tiles work in basements or bathrooms?
How well will peel-free carpet tiles hold up in damp areas like basements or bathrooms? They can work if you control moisture: use a vapor barrier or waterproof underlayment, guarantee proper drainage and ventilation, and choose tiles with moisture-resistant backing and quick-dry fibers. Avoid direct contact with standing water and inspect regularly for mold. For persistent dampness, opt for hard-surface flooring instead.
How many tiles should I buy to allow for cuts and mistakes?
Buy about 10–15% extra tiles to cover cuts, pattern matching, and inevitable mistakes; for rooms with lots of irregular edges or diagonal layouts, increase that to 15–20% so you won’t run short mid-job.
Measure your room area, calculate tile count, then add the chosen percentage.
Order whole boxes when possible—mix lots can vary—and keep leftovers for future repairs or replacements.
Can I reuse peel-free carpet tiles after removal?
If you’ve got leftover peel-free carpet tiles from that extra 10–15% you ordered, you can often reuse them after removal—but success depends on how they were installed, how long they’ve been down, and the condition of the adhesive backing.
Inspect pads for intact adhesive, minimal dirt, and no delamination. Clean gently, let them dry, and test a small area before reinstalling to guarantee secure hold.
How do I transition from carpet tiles to other flooring types?
When you’re switching from carpet tiles to a different floor, plan for a tidy, level changeover that protects edges and creates a smooth look between materials.
Remove tiles, clean subfloor, and guarantee height match. Use transition strips or tapered underlayment where needed. Seal gaps and secure thresholds for traffic.
- Measure height difference
- Choose matching transition strip
- Prep and level subfloor
- Install and secure threshold