How to Clean Vinyl Floor Tiles and Restore Their Original Shine
You can restore vinyl tile shine by first sweeping or vacuuming to remove grit, then mopping with a pH‑neutral cleaner or diluted white vinegar, rinsing well, and drying with a microfiber cloth. Spot‑treat scuffs with a baking soda paste or melamine sponge, strip old wax if present, and apply a commercial vinyl restorer or polish in thin, even coats, buffing between layers. Follow manufacturer guidance and safety steps, and keep going to learn tips for repairs, products, and maintenance.
How to Clean Vinyl Floor Tiles and Restore Their Original Shine
To get your vinyl tiles looking like new, start with a simple routine you can stick to.
You’ll sweep or vacuum, mop with a mild cleaner, then buff dry to bring back the shine.
Follow those steps regularly and you’ll protect the finish while restoring gloss.
Best Simple Method to Clean and Shine Vinyl Tiles
If you want your vinyl tiles to look fresh without harsh chemicals or special tools, a simple routine of sweeping, a gentle mop with warm water and mild dish soap, and a final rinse will restore most of their shine.
To learn how to clean vinyl floor tiles effectively, dry thoroughly, spot-treat scuffs with baking soda paste, and buff with a microfiber cloth for lasting gloss.
Understanding Vinyl Floor Tiles
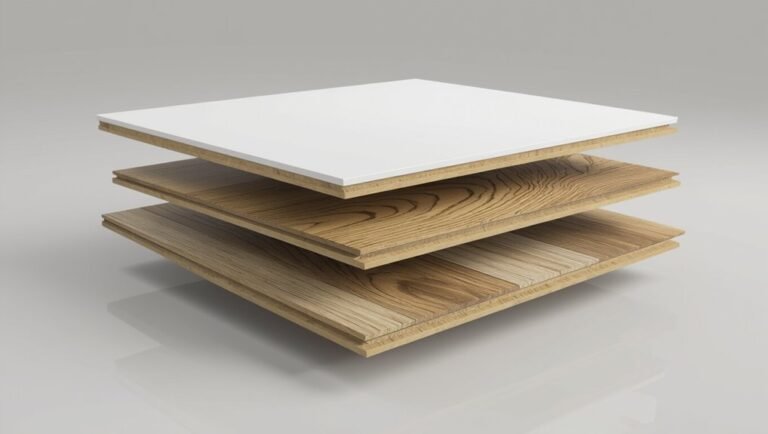
Vinyl floor tiles are made from layers of PVC and come in sheet, tile, and luxury vinyl plank varieties, each with different durability and finish.
Over time they lose shine from dirt, wear, wax buildup, and scratches, so you’ll need to identify the cause before cleaning.
If damage is superficial you can restore the surface, but deep gouges or worn-through wear layers usually mean replacement is the better option.
What Vinyl Floor Tiles Are (materials and common types)
Flooring made from synthetic materials, vinyl tiles combine durability, water resistance, and easy maintenance, making them a popular choice for homes and businesses.
You’ll find sheet vinyl, luxury vinyl tile (LVT), and vinyl composition tile (VCT). LVT mimics wood or stone with printed layers and a wear layer; VCT is durable, often used commercially; sheet vinyl is seamless and affordable.
Why Vinyl Tiles Lose Shine (wear, dirt, wax buildup, scratches)
Over time you’ll notice vinyl tiles losing their original sheen for a few clear reasons: foot traffic wears the protective finish, tiny scratches scatter light, and embedded dirt dulls surfaces.
Old wax or polish layers build up unevenly, trapping grime and causing cloudy patches.
Spills that aren’t cleaned promptly can etch or stain, further diminishing shine and clarity.
When to Clean vs When to Replace
Not every loss of shine means you have to replace the tiles; many issues respond to cleaning or refinishing.
Inspect for deep gouges, curling seams, or layer separation—those signal replacement. If damage is surface-level, try thorough cleaning, strip and reseal, or apply a fresh finish.
Consider age, cost, and long-term durability to decide: clean and restore when practical; replace when structural integrity’s compromised.
Safety and Preparation
Before you start cleaning, gather the right tools and supplies—mild cleaner, mop, bucket, soft cloths, and any manufacturer-recommended products.
Open windows, wear gloves and eye protection, and always test cleaners on a small, inconspicuous spot to check for damage.
Also identify your floor’s finish and check the manufacturer’s care instructions so you use safe methods and approved products.
Tools and Supplies You’ll Need
Gather a few essential tools and supplies so you can clean vinyl tiles safely and efficiently: a soft-bristle broom or vacuum with a hard-floor setting, a microfiber mop, a bucket, pH-neutral floor cleaner, and non-abrasive sponges or cloths.
- Soft-bristle broom or vacuum
- Microfiber mop and washable pads
- pH-neutral cleaner and measured mixing tools
- Non-abrasive sponges, cloths, and a spare towel
Safety Precautions (ventilation, test spots, protective gear)
Because cleaning solutions and scrubbing can release fumes or damage finishes, take a few safety steps first: open windows and run fans for ventilation, wear gloves and eye protection, and use kneepads if you’ll be on hands and knees.
Always test cleaners in an inconspicuous spot, wait for results, and follow product label precautions to avoid discoloration or harmful reactions.
How to Identify Finish Type and Manufacturer Recommendations
Wondering whether your vinyl has a wear layer, urethane coat, or no finish at all?
Check product paperwork, look for embossing or a glossy factory sheen, and test a hidden corner with mild cleaner—sealed finishes resist staining.
Note any manufacturer labels under appliances or trim.
Follow their cleaning guidelines and approved products to avoid voiding warranties and damaging the floor.
Step-by-Step Cleaning Process
Start by removing loose dirt and debris with a broom or vacuum so you’re not pushing grit around when you mop.
Then mix a mild cleaner at the proper ratio and scrub, targeting stubborn stains like grease, ink, or dye with spot treatments as needed.
Finish by rinsing to neutralize cleaner residue and drying thoroughly to prevent water damage.
Step 1 Remove Loose Dirt and Debris (sweeping, vacuuming)
Sweep or vacuum the floor to remove loose dirt, dust, and grit that can scratch vinyl over time.
Work from the farthest corner toward the exit so you don’t re-soil cleaned areas.
Use a soft-bristle broom or a vacuum with a hard-floor setting to avoid scuffs.
Empty the vacuum or shake out the dustpan frequently to keep debris from settling back onto the floor.
Step 2 Deep Clean with Mild Cleaner (mix ratios, techniques)
A gentle cleaning solution will lift grime without harming your vinyl: mix a few drops of mild dish soap or a cup of white vinegar into a gallon of warm water, and avoid harsh cleaners or abrasive pads that can dull the finish.
Mop with a microfiber mop, rinse frequently, change water when dirty, and dry with clean towels to prevent streaks and residue buildup.
Step 3 Tackling Stubborn Stains (spot treatments for grease, ink, dye)
Treat stubborn stains spot by spot so you don’t damage the surrounding vinyl: identify the stain type (grease, ink, dye), blot or scrape off excess gently, then apply a targeted cleaner—dish soap or degreaser for grease, isopropyl alcohol for ink, and a diluted oxygen bleach for dye—working from the outer edge inward and testing in an inconspicuous area first.
Use soft cloths, repeat gently, dry thoroughly.
Step 4 Rinse and Neutralize Cleaner Residue
Now rinse the floor to remove any cleaner residue that can attract dirt or dull the finish.
Fill a bucket with clean, warm water and wring your mop until it’s damp. Work in small sections, changing water when it gets cloudy.
For alkaline cleaners, use a mild vinegar rinse (one cup per gallon) to neutralize.
Finish with a clear water pass to remove vinegar.
Step 5 Drying Properly to Prevent Water Damage
Once you’ve rinsed away cleaners, dry the vinyl thoroughly to prevent moisture from seeping into seams or underlayment.
Use absorbent microfiber mops or towels to blot excess water, then follow with a dry mop in overlapping strokes. Open windows or run fans to speed evaporation.
Don’t leave puddles or damp corners; check edges and baseboards to verify everything’s completely dry before walking or replacing rugs.
Restoring Shine and Finishing
Now that your tiles are clean, you’ll want to restore their shine and protect the finish using either simple DIY remedies (with cautions about vinegar, baking soda and oil) or a commercial vinyl restorer.
Learn the right tools and technique for applying polish or restorer, how many coats to use, and whether to buff by hand or with a machine.
Follow proper application and buffing methods to get an even, long-lasting shine.
Option A DIY Home Remedies to Restore Shine (vinegar, baking soda, olive oil cautions)
You can try a few simple home remedies to revive dull vinyl tiles, but be cautious: common pantry ingredients like vinegar, baking soda, and even olive oil can help remove grime or add temporary shine and can also damage the finish if used improperly.
Test a small hidden area first. Use diluted vinegar for cleaning, avoid abrasive baking soda scrubbing, and skip olive oil as a long-term polish.
Option B Commercial Vinyl Floor Restorers and Polishes
If you want a more reliable, longer-lasting shine than DIY tricks provide, commercial vinyl restorers and polishes are designed to rebuild worn finishes and protect against future scuffing. You’ll find products for high-traffic areas, matte or gloss preferences, and quick-dry formulas. Choose reputable brands, follow label warnings, and test a small area to verify compatibility.
| Feature | Benefit |
|---|---|
| Gloss level | Custom finish |
| Durability | Longer wear |
| Dry time | Fast return to use |
| Scuff resistance | Less marking |
| Brand rating | Quality signal |
How to Apply Polish or Restorer (tools, technique, number of coats)
Before you start, gather the right tools—microfiber mop or applicator pad, bucket, clean rags, and a floor buffer if you have large areas—so you can work efficiently and avoid streaks.
Work in small sections, apply thin even coats, let each dry per label instructions, and lightly overlap edges.
Two coats suit most floors; add a third for high-traffic areas.
Buffing Methods: Manual vs Machine Buffing
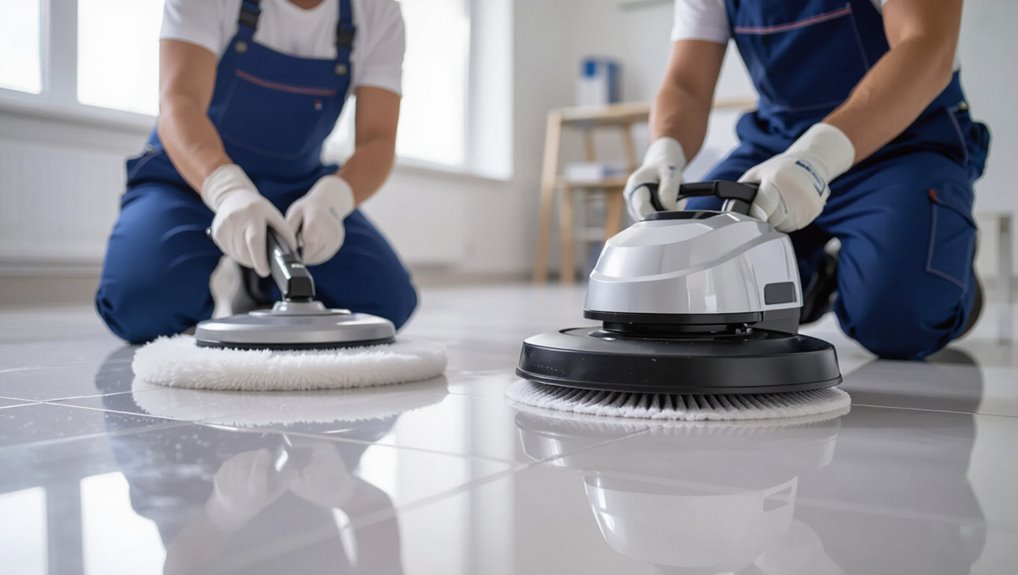
1 clear pass with a pad or a few short runs with a machine will make a big difference in finish: manual buffing uses a soft cloth or hand pad to work polish into small areas and touch-ups, while machine buffing relies on a high-speed or rotary buffer to restore overall shine quickly and evenly.
You’ll choose manual for edges and spot work, machine for large, consistent results.
Deep Repair and Restoration for Worn or Damaged Vinyl
If your vinyl has heavy wax buildup, start by removing it with a manufacturer-safe stripper so you can see the true condition of the surface.
You can fix minor scratches and small gouges with repair kits or seam glue, but larger seam separation or extensive damage may need professional restoration or replacement.
We’ll cover safe removal methods, step-by-step repairs, and how to decide when to call a pro.
Removing Old Wax or Buildup Safely
When your vinyl tiles look dull or feel sticky from layers of old wax and cleaners, you’ll want to remove that buildup carefully to avoid damaging the surface; the right approach restores shine without stripping or etching the vinyl.
Start with a pH-neutral cleaner, mop, then test a solvent like mineral spirits on a hidden area.
Use gentle scrubbing pads, rinse well, and dry thoroughly.
Repairing Scratches, Gouges, and Seam Separation
Assess the damage before you start: small surface scratches can often be buffed or filled, shallow gouges may need a vinyl patch or filler, and seam separation calls for adhesive and careful realignment.
Clean the area, sand lightly, apply color-matched filler or patch, smooth and cure per instructions, then finish with a protective sealer so repairs blend and hold up to traffic.
When Professional Restoration or Replacement Is Recommended
Although small fixes work for many issues, there are limits to DIY repairs—so call a pro when damage is extensive, the subfloor is compromised, or matching and structural restoration exceed your skills.
If tiles warp, rot, or have widespread wear, a technician can assess adhesion, moisture, and leveling. They’ll recommend targeted restoration or full replacement, saving time and preventing recurring problems.
Routine Maintenance and Preventive Care
To keep vinyl looking its best, you’ll want simple daily and weekly cleaning habits like sweeping and damp-mopping to prevent grit buildup.
Schedule seasonal tasks—deep cleans, inspections, and reapplying finish if needed—plus an annual check for seams or edges.
Use protective measures (entry mats, furniture pads, and stable humidity) to minimize wear and costly repairs.
Daily and Weekly Cleaning Habits
When you keep up with simple daily and weekly habits, your vinyl floor tiles will stay cleaner and last longer; sweep or dust-mop high-traffic areas daily, spot-clean spills right away, and schedule a gentle damp-mop once a week to remove built-up dirt without harming the finish.
- Remove grit with a soft broom or dust mop.
- Wipe spills immediately with a microfiber cloth.
- Damp-mop with a mild cleaner weekly.
- Use felt pads on furniture to prevent scratches.
Seasonal and Annual Maintenance Tasks
Because daily care only goes so far, you should add a few seasonal and annual tasks to protect your vinyl tiles and catch issues early.
Every season, inspect seams and edges for lifting or gaps, clean grout lines and under appliances, and reseal any scuffs with a manufacturer-approved polish.
Annually, deep-clean with a pH-neutral solution and check for discoloration or wear that needs repair.
Protective Measures (mats, furniture pads, humidity control)
You’ve covered seasonal checks and deep cleaning, but preventing damage in the first place will keep your vinyl tiles looking new longer.
Place doormats at entrances, use washable rugs in high-traffic zones, and fit felt pads under furniture legs.
Keep indoor humidity between 35–55% to prevent warping or seams lifting.
Wipe up spills promptly and avoid dragging heavy items across the floor.
Common Mistakes and Problems to Avoid
Don’t use harsh cleaners or abrasive pads that can scratch or strip the vinyl’s finish.
Avoid overusing wax or polish, which leaves a sticky residue and attracts dirt.
Use the right mop and controlled water—excess moisture and improper tools can warp seams and cause staining.
Harsh Cleaners and Abrasives That Damage Vinyl
While vinyl is tough, harsh chemicals and abrasive tools can quickly strip its protective wear layer and leave permanent scratches, dullness, or discoloration.
Don’t use bleach, ammonia, solvent-based cleaners, scouring pads, or wire brushes. They break down the finish and weaken seams.
Instead, choose pH-neutral cleaners, soft microfiber mops, and gentle spot-cleaning with nonabrasive cloths to protect and preserve your vinyl.
Overuse of Wax or Polish Leading to Residue Buildup
If you keep applying wax or polish “just to be safe,” residue can build up into a cloudy, sticky layer that attracts dirt and dulls your vinyl’s shine.
You should limit coatings, follow product directions, and buff between applications.
When buildup appears, strip it with a recommended remover and rinse thoroughly.
Regular light cleaning prevents compounding layers and keeps floors looking fresh without heavy polish use.
Incorrect Mop Types and Water Damage Risks
Even a well-meaning cleaning routine can damage vinyl when you grab the wrong mop: heavy string mops and overly wet steam mops leave too much water that seeps into seams and causes warping or lifting, while abrasive scrub brushes and harsh pads scratch the surface.
Use a damp microfiber mop, wring thoroughly, avoid standing water, and dry promptly to prevent swelling, delamination, and stains.
Compare Cleaning Products and Tools
Now you’ll compare the tools and products that actually make vinyl floors shine.
Pick the right mop—microfiber for gentle, string for heavy messes, and steam mops with caution—and weigh cleaners: pH-neutral for regular use, diluted vinegar sparingly, and commercial solutions for tough buildup.
Consider when machines like buffers or polishers are worth the cost and risk to extend finish life.
Mop Types: Microfiber, String, Steam Mop (pros and cons)
Choosing the right mop can make cleaning vinyl tiles faster and protect their finish, so let’s compare three common types—microfiber, string, and steam mops—by how well they lift dirt, handle moisture, and affect the floor over time.
| Type | Strength | Drawback |
|---|---|---|
| Microfiber | Great dirt pickup, low water | Needs frequent rinsing |
| String | Heavy-duty scrubbing | Traps moisture |
| Steam | Sanitizes, deep cleans | Can warp vinyl with heat |
Cleaners: pH-Neutral vs Vinegar vs Commercial (when to use each)
When you pick a cleaner for vinyl tiles, think about how each option acts on dirt and the floor’s finish:
Use pH-neutral cleaners for routine cleaning and to protect the finish; dilute white vinegar sparingly for stubborn grime, never full strength; choose commercial vinyl formulas for heavy buildup or textured tiles, following manufacturer instructions.
Always test a small area first and rinse well to avoid residue.
Machines: Buffers and Floor Polishers When They’re Worth It
After you’ve picked the right cleaner—whether that’s a pH-neutral solution for regular upkeep, a diluted vinegar mix for spot grime, or a commercial product for heavy buildup—you may wonder if a machine will speed things up or improve results.
Use buffers for light maintenance and polishing pads; rent a floor polisher for large areas or worn finish. Test first, control speed, and avoid abrasive pads.
Time and Cost Estimates
For routine sweeping and mopping, you’ll usually spend 15–45 minutes for a typical room, while a full restoration with stripping, deep cleaning, and sealing can take several hours to a full day.
DIY supplies—cleaner, mop, scrub brush, and a stripping agent if needed—typically run $20–$100 depending on quality, whereas hiring a pro can cost $100–$500 or more depending on room size and condition.
Use these ranges to decide whether to tackle the job yourself or call a professional.
Typical Time Required for Routine Cleaning vs Full Restoration
Routine cleaning usually takes 15–30 minutes for a small room and up to an hour for a larger space.
A full restoration can span several hours to a full day depending on damage and square footage.
You’ll plan short, regular sessions: sweeping, mopping, spot-treating.
For restoration, expect drying, multiple treatment steps, and curing times; schedule accordingly and allow breaks between phases.
Estimated Costs for DIY Supplies vs Professional Service
1 clear way to weigh whether to DIY or hire a pro is to compare time and cost side-by-side: you’ll save on labor but buy supplies and spend hours; pros charge more but finish faster and guarantee results.
| Option | Typical Cost | Time |
|---|---|---|
| DIY supplies | $20–$80 | 2–6 hrs |
| Professional | $150–$400 | 1–3 hrs |
FAQs
You’ve probably got specific questions like whether a steam mop is safe for vinyl, if vinegar or bleach will harm the finish, or how to tackle black scuff marks.
You’ll also want to know how often to polish to keep the shine without overdoing it.
Below are clear, practical answers to those common concerns.
Can I use a steam mop on vinyl floor tiles?
Wondering if a steam mop’s a safe choice for your vinyl floor tiles? You can use one cautiously: low-temperature steam and minimal passes reduce risk.
Test a hidden spot first, avoid prolonged heat on seams or damaged areas, and don’t oversaturate.
If tiles are loosely glued, old, or have wear, skip steam and stick to recommended mild cleaners to prevent lifting or warping.
How often should I polish vinyl floors to maintain shine?
If you decide against steam cleaning because of heat or wear concerns, polishing can keep vinyl looking bright without risking seams or adhesive.
For regular traffic, polish every 3–6 months. Low-traffic areas need treating once or twice a year.
Always follow product instructions, test a small spot first, and buff lightly to maintain shine without building up residue or causing slipperiness.
Will vinegar damage my vinyl floors?
Can vinegar harm vinyl floors? You can use diluted white vinegar (about 1 cup per gallon of water) for routine cleaning without harm.
Avoid undiluted vinegar, frequent acidic treatments, or letting solution sit—those can dull or weaken finish over time.
Test a small inconspicuous area first, and rinse with clean water after mopping to remove residual acidity.
How do I remove black scuff marks from vinyl?
How do you get stubborn black scuff marks off vinyl without scratching the surface?
Use a soft cloth or melamine sponge dampened with warm water and mild dish soap; rub gently in a circular motion.
For tougher marks, try a small amount of baking soda paste or a commercial vinyl-safe cleaner.
Rinse, dry, and buff to restore shine—avoid abrasive tools or harsh chemicals.
Can I use bleach or ammonia-based cleaners on vinyl tiles?
After removing scuff marks with gentle methods, you might wonder whether stronger cleaners like bleach or ammonia are safe for vinyl tiles.
Don’t use undiluted bleach or ammonia—they can discolor, dull finish, and break down adhesives. For stubborn stains, dilute household bleach heavily or choose a vinyl-safe cleaner.
Rinse thoroughly and test in an inconspicuous spot first to avoid damage.