How to Clean Grout on Tile Floors Without Scrubbing for Hours
You can get grout noticeably cleaner without hours of scrubbing by using steam, oxygen-bleach soaks, enzyme cleaners, or a microfiber steam mop. Start by testing a hidden spot, apply steam or an oxygen-bleach paste to the grout lines, let it dwell, then wipe or extract with hot water; finish by drying and sealing. These methods cut elbow grease and protect grout longer, and if you want, keep going for step-by-step instructions and tips.
Clean Grout Without Hours of Scrubbing
You don’t need to spend hours scrubbing to get grout clean — steam cleaning, a baking soda and vinegar paste, and oxygen bleach soak are the fastest, most effective options.
For most ceramic and porcelain tile, a steam cleaner is the single best method because it loosens grime without harsh chemicals.
If you have natural stone, stick to oxygen bleach or a pH-neutral cleaner to avoid damage.
Short, actionable summary of the fastest methods
Cut the scrubbing—use quick, high-impact methods that loosen and lift grout grime fast.
You’ll learn how to clean grout from tile floor using steam, a concentrated baking soda-vinegar paste, or a commercial grout cleaner with a short dwell time.
Apply, wait a few minutes, then lift with a microfiber mop or stiff brush.
Rinse and seal for longer results.
Best single-method recommendation based on common tile types
If you want one reliable method that works for most tile floors without hours of scrubbing, use steam cleaning for glazed ceramic and porcelain, and a concentrated baking-soda paste for unglazed or natural stone.
Test a small area first, protect delicate sealants, and lift loosened grime with a microfiber mop.
Rinse thoroughly, dry grout, and reseal porous grout yearly for lasting results.
How Grout Gets Dirty and Why Scrubbing Feels Endless
Grout is the porous, sand-like material between tiles, and it soaks up dirt, mold, and stains where surface cleaning can’t reach.
Soap scum, hard water deposits, and mildew all speed up discoloration and make scrubbing feel never-ending.
If stains won’t budge or the grout is crumbling, you’ll need professional cleaning or regrouting to restore the floor.
What grout is and how it traps dirt, mold, and stains
Think of grout as the porous, cement-like bedding between tiles that soaks up spills, dust, and soap scum; because it’s rough and slightly porous, dirt and moisture get trapped in tiny pits and then feed mold and stains, which makes every scrub feel like you’re chipping away at more than just surface grime.
You’ll find stains settle deep, fibers and biofilm cling, and cleaning reaches crevices ordinary mops miss.
Common causes of grout discoloration (soap scum, hard water, mildew)
The same porous texture that soaks up spills also invites several common culprits that change grout from light to dingy: soap scum, mineral deposits from hard water, and mildew each leave distinctive residues and stubborn stains.
You’ll notice soap scum feels filmy and yellowish, hard water creates chalky white or gray crusts, and mildew appears as fuzzy dark spots that thrive in damp grout.
When professional cleaning or regrouting is necessary
When scrubbing brings back only partial color, or stains sink deep despite regular cleaning, it’s a sign you might need professional help or even regrouting.
Call a pro if grout crumbles, gaps appear, or mold returns after treatment.
Professionals use steam, ultrasonic tools, or color sealing to restore or replace grout safely.
Regrouting fixes structural issues and prevents recurring stains and moisture damage.
Tools and Materials You Need (No Heavy Scrubbing Required)
You don’t need to scrub endlessly to get grout clean—pick the right tools like a steam cleaner, microfiber mop, and poultice applicators to loosen dirt with minimal effort.
Use safe cleaners or DIY mixes (vinegar only on unsealed grout, baking soda, oxygen bleach, or enzyme cleaners) and steer clear of harsh acids, metal brushes, or abrasive pads that can damage tile and grout.
Below I’ll show which items to use for each step and a visual setup so you can work efficiently and safely.
Essential non-scrub tools (steam cleaner, microfibre mop, poultice applicators)
Although you won’t be scrubbing, you’ll still need a few key tools to loosen and lift grime: a steam cleaner for deep sanitizing, a microfiber mop to trap loosened dirt without redepositing it, and poultice applicators for treating stubborn stains.
- Handheld steam cleaner
- Microfiber flat mop with washable pads
- Poultice spreader and reusable applicators
Safe cleaners and DIY solutions (vinegar, baking soda, oxygen bleach, enzyme cleaners)
Because grout is porous and holds grime, picking the right cleaners matters: mild acids like vinegar, gentle abrasives like baking soda, oxygen bleach for organic stains, and enzyme cleaners for biological buildup will lift soils without harsh chemicals or heavy scrubbing.
Use them diluted, test a small area, and let dwell time do the work.
- Vinegar solution for light stains
- Baking soda paste for spot cleaning
- Oxygen bleach soak for deep organic grime
Items to avoid that damage grout or tile
When cleaning grout and tile, steer clear of tools and chemicals that seem effective but actually cause long-term damage—abrasive scrubbers, harsh acids, and undiluted chlorine bleach can erode grout, scratch tiles, or strip protective seals.
Don’t use metal brushes or scouring pads; avoid muriatic acid or concentrated acids; and skip full-strength bleach—choose gentler, labeled-safe alternatives instead.
- Metal brushes
- Muriatic or concentrated acids
- Full-strength chlorine bleach
Visual guide to tool use and setup
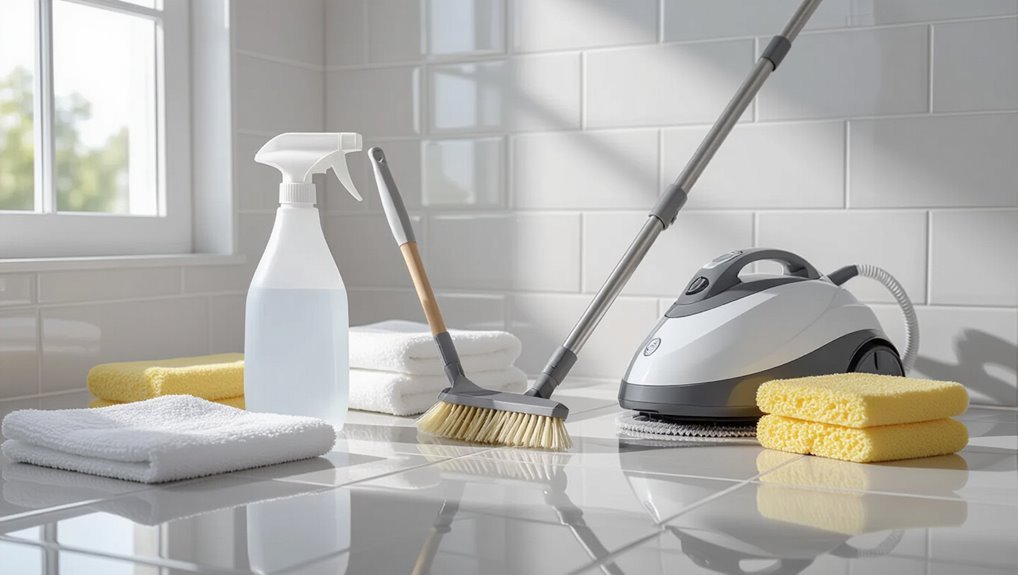
Before you start, gather the right supplies and arrange a small, comfortable workspace so you can clean effectively without heavy scrubbing.
Lay out a spray bottle with cleaner, a stiff nylon brush, microfiber cloths, grout pen or sealer, gloves, and a bucket.
Position good lighting, protect nearby surfaces with towels, and keep tools within reach to work efficiently and safely.
Fast Non-Scrubbing Methods Step-by-Step
You can tackle grout quickly without scrubbing by choosing the right low-effort method for the stain and tile finish.
Use steam cleaning for sealed grout, an oxygen bleach soak for deep organic stains, enzyme cleaners or mold removers for mildew, hot water extraction for gentle overall cleaning, or a microfiber steam mop with cleaning solution for fast maintenance.
Below are step-by-step tips to help you pick and apply the best option.
Method 1 Steam Cleaning (best for sealed grout)
Use steam cleaning when your grout is sealed and you want fast, chemical-free results—you’ll get loosened dirt and brighter grout with minimal scrubbing.
First clear the floor and vacuum, then mop if there’s sticky residue so the steam can work on the grout.
Set the cleaner to the manufacturer’s grout setting, make slow overlapping passes, and after steaming let the grout dry fully before re-sealing any areas that need protection.
When to use it and expected results
When grout is sealed and you want a quick, low-effort refresh, steam cleaning is ideal: it lifts dirt and light stains without harsh chemicals or elbow grease, though it won’t restore heavily stained or unsealed grout to like-new condition.
Use it for routine maintenance or mild discoloration; expect cleaner grout lines, reduced surface grime, and faster drying, but plan deeper treatment for stubborn stains.
Step 1: Prep area
If your grout is sealed and you’ve decided on steam cleaning for a quick refresh, start by clearing and prepping the area so the steamer can work efficiently.
Remove furniture, rugs, and loose debris. Sweep or vacuum thoroughly, mop if greasy, and let the floor dry.
Protect baseboards and nearby electronics with towels or plastic. Guarantee good ventilation and a nearby water source.
Step 2: Correct steam cleaner settings and passes
Although steam cleaners vary, set yours to the manufacturer-recommended low-to-medium steam setting and work in 2–3-foot sections so you control moisture and heat.
Hold the nozzle 1–2 inches above grout, make slow overlapping passes (two per section), and angle for grout lines.
Pause briefly on stubborn spots, avoid over-saturation, and move on once grout looks visibly cleaner to prevent excess dampness.
Step 3: Post-steam drying and sealing tips
Once the grout looks visibly cleaner, dry it promptly to stop moisture from seeping back in and to prepare the line for sealing.
Use microfiber towels and a fan or dehumidifier to speed drying.
When dry, apply a grout sealer per product instructions, working in small sections.
Wipe excess, allow full cure time, and avoid moisture or traffic until sealed grout bonds firmly.
Method 2 Oxygen Bleach Soak (best for deep organic stains)
When you’re tackling deep organic stains on unsealed or heavily soiled grout, oxygen bleach soak is a safe, non-scrubbing option if you wear gloves and keep the area ventilated.
Mix a poultice or soak solution according to the product label, apply it to grout lines, and guarantee full coverage.
Let it dwell for the recommended time, then rinse thoroughly and neutralize any residue before drying.
When to use and safety precautions
If your grout has dark, set-in stains from mold, mildew, pet accidents, or food spills, an oxygen bleach soak is a strong, low-effort option you can rely on; it works best on porous grout that needs a deep, chemical lift rather than surface scouring.
Use it when stains resist cleaners, test a hidden spot first, ventilate well, wear gloves and eye protection, and keep pets and kids away.
Step 1: Mix and apply poultice or soak solution
Now that you’ve decided an oxygen bleach soak is the right approach, prepare the mixture and apply it carefully.
Mix oxygen bleach powder with warm water to a thick but pourable consistency, following label ratios. Test a small area first.
Apply with a sponge or pour along grout lines, ensuring full contact.
Wear gloves and ventilate the room; avoid metal tools or acidic cleaners.
Step 2: Dwell time and coverage
Because oxygen bleach needs time to break down stains, let the paste or soak sit long enough to penetrate the grout—typically 20–30 minutes for light discoloration and up to several hours (or overnight for stubborn organic stains).
Cover treated areas with plastic wrap or damp towels to keep the solution moist and active, and avoid foot traffic or evaporation so the oxidizer can do its work effectively.
Step 3: Rinse and neutralize
After the soak has had time to work, you’ll need to rinse thoroughly to remove residual oxidizer and loosened soil.
Use clean water and a mop or wet vacuum, flushing grout lines until runoff is clear.
Neutralize any remaining bleach with a diluted vinegar rinse (1 part vinegar to 10 parts water), then rinse again.
Dry the floor to prevent re-soiling and inspect for spots.
Method 3 Enzyme Cleaners or Mold Removers (best for mildew)
Enzyme cleaners break down the organic matter in grout stains and mildew so you can remove them without scrubbing.
Apply the product evenly, let it sit for the manufacturer’s recommended dwell time (usually 10–30 minutes), then rinse thoroughly with clean water.
After rinsing, dry the area and use a mildew-resistant sealer or improve ventilation to help prevent regrowth.
How enzymes work on grout soils
When you spray an enzyme cleaner onto grout, microscopic proteins get to work breaking down the organic matter—mildew, soap scum, and body oils—that feed stains and odors, turning them into water-soluble compounds you can rinse away without hard scrubbing.
You’ll notice bioenzymes target proteins, fats, and carbs selectively, loosening deposits and reducing regrowth by consuming food sources that let microbes rebound.
Application steps and dwell time
Start by clearing loose debris and giving the grout a quick rinse so the enzyme formula can reach the mildew directly; then spray the product evenly along grout lines until they’re visibly wet but not pooling.
Let the enzymes sit per label instructions—usually 15–30 minutes—keeping area undisturbed.
Reapply to stubborn spots and allow full dwell for breakdown before proceeding to the next step.
Rinse and prevent regrowth
After the enzymes have broken down the mildew, rinse the grout thoroughly with clean water to remove residue and spent microorganisms so they won’t interfere with drying.
Dry the area with a microfiber cloth or fan, then apply a mildew-resistant sealer or spray to grout lines.
Repeat enzyme treatment monthly in humid spaces and fix leaks or ventilation issues to prevent regrowth.
Method 4 Hot Water Extraction with Carpet Cleaner (gentle, low-effort)
For a gentle, low-effort clean, set up your carpet cleaner with a narrow wand or upholstery attachment and fill it with hot water (and a mild tile-safe solution if recommended).
You’ll run the extractor slowly over grout lines, letting the suction pull out loosened soil as you go.
After extraction, open windows or use fans to speed drying so grout doesn’t stay damp and attract mold.
Setup and recommended attachments
Before you run the machine, gather a carpet cleaner with a hot water extraction wand or a small upholstery tool, a vacuum with a crevice attachment, mild tile-safe detergent, and a bucket of hot water—these will let you work quickly without scrubbing.
Attach a narrow wand for grout lines, use low-pressure nozzle settings, secure fresh clean solution, and keep microfiber towels handy to blot excess moisture.
Extraction steps and drying
Start by flushing the grout with hot cleaning solution and immediately extract the loosened soil with your carpet cleaner’s narrow wand, working in short passes along each joint so you don’t oversaturate the floor.
Move methodically, overlap passes slightly, and empty the recovery tank when it fills.
Finish with a dry microfiber pad over joints to lift remaining moisture, then air-dry with fans.
Method 5 Microfiber Steam Mop + Solution (quick maintenance)
Use a microfiber steam mop with a mild cleaning solution when you need fast, routine maintenance between deep cleans.
Fill the tank with water, add the recommended solution, run the mop over grout lines slowly, and change or wash the pad after each use; do this weekly in high-traffic areas and every 2–4 weeks elsewhere.
Keep the mop’s steam setting moderate to protect grout sealers and empty and rinse the tank after every session.
When to choose this for routine cleaning
When you need a quick, low-effort touch-up between deep cleans, reach for a microfiber steam mop with a mild cleaning solution; it lifts surface dirt and light grime without scrubbing, saving time and effort.
Use it when grout is generally clean, traffic is moderate, spills are fresh, or you want fast weekly upkeep.
It’s not for heavy stains or neglected grout.
Usage steps and maintenance frequency
Grab your microfiber steam mop and a mild tile-safe solution—this method cleans and refreshes grout quickly without scrubbing.
Fill the mop reservoir, test a small area, then steam across tiles in overlapping passes. Rinse microfiber pad often and change solution weekly.
Use this every 1–2 weeks for high-traffic areas, monthly for low-traffic zones, and deep-clean grout quarterly.
Comparing Methods Which One to Pick for Your Situation
You’ll want to match your tile type and grout condition to the right non-scrub method so you don’t waste time or damage surfaces. Below is a quick comparison of common tiles/grout vs recommended non-scrub approaches and a simple time/cost/effectiveness/safety snapshot to help you pick. Use the table to guide a practical choice based on your priorities.
| Tile/Grout Situation | Recommended Non-Scrub Method | Time / Cost / Effectiveness / Safety |
|---|---|---|
| Porcelain, sealed grout | Steam or mild enzyme cleaner | Fast / Low / High / High |
| Natural stone, sensitive grout | pH-neutral cleaner | Moderate / Low / Moderate / High |
| Old stained grout, unsealed | Oxygen bleach soak | Longer / Low / High / Moderate |
Tile types and grout conditions vs recommended non-scrub method
Because tile material and the state of your grout directly affect which non-scrub cleaning method will work, you should match the cleaner to both tile type (porcelain, ceramic, natural stone) and grout condition (discolored, stained, crumbly, or sealed).
For porcelain or ceramic with surface discoloration, use mild alkaline cleaners or steam.
For stained grout, try oxygen bleach.
For crumbly or sealed grout, consult repair or gentle seal-safe cleaners.
Time, cost, effectiveness, and safety comparison
Now that you’ve matched cleaner types to your tile and grout condition, weigh how long each option takes, what it costs, how well it works, and the safety trade-offs.
Homemade solutions are cheap and gentle but slower; commercial cleaners work faster yet cost more and may need ventilation.
Steam cleaners balance speed and safety but require equipment.
Choose based on budget, time, stain severity, and household sensitivities.
Preventing Grout Re-Soiling Best Practices
To keep grout looking fresh, you’ll want a simple routine cleaning schedule and a few low-effort habits you can stick with.
Seal grout after a deep clean and reapply according to the manufacturer’s recommendation to block stains and moisture.
Also adopt quick daily habits—use mats, improve ventilation, and wipe spills promptly—to stop buildup before it starts.
Routine cleaning schedule and low-effort maintenance tips
Keeping grout looking fresh mostly comes down to simple, consistent habits you can stick with. You’ll prevent buildup by staying regular: quick spot cleans, weekly light mopping, and immediate spill response.
Pair them with low-effort habits that fit your routine to avoid heavy scrubbing later.
- Sweep or vacuum daily
- Damp-mop once a week
- Wipe spills immediately
Sealing grout: when, how, and how often
Along with regular sweeping and quick mopping, sealing grout is the single most effective step to prevent new dirt and stains from sinking in.
Apply a penetrating sealer after grout cures (usually 72 hours), follow manufacturer directions, and use a microfibre cloth to remove excess.
Reseal high-traffic areas every 1–2 years and less-used spaces every 3–5 years to maintain protection.
Quick clean habits to avoid buildup (mats, ventilation, wiping)
If you want grout to stay clean longer, adopt a few quick daily habits that stop dirt before it settles:
Place doormats inside and outside entrances, sweep or vacuum high-traffic areas daily, and wipe spills immediately with a microfiber cloth.
Run exhaust fans or open windows to reduce humidity, and mop weekly with a pH-neutral cleaner to prevent grime buildup.
Common Mistakes That Make Grout Cleaning Harder
Don’t use acidic cleaners on porous grout or natural stone, because they can etch and weaken the surface.
Avoid over-wetting grout, which promotes mold and makes stains harder to remove.
Also don’t skip sealing (or use the wrong sealant) and don’t rely on bleach alone for long-term prevention.
Using acidic cleaners on porous grout or natural stone
Because acidic cleaners can eat away at porous grout and natural stone, you should avoid using them on these surfaces.
They’ll etch, discolor, and weaken joints. Instead, choose pH-neutral cleaners or specially formulated stone-safe products.
Test any cleaner in an inconspicuous spot first. If stains persist, use targeted poultices or consult a professional to prevent long-term damage and costly repairs.
Over-wetting grout and causing mold
When you douse grout with too much water or cleaner, it soaks into the porous material and creates the damp conditions mold loves; that trapped moisture can lead to discoloration, a musty smell, and stubborn biological growth that’s hard to remove.
Work in small sections, blot excess liquid, and use a damp—not soaking—microfiber mop.
Dry thoroughly and ventilate to prevent recurrence.
Skipping sealing or using wrong sealant
Over-wetting leaves grout more vulnerable to mold and stains, and failing to seal it or using the wrong sealant leaves it exposed in a different way: unprotected grout soaks up spills, dirt, and cleaners, making stains harder to lift and requiring more frequent deep cleaning.
Seal new grout promptly with a compatible penetrating sealer, reapply as recommended, and test products to avoid film-forming sealers that trap grime.
Relying only on bleach for long-term prevention
If you keep reaching for bleach as your go-to grout solution, you’ll get short-term whitening but not lasting protection.
Bleach kills surface mold and lightens stains, yet it doesn’t seal pores or prevent future growth. You should stop relying solely on it.
Instead, dry thoroughly after cleaning, apply a proper grout sealer, and use milder maintenance cleaners to reduce recurring discoloration and deterioration.
Cost and Time Estimates for Each Method
You’ll want to contemplate both the upfront costs for tools and cleaners—basic supplies run low, while specialty machines cost more.
Expect about 1–3 hours per room for prep, treatment, and initial drying depending on method and room size.
I’ll compare typical price ranges and realistic time estimates so you can pick the best option for your budget and schedule.
Typical equipment and cleaner costs
While some grout-cleaning methods need only a few dollars’ worth of supplies, others call for specialized tools and pricier cleaners, so you’ll want to match your budget to the approach you pick.
Basic DIY: vinegar, baking soda, brush ≈ $5–$15.
Store-grade grout cleaners $8–$20.
Steam cleaners or rotary scrubbers $80–$300.
Replacement grout/sealers $10–$50.
Consider durability versus upfront cost.
Time per room for prep, treatment, and drying
Expect most rooms to take between 30 minutes and 4 hours from start to finish depending on the method you choose: quick DIY scrubs (vinegar, baking soda, brush) usually need 30–90 minutes of hands-on time plus 1–2 hours to dry.
Store-grade chemical cleaners run 45–120 minutes with similar drying. Steam or rotary machines cut scrubbing to 20–60 minutes but add setup and cool-down for a total of 1–3 hours.
Regrouting or sealing can stretch to 3–4 hours plus 24–48 hours of cure time before foot traffic.
Plan prep (masking, moving furniture) for 10–30 minutes, active treatment per above, then allow full drying or curing before walking on tiles.
How to Test and Spot-Treat Tough Stains Without Scrubbing
Before treating a stubborn spot, you’ll do a small patch test on an inconspicuous grout area to check cleaner compatibility and tile reaction.
If it’s safe, apply a targeted poultice—mix the cleaning paste, spread it over the stain, cover and let it sit per instructions, then remove and rinse.
If stains don’t lift, or grout is crumbling or widespread, call a pro or consider regrouting.
Patch test procedure for cleaner compatibility
To make sure a cleaner won’t damage your tile or grout, do a small patch test in an inconspicuous spot first; this lets you confirm compatibility and effectiveness without risking a visible area.
Apply a tiny amount, wait the product’s recommended dwell time, then blot and rinse.
Check for color change, etching, or residue after 24 hours. If safe, proceed cautiously.
Targeted poultice application steps for spot stains
Once you’ve confirmed a cleaner won’t harm the surface, you can focus on treating stubborn spots without heavy scrubbing by using a poultice.
Mix absorbent powder and cleaner to a toothpaste consistency, apply directly to the stain, cover with plastic and tape edges, let sit per product instructions, then remove and rinse.
Repeat once if needed, then dry and inspect.
When to call a pro or choose regrouting
If a poultice and spot tests don’t lift stubborn grout stains, you’ll need to decide whether to call a professional or replace the grout yourself.
Factors like stain depth, grout condition, and your comfort with tools should guide that choice.
Call a pro if grout is crumbling, extensive, or you lack time.
Regrout yourself for isolated, sound joints and if you’re handy and patient.
FAQ Fast Answers to Common Questions
You probably have quick questions like whether you can clean grout without chemicals or if steam is safe for your tile type.
You’ll also want to know how often to reseal grout, whether oxygen bleach will harm colored grout, and if a pressure washer is safe to use indoors.
Below are fast, practical answers to each.
Can I clean grout without chemicals?
Wondering whether you can clean grout without chemicals? You can—use baking soda paste, vinegar sparingly on unsealed grout, or a hydrogen-peroxide spot treatment for tougher stains.
Apply, let sit, then scrub briefly with a stiff brush or old toothbrush. Rinse thoroughly and dry.
For sealed grout, mild soap and water often suffice; avoid harsh abrasives that damage grout.
Is steam safe for all tile types?
Although steam works well on many tile floors, it isn’t safe for every type—porcelain and glazed ceramic usually handle steam fine, but natural stone (like marble, limestone, and some travertine) and some vinyl or laminate tiles can be damaged by heat and moisture.
Check manufacturer guidelines, test a hidden spot, and avoid high-temperature steam on sensitive surfaces to prevent etching, discoloration, or warping.
How often should I reseal grout?
How often should you reseal grout? Aim to reseal tiled floors every 1–3 years depending on traffic, moisture exposure, and grout type. Check by sprinkling water—if it soaks in within minutes, reseal. Use a penetrating sealer, follow manufacturer directions, and clean thoroughly before applying. High-traffic or wet areas may need annual resealing; low-use spaces can stretch toward three years.
Will oxygen bleach damage colored grout?
Can oxygen bleach harm colored grout? It’s gentler than chlorine bleach and usually won’t strip dye if you follow instructions.
Test a hidden spot first, use recommended dilution, and avoid prolonged saturation. Rinse thoroughly and allow grout to dry.
For vintage or nonstandard pigments, consult manufacturer guidance or try a mild alternative to be safe.
Can I use a pressure washer indoors on grout?
Ever thought about blasting indoor grout with a pressure washer? You probably shouldn’t.
Pressure washers can dislodge grout, crack tiles, and force water into subflooring, causing mold. If you insist, use a low-pressure setting, keep the nozzle distant, and test a hidden area first.
Safer options include steam cleaners or targeted grout brushes with appropriate cleaners for effective, controlled results.