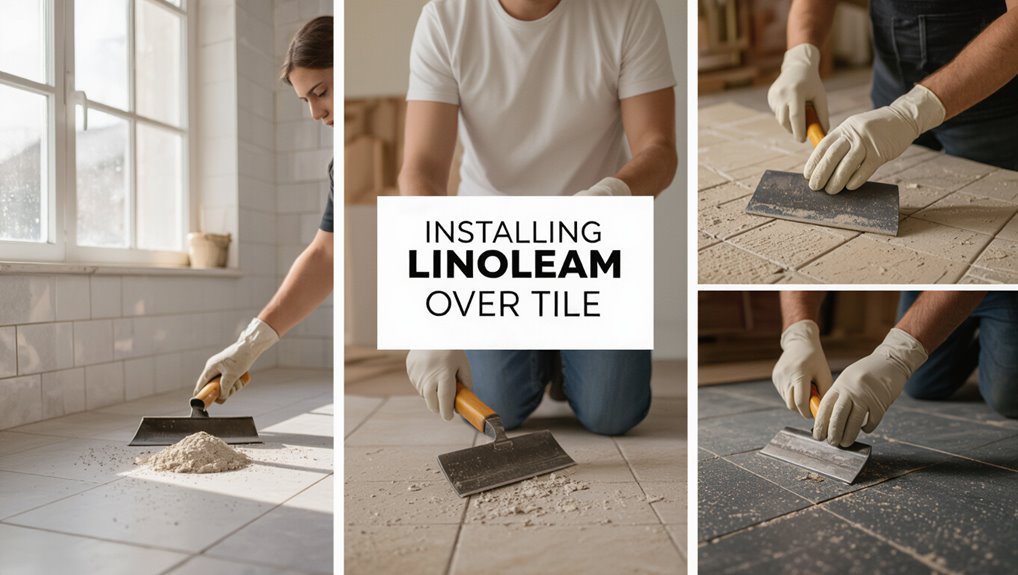
Can You Install Linoleum Over Tile? What You Should Know First
Yes—you can install linoleum over tile if the existing tile is sound, flat, and well-bonded. You’ll need to inspect for loose, cracked, or water-damaged tiles, check grout height, and test for moisture. Prep includes cleaning, sanding high spots, filling voids, and possibly installing a leveling compound or underlayment. Use the manufacturer’s recommended adhesive and allow proper curing. If you want a smooth, long-lasting result, follow proper prep and product choices and keep reading for specifics.
Can You Install Linoleum Over Tile? Quick Answer and Summary
Yes— you can install linoleum over tile if the tile is clean, level, and well-bonded, though you should avoid it on loose, uneven, or water-damaged surfaces.
Installing over tile can save time and reduce waste, but it may raise floor height, hide structural issues, and require careful surface prep or an underlayment for a smooth finish.
We’ll cover the pros, cons, and key considerations so you can decide whether to go over your existing tile or remove it first.
Direct short answer (yes/no and when)
You can install linoleum over existing tile in many cases, but only when the tile is sound, level, clean, and well-adhered; if tiles are loose, cracked, or uneven, you’ll need to repair or remove them first.
One-paragraph summary of pros, cons, and key considerations
Although installing linoleum over existing tile can save time and demolition costs, it works best when the tile is solid, level, and clean; you’ll gain a smooth, durable floor without tearing up the substrate, but you may inherit grout lines and height issues that require filling or an underlayment.
Weigh savings, prep work, moisture, adhesive compatibility, and changes; consider professional assessment for uneven or damaged tile.
Basic Understanding: What Is Linoleum and How It Differs from Vinyl and Other Flooring
Linoleum is a natural sheet material made from linseed oil, cork dust, wood flour and pigments, and comes in sheet, tile, and plank formats.
You’ll want to contrast that with vinyl, which is petroleum-based and behaves differently for adhesion and flexibility.
When considering installing over tile, note whether the substrate is ceramic, porcelain, or existing vinyl tile—smooth, stable tiles can work, but uneven, loose, or high-gloss surfaces usually need prep or removal.
What linoleum is made of and common types
Flooring made from natural materials, linoleum combines oxidized linseed oil, pine resin, wood flour, cork dust, and a jute backing into a resilient, biodegradable sheet that’s different from synthetic options like vinyl.
You’ll find linoleum in sheet, plank, and tile forms, plus cushioned or reinforced varieties for heavy traffic.
Choose by thickness, wear layer, and pattern to match durability and style needs.
How tile substrates differ (ceramic, porcelain, vinyl tile)
Knowing what linoleum is made of helps you pick the right substrate to install it over, since different tile types behave very differently beneath a sheet or plank.
Ceramic and porcelain are rigid and stable but grout lines can telegraph; porcelain is denser and less porous.
Vinyl tile flexes and may move or bond poorly.
You’ll check flatness, cleanliness, and adhesion before proceeding.
When installing over tile is feasible
If your tile is sound, level, and well-bonded, you can often install linoleum right over it; otherwise you’ll need to prep or remove the tile first.
You should check for loose, cracked, or uneven tiles, high grout lines, and moisture issues.
Smooth, rigid substrates like ceramic or porcelain usually work; cushioned or flexible vinyl tiles often need removal before linoleum installation.
Is Your Existing Tile Suitable? How to Inspect and Evaluate
Before you install linoleum over tile, you’ll need to inspect the floor for structural issues like flatness, level, and loose or cracked tiles, plus check grout height and surface condition.
Test for moisture and verify the subfloor’s integrity with a few simple tools and tests—straightedge, level, and a moisture meter or tape test.
If you find significant unevenness, loose tiles, or moisture problems, address them before proceeding.
Structural checks: flatness, level, and integrity
Because your linoleum will mirror every imperfection beneath it, you need to verify the existing tile’s flatness, level, and structural soundness before you begin.
Walk the area, press tiles to detect movement, and use a straightedge and level for gaps or high spots exceeding manufacturer limits.
Note any deflection, hollow sounds, or soft subfloor areas; these require repair before installing linoleum.
Surface condition: cracks, loose tiles, grout height
When you inspect the tile surface, pay close attention to cracks, loose pieces, and grout height since these directly affect adhesion and the finished look of your linoleum.
Tap tiles to find hollows, mark and replace any loose or broken pieces, and grind high grout or fill low joints so the surface becomes uniformly flat.
Small defects must be corrected before installation.
Moisture and subfloor considerations
If your tile sits over a damp or unstable subfloor, linoleum won’t stick or will fail prematurely, so you need to check moisture levels and the subfloor’s condition before you proceed.
Look for water stains, mold, soft spots, and movement. Confirm the substrate is dry, structurally sound, and flat.
Repair or replace damaged underlayment; address ongoing moisture sources first.
Tools and simple tests to perform
Before you commit to installing linoleum over existing tile, gather a few basic tools and run simple tests so you can quickly decide whether the job’s feasible or needs extra prep.
Inspect grout, adhesion, level, and moisture with these steps:
- Put on gloves, use a stiff brush for dirt
- Tap tiles for hollow sounds
- Scrape grout and check gaps
- Use a moisture meter on grout and substrate
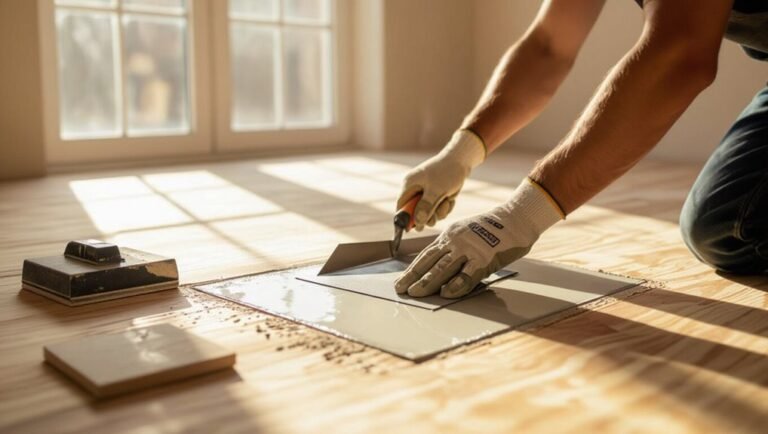
Preparing Tile for Linoleum: Step-by-Step Installation Overview
Before you lay linoleum, you’ll need to make the tile surface sound and flat: remove loose or damaged tiles, fill voids, and clean and degrease everything thoroughly.
Grind or sand any high spots and feather grout lines, then apply a leveling compound or underlayment where needed.
Finally, pick the proper adhesive or underlayment recommended for linoleum to guarantee a durable bond.
Step 1 Remove loose or damaged tiles and fill voids
Start by removing any loose or broken tiles so you’re left with a stable surface to work on.
Pry up damaged pieces, scrape away old adhesive, and clear debris.
Inspect for hollow spots and fill voids with a floor patch or thinset, smoothing flush with surrounding tile.
Let repairs cure fully before proceeding to the next preparation step.
Step 2 Clean and degrease the surface thoroughly
With the loose tiles removed and any voids patched and cured, you’ll need to clean and degrease the remaining surface so the linoleum adhesive will bond properly.
Sweep and vacuum grit, then mop with a degreasing cleaner or trisodium phosphate solution.
Rinse thoroughly, allow full drying, and wipe away residue.
Any remaining oil or dirt will prevent proper adhesion, so be meticulous.
Step 3 Grind or sand high spots and feather grout lines
Tackle any unevenness by grinding or sanding down high tiles and carefully feathering the grout lines so the linoleum will lie flat and the seams won’t telegraph through.
Wear eye and respiratory protection, use a diamond cup wheel or floor sander on stubborn spots, and work gradually.
Remove dust with a vacuum and tack cloth, inspecting frequently to guarantee a smooth, consistent surface before proceeding.
Step 4 Apply a leveling compound or underlayment if needed
If your sanded and ground surface still shows dips, grout ridges, or unevenness that could telegraph through linoleum, apply a self-leveling compound or lay a thin underlayment to create a smooth, stable substrate.
Let it cure per manufacturer instructions, then sand lightly and clean.
Consider:
- Thickness needed
- Drying time
- Compatibility with linoleum
- Floor flatness tolerance
Step 5 Choose appropriate adhesive or underlayment for linoleum
Now you’ll choose an adhesive or underlayment that matches your linoleum type, subfloor condition, and traffic expectations—pressure-sensitive adhesives work well for many sheet and tile linoleum installations, while full-spread adhesives give maximum bond on porous or uneven tiles.
For floating or cushion-backed linoleum, a moisture-resistant underlayment or felt pad may be preferable to isolate and level the floor.
Select manufacturer-recommended products, check VOCs, and confirm compatibility.
Step 6 Acclimate, lay out, and install linoleum
With your adhesive or underlayment chosen and ready, you’ll acclimate the linoleum, lay out the sheets or tiles, and proceed with the installation.
Unroll or dry-fit pieces, trim for tight seams, and mark reference lines. Let the material rest per manufacturer temperature and humidity guidelines.
Apply adhesive methodically, press or roll seams firmly, and work outward to guarantee even adhesion and alignment.
Step 7 Sealing edges, transitions, and finishing touches
When the linoleum’s in place, you’ll finish by sealing edges, installing connectors, and adding trim so the floor looks professional and stays watertight.
Run a bead of compatible silicone or seam sealer along walls and around fixtures, press junctions and thresholds firmly, then reinstall or add quarter-round and reducer strips.
Clean excess sealant, inspect seams, and allow full cure before traffic.
Materials, Tools, and Products You’ll Need
Before you start, you’ll want to know which linoleum types and thicknesses work best over tile and what adhesives, primers, leveling compounds, or underlayments are required.
Gather the essential tools—trowels, rollers, utility knife, straightedge—and safety gear like knee pads and a respirator.
Having the right products and protective equipment on hand will keep the job fast, safe, and long-lasting.
Recommended linoleum types and thicknesses
Choosing the right linoleum type and thickness matters for durability, comfort, and ease of installation, so pick options that match your room’s traffic and subfloor conditions.
Choose commercial-grade linoleum for high-traffic areas (2.5–3.2 mm) and residential for bedrooms or living rooms (2.0–2.5 mm).
Thicker options hide minor subfloor imperfections and improve sound and underfoot comfort—balance cost with performance.
Adhesives, primers, leveling compounds, and underlayments
Because a solid substrate and the right bonding products determine how long your linoleum will perform, you’ll need to gather specific adhesives, primers, leveling compounds, and underlayments before you start.
Choose a polymer-modified floor primer, a latex or cement-based self-leveler, an adhesive rated for vinyl/linoleum, and a vapor-retardant felt or foam underlayment.
- Primer
- Self-leveler
- Linoleum adhesive
- Vapor underlayment
Essential tools and safety gear
You’ll need a compact set of reliable tools and proper safety gear to get linoleum over tile installed cleanly and safely: basic hand tools, cutting and smoothing implements, a trowel and roller for adhesives, a leveling float, plus gloves, eye protection, and a respirator for dust and fumes.
Plan for:
- Accurate measuring tools
- Sharp utility knife
- Notched trowel and seam roller
- Knee pads and respirator
When NOT to Install Linoleum Over Tile: Risks and Red Flags
If your tile is loose, cracked, or uneven, you shouldn’t cover it—those conditions usually require removal before installing linoleum.
Covering problematic tile can lead to adhesive failure, visible telegraphing, and premature peeling.
Also check warranties and long-term durability: many manufacturers void coverage if you install over unsuitable substrates.
Situations that require tile removal first
When existing tile is cracked, loose, uneven, or installed over a soft or water-damaged substrate, you should remove it before laying linoleum; covering such problems just hides them and creates a weak, unstable floor that will fail quickly.
You should also pull tile if grout joints are wide or missing, tiles are hollow-sounding, or previous repairs are unstable—any condition that prevents a rigid, level underlayment.
Common failures from covering problematic tile
Because covering damaged or unstable tile hides the real problems, you’ll often end up with more than just an ugly floor—expect buckling, delamination, uneven wear, and rapid adhesive failure that can make the new linoleum peel, ripple, or trap moisture.
You’ll also face grout ridge telegraphing, loose tiles creating hollow spots, and hidden moisture causing mold or substrate rot, forcing costly removal and repair.
Long-term durability and warranties issues
Longevity matters, and installing linoleum over existing tile can seriously shorten it—manufacturers and installers often void warranties if you cover suspect substrates, uneven grout, or wet areas instead of preparing them properly.
You’ll inherit hidden issues: moisture, tile movement, and adhesive failures. That risks premature delamination and costly replacements, leaving you liable for repairs and out-of-pocket warranty claims if installation guidelines weren’t followed.
Comparison: Installing Over Tile vs Removing Tile First
You’ll want to weigh quick-install benefits against long-term consequences when choosing to lay linoleum over tile or remove the tile first. Below is a quick comparison to help you judge time, cost, dust/disruption, longevity, warranty, and resale impact at a glance.
| Factor | Over Tile vs Remove Tile |
|---|---|
| Time & Cost | Faster and cheaper to install over tile; removing tile adds days and labor cost |
| Dust/Disruption | Minimal with over-tile; removal creates heavy dust and more disruption |
Time, cost, dust, and disruption comparison
While keeping the existing tile saves time and labor, it can add hidden costs and mess you won’t see until work begins.
Installing over tile is faster, cheaper upfront, and creates less demolition dust, but you may pay for leveling, adhesives, and repairs.
Removing tile increases time, disposal fees, and dust control needs, yet gives a cleaner substrate and fewer surprises during installation.
Longevity, warranty, and resale impact
If you want the floor to last and keep warranty protections intact, installing linoleum over tile can be a trade-off: it’s quicker but may shorten the life of the new surface if the underlying tile is uneven, loose, or moisture-damaged.
You’ll likely void some manufacturer warranties and lower resale appeal.
Removing tile first improves durability, warranty eligibility, and market value despite higher upfront cost.
Common Mistakes and How to Avoid Them
When you install linoleum over tile, small oversights can cause big problems later.
Check that the subfloor is flat, use the correct adhesive and primer, and fix any moisture issues or loose tiles before you start.
Pay careful attention to seams and junctions so they stay secure and look professional.
Mistake 1 Ignoring subfloor flatness
Because a smooth, level surface is the foundation of any successful flooring job, you can’t skip checking the subfloor before laying linoleum over tile.
Inspect for high spots, loose tiles, grout ridges, or dips. Use a straightedge and level; sand, grind, or patch as needed.
Failing to flatten the substrate causes telegraphing, premature wear, and adhesive failure—fix it first.
Mistake 2 Using wrong adhesive or skipping primer
After you’ve flattened and repaired the subfloor, pick the right adhesive and use a primer on porous or smooth tile surfaces—skipping either is one of the fastest ways to ruin a linoleum installation.
You should match adhesive type to linoleum and substrate, follow manufacturer open time, and apply primer where recommended.
Wrong glue or no primer causes poor bond, bubbles, and premature failure.
Mistake 3 Failing to address moisture or loose tiles
If you ignore moisture issues or don’t secure loose tiles, your new linoleum won’t last—moisture can lift adhesive and trapped tiles can telegraph through the sheet.
Before installation, test for dampness, replace cracked grout, reattach or remove hollow tiles, and level the substrate.
Use a moisture barrier or vapor retardant when required.
Don’t proceed until the floor is dry and stable.
Mistake 4 Poor seam and transition treatment
While you might focus on fitting the sheet, poor seam and alteration treatment will quickly betray a professional-looking installation; seams that aren’t tight or changes that sit proud will catch dirt, peel, and trip.
You should cut precise seams, heat-weld or use proper seam adhesive, and install low-profile thresholds.
Test fit, clamp, and trim to guarantee smooth, secure joins that resist movement and moisture.
Tips and Best Practices for a Durable Installation
You’ll want to know when a project is beyond your skill set and calls for a pro, especially if tiles are uneven or subfloor repairs are needed.
Keep your linoleum lasting longer by cleaning gently, avoiding harsh chemicals, and using felt pads under furniture.
Save money by prepping well, shopping quality adhesives on sale, and tackling straightforward sections yourself while hiring help for complex spot work.
Professional vs DIY indicators: when to hire a pro
Because installing linoleum over tile can hide uneven surfaces and trap moisture, you’ll want to honestly assess your skills and the condition of the substrate before tackling the job yourself.
Hire a pro if tiles are uneven, cracked, or moisture-prone, if extensive prep or leveling is needed, or if you lack tools or experience.
DIY only if substrate is flat, dry, and you’re confident.
Maintenance tips for linoleum over tile
If you want your linoleum-over-tile floor to last, follow a few simple maintenance habits: sweep or vacuum daily to remove grit, mop with a pH-neutral cleaner weekly, and dry promptly to prevent moisture seeping into seams.
Use felt pads on furniture, avoid harsh chemicals or abrasive tools, and inspect seams and edges regularly to repair adhesive failures before they worsen.
Cost-saving strategies without compromising quality
When you balance smart prep with selective spending, you’ll cut costs without sacrificing a long-lasting linoleum-over-tile installation.
Inspect and repair grout, pick durable mid-range linoleum, and rent tools instead of buying. Do DIY where skill fits; hire pros for tricky spots.
- Prep thoroughly
- Buy quality underlayment
- Rent specialty tools
- Prioritize skilled labor for seams
Cost Estimates and Timeframes
You’ll want a clear picture of costs before you start, from a typical DIY breakdown (materials, underlayment, adhesive, tools) to what pros charge per square foot.
Expect professional installation to run higher but include warranties and faster turnaround.
I’ll also cover typical timelines and key factors—room size, prep work, and subfloor condition—that can speed up or slow the job.
Typical DIY cost breakdown
A basic DIY linoleum-over-tile project typically runs $2–$6 per square foot in materials and 4–12 hours of hands-on work for an average 100–200 sq ft room.
You’ll budget for rolls, adhesive, underlayment, seam tape, and trims. Expect $50–$200 for supplies plus rental tools ($20–$60/day).
Factor cleanup time and small contingencies for damaged tiles or leveling.
Professional installation cost range
Professional installation typically costs considerably more than DIY, running about $3–$12 per square foot for straightforward linoleum-over-tile jobs.
It can go up to $8–$20+ per square foot when tile repairs, subfloor leveling, or complex layout work are needed.
You’ll pay more for premium materials, adhesive types, edge trim, and experienced contractors.
Get multiple quotes, check references, and confirm warranty terms before hiring anyone.
Expected project timelines and factors that affect them
Because prep work and room size vary widely, expect linoleum-over-tile projects to take anywhere from a few hours to several days.
You’ll factor in tile condition, adhesive removal, subfloor leveling, and acclimation time for linoleum.
Small, straightforward rooms finish fastest; complex layouts, heavy repairs, or glue-down installations add days.
Plan extra time for trimming, seams, and curing before heavy use.
Case Examples and Scenario-Based Recommendations
For a small bathroom, you’ll usually get the best results by flattening grout lines and using a thinner linoleum with a tight seam.
In kitchens and other high-traffic areas, you’ll want a more durable product and stronger adhesive, plus careful edge sealing.
If the tile is uneven or heavily textured, consider a leveling underlayment or plywood subfloor before you lay the linoleum.
Best approach for small bathrooms
When you’re working in a small bathroom, planning the layout and prep is even more important than in larger spaces because tight quarters magnify any surface imperfections and seams.
Focus on thorough tile cleaning, level repairs, and moisture barriers. Choose a thin, flexible linoleum with tight seams, trim accurately around fixtures, use adhesive suited for damp areas, and test edges to prevent lifting.
Best approach for kitchen and high-traffic areas
Although kitchens and other high-traffic areas demand tougher solutions, you can still get a durable, attractive linoleum floor by focusing on substrate prep, heavier-duty adhesives, and seam placement that reduces wear points; in practice that means leveling any uneven tile, applying a cement backer or underlayment where needed, choosing a commercial-grade adhesive and edge sealer, and orienting seams away from primary walk paths and appliance zones to minimize lifting and visible joints.
Use threshold strips, reinforce entry zones, and plan seam layout to avoid drains and cabinet edges so you reduce peeling and simplify future repairs.
Solutions for uneven or heavily textured tile
Kitchens and high-traffic rooms often force you to deal with tile that isn’t flat or has a pronounced texture, so here’s how to handle those tougher substrates.
For shallow irregularities, use a self-leveling compound after priming.
For deep grout lines or textured quarry tile, pack with thinset and fabric mesh, then skimcoat.
When damage or movement exists, remove tile and install a plywood subfloor.
Frequently Asked Questions
You probably have a few quick questions before you start, like whether linoleum can go over vinyl tile or glazed ceramic and how much height it adds.
You’ll also want to know if radiant floor heating can stay in place and how long to wait before setting furniture on the new floor.
Below are clear answers to those common concerns.
FAQ 1: Can I lay linoleum over vinyl tile?
Wondering if you can lay linoleum over existing vinyl tile? You can, but only if the vinyl is well-adhered, level, and undamaged.
Clean thoroughly, repair loose tiles, and sand glossy surfaces for adhesion. Use a recommended adhesive or underlayment to prevent telegraphing seams and provide stability.
Avoid installing over cushioned or heavily textured vinyl; remove those first.
FAQ 2: How much height will linoleum add over tile?
How much height linoleum adds over tile depends on the type and installation method: sheet linoleum typically adds about 1/8 to 1/4 inch.
Linoleum tiles or planks add roughly 1/8 to 3/8 inch, and adding an underlayment or adhesive can increase that by another 1/8 to 1/4 inch—so plan for a total build-up of about 1/4 to 5/8 inch in most cases.
Consider thresholds, changes, and door clearances when measuring.
FAQ 3: Will linoleum adhere to glazed ceramic tile?
If your tile is glazed, linoleum won’t reliably stick without preparation because the smooth, nonporous surface repels adhesive.
You’ll need to roughen or etch the glaze, clean thoroughly, and use a high-quality adhesive made for nonporous substrates.
Test a small area first.
If you don’t prepare the tile, expect bubbling, lifting, or failure of the bond over time.
FAQ 4: Can radiant floor heating remain under linoleum?
Can radiant heat stay under linoleum without causing problems? Yes—if you use low-temperature radiant systems and linoleum rated for underfloor heating.
Avoid high surface temps (generally keep below 85°F/29°C), follow manufacturer specs, and guarantee proper adhesive compatibility.
Allow gradual temperature increases after installation to prevent warping or adhesive failure.
Consult product docs and installers for safe limits.
FAQ 5: How long before I can place furniture on new linoleum?
Radiant heating can affect curing times, so once your floor has reached stable temperatures and the adhesive has set, you’ll want to wait before placing furniture.
Generally wait 24–48 hours for loose-lay or pressure-sensitive adhesives, and 72 hours to a week for full-spread or epoxy adhesives.
Use furniture pads and lift heavy items after the minimum cure to avoid indentations or shifting.
Visual Guide and Resources
You should include clear photos and simple diagrams showing each prep and installation step so readers can follow along visually.
Add links to manufacturer installation guides and relevant standards so people can confirm specs and warranties.
Keep captions brief and reference the exact pages or sections you’re illustrating.
Suggested photos and diagrams to document steps
A simple set of clear photos and a few labeled diagrams will make each step of installing linoleum over tile easier to follow and reduce costly mistakes.
Photograph existing tile condition, cracks, and grout lines. Capture subfloor preparation, adhesive application patterns, and seam alignment.
Include overhead layout diagrams, edge trims, and junction profiles. Label images with scale, orientation, and brief step notes for reference.
Links to manufacturer installation guides and standards
Before you start cutting or gluing, consult the manufacturer’s installation guides and industry standards so you’re following the exact substrate prep, adhesive, and junction details they require.
Then locate and bookmark official resources so you can reference specs during installation.
Check:
- Manufacturer installation PDF for your linoleum
- Adhesive and trowel recommendations
- Substrate preparation standards (ASTM, ISO)
- Junction and edge detail diagrams