How to Clean a Floor Carpet Without a Machine or Professional
You can clean a floor carpet yourself without a machine by vacuuming thoroughly, treating spots immediately, and hand-scrubbing small sections with a mix of warm water, dish soap, and white vinegar. Blot—don’t rub—fresh spills, rinse with plain water, and press towels to lift moisture. Sprinkle baking soda for odors before vacuuming. Air the room with fans to dry and avoid over-wetting to prevent mold. Keep going for step-by-step tips, stain fixes, and dry-time tricks.
Quick Answer Clean a Floor Carpet Without a Machine or Professional
You can freshen a carpet by spot-treating stains with a mild detergent solution, scrubbing gently with a brush, and blotting dry.
Expect about 30–60 minutes for a small room, minimal cost for common household supplies, and tools like a spray bottle, brush, microfiber cloths, and baking soda.
Followed correctly, this method’s quick, inexpensive, and effective for routine upkeep.
One-sentence summary of the easiest effective method
Quickly refresh a floor carpet without a machine or professional by vacuuming thoroughly, spot-treating stains with a mild detergent solution, scrubbing with a soft brush, and blotting dry with clean towels.
You’ll learn how to clean a floor carpet by tackling small sections, testing cleaners on an inconspicuous spot, working from edges inward, rinsing lightly, and airing the area until completely dry to prevent odor and mildew.
Time, cost, and tools quick reference
Plan on 20–60 minutes for a typical room: most quick refreshes take about half an hour, while heavy spot cleaning or deep scrubbing can push you toward an hour. You’ll need basic supplies; expect low cost and simple effort. Pick a method, follow steps, and finish within an hour.
| Item | Typical cost |
|---|---|
| Broom/vacuum | $0–$50 |
| Brush | $5–$20 |
| Cleaner | $3–$15 |
| Towels | $0–$10 |
| Bucket | $5–$20 |
Basic Understanding Carpet Types, Risks, and Why Machine-Free Methods Work
You should know basic fiber types—nylon and polyester handle water and scrubbing better than wool, while olefin resists moisture but can crush under abrasion.
Cut-pile and loop-pile constructions clean differently, so test methods on an inconspicuous spot before treating the whole area.
DIY risks include shrinkage, dye bleed, mold from over-wetting, and pile distortion, which is why gentler, machine-free techniques often work safer.
Common carpet fibers and how they react to water and scrubbing (nylon, polyester, wool, olefin)
Because different fibers absorb water and resist abrasion in different ways, knowing whether your carpet is nylon, polyester, wool, or olefin helps you choose safer cleaning steps.
Nylon tolerates scrubbing and dries reasonably fast; polyester resists staining but can hold oily soils.
Wool shrinks and felt if over-wet or agitated; olefin repels water yet shows oil stains and can pill with rough scrubbing.
Typical carpet constructions (cut pile, loop pile) and cleaning considerations
Texture matters: cut-pile carpets have tufts sheared to a smooth surface while loop-pile keeps yarns uncut in loops, and each construction demands different care to avoid damage.
You’ll treat cut piles gently to preserve softness and avoid matting, using light agitation and blotting.
For loop piles, avoid aggressive brushing or snagging; lift stains with dabbing and mild cleaners to protect loops.
Risks of DIY cleaning (shrinkage, dye bleed, mold, pile distortion)
Different constructions demand different handling, and getting it wrong can cause real damage: DIY cleaning risks include shrinkage, dye bleed, mold growth, and pile distortion.
You’ll avoid problems by testing cleaners on an inconspicuous area, using minimal moisture, blotting instead of scrubbing, rinsing thoroughly, and drying fast with fans.
When in doubt, consult manufacturer care labels or a pro for guidance.
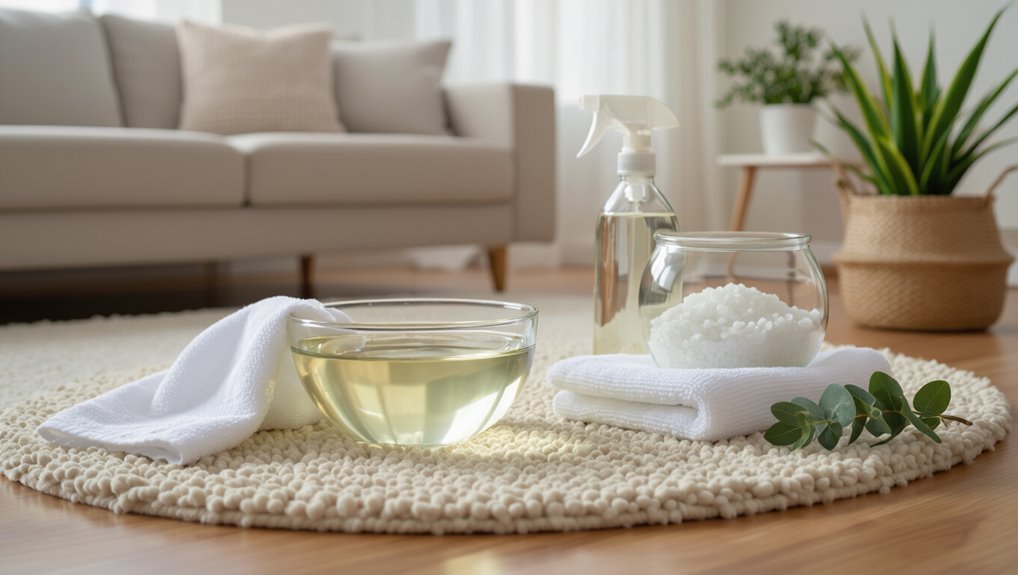
What You’ll Need Tools, Cleaners, and Safety Supplies
You’ll want a few basic tools—scrub brush, microfiber cloths, a spray bottle, and a handheld vacuum—or simple substitutes like a clean towel and a soft-bristled brush.
Keep common DIY cleaners on hand (vinegar, baking soda, a drop of dish soap, and hydrogen peroxide for specific stains) and note recipes for mixing them safely.
Always ventilate, spot-test in an inconspicuous area, and choose pet- and child-safe options when needed.
Essential tools and household substitutes
Before you start, gather the right tools, cleaners, and safety supplies so the job goes smoothly and you don’t have to stop mid-clean.
You’ll need basics and clever substitutes: sturdy brush, absorbent cloths, and a bucket. Wear gloves and ventilate. Improvise a squeegee with a spatula or use a toothbrush for edges.
- Stiff-bristled brush
- Microfiber towels
- Rubber gloves
Recommended DIY cleaning solutions and recipes (vinegar, baking soda, dish soap, hydrogen peroxide)
Gather a few common household ingredients—white vinegar, baking soda, mild dish soap, and hydrogen peroxide—and you’ll have versatile, effective cleaners for most carpet spots and odors; combine them in small batches, label mixes clearly, and test any recipe on a hidden seam to check for colorfastness before treating visible areas.
- Fizzing baking soda lifting odors
- Vinegar-dish soap suds breaking grease
- Hydrogen peroxide brightening protein stains
Safety and stain-specific cautions (ventilation, spot testing, pet/child-safe options)
After mixing up those DIY cleaners, think about safety and stain-specific precautions so you protect your home and health while treating carpets.
Open windows for ventilation, wear gloves, and keep kids and pets away.
Spot-test cleaners on an inconspicuous area, follow dilution instructions, avoid bleach on colored fibers, and choose pet-safe enzymes for organic stains.
Rinse thoroughly and dry fully.
Preparation Inspecting and Preparing the Room and Carpet
Start by clearing the room so you can reach every carpeted area and protect or move fragile items.
Next, remove dry soil with thorough vacuuming or gentle beating to lift loose dirt.
Finally, spot-test your chosen cleaner in an inconspicuous spot to make sure it won’t damage fibers or colors.
Step 1: Remove furniture and items
1. Clear the room by removing furniture, décor, and loose items so you can access the entire carpet.
Lift or slide heavier pieces with help or furniture sliders to avoid strain and damage.
Check under rugs and along baseboards for hidden objects.
Store removed items in a nearby clean area to prevent recontamination while you inspect and prepare the carpet surface.
Step 2: Dry soil removal vacuuming and beating
Begin by removing loose debris with a quick sweep: vacuum the entire carpet using slow, overlapping passes, then beat any area rugs outside to loosen ingrained dirt.
Work from farthest corner toward the exit, checking edges and under furniture. Empty the vacuum frequently to maintain suction.
- Dust clouds puffing from a beaten rug
- Dirt lines revealing high-traffic paths
- Carpet nap flattened, then revived by brushing
Step 3: Spot test cleaning solution on inconspicuous area
Before you apply any cleaner across the room, test it on an out-of-the-way patch so you can spot any color change or fiber damage; dampen a white cloth, blot the test area with the solution, then wait for it to dry to inspect the result.
If color runs, fibers matt, or residue remains, choose a gentler mix or test another product until the carpet stays unchanged.
Step-by-Step Cleaning Process (No Machine)
Start by sprinkling baking soda over the carpet and letting it sit to absorb odors while you prep for stains.
Treat each spot—coffee, wine, urine, grease—with the appropriate cleaner and work from the outside in before hand-scrubbing the whole area with a mild solution and a brush or pad.
Finish by rinsing with a damp mop without overwetting and extracting moisture manually using towels, a squeegee, and firm wringing.
Step 1: Dry-cleaning and odor control (baking soda application and dwell time)
Sprinkle a generous, even layer of baking soda over the carpet—about a quarter cup per square yard—focusing on high-traffic and odor-prone areas.
Then gently work it into the fibers with a soft brush or broom so it reaches the base of the pile.
Let it sit for at least 30 minutes, or overnight for strong odors, then vacuum thoroughly, repeating if scent lingers.
Step 2: Spot treatment for common stains (coffee, wine, pet urine, grease) stepwise actions
Treat stains promptly and you’ll have a much better chance of removing them without a machine.
Blot fresh spills, work outward, apply appropriate cleaner (vinegar mix for wine/coffee, enzyme for urine, dish soap for grease), then rinse and blot dry.
Avoid over-wetting; test cleaners first.
- Coffee seeping into fibers, dark ring forming
- Purple wine splash spreading
- Yellow urine patch with odor
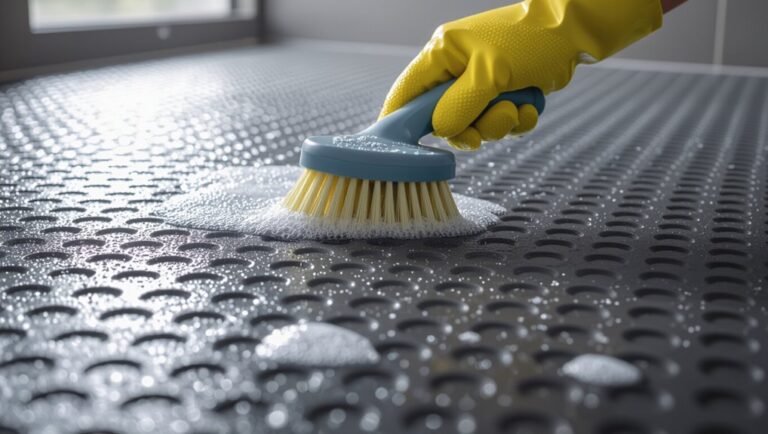
Step 3: Hand-scrub full carpet method mixing solution, scrubbing technique, tool use
Once you’ve handled stubborn spots, you’re ready to clean the whole carpet by hand; gather a mild cleaning solution (warm water with a small amount of dish soap and a cup of white vinegar, or an oxygen-based powder dissolved per package directions for deeper cleaning), a stiff-bristled brush or floor scrub brush, a bucket, and several clean towels or microfiber cloths.
Work in small sections, apply solution, scrub with short strokes, lift dirt, blot excess moisture, and repeat until carpet looks evenly clean.
Step 4: Rinsing without overwetting damp-mop and blot method
Step 4 is rinsing: damp-mop the cleaned area with plain warm water to remove soap residue, working in small sections so you don’t overwet the carpet.
After rinsing each section, press a clean microfiber cloth or towel onto the pile to lift loosened soap and moisture.
Repeat rinsing with fresh water until suds are gone, keeping motion gentle to protect fibers.
Step 5: Extracting moisture manually towels, squeegee, and wringing techniques
Blot excess water with absorbent towels, then use a rubber squeegee and repeated wringing to draw out remaining moisture from the pile—work in small sections, pressing firmly along the nap and pulling toward the edges to channel water into the towel; change or wring towels often so you’re lifting water, not redistributing it.
Continue alternating squeegee strokes and towel presses until the carpet feels noticeably less damp.
Step 6: Speeding drying safely airflow, dehumidifier alternatives, sun vs shade
After you’ve pulled as much moisture out as possible, speed drying to prevent mildew and fiber damage by increasing airflow and lowering humidity.
Open windows and use fans to move air across the carpet; point several toward exits.
If you lack a dehumidifier, run an air conditioner or place bowls of salt or silica in the room.
Dry rugs in shade to avoid fading.
Deep Cleaning Alternatives Without a Machine
For deeper cleaning without a machine, you can use dry carpet powders or foam cleaners—apply, work in gently, then vacuum or blot out residue.
You can also shampoo by hand with a stiff brush and a rinseless carpet shampoo, working small sections and blotting until nearly dry.
For sanitizing without heavy steam, try a vinegar steam bag on low or spot‑treat with hot water sparingly to avoid overwetting.
Dry carpet powder and foam cleaners application and removal
Dry carpet powders and foam cleaners give you a quick, low-effort way to lift soil and refresh fibers without hauling a machine; you’ll apply, agitate lightly, let the product work, then vacuum or wipe it away.
Work in sections, follow label dwell times, blot any excess with a microfiber cloth, then vacuum thoroughly with overlapping passes.
Repeat stubborn spots once, not repeatedly.
Shampooing by hand with brushes and rinseless shampoo
Scrub gently: shampooing by hand with a stiff brush and a rinseless shampoo lets you target deeply soiled areas without renting a machine.
Work small sections, agitate in circular motions, and blot with a microfiber pad to lift soil. Rinse the pad frequently.
Let carpets air-dry fully, then vacuum to restore texture.
Test first on an inconspicuous spot for colorfastness.
Steam-free sanitizing options (vinegar steam bag, hot water sparingly)
While you won’t get the deep extraction of a steam cleaner, steam-free methods can sanitize and refresh carpets without soaking them: a vinegar steam bag uses hot vapor to lift odors and kill surface bacteria, and controlled applications of hot water help loosen grime without overwetting fibers.
Use a sealed bag with diluted vinegar, hold over low heat briefly, blot damp spots, and air dry thoroughly.
Stain-Specific Guides (Problem-Solution)
When a spill or mess happens, you’ll want targeted tactics for each type of stain.
For red wine or juice act fast and follow up to lift pigments.
Use absorbents and emulsifiers for oil and grease, and apply enzyme treatments to neutralize pet urine odors.
For mud and tracked-in dirt, work through progressive removal steps to loosen, lift, and protect the fibers.
Red wine and juice stains immediate action and follow-up
Act fast: blot up as much of the spill as you can with a clean, white cloth or paper towel—don’t rub, which pushes the liquid deeper—and work from the edges toward the center to prevent spreading.
Sprinkle salt or baking soda to lift moisture, let sit briefly, then vacuum.
Mix mild dish soap with water, dab the stain, blot dry, and air-dry fully.
Oil and grease absorbents and emulsifiers
Spills from drinks need quick blotting, but oil and grease require a different approach because they don’t dissolve in water.
Sprinkle absorbent powder (baking soda, cornstarch, or talc), let sit 15–30 minutes, then vacuum.
For remaining residue, apply a small amount of dishwashing detergent diluted in water, blot with a clean cloth, rinse lightly, and air-dry.
Repeat if necessary.
Pet urine and odor enzyme treatments and neutralization
Although pet urine can seem like an unavoidable mess, you can remove stains and neutralize odors effectively with the right enzyme treatment and prompt action.
Blot fresh urine, rinse with cold water, then apply a commercial enzyme cleaner saturating the pad and backing.
Let it sit per instructions, blot again, and air-dry.
Repeat if odor persists; avoid heat and bleach.
Mud, tracked-in dirt, and ground-in grime progressive removal steps
Mud, tracked-in dirt, and ground-in grime each need a slightly different approach, but you’ll always start by letting debris dry just enough to loosen, then removing dry clumps and vacuuming thoroughly before treating stains.
Brush fibers, loosen compacted soil, then blot remaining residue with cool water. Use mild detergent solution for stubborn grime, rinse with clean water, blot to dry, and air-dry fully.
Common Mistakes to Avoid
Don’t soak the carpet or leave cleaning solutions behind, because overwetting and poor extraction lead to mold and lingering stains.
Check fiber types before you use a product and avoid harsh scrubs that can flatten or shred the pile.
Always neutralize pH and rinse residues so cleaners don’t attract dirt or cause discoloration.
Overwetting and inadequate extraction
When you soak a carpet without extracting the water thoroughly, you risk shrinking, backing breakdown, and long-term mold or odor problems.
Don’t drench fibers; work in small sections, blot with clean towels, and press repeatedly to lift moisture.
Use a wet/dry vacuum or absorbent cloths to remove water.
Dry quickly with fans and ventilation to prevent stains and mildew.
Using wrong cleaners for fiber types
If you use a cleaner that’s not formulated for your carpet’s fiber, you’ll risk discoloration, fiber damage, or residue that attracts dirt.
Check labels and test a hidden patch first. Wool, silk, and natural fibers need pH-neutral, gentle products; synthetics tolerate stronger detergents.
Rinse thoroughly and blot, not rub. When in doubt, use water and mild soap sparingly.
Aggressive scrubbing that damages the pile
Scrubbing hard with a brush or stiff pad can flatten and fray carpet fibers, so let gentler methods handle most stains and traffic spots.
Instead, blot spills, work mild cleaners in with a soft cloth, and lift dirt with a gentle back-and-forth motion.
Test on an inconspicuous area first, and use short, controlled strokes to preserve texture and prolong carpet life.
Failing to neutralize pH or rinse residues
Letting cleaning products sit without rinsing or neutralizing can leave behind residues that attract dirt, discolor fibers, or degrade backing and adhesives over time.
You should always rinse with plain water and blot thoroughly, or apply a proper neutralizer after acidic or alkaline cleaners.
If you skip this, soils rebuild quickly and fibers yellow; adhesives can weaken, causing delamination and premature wear.
Prevention and Maintenance Best Practices
To keep your carpet lasting and looking its best, set a regular vacuuming schedule and use proper techniques to lift dirt before it settles.
Treat spills immediately with spot-response tactics, and protect high-traffic areas with mats and furniture pads while scheduling professional cleanings at routine intervals.
Also plan seasonal deep-cleans—monthly for trouble spots, quarterly for general care, and an annual full clean.
Regular vacuuming schedule and techniques
Regularly vacuuming—ideally once or twice a week for most homes—keeps dirt from grinding into fibers and extends your carpet’s life.
Use slow, overlapping passes and change directions to lift embedded debris. Empty or replace bags and clean filters for maximum suction.
Tackle high-traffic areas more often, use attachments on edges and under furniture, and rotate vacuuming patterns to maintain even wear.
Immediate spot-response tactics
When a spill happens, act fast: blot liquids with a clean cloth, scrape solids gently, and avoid rubbing so you don’t push stains deeper.
Mix mild detergent and water, test an inconspicuous spot, then dab the stain from edges inward.
For oily marks use baking soda to absorb before brushing away.
Rinse with clean water, blot dry, and air-dry fully to prevent odors.
Protective measures: mats, furniture pads, and routine professional intervals
If you want your carpet to last and look good, use entry mats to trap dirt, place absorbent runners in high-traffic zones, and put felt or rubber pads under furniture legs to prevent indentations and wear.
Rotate furniture occasionally to avoid permanent pile crush, vacuum regularly to remove abrasives, and schedule periodic professional inspections or cleanings to catch issues before stains or fibers degrade.
Seasonal deep-clean routines (monthly, quarterly, annual)
Because seasonal care keeps small problems from becoming big ones, set a simple deep-clean schedule you can stick to: a light monthly refresh, a thorough quarterly treatment, and a full annual clean.
Each month, vacuum, spot-treat stains, and air carpets.
Quarterly, do a salted or baking soda deodorize, brush fibers, and steam-clean with hot water and vinegar.
Annually, rotate rugs and inspect padding.
Troubleshooting When DIY Isn’t Working
If a stain won’t lift after spot-treating, try stronger escalation steps like enzyme cleaners, repeating treatments, or controlled steam before calling a pro.
If odors keep coming back, use targeted neutralizers (enzyme or oxidizing formulas) and check padding and subfloor for trapped smells.
For wet carpet with mold or mildew signs—musty smell, visible growth, or worsening stains—dry and ventilate immediately, isolate the area, and contact remediation if you see rapid spread.
Persistent stains: escalation steps before calling a pro
When a stain won’t budge after your usual steps, take a measured escalation: blot remaining residue, test a stronger spot-cleaner in an inconspicuous area, and apply with a soft brush.
Rinse thoroughly and blot dry. If fibers distort, gently lift with a spoon or comb.
Repeat once more only. If the stain persists or spreads, document it and contact a professional for targeted treatment.
Odor that returns after cleaning: advanced neutralizers
Even after you think you’ve removed the source, stubborn odors can come back—so you’ll want targeted neutralizers that break down odor molecules, not just mask them.
Use enzymatic cleaners for organic smells, oxidizing agents (follow label precautions) for smoky or chemical odors, and odor-absorbing powders like activated charcoal.
Test a hidden patch, ventilate thoroughly, and repeat treatments until the smell truly dissipates.
Wet carpet mold/mildew indicators and emergency steps
A musty smell, visible dark spots, or a damp, spongy feel underfoot are clear indicators that mold or mildew has taken hold in a wet carpet, and you should act fast to limit damage and health risks.
Ventilate, blot with clean towels, lift padding to dry, and use fans and dehumidifiers.
If stains persist, discolored backing appears, or occupants have symptoms, call a professional.
Cost, Time and Effort Comparison (DIY vs Machine vs Professional)
Deciding between DIY, renting a carpet machine, or hiring pros comes down to your budget, schedule, and how much effort you want to put in.
Expect DIY to cost the least but take the most time, machine rentals to be a mid-range option in both cost and labor, and professionals to cost more while saving you time and delivering the best results.
Use a simple pros-and-cons checklist—estimated hours, out-of-pocket cost, and expected outcome quality—to pick the right approach for your situation.
Typical time and cost estimates for each option
1 quick comparison will help you pick the right cleaning route: DIY spot-cleaning, renting or buying a machine, or hiring pros. You’ll save money with DIY (30–90 minutes, $0–$20), spend more time and cost with rentals (2–4 hours, $30–80) or buying (hours, $200+), while pros take 1–3 hours, $100–$300.
| Option | Time & Cost |
|---|---|
| DIY spot | 30–90 min, $0–$20 |
| Rent machine | 2–4 hrs, $30–$80 |
| Professional | 1–3 hrs, $100–$300 |
Pros and cons checklist for homeowner decision-making
Now that you’ve seen typical time and cost ranges for DIY spot-cleaning, rentals, and pros, weigh a clear pros-and-cons checklist to pick what fits your schedule, budget, and energy.
You’ll balance upfront cost, time investment, and result reliability. Choose DIY for low cost/time, rentals for deeper clean without ownership, pros for convenience and best results.
- DIY: quick, cheap, hands-on
- Rental: deeper, moderate effort
- Professional: effortless, costly
FAQs
You’ll find answers here to common questions like how long a hand-cleaned carpet takes to dry and whether bleach or strong chemicals are safe to use.
I’ll explain when hand-cleaning wool is appropriate, how often you should deep-clean without a machine, and what to expect with pet urine stains.
If you’ve got a specific situation, ask and I’ll give practical, safe guidance.
How long does a hand-cleaned carpet take to dry?
How long will your hand-cleaned carpet stay damp? Expect 6–24 hours depending on pile, padding, humidity, and how much water you used.
Thin, low-pile carpets can dry in 4–8 hours with good airflow; thick or densely padded carpets may need 12–24 hours.
Speed drying with fans, open windows, and blotting cuts time. Avoid walking on it until fully dry.
Can I use bleach or strong chemicals on my carpet?
Can you use bleach or other strong chemicals on your carpet? You shouldn’t.
Bleach and harsh solvents can strip color, weaken fibers, and leave toxic residues. For tough stains, test a mild, diluted detergent or vinegar solution in an inconspicuous spot first.
Blot, don’t rub, and rinse thoroughly with water. When in doubt, consult manufacturer care instructions or a professional.
Is it safe to clean wool carpet without a machine?
Wondering whether you can safely clean wool carpet without a machine? Yes—you can.
Use gentle methods: vacuum regularly, blot spills with cool water, spot-clean with a mild wool-safe detergent, and rinse lightly.
Avoid soaking, hot water, harsh chemicals, or vigorous scrubbing that can shrink, felt, or damage fibers.
Test cleaners on an inconspicuous spot first and air-dry flat to preserve shape.
How often should I deep-clean my carpet without a machine?
If you’re cleaning wool or any carpet by hand rather than with a machine, you’ll also want a plan for deep-cleaning frequency to keep fibers healthy and remove embedded dirt.
Generally, deep-clean by hand every 12–18 months for low-traffic areas and every 6–12 months for high-traffic zones.
Increase frequency if you have allergies, kids, or pets, and spot-clean as needed.
Will hand-scrubbing remove pet urine stains permanently?
How well hand-scrubbing works on pet urine depends on how long the stain’s been there and what fibers you’re treating.
If fresh, you can lift urine with blotting, enzyme cleaner, and firm scrubbing; persistent odors or deep-set stains often need repeated enzyme treatments or professional extraction.
Always rinse, blot, and dry thoroughly; otherwise residues or odor may return.