
Can You Restain Laminate Flooring? What Really Works
You can’t truly restain laminate like hardwood because the printed decorative layer and clear wear coating won’t absorb stain, and sanding or stripping will damage it and void warranties; instead, you can change its look with deep cleaning, tinted topcoats, specialized floor paints, peel-and-stick overlays, or plank replacement for localized wear. These surface options require careful prep, adhesion tests, and the right products for durability, and if you want step-by-step methods, keep going to learn what works.
Can You Restain Laminate Flooring? and Bottom Line
You generally can’t stain traditional laminate because its printed wear layer won’t absorb stain, but you can restain if you have a solid wood or unfinished real-wood surface.
If staining isn’t an option, practical choices are to refinish (on real wood), replace the planks, or apply a refilm/overlay to change the look.
Bottom line: check what layer you have—real wood lets you refinish or stain, laminate usually needs replacement or a surface film.
Direct short answer: when restaining is possible vs when it’s not
Although laminate looks like wood, you usually can’t restain it the way you’d solid hardwood because the color sits in a thin printed layer beneath a tough protective coating.
When that wear layer’s intact, only surface treatments (like tinted finish or topical dyes) can change appearance.
When it’s heavily worn or the print layer’s gone, replacement is the practical option.
Summary of practical options (restain, refinish, replace, refilm)
Five practical paths cover most laminate-flooring updates: surface restaining (tinted topcoats or dyes), refinishing with thin coatings, replacing damaged planks, or applying a decorative refilm (vinyl/film overlays).
You’ll choose based on damage, wear, budget, and desired look. Restain or refinish for light wear, replace for deep core damage, and refilm to change style quickly without demolition.
Understanding Laminate Flooring: Material and Finish Basics
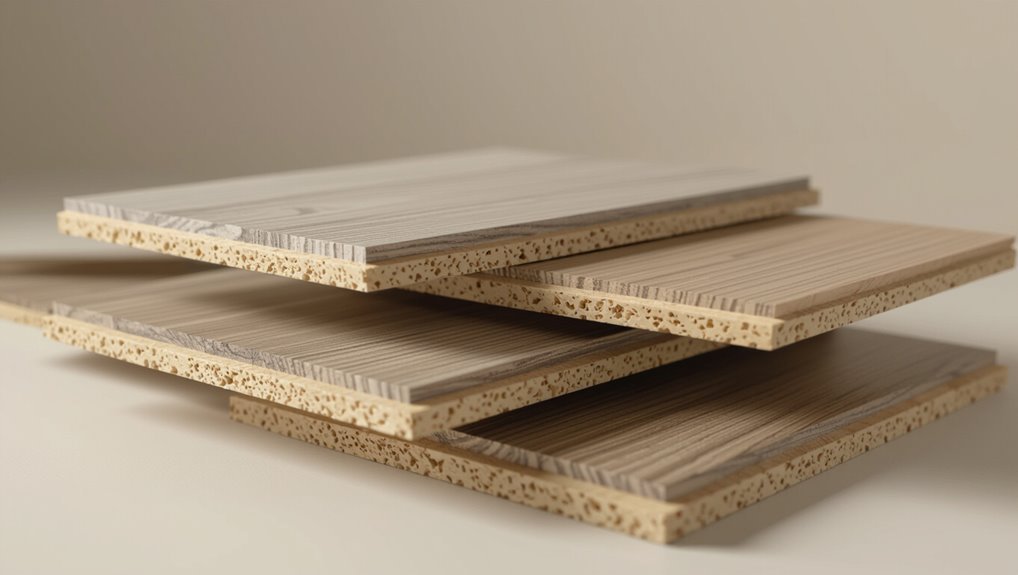
To restain or refinish laminate, you should first know what it’s made of: a clear wear layer, a printed decorative layer, a dense core, and a backing.
The top wear layer can be melamine, aluminum oxide, or urethane, each with different scratch and chemical resistance.
Because laminate’s decorative image sits under that sealed wear layer rather than in solid wood fibers, it won’t absorb stain the way wood does.
What laminate flooring is made of (layers: wear layer, decorative layer, core, backing)
Think of laminate flooring as a layered sandwich: each thin sheet has a specific job that together creates a tough, attractive surface.
You get a clear wear layer protecting against scratches, a decorative layer with the printed wood or stone look, a dense fiberboard core providing stability, and a backing layer that resists moisture and balances the plank to prevent warping.
Types of top layers and common finishes (melamine, aluminum oxide, urethane)
Now that you know how laminate is built from layered sheets, the topmost layer deserves a closer look because it’s what you actually touch and see every day.
You’ll find melamine resin — a printed design sealed for basic scratch resistance; aluminum oxide — microscopic particles added for superior durability; and urethane coatings — tougher, often water-resistant finishes.
Each affects wear, cleaning, and repair options.
Why laminate behaves differently from solid wood when it comes to staining
Because laminate’s visible surface is a printed image sealed under a protective layer rather than solid wood grain, it won’t accept stains the way timber does—you can only alter the finish layer, not penetrate and change the core.
You’ll find stains soak into wood fibers; laminate’s wear layer blocks absorption, so color changes rely on surface coatings, overlays, or replacements rather than traditional refinishing.
When You Can’t Restain Laminate: Limitations and Risks
You can’t restain most laminate because its non-porous wear layer won’t absorb stain, so color changes won’t take.
Trying to sand or chemically strip that wear layer can damage the decorative film and leave you with warped or ruined boards.
Don’t forget that DIY refinishing attempts can void warranties and create structural issues that are costly to fix.
Non-porous wear layer and stain absorption limits
Although laminate looks like wood, its top layer is a tough, non-porous wear layer that won’t absorb stain the way real hardwood does, so you can’t simply sand and re-stain it to change color.
You’ll find stains sit on the surface, soak unevenly, or fail entirely. That barrier limits penetration, so finish-changing options are restricted to surface coatings, overlays, or plank replacement.
Risks of attempting to sand or chemically strip laminate
If you try to sand or chemically strip laminate, expect problems: the wear layer is engineered to resist abrasion and solvents, so aggressive sanding can melt or fray the surface and chemicals can dissolve the printing layer or leave a sticky, discolored residue.
You’ll likely create uneven texture, expose inner core fibers, and ruin finish integrity, making repairs costly or forcing full replacement rather than successful refinishing.
Warranty and structural risks of DIY refinishing
Because laminate isn’t designed to be refinished, tackling it yourself can void warranties and compromise the floor’s structure, so don’t assume a DIY fix is low-risk.
You could strip protective layers, warp cores with moisture, or break click-lock seams. Manufacturers often refuse claims after unauthorized alterations.
If appearance matters, consult pros or consider replacement panels to preserve warranty coverage and structural integrity.
Viable Alternatives to “Restaining” Laminate (Primary How-To Section)
If restaining isn’t an option, you’ve still got practical ways to improve your laminate’s look.
You can try deep cleaning and color-correcting spots, apply topical tinted finishes or paints, use laminate repair kits or overlays, or replace individual planks—or the whole floor—depending on damage and budget.
I’ll walk you through what each option involves and when to choose it.
Option 1 Deep cleaning and color correction
Before you consider any coating or replacement, check whether a thorough cleaning and color correction will bring your laminate back to life.
You’ll want to use pH-neutral laminate cleaners or a mix of gentle dish soap and water, plus a microfiber mop for best results.
For stubborn grime or faded-look streaks, try a diluted vinegar solution or a commercial color-correcting restorer following the manufacturer’s instructions.
When cleaning can restore appearance
When regular dirt, grime, or light surface wear are the main issues, a deep clean combined with targeted color correction can make your laminate look much fresher without sanding or refinishing.
You’ll assess stains, scuffs, and faded areas, then remove soils and blend tone with safe touch-ups. This preserves the wear layer and saves time and cost versus replacement or chemical stripping.
Recommended cleaners and methods
Now that you’ve assessed which marks are surface-level and which need color correction, pick cleaners and methods that remove soil without harming the wear layer.
Use mild pH-neutral floor cleaner, a microfiber mop, and targeted stain lifts. Avoid abrasives and excess water. Follow with a protective polish designed for laminate.
- pH-neutral cleaner
- Microfiber and gentle agitation
- Stain-specific treatments
Option 2 Using topical tinted floor finishes and paints
You can change the look of laminate with topical products like floor paints, stain-like tinted finishes, and clear urethane coatings—each has different durability and finish.
Make sure the product is rated for laminate, scuff and degloss the surface, and clean thoroughly before starting.
Then follow the six-step process: prep, prime, apply thin coats, allow proper flash time between coats, topcoat if needed, and cure fully before foot traffic.
Types of products (floor paint, stain-like tinted finishes, urethane coatings)
If you’re looking to change the color of laminate without stripping it, there are three main product types to evaluate: floor paints, stain-like tinted finishes, and clear urethane topcoats—each behaves differently on laminate’s smooth, nonporous surface and requires specific prep and application.
Floor paints offer opaque coverage; tinted finishes provide translucent, layered color; urethane topcoats add durability and sheen, sealing whatever color you choose.
Compatibility with laminate and required surface prep
Because laminate is nonporous and often has a protective wear layer, you’ll need to choose finishes specifically formulated for slick surfaces and prep the floor so they’ll adhere—light sanding or chemical etching, thorough cleaning, and a primer or bonding agent are common steps.
Verify product labels for laminate compatibility, test adhesion in an inconspicuous spot, and pick flexible, abrasion-resistant coatings designed for high-traffic floors.
Step-by-step: prep, priming, applying, curing (Step 1Step 6)
Gather your tools and plan the workflow before you begin: this six-step process—prep, light sanding or etching, cleaning, priming/bonding, applying the tinted finish or floor paint, and curing—keeps results consistent and durable on laminate.
Work in sections: sand/etch lightly, clean thoroughly, apply bonding primer, then thin coats of tinted finish. Allow full cure before traffic.
- Test adhesion
- Thin coats
- Full cure
Option 3 Laminate-specific repair kits and overlays
If your laminate has only surface wear, you can often use laminate-specific repair kits or thin peel-and-stick overlays to refresh the look without replacing boards.
You’ll peel, cut to fit, and adhere overlays or follow kit instructions for filling and color-matching, which is usually faster and less messy than full replacement.
The tradeoffs are durability and seam visibility versus cost and ease of installation, so pick a product that matches your traffic and aesthetic needs.
When overlays or thin peel-and-stick planks work
When your laminate’s wear layer is worn but the core is still flat and stable, thin overlays or peel-and-stick planks can give you a fast, affordable refresh without ripping up the floor.
You’ll choose them when scratches, scuffs, or color fade are cosmetic only. They bond to smooth, dry surfaces, hide minor edge gaps, and let you update color or texture quickly with minimal tools and downtime.
Installation overview and pros/cons
Consider laminate-specific repair kits and thin overlays for a targeted, low-effort fix that skips full refinishing or replacement.
You’ll clean and prep the area, match color with putty or markers, and press overlays or peel-and-stick patches into place.
Pros: fast, affordable, minimal tools, hides damage.
Cons: limited durability, visible seams, color mismatch risk, not a long-term substitute for replacement.
Option 4 Replacing planks or full replacement
If damage is widespread or repairs cost more than new boards, you’ll often find replacing planks or the entire floor is more cost-effective.
Decide whether you’ll match existing laminate for a seamless look or choose a new style to refresh the room.
Also plan for disposal of old boards—check local recycling options or bulk-waste rules before you start.
When replacement is more cost-effective
Sometimes replacing planks or the entire floor is actually cheaper and faster than attempting to restain damaged laminate; you’ll want to choose replacement when damage is extensive, matching replacements are available, or labor and materials for restoration exceed the cost of new boards.
You’ll also pick replacement if wear is widespread, subfloor issues exist, or warranty coverage and long-term value make new laminate the smarter investment.
Choosing matching or new-look laminate; disposal considerations
Want to match the existing look or give the room a fresh style? You can hunt for identical planks or pick a complementary new finish—measure carefully, test lighting, and buy extra for cuts.
When removing old boards, bag damaged pieces; recycle or donate usable planks. Dispose of untreated laminate at local waste facilities and follow recycling rules to avoid landfill contamination.
Step-by-Step Guide: How to Change Laminate Color Safely (If You Choose Topical Finish)
Before you start, check the floor’s condition and confirm the laminate accepts a topical finish so you don’t waste time or materials.
Gather the right tools—cleaners, deglossers, patching compounds, primer/adhesion promoter, and rollers—then thoroughly clean and degloss the surface.
Patch scratches and edges, let repairs cure, and apply a suitable primer before painting to guarantee adhesion and durability.
Step 1 Assess condition and compatibility
1 quick inspection will tell you whether your laminate is a candidate for a topical recoat: check for wear-layer damage, peeling edges, deep scratches, or separation between planks.
You’ll also confirm substrate stability, cleaning history, and existing finish type (branded or generic).
If damage is extensive or core swells, topical color won’t adhere or last—replace those areas instead of recoating.
Step 2 Gather tools and materials (primers, paints, rollers, cleaners)
Now that you’ve confirmed the floor can take a topical coat, gather everything you’ll need so the job goes smoothly: a pH-neutral cleaner and degreaser, fine-grit sandpaper or scuff pads, a high-adhesion primer formulated for laminates or melamine, a durable water- or oil-based floor paint or urethane topcoat recommended for high-traffic surfaces, tack cloths, foam or low-nap rollers and angled brushes for edges, painter’s tape and drop cloths, and solvent and safety gear (gloves, mask, goggles).
- Choose compatible primer and paint.
- Pick tools for smooth, even application.
- Stock safety and cleanup supplies.
Step 3 Clean and degloss the surface
Step 3 is where you’ll remove dirt, oils, and the glossy layer that keeps coatings from sticking; start by vacuuming and wiping the floor with a pH-neutral cleaner and degreaser to lift surface grime.
After drying, scuff the laminate with a fine-grit sanding pad or Scotch-Brite to degloss evenly.
Then vacuum and tack cloth to remove dust before primer and paint.
Step 4 Patch scratches and edges
Because small dings and worn edges will telegraph through any new finish, you should repair scratches and damaged trim before priming or painting.
Fill shallow scratches with color-matched laminate repair putty or wood filler, sand feather-smooth, and replace or sand frayed edges.
Clamp loose trim, glue gaps, and wipe dust. Proper patching guarantees an even, durable surface for the finish.
Step 5 Apply primer/adhesion promoter
With scratches filled and edges smoothed, you’re ready to prime—this layer promotes adhesion and blocks stains so your new topcoat bonds properly to the laminate.
Choose a primer made for non-porous surfaces or an adhesion-promoting bonding primer.
Apply thin, even coats with a foam roller or brush, allow full flash time, and lightly scuff between coats for best mechanical grip before proceeding.
Step 6 Apply color coats and protective topcoat
Now you’re ready to lay down the color and seal it—apply thin, even color coats using a foam roller or high-density pad to avoid lap marks.
Allow proper flash time between coats, and finish with a durable clear topcoat formulated for laminate to protect against wear and moisture.
Work small sections, feather edges, sand lightly between coats if needed, and follow manufacturer recoat windows for best adhesion.
Step 7 Cure time and first use precautions
After the last topcoat goes on, allow the finish to cure fully before heavy use—you’ll typically need 24–72 hours for light foot traffic and up to 7 days for full hardness, depending on the product.
During curing, keep ventilation steady, maintain moderate temperature and humidity, and avoid placing rugs, furniture, or pet traffic.
Test with a small, inconspicuous step before returning to normal use.
Comparison: Restaining Laminate vs Refinishing Wood vs Replacing Laminate
Although laminate can often get a fresh look without the mess of sanding, you’ll want to weigh its limits against the options: refinishing real wood and replacing the flooring. You’ll choose based on budget, durability, and appearance. Quick guide:
| Option | Cost | Lifespan |
|---|---|---|
| Restain laminate | Low | Short–medium |
| Refinish wood | Medium | Long |
| Replace laminate | High | Medium–long |
Common Mistakes and How to Avoid Them
When restaining laminate, you’ll want to avoid a few common mistakes that can ruin the job.
Don’t sand or use aggressive strippers, skip adhesion tests, use the wrong paint or finish, or ignore expansion gaps and connections.
Following proper prep, testing, and product choices will keep your new surface durable and even.
Mistake 1 Sanding or using aggressive strippers
If you try sanding or reach for powerful chemical strippers, you’ll likely damage the thin decorative layer of laminate beyond repair. Laminate isn’t solid wood, so aggressive abrasion or harsh solvents can sand through the veneer, expose the substrate, and ruin the floor’s appearance and integrity.
Don’t sand, scrub, or strip—use manufacturer-approved cleaners and light deglossers, or consider a specialized coating designed for laminate.
Mistake 2 Skipping adhesion tests
Because adhesion varies by product and surface, you shouldn’t assume that a paint, primer, or coating will stick to your laminate without testing first.
You should patch-test a small, inconspicuous area using the exact combo and application method you’ll use. Check bond after curing, try a tape pull, and note any lifting or peeling.
If it fails, adjust prep or materials before committing.
Mistake 3 Using wrong paint or finish types
Although you want the job to look great, choosing the wrong paint or finish will cause flaking, poor adhesion, or a finish that yellows or scratches quickly.
Pick products formulated for laminate or for nonporous surfaces and match the sheen and durability to traffic levels.
You should avoid interior wall paints, oil-based varnishes that yellow, and low-quality polyurethanes—use waterborne urethanes or specialty laminate coatings for lasting results.
Mistake 4 Ignoring expansion gaps and transitions
One small oversight—skipping expansion gaps or rushing changes—can make your newly restained laminate buckle, pop loose, or split as it expands and contracts with temperature and humidity changes.
Always preserve or reinstall proper expansion gaps at walls, doorways, and between runs. Use flexible connector strips and leave recommended clearance.
Plan layout, acclimate flooring, and check manufacturer specs to prevent damage and noisy seams.
Best Practices and Maintenance After Changing Color
After you change the color, pick durable sealers and cleaners made for laminate to keep the new finish looking sharp.
Establish a simple cleaning routine—sweep daily, mop with a pH-neutral product, and avoid abrasive tools—to extend finish life.
For high-traffic zones, use rugs and furniture pads, and learn quick spot-repair tricks so small dings don’t become big problems.
Recommended products for durability and appearance
Pick durable, low-VOC finishes and quality primers to protect your newly stained laminate and keep the color true; you’ll want a bonding primer formulated for slick surfaces, a water-based urethane or polyurethane topcoat for abrasion resistance, and a mild cleaner/sealer for routine maintenance.
Choose reputable brands with laminate-specific labels, satin or low-sheen sheens to hide imperfections, and test compatibility on scrap before full application.
Cleaning and care routine to extend finish life
Because you’ve changed the color and applied a new finish, a deliberate cleaning and care routine will keep the floor looking fresh and protect that investment; start by waiting the full cure time recommended by the finish manufacturer before any routine cleaning.
Use gentle methods, avoid harsh chemicals, and protect from grit. Follow this simple plan:
- Sweep or vacuum daily with a soft attachment.
- Mop weekly with pH-neutral cleaner.
- Use felt pads and rugs at entryways.
Tips for high-traffic areas and spot repairs
When you’ve changed the color of your laminate, high-traffic zones demand targeted care to prevent wear and visible touch-ups. Focus on reducing abrasion, using protective products, and making quick, precise spot repairs so the new finish stays uniform and durable.
Place runners and pads, rotate furniture, trim pet nails, and use felt under chair legs.
For scratches, clean, apply matching touch-up pen, and seal.
Cost, Time, and ROI: What to Expect
You’ll want to weigh typical DIY costs—mainly materials and rental tools—against professional service fees that can run several times higher.
Expect a weekend for prep and application, plus 24–72 hours of curing depending on products and humidity.
Consider longevity and know that if planks are heavily worn or delaminating, replacement often gives a better ROI than restaining.
Typical DIY costs vs professional service costs
Deciding between DIY restaining and hiring a pro comes down to money, time, and the results you want: doing it yourself usually saves on labor but can cost more in mistakes and longer downtime, while professionals charge for expertise and speed but deliver a more consistent finish.
DIY supplies and sealer run $50–300; expect added costs if you rent equipment.
Pros typically charge $2–6 per sq ft installed.
Time estimates for prep, application, and curing
Budget about a weekend for a small room and a few days to a week for larger areas: prep, application, and curing each take distinct blocks of time you should plan around.
Prep (cleaning, light sanding, masking) often takes 2–6 hours per room.
Application runs 1–4 hours depending on coats.
Curing needs 24–72 hours per coat before light use, longer for full traffic.
Longevity and when replacement yields better ROI
After you’ve accounted for prep, application, and curing times, the next question is how long a restain will actually hold up and when replacing the floor makes more sense financially.
A restain on quality laminate typically lasts 3–7 years under normal traffic.
If wear, delamination, or underlying damage exists, replacement yields better ROI—lower maintenance, longer lifespan, and often higher resale value.
Case Studies and Scenarios
You’ll look at three practical scenarios to help you choose the right approach for your laminate.
First, we’ll walk through a small-room refresh with step-by-step choices; next, you’ll weigh repair versus replace for heavily damaged boards; and finally, you’ll consider temporary, tenant-friendly color options for rental units.
Use these case studies to match cost, time, and outcome to your situation.
Scenario A Small room refresh: step-by-step choices
When revitalizing a small room, start by evaluating the laminate’s condition and your goals—do you want a subtle tone change or a bold new look?
Clean thoroughly, sand lightly if surface texture allows, test stain on a hidden plank, choose a compatible stain or tinted finish, apply evenly, protect with a compatible clear coat, and let cure before returning furniture.
Scenario B Heavily damaged laminate: repair vs replace decision
If your laminate’s surface is gouged, warped, or peeling across multiple boards, decide whether to repair or replace by weighing cost, time, and long-term results.
Inspect subfloor, moisture damage, and matching available planks.
Repair small clusters with replacement boards and sealant; choose full replacement when damage is widespread, water-related, or matching finishes are impossible.
Factor labor, lifespan, and resale impact.
Scenario C Rental property: temporary color change options
After deciding whether to repair or replace heavily damaged laminate, landlords often face a different problem: making a temporary color change that appeals to tenants without committing to permanent work.
You can use peel-and-stick planks, vinyl overlays, area rugs, or removable floor paint designed for laminate.
Test adhesion, pick neutral tones, and document condition for deposits to avoid disputes at move-out.
Frequently Asked Questions
You’ll get clear answers to common concerns like whether you can stain laminate the same way you stain hardwood and if paint will stick without sanding.
You’ll learn how long topical finishes typically last and whether damaged planks can be color-matched for spot repairs.
You’ll also see environmentally friendly options for changing laminate color.
Can I stain laminate the same way I stain hardwood?
How you treat laminate matters — you can’t stain it the same way you stain hardwood because laminate lacks the porous, natural wood surface that absorbs stain.
You’ll find stains sit on or smear across the wear layer instead of penetrating. For consistent color, you’ll use surface alternatives like tinted sealers, gel stains made for nonporous surfaces, or replacement planks rather than traditional wood staining.
Will paint adhere to laminate without sanding?
Will paint stick to laminate without sanding?
You might get temporary adhesion if the surface is very clean and you use a high-bond primer and paint designed for slick surfaces.
Still, laminate’s plastic topcoat repels coatings, so skipping sanding risks peeling and chipping.
For reliable, durable results, deglossing or light abrasion before priming is strongly recommended.
How long will a topical finish last on laminate?
Curious how long a topical finish on laminate will hold up? Expect 3–7 years with normal wear if you use a quality water-based polyurethane and follow proper application and curing steps.
High-traffic areas shorten that lifespan; mats and regular cleaning help.
Recoat small sections every few years to refresh protection instead of full replacement, monitoring for peeling or abrasion.
Can damaged laminate be color-matched for spot repairs?
After rejuvenating a laminate surface with a topical finish, you might notice isolated chips or scratches that stand out—so can you match those spots without replacing the plank?
You can often hide small defects using color-matched touch-up kits, wax sticks, or marker pens, but perfect blending is rare.
Test discreetly, layer carefully, and seal repairs to protect contrast and sheen differences.
Are there environmentally friendly options for changing laminate color?
Looking for greener ways to change your laminate’s color? You can, but options are limited.
Low-VOC paints and water-based stains designed for laminates reduce fumes; use ecological primers and non-toxic sealers.
Peel-and-stick recycled vinyl planks offer a low-waste alternative.
Always ventilate, test on a scrap, and check product certifications (GREENGUARD, low-VOC) to keep indoor air quality safe and eco-friendly.