How to Clean Stained Vinyl Flooring Back to Its Original Look
You can usually restore stained vinyl by starting with a sweep and a warm, mild-soap mop, then treating stains from least to most aggressive: blot fresh spills, use dish soap for organic stains, isopropyl alcohol for ink and dyes, baking soda paste for grease or rust, and a vinyl-safe cleaner or enzymatic product for set-in marks. Rinse and dry thoroughly, test cleaners first, and repair deep gouges with a kit; keep going for step-by-step methods and prevention tips.
How to Restore Stained Vinyl Flooring to Its Original Look Quick Answer
Start by using a mild detergent and warm water for the fastest, safest way to restore vinyl without harming the surface.
If the stain’s fresh, blot up any liquid, rinse the area, then gently scrub with a soft cloth or sponge.
For stubborn spots, follow with a vinyl-safe cleaner and rinse thoroughly.
One-sentence summary of the fastest, safest method
Although you can try many fixes, the quickest, safest way to restore stained vinyl flooring to its original look is to gently scrub the stain with a soft-bristle brush and a solution of warm water and mild dish soap.
Rinse thoroughly, and dry with a microfiber cloth, using a baking soda paste only for stubborn spots.
You’ll follow proper technique for how to clean stained vinyl flooring.
Best immediate actions for fresh stains
If you’ve just noticed a spill, act fast: blot liquids with a clean microfiber or paper towel—don’t rub—then gently lift the remaining residue with warm water and mild dish soap using a soft cloth or sponge.
For sticky or colored stains, apply a baking soda paste briefly, scrub gently, rinse, and dry.
Repeat once if needed; avoid harsh abrasives or bleach.
Understanding Vinyl Flooring and Staining
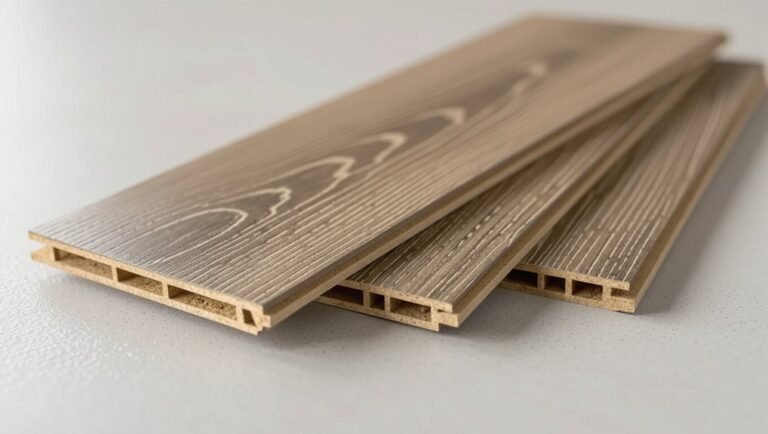
You’re working with vinyl in three main forms—sheet, plank, or tile—each with a different construction and wear layer.
Stains come from everyday sources like food, dyes, pets, oil, rust, and old adhesives.
How a stain behaves depends on the vinyl’s surface and wear layer thickness, so knowing your flooring helps you choose the right cleaning approach.
What vinyl flooring is (types: sheet, plank, tile)
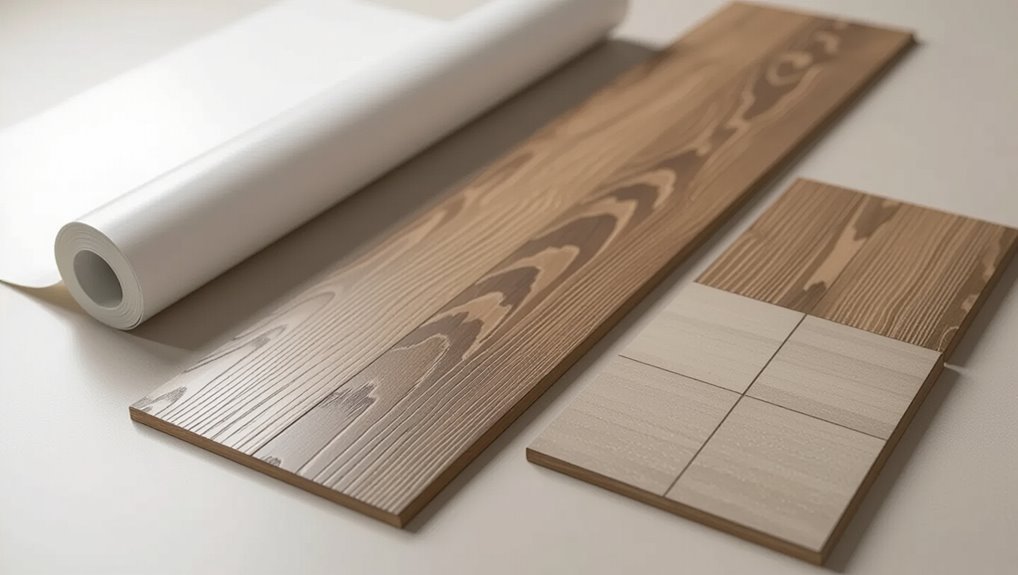
Vinyl flooring comes in three main formats—sheet, plank, and tile—each made from layers of resilient PVC that handle wear and stains differently.
Sheet vinyl is seamless for moisture-prone rooms.
Plank (luxury vinyl plank) mimics wood with click or glue installation.
Vinyl tile offers modular replacement and varied patterns.
You’ll choose based on appearance, durability, and installation preference.
Why vinyl stains common causes (food, dye, pet stains, oil, rust, adhesives)
After picking the right sheet, plank, or tile, you’ll want to know what commonly stains those surfaces so you can prevent and treat spots promptly.
Foods (berries, sauces), dyes (markers, inks), pet accidents, oils (cooking, grease), rust from metal, and sticky adhesives are frequent culprits.
You’ll spot fresh spills faster; older stains may set, so act quickly with appropriate cleaners and tools.
How stains interact with vinyl surface and wear layers
Because the protective wear layer sits on top of the printed design and core, stains affect each part differently and your cleanup approach should match what they’re trying to reach.
Surface spills often sit on top and wipe away; oily, dye or adhesive stains may penetrate or bond to the wear layer.
Abrasive cleaning can remove the wear layer, exposing printed vinyl and making stains harder to remove.
Safety and Preparation Before Cleaning
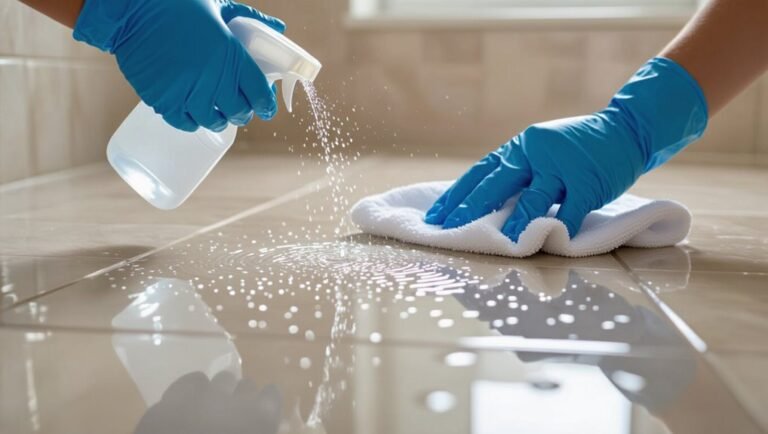
Before you start cleaning, gather your materials and tools—mild cleaners, soft mops, microfiber cloths, a bucket, and gloves—and make sure the area will be well ventilated.
Wear gloves, open windows, and always spot-test cleaners on a hidden patch to protect the finish.
Also check your vinyl’s finish and wear-layer thickness (manufacturer info or a small edge inspection) so you choose safe methods that won’t damage the floor.
Materials and tools checklist
Start by gathering the essential materials and tools so you won’t interrupt the job to hunt for supplies: soft-bristle broom or vacuum with a hard-floor setting, microfiber mop and cloths, a bucket, pH-neutral vinyl cleaner or mild dish soap, rubbing alcohol for spot treatment, white vinegar (diluted) for stubborn grime, a plastic putty knife or nylon scraper, gloves, and safety glasses.
- Ready your cleaning solutions.
- Organize tools by task.
- Keep cloths separate for dirty and clean.
Safety precautions (ventilation, gloves, test patches)
1 simple safety step can keep a small job from turning hazardous: ventilate the area, wear gloves and eye protection, and test-clean an out-of-the-way patch before you apply any cleaner broadly.
Open windows, run a fan, and avoid breathing fumes. Use chemical-resistant gloves, keep pets and kids away, and wait to confirm no discoloration or damage before treating larger areas.
How to identify your floor finish and wear layer thickness
Because different vinyl floors take different treatments, you’ll want to identify the finish and measure the wear layer before you clean—these tell you which cleaners, tools, and techniques are safe.
Check manufacturer labels or ask the installer. Peel a small edge or examine a concealed seam: luxury vinyl has a clear wear layer (usually 2–20 mil), while sheet vinyl and VCT differ in finish and care needs.
Quick Daily Cleaning Routine to Prevent Stains
Start each day by sweeping or using a dry dust mop to remove grit and crumbs that can scratch vinyl.
Then mop with a pH-neutral cleaner diluted per the label to lift spills without harming the finish.
Do this daily in high-traffic areas and use gentle, recommended products to keep stains from setting.
Step 1: Sweeping and dry dust removal
A quick daily sweep keeps grit and crumbs from abrading your vinyl and turning into stains, so grab a soft-bristle broom or a dust mop and cover high-traffic areas first.
You’ll prevent scratches and make deeper cleaning easier. Focus on edges and under furniture; empty the dustpan promptly.
- Sweep toward the door.
- Use a vacuum on hard-floor setting.
- Shake or rinse the dust mop.
Step 2: Mopping with pH-neutral cleaners
Once you’ve removed loose dirt, mop regularly with a pH-neutral cleaner to lift spills without harming the vinyl’s finish.
Dilute per label, wring the mop so it’s damp not soaking, and work in small sections. Rinse the mop often to avoid spreading grime.
Dry the floor with a microfiber pad or towel to prevent streaks and water damage.
Recommended frequency and products
If you stick to a short daily routine, you’ll keep stains from setting and make deeper cleanings far easier.
Sweep or vacuum high-traffic areas daily, then damp-mop with a pH-neutral cleaner twice weekly.
Tackle spills immediately with a microfiber cloth and mild dish soap.
Use felt pads on furniture, avoid abrasive products, and test any new cleaner in an inconspicuous spot.
Step-by-Step Stain Removal Guide
Start by evaluating the stain and testing a cleaning solution in an inconspicuous spot so you know what’s safe for your vinyl.
Remove surface dirt, then identify the stain type—organic, dye, oil, rust, adhesive, or ink—to choose the right method.
For set-in stains you may need enzymatic cleaners and gentle scrubbing or a targeted deep-clean approach.
Overview: Assess, test, act
Before you plunge into scrubbing, assess the stain, test a small hidden area, and then act—those three steps keep you from damaging the vinyl while maximizing your chances of full removal.
Identify stain type, age, and spread.
Try your chosen cleaner in a discreet spot and wait for results. If no discoloration or texture change occurs, proceed systematically from least to more aggressive methods.
Step 1 Remove surface dirt and residue
Sweep or vacuum the area to lift loose grit, hair, and dust that can scratch vinyl during cleaning.
Next, use a soft-bristle broom or a vacuum with a hard-floor setting.
Follow with a microfiber damp mop and a pH-neutral cleaner diluted per label instructions.
Rinse with clean water, wring the mop well, and let the floor air-dry before treating stains.
Step 2 Identify stain type (organic, dye, oil, rust, adhesive, ink)
1. You’ll inspect the stain to determine its type—organic (food, plant), dye (color transfer), oil, rust, adhesive, or ink—so you can choose the right treatment later.
Look at color, texture, location, and smell. Note new vs. set-in stains and test a small hidden area.
- Color/texture clues
- Smell/timing
- Small test spot
Step 3 Cleaning methods by stain type
Now you’ll tackle stains based on what caused them, since organic spills, dyes and inks, grease and oil, rust, and adhesive or paint each need different treatments.
You’ll start with gentler cleaners for food, drink, and coffee, then move to targeted solutions for ink, oil, rust, and sticky residues.
Follow the step-by-step tips for each type to avoid damaging your vinyl.
Organic stains (food, drink, coffee)
When food, drinks, or coffee spill on vinyl, act quickly to prevent staining and sticky residue; blot solids, then dab with a damp cloth.
Mix mild dish soap with warm water, scrub gently with a soft brush, rinse, and dry.
For stubborn spots, use a baking soda paste, let sit briefly, rub gently, then wipe clean and dry thoroughly to avoid damage.
Dye and ink stains
Food and drink spills often respond to quick blotting and mild soap, but dye and ink pose a different challenge because their pigments can penetrate vinyl’s surface.
For fresh ink, blot leftover liquid, then apply isopropyl alcohol with a cloth, rubbing gently.
For set stains, try a paste of baking soda and water or a commercial vinyl-safe stain remover, testing an inconspicuous area first.
Grease and oil stains
Tackle grease and oil stains promptly, since their slippery films can attract dirt and sink into vinyl if left to set.
Blot excess with paper towels, then sprinkle baking soda or cornstarch to absorb oil for 10–15 minutes.
Vacuum residue, apply a few drops of dish soap with warm water, scrub gently with a soft brush, rinse, and dry.
Repeat if needed.
Rust stains
Rust can eat into vinyl’s surface and leave stubborn orange-brown marks, so act quickly to prevent permanent discoloration.
Remove loose rust with a soft brush, then apply a paste of baking soda and water or a commercial rust remover made for vinyl.
Let it sit briefly, gently scrub with a nonabrasive pad, rinse thoroughly, and dry.
Repeat if needed.
Adhesive and paint spots
Adhesive and paint spots can be stubborn, but you can remove most of them with the right solvent and a gentle technique.
Test solvent (rubbing alcohol, citrus remover, or acetone) in an inconspicuous area. Soften residue, scrape gently with a plastic scraper, then wipe with a damp cloth.
Rinse thoroughly and dry. Repeat if needed, avoiding abrasive tools that damage vinyl.
Pet stains and odors
Pet stains and odors need quick, targeted care to prevent permanent discoloration and lingering smells.
Blot fresh messes, rinse with cold water, then apply a mixture of equal parts white vinegar and water. Let sit five minutes, blot, and air dry.
For persistent odors use an enzyme cleaner per label instructions. Rinse and dry thoroughly to avoid residue and repeat if needed.
Step 4 Deep cleaning for set-in stains (enzymatic cleaners, gentle scrubbing)
Once surface cleaning hasn’t lifted a stain, it’s time to go deeper: use an enzymatic cleaner formulated for vinyl and a soft-bristled brush or microfiber pad to loosen and lift set-in soils.
Apply cleaner per label, let it dwell to break down organic matter, gently agitate in circles, and repeat sparingly until the stain fades.
Test first in an inconspicuous spot.
Step 5 Rinsing and drying properly
5. After treating the stain, rinse the area thoroughly with clean water to remove cleaner residue.
Use a damp microfiber mop or cloth, changing water often to avoid re-depositing grime.
Blot excess moisture with dry towels, then air-dry or use a fan for faster results.
Verify the floor feels dry and non-slippery before walking on it.
Step 6 When to repeat, when to stop to avoid damage
Although you’ll want to remove the stain fully, don’t keep scrubbing until the vinyl thins or the finish dulls—stop and reassess after each treatment.
If stain lightens after one or two gentle attempts, pause, rinse, and let the floor dry; repeat only if progress resumes.
Stop if color loss, sheen change, or surface softening appears, and consult a pro for stubborn or widespread damage.
DIY Solutions vs Commercial Cleaners
You can often treat fresh stains with household remedies like vinegar, baking soda, or rubbing alcohol—each works best for specific stains and surfaces, so test in an inconspicuous spot first. For tougher or old stains, look for commercial cleaners with ingredients such as non-abrasive surfactants, mild solvents, or pH-balanced formulas, and follow label instructions. If stains persist or flooring is delicate, consider hiring professionals who have heavy-duty equipment and expertise.
| DIY Remedy | Best Use | Caution |
|---|---|---|
| Vinegar solution | Light grease, general cleaning | Avoid on stone or unsealed floors |
| Baking soda paste | Scuff marks, mild stains | Rinse thoroughly to prevent residue |
Common household remedies (vinegar, baking soda, rubbing alcohol) how and when to use
When deciding between DIY fixes and commercial cleaners, weigh the stain type and your vinyl’s finish. Simple spills like juice or coffee usually respond well to a vinegar-water mix or a baking soda paste.
However, tougher stains, adhesive residue, or protective-film discoloration may need rubbing alcohol or a commercial cleaner formulated for vinyl.
Use diluted vinegar for routine cleaning, baking soda paste for gentle scrubbing, and isopropyl alcohol sparingly on persistent spots.
Recommended commercial products and active ingredients to look for
A good commercial vinyl cleaner can save you time and prevent damage, so pick products with gentle but effective active ingredients like nonionic surfactants, mild solvents (propylene glycol ethers), and diluted citric or lactic acids; these break down dirt, oils, and adhesive without stripping the wear layer.
Look for pH-neutral formulations, label claims for vinyl/luxury vinyl, ready-to-use sprays or concentrates, and manufacturer-approved brands.
When to choose professional cleaning services
If your vinyl has minor scuffs, routine grime, or fresh spills, DIY cleaners and commercial products will usually do the job quickly and cheaply.
But if stains are deep-set, cover large areas, or the floor shows wear-layer damage and odors, call a professional who can assess risks, use industrial-grade equipment, and apply restorations without voiding warranties.
You should hire pros for stubborn stains, extensive discoloration, adhesive removal, or warranty concerns.
Repairing and Restoring Surface Appearance
After cleaning stains you’ll want to tackle scuffs and light scratches using a rubber eraser or a gentle polish to blend the surface.
For deeper gouges or open seams, use a vinyl repair kit to fill and level the area before it traps dirt.
Finally, apply a vinyl-safe floor finish to restore shine, but know when damage is beyond repair and replacement is the best option.
Removing scuffs and light scratches (erasers, polishing)
When you notice scuffs or shallow scratches on vinyl, you can often erase or polish them away without heavy repairs.
Gently rub scuffs with a clean eraser or melamine sponge, then buff with a microfiber cloth.
For light scratches, use a vinyl-safe polishing compound or paste wax sparingly, working in small circles.
Wipe residue and inspect; repeat if needed.
Filling deeper gouges and seams (repair kits)
Address deeper gouges and open seams with a vinyl repair kit designed to match color and texture; these kits let you fill, smooth, and seal damage so the floor looks continuous again.
Clean and dry the area, roughen edges lightly, then apply filler in thin layers, curing each per instructions.
Sand lightly, blend color with touch-up compound, and finish by sealing seams to prevent dirt and moisture intrusion.
Restoring shine safely (floor finish products suitable for vinyl)
If your vinyl floor looks dull or has light surface wear, you can restore its shine without harming the material by choosing products formulated specifically for vinyl rather than hardwood or tile finishes.
Test any finish in an inconspicuous area, follow manufacturer directions, apply thin even coats, and allow full curing between layers.
Avoid oil-based polishes and abrasive restorers that can yellow or damage vinyl.
When replacement is the only option
Although minor scratches and stains can often be fixed, there comes a point where patching or refinishing won’t restore the floor’s look or safety, and you’ll need to replace affected vinyl planks or sheets.
Measure damaged area, source matching material, and prep subfloor.
Remove old pieces carefully, install replacements with proper adhesive or click system, then seal seams and allow full cure before foot traffic.
Common Mistakes That Damage Vinyl Floors
Don’t use abrasive tools or harsh chemicals, because they’ll scratch or strip the vinyl’s wear layer.
You shouldn’t over-wet or use steam cleaners, and avoid polishes or waxes not made for vinyl.
Always follow the manufacturer’s care instructions to prevent costly mistakes.
Using abrasive tools or harsh chemicals
When you scrub with steel wool, scouring pads, or harsh chemicals, you’ll remove the protective layer and create scratches that trap dirt and ruin the finish; instead, use soft cloths, non-abrasive pads, and pH-neutral cleaners made for vinyl to protect the surface and keep it looking new.
Test any cleaner in a hidden spot first, follow manufacturer instructions, and rinse residue thoroughly to avoid buildup.
Over-wetting and steam cleaning risks
You might think more water gets grime out faster, but over-wetting and steam cleaning can swell seams, lift adhesive, and warp the backing of vinyl floors.
Don’t soak the floor; use a damp mop and wring it well. Avoid steam mops, especially on glued or sheet vinyl.
Dry any damp spots promptly to prevent cupping, bubbling, and long-term damage.
Wrong polish or wax products
If you grab a polish or wax meant for hardwood or tile, it can create a cloudy buildup, slippery surface, or sticky residue that attracts dirt and shortens your vinyl’s life.
Always use products labeled safe for vinyl, test in a hidden spot, and apply sparingly.
Remove old inappropriate coatings with a manufacturer-recommended cleaner or a gentle, pH-neutral solution before resealing.
Ignoring manufacturer’s care instructions
Mistakes like using the wrong polish often stem from ignoring the manufacturer’s care instructions, so check those guidelines before trying any new product or method.
You’ll avoid voiding warranties, discoloration, and surface damage by following recommended cleaners, pH limits, and application techniques.
If instructions aren’t available, contact the manufacturer or test a small inconspicuous area first to verify compatibility and results.
Prevention and Best Practices for Long-Term Care
To keep stains from coming back, you should use protective mats and furniture pads and keep high-traffic entryways swept and scrubbed.
Have a simple spilled-stain protocol and a seasonal deep-clean schedule so small problems don’t become permanent.
When replacing or upgrading, pick vinyl and finishes rated for stain resistance to make long-term care easier.
Protective mats and furniture pads
Think of protective mats and furniture pads as the first line of defense for your vinyl floor: they prevent scratches, dents, and wear by distributing weight and blocking abrasive grit.
You should place mats in high-traffic zones and use felt or rubber pads under legs to avoid scuffs. Replace pads when worn.
- Choose non-staining, breathable mats
- Pad heavy furniture generously
- Check and rotate pads regularly
Entryway maintenance and spilled-stain protocols
One simple habit can save you hours of cleaning: keep your entryway set up to block dirt and catch spills before they reach the vinyl.
Place durable doormats, a shoe rack, and a small wipe station.
Wipe spills immediately with a soft cloth and mild cleaner, blotting rather than rubbing.
Rinse and dry the area to prevent residue and staining.
Seasonal deep-clean schedule
Although you clean regularly, a seasonal deep-clean keeps vinyl looking new and prevents wear that daily upkeep misses.
Every spring and fall, move furniture, vacuum grit, mop with a manufacturer-safe cleaner, and treat stains with a targeted solution.
Apply a protective polish if recommended, dry thoroughly, and inspect seams.
Schedule spot checks monthly to catch issues before they worsen.
Choosing flooring and finishes for stain resistance
When you’re selecting vinyl flooring, prioritize construction and finishes that resist staining—look for a durable wear layer, a high-quality urethane or ceramic bead coating, and a tightly fused surface that keeps spills from penetrating.
Choose embossed textures that hide marks, darker or patterned designs to mask stains, and manufacturer-backed stain warranties.
Match maintenance recommendations to finish for long-lasting protection.
Cost and Time Estimates
You’ll see that quick surface stains like coffee or juice usually take 5–15 minutes with a DIY cleaner, while tougher stains like ink or adhesive can take 30–60 minutes and stronger methods.
DIY supplies typically cost $5–30 for cleaners and tools, whereas hiring a pro can run $100–300 or more depending on scope.
Next, you’ll get a concise breakdown of time by stain type and a cost comparison to help you choose.
Typical time per stain type and method
Expect most common vinyl stains—food spills, scuff marks, ink, grease, and pet accidents—to take between a few minutes and up to an hour each to remove, depending on the method and severity.
Quick wipes or mild cleaners often take 5–15 minutes. Stubborn stains needing scrubbing, poultices, or repeated treatments can require 20–60 minutes.
Test first and work systematically.
Estimated costs: DIY supplies vs professional service
One quick way to decide between DIY and professional help is to compare upfront costs and likely outcomes:
DIY supplies—cleaner, scrub brush, microfiber, stain remover, sealer—usually run $15–60. You’ll invest time and risk imperfect results.
Pros cost $150–400 for service, warranty, and faster, consistent results.
Choose DIY for low-cost, minor stains; hire pros for large areas or stubborn discoloration.
Frequently Asked Questions
You probably have a few specific concerns about stains, cleaning products, and long-term fixes.
In the FAQ below you’ll find clear answers about which stains can be removed, whether bleach or steam mops are safe, how to tackle ink or marker, and if vinyl can be refinished to change color or hide damage.
Read on for practical, short solutions.
Can all stains be removed from vinyl flooring?
How well stains come out of vinyl depends on what caused them and how long they’ve set—some spots lift easily, while others may be permanent.
You can remove many common stains with prompt cleaning, gentle detergents, or specialized cleaners.
Deep-set dye, ink, or chemical burns mightn’t fully disappear; you may need repair options like replacement planks or professional restoration for best results.
Is it safe to use bleach on vinyl floors?
If some stains won’t budge with gentler cleaners, you may be tempted to reach for bleach—but that can harm vinyl flooring.
Bleach can discolor, weaken the wear layer, and leave residues that attract dirt. If you must use a bleach solution, dilute it heavily, test in an inconspicuous spot, rinse thoroughly, and ventilate.
Prefer vinyl-safe cleaners when possible.
Will steam mops ruin my vinyl floor?
Wondering whether a steam mop will damage your vinyl floor? You should avoid high-heat steam on older, glue-down, or luxury vinyl planks—heat can loosen adhesive and warp edges.
If your vinyl is resilient, check manufacturer guidelines first. Use low-heat steam settings, move quickly, and keep mop head barely damp.
Test a hidden spot before treating visible areas.
How do I remove permanent marker or ink from vinyl?
Steam cleaning isn’t the only stain concern—permanent marker and ink require a different approach.
Test any solvent on an inconspicuous spot. Use rubbing alcohol, nail polish remover (acetone-free), or a magic eraser, applying gently with a cloth.
Blot—don’t rub—work outward, rinse with warm water, then dry.
Repeat sparingly to avoid dulling the vinyl finish.
Can I refinish vinyl flooring to change its color or hide stains?
Can you refinish vinyl flooring to change its color or hide stains? You generally can’t sand and refinish vinyl like wood.
Instead, consider full replacement, vinyl plank overlays, or professional reglazing/coating products made for vinyl.
Spot repairs, color-matched patches, or high-quality peel-and-stick luxury vinyl planks can hide stains.
Consult a flooring pro to match texture, adhesion, and warranty requirements before altering existing vinyl.