How to Get Paint Off Vinyl Floor Without Scratching the Surface
You can remove paint from vinyl without scratching by working gently: start with a soft plastic scraper and warm, soapy water to lift fresh spots, blotting rather than rubbing. For dried latex, soften with warm soapy cloths or rubbing alcohol; for oil-based paint, test denatured alcohol in a hidden spot first. Avoid metal scrapers, abrasive pads, and strong solvents. Work patiently and rinse with a damp microfiber. Keep going for step-by-step methods and troubleshooting tips.
Remove Paint from Vinyl Floors Without Scratching
Start by using a soft plastic scraper and a warm, soapy cloth—that’s the safest and usually fastest way to lift paint without scratching vinyl.
Work slowly and test a small area first, and if the paint won’t budge or the floor’s textured or damaged, stop.
Call a professional when stubborn stains persist, the finish looks compromised, or you’re unsure which cleaner won’t harm the vinyl.
One-line summary of safest, fastest method
When you need the safest, fastest way to remove paint from vinyl without scratching, gently soften the paint with warm soapy water or a little rubbing alcohol.
Then lift it with a plastic scraper or credit card, finishing with a soft microfiber cloth to wipe residue away.
For clear guidance on how to get paint off vinyl floor, work patiently, use minimal force, and rinse well afterward.
When to call a professional
If DIY methods aren’t removing the paint or you spot damage, call a pro.
You should hire a specialist if paint’s deeply embedded, covers large areas, or if scraping risks seams or edges.
Professionals use safe solvents, heat tools, or low-abrasion machines and can assess adhesive or substrate issues.
They’ll prevent further harm and restore appearance faster than continued home attempts.
Basic Understanding Why Paint Sticks to Vinyl and Risks of Scraping
Vinyl floors are made from layered PVC and a printed or clear wear layer, so they’re softer and can be sensitive to abrasion and harsh chemicals.
Paint can be water-based or oil-based, and each bonds differently to the vinyl surface and finish.
Scraping risks include surface scratches, color loss, and chemical damage from solvents, so you’ll want to choose removal methods carefully.
How vinyl flooring is made and why it’s sensitive
Think of vinyl flooring as a multi-layered plastic sandwich: a printed design layer sits under a clear wear layer, all bonded to a flexible backing.
You’ll find the wear layer is thin and can abrade or scuff easily, while adhesives and top coatings attract solvents.
Types of paint common on floors (water-based vs oil-based)
Because the chemistry and finish differ, water-based (latex) and oil-based paints behave very differently on vinyl floors: latex dries by evaporation and forms a flexible film that generally sits on the surface, while oil-based paints cure by oxidation and bond into a harder, more adhesive layer.
You’ll find latex easier to soften with mild solvents and warm water; oil-based spots often need stronger, solvent-based removers and more patience.
Risks: scratching, discoloration, chemical damage
If paint’s stuck to your floor, it’s tempting to scrape hard, but that can leave scratches, remove the wear layer, or strip color from patterned vinyl; solvents and abrasive tools can also bleach or soften the plastic, causing permanent discoloration or surface pitting.
You should test removers in an inconspicuous spot, use gentle plastic scrapers, and avoid strong solvents or metal tools that damage finish.
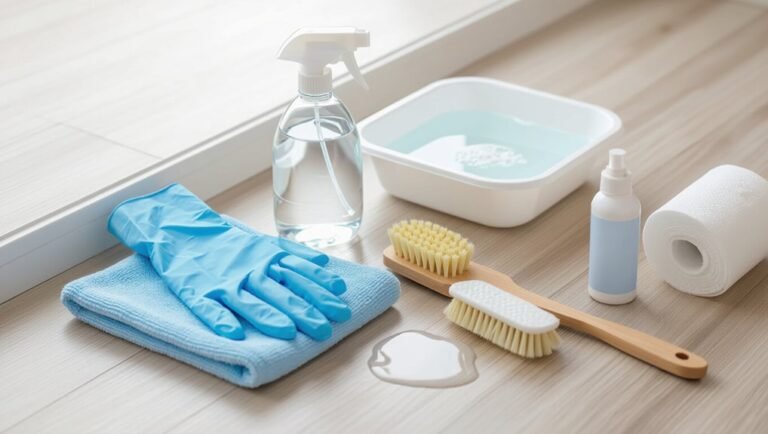
Tools and Materials You May Need
You’ll want a few safe household items like warm soapy water, rubbing alcohol, and a soft cloth to start removing paint without harming the vinyl.
If that doesn’t work, consider recommended non-abrasive commercial products such as citrus-based removers or gentle adhesive cleaners formulated for vinyl.
Avoid abrasive scrapers and harsh solvents, since those tools can scratch or dissolve the flooring.
Safe household items
A few common household items can safely tackle most paint spills on vinyl without harsh chemicals: dish soap, warm water, rubbing alcohol, white vinegar, baking soda, a soft cloth or sponge, and a plastic scraper or old credit card.
Use them gently and test in a hidden spot first.
- Dish soap and warm water
- Rubbing alcohol
- White vinegar
- Baking soda paste
- Soft cloth or plastic scraper
Recommended commercial products (non-abrasive)
When household items won’t fully remove stubborn paint, reach for non-abrasive commercial products designed for vinyl—these save time and lower the risk of surface damage.
You’ll want gentle, vinyl-safe formulas and soft applicators. Consider:
- Citrus-based adhesive remover
- Gentle vinyl floor cleaner
- Water-based paint remover
- Foam applicator pads
- Microfiber cloths for buffing
Tools to avoid (abrasive scrapers, harsh solvents)
1 thing to remember: avoid abrasive scrapers and harsh solvents, because they can gouge, dull, or chemically damage vinyl even if the paint comes off.
You should skip tools and chemicals that risk the surface:
- Steel wool
- Metal putty knives
- Sandpaper
- Acetone or paint thinner
- Strong alkaline cleaners
Use soft, vinyl-safe methods instead.
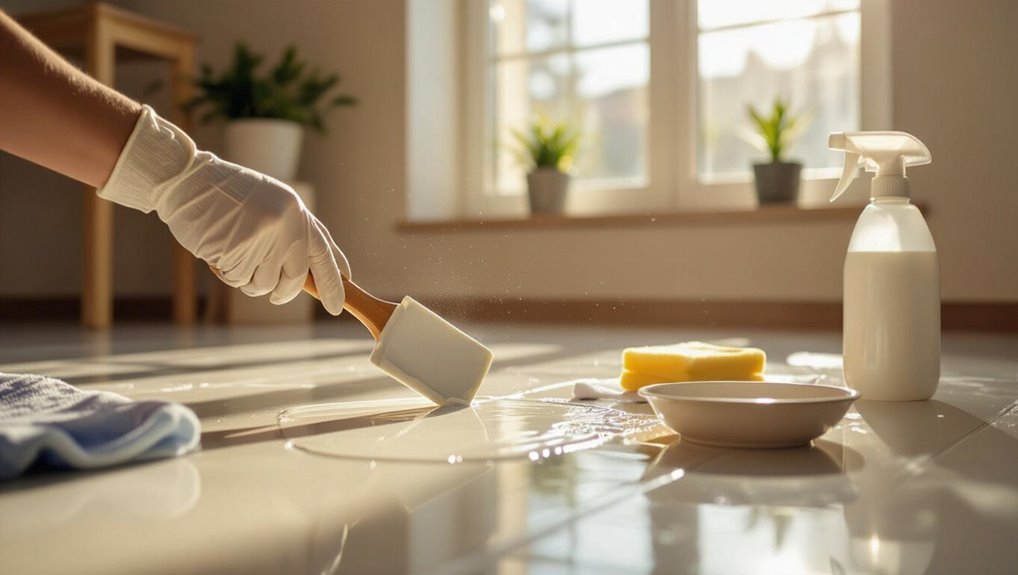
Step-by-Step Removal Guide (Safe, Non-scratching Methods)
Start by identifying the paint type and testing a small, hidden area so you know what you’re dealing with.
If the paint’s wet, gently lift the excess with a microfiber cloth, plastic scraper, or credit card; for water-based paint soften with warm soapy water and a microfiber pad, and for oil-based paint use a vinyl-safe solvent or mineral spirits alternative.
Finish stubborn spots with an adhesive remover or commercial vinyl-safe cleaner, always working gently to avoid scratching.
Step 1 Identify paint type and test a small area
Before you try any remover, figure out what kind of paint you’re dealing with—water-based (latex) or oil-based—because the wrong solvent can damage vinyl.
Check labels or recall the project. Test a hidden corner: apply chosen cleaner (water for latex; manufacturer-recommended solvent for oil) with a soft cloth, wait a few minutes, then blot.
If vinyl shows no softening, fading, or tackiness, proceed.
Step 2 Remove excess wet paint with soft tools
Once you’ve confirmed the paint type and tested a hidden spot, tackle wet paint right away to prevent it from bonding to the vinyl.
Gently blot excess with a clean, lint-free cloth. Use a plastic scraper or old credit card at a low angle to lift thicker globs.
Wipe frequently, working outward to avoid spreading, and replace tools as they fill.
Step 3 Soften dried water-based paint (warm soapy water + microfiber)
Soften dried water-based paint by soaking the area with warm, soapy water and working it gently with a microfiber cloth—this relaxes the film so you can lift it without scraping.
You’ll:
- Apply warm, not hot, soapy water
- Let it sit 5–10 minutes
- Blot gently with a microfiber cloth
- Repeat soak if needed
- Pat dry and inspect for residue
Step 4 Dissolve dried oil-based paint safely (mineral spirits alternatives)
Work carefully with solvents that break down oil-based paint without damaging vinyl—if you’re avoiding mineral spirits, good alternatives include denatured alcohol, rubbing alcohol (isopropyl), commercial citrus-based removers, or a small amount of acetone applied cautiously.
Test a hidden spot, ventilate, wear gloves, and blot gently.
Use:
- Denatured alcohol
- Isopropyl alcohol
- Citrus remover
- Careful acetone
- Soft cloth and patience
Step 5 Use adhesive removers and commercial vinyl-safe cleaners
Reach for an adhesive remover or a commercial vinyl-safe cleaner when solvents haven’t done the job—these products are formulated to lift paint and sticky residues without scratching or discoloring vinyl.
Test a small, hidden area first. Apply per instructions, let dwell briefly, then blot with a soft cloth.
Rinse thoroughly with warm water and dry. Repeat as needed until residue’s gone.
Step 6 Gentle mechanical options (plastic scraper, putty knife wrapped in cloth)
Grab a plastic scraper or a putty knife wrapped in a soft cloth to lift stubborn paint without gouging the vinyl.
Work at a low angle, pushing gently under edges of softened paint. Rotate the cloth as it picks up residue to avoid scratching.
If resistance is high, stop and reapply a safe solvent; don’t force or use metal blades.
Step 7 Final cleaning and neutralization of residue
Once the paint’s been lifted, you’ll want to remove any solvent residue and sticky smears so the vinyl looks and feels normal; start by wiping the area with a soft cloth dampened in warm, soapy water to neutralize leftover cleaner.
Rinse with a clean damp cloth, blot dry, then buff gently with a microfiber to restore sheen.
Dispose of used cloths safely.
Step 8 Drying and inspecting for damage
After you’ve rinsed and buffed the area, let the vinyl air-dry for at least 30–60 minutes while keeping foot traffic away; this helps any remaining solvent residues evaporate and reveals the true condition of the surface.
Inspect for discoloration, soft spots, lifting seams, or dulling. If you spot damage, document it, stop using harsh cleaners, and consult a pro or the manufacturer for repair or warranty guidance.
Alternative Methods and When to Use Them
If the safe, non-scratching steps don’t fully remove the paint, you can try heat to soften spots (use a hair dryer on low and keep a safe distance if you use a heat gun).
Steam can help lift paint but watch for warping and don’t oversaturate seams.
Test rubbing alcohol or acetone on an inconspicuous area first because they can dull the finish.
For stubborn or large jobs, consider professional-grade removers or hiring a pro to avoid permanent damage.
Heat-based softening (hair dryer/heat gun precautions)
When paint’s dried hard on vinyl, applying controlled heat can soften it enough to scrape or wipe it away without harsh chemicals.
You’ll use a hair dryer or low-setting heat gun, keep the tool moving, and hold it several inches away.
Test a hidden spot first, wear heat-resistant gloves, avoid overheating, and stop if vinyl warps or emits fumes to prevent damage or hazards.
Steam cleaning considerations
Although steam can loosen stubborn paint without chemicals, you should use it cautiously on vinyl—high heat and moisture can warp flooring or lift seams.
If you try a steam cleaner, use the lowest setting, keep the nozzle moving, and avoid seams or edges. Test an inconspicuous area first, limit exposure time, and blot moisture promptly to prevent swelling or adhesive failure.
Using rubbing alcohol or acetone sparingly and testing first
Because solvents like rubbing alcohol and acetone can dissolve paint quickly, you should use them sparingly and always spot-test first to make sure they won’t damage your vinyl’s finish or adhesive.
Dab a cotton swab with solvent, rub a hidden area for 30 seconds, then wait. If no softening or discoloration appears, gently work at paint, ventilate, and rinse thoroughly when done.
Professional-grade removers and hire pros
If DIY methods won’t budge the paint or you’re dealing with large stains, consider professional-grade removers or hiring a pro. You’ll get safer solvents, faster results, and warranty-safe techniques.
Ask about testing, ventilation, and floor protection. Expect higher cost but less risk.
- stronger, vinyl-safe solvents
- controlled application
- protective equipment
- contractor warranty
- cleanup and disposal services
Comparison of Common Removal Agents
You’ll compare common paint removers by weighing effectiveness against vinyl safety, cost and availability, and recommended use cases. Below is a quick snapshot to guide your choice:
| Agent | Effectiveness vs Safety | Cost & Availability |
|---|---|---|
| Warm soapy water | Low effectiveness, very safe | Very cheap, widely available |
| Rubbing alcohol/acetone | Moderate effectiveness, can dull finish | Cheap, common at stores |
| Commercial stripper | High effectiveness, higher risk to vinyl | Moderate to expensive, specialty or hardware stores |
Effectiveness vs safety for vinyl
When choosing a paint remover for vinyl, weigh how well it works against the risk of damaging the floor and harming yourself.
Test small hidden area first. Solvents like acetone remove paint fast but can dull or melt vinyl and irritate skin; mild soap, rubbing alcohol, or citrus-based removers are gentler but slower.
Always ventilate, wear gloves, and use soft tools to protect the finish.
Cost and availability
Although some removers work faster, you’ll often trade speed for cost or availability, so pick one that fits your budget and what you can buy locally.
Household items like rubbing alcohol or dish soap are cheap and easy to find. Commercial solvents cost more and may require special stores.
Consider quantity, packaging size, and whether you need gloves or ventilated spaces when estimating total expense.
Recommended use cases
Water-based paints usually come off with soap, warm water, or rubbing alcohol, while oil-based or enamel paints often need stronger solvents like mineral spirits or commercial removers.
Test any solvent on an inconspicuous spot first. Use plastic scrapers and soft cloths to avoid gouging.
For dried thick layers, consider mechanical removal then solvent cleanup.
Ventilate and wear gloves.
Common Mistakes That Cause Scratches or Damage
Don’t use metal scrapers or steel wool, because you’ll gouge the vinyl’s surface.
Don’t apply strong solvents without testing first, and don’t rub too hard or use abrasive pads that remove the finish.
Also avoid waiting too long or using the wrong temperature, since dried paint and heat can make removal harder and increase the risk of damage.
Using metal scrapers or steel wool
Avoid using metal scrapers or steel wool on vinyl floors — they’ll gouge the surface and leave permanent scratches.
If paint’s stubborn, don’t press metal harshly or scrub with wire pads. Use plastic scrapers or soft cloths instead, working gently to lift paint.
Test pressure on an inconspicuous spot and stop immediately if you see any abrasion or dulling of the finish.
Applying strong solvents without testing
If you grab a strong solvent and start scrubbing without testing, you can easily strip the vinyl’s finish or discolor it permanently.
Always test solvents on an inconspicuous spot, wait for full drying, and inspect for softening, whitening, or color loss.
Use milder cleaners first, apply sparingly with a soft cloth, and stop immediately if the surface changes.
Rubbing too hard or using abrasive pads
When you scrub too hard or reach for steel wool or abrasive pads, you can quickly grind tiny scratches into the vinyl or wear away its protective finish.
Don’t force friction; instead use soft cloths or non-scratch sponges and gentle, circular motions. Test any tool on an inconspicuous spot first.
If paint won’t lift, switch to a milder solvent rather than escalating scrubbing intensity.
Waiting too long or using incorrect temperature
Scrubbing gently won’t help if you let paint sit and harden first or apply heat at the wrong temperature.
If paint cures, it bonds and needs harsher methods that risk gouging vinyl.
Don’t blast heat — too hot warps or softens the floor.
Work promptly with appropriate warm, not hot, softening techniques and test a hidden spot before treating the visible area.
Prevention and Best Practices to Protect Vinyl Floors
Before you start painting, get into the habit of wiping spills immediately and keeping a small bucket of cleaner nearby so drips don’t set.
Lay down protective coverings like heavy-duty drop cloths or rosin paper and use low-tack painter’s tape on trim to avoid adhesive residue or surface lift.
Prep vinyl by cleaning and drying the area, and follow a simple maintenance routine to gently remove or conceal tiny spots without harsh scrubbing.
Immediate cleanup habits during painting
Although spills can happen fast, you can stop most messes from becoming stains by adopting a few simple immediate-cleanup habits while you paint.
Keep a damp cloth, paper towels, and a small bucket of warm soapy water nearby. Wipe drips immediately, blotted not rubbed.
Scrape dried splatters gently with a plastic scraper, then clean and rinse promptly to prevent residue build-up.
Protective coverings and adhesive tape recommendations
Cover your vinyl with a layer of protection every time you paint—start with a breathable rosin paper or a heavy-duty drop cloth to shield against spills and tracking.
Then add cardboard or rigid foam for high-traffic zones. Use low-tack painter’s tape on baseboards and edges to prevent residue; avoid duct tape.
Secure seams with overlapping tape and remove coverings promptly after paint fully cures.
How to prepare vinyl before painting nearby
1 simple routine can save your vinyl from paint damage: clear the area, clean the floor, and set up protection before you mix any paint.
Remove dust and residues with a mild detergent, let it dry, then tape edges and lay overlapping drop cloths or plastic sheeting.
Keep tools and cans off the vinyl, work from outside in, and inspect barriers often.
Routine maintenance to hide minor spots safely
A few quick habits will keep small paint spots from becoming permanent eyesores: wipe up splatters immediately with a damp cloth, use a gentle cleaner for residue, and avoid scrubbing hard or using harsh chemicals that can dull the finish.
Use a soft eraser or microfiber to lift dried specks, apply a matching vinyl touch-up kit for color, and protect high-traffic areas with mats.
Troubleshooting Stubborn Stains and Partial Damage
If paint has stained the color rather than just scratched the finish, you’ll need different fixes than for surface damage.
For minor scratches and areas with slight color loss, you can often buff, touch up with matching vinyl repair products, or use a heat-activated filler.
If damage goes through the wear layer or covers a large area, consider replacing the plank or calling a pro to avoid making it worse.
When paint leaves discoloration vs surface scratch
When paint stays behind, you’ll need to tell whether it’s merely discolored or actually scratched into the vinyl, because the fixes differ: discoloration often responds to cleaning or gentle chemical removal, while surface scratches require buffing, heat, or repair compounds to restore the finish.
Inspect under bright light, run a fingernail—if pigment lifts, clean; if gouged, stop and prepare for surface restoration steps.
Repair options for minor scratches and color loss
Since minor scratches and color loss usually affect only the surface layer, you can often restore appearance without replacing the vinyl.
Clean the area, then buff light scratches with a soft cloth and a vinyl-safe polish or rubbing compound.
For faded spots, use a matching vinyl repair kit or colored touch-up pen.
Finish with a protective sealer to blend and prevent further wear.
When to replace a vinyl plank or call a pro
Because surface fixes won’t help every problem, you’ll need to assess the damage to decide whether to replace a plank or call a pro.
If paint has deeply penetrated or the plank is warped, cracked, or delaminating, replacement is best.
For large stains, extensive adhesive residue, or subfloor concerns, hire a pro.
Small, localized issues can often be remedied DIY with proper tools and caution.
Tools, Products, and Safety Checklist Before You Start
Before you start scraping or applying solvents, make sure you’re protected and working in a well-ventilated area to avoid fumes and skin contact.
Test any cleaner on an inconspicuous spot and follow proper disposal methods for paint and used solvents to stay safe and legal.
Gather these basics before you begin:
- gloves, eye protection, and a respirator or mask
- open windows or a fan for ventilation
- small test patch supplies (cotton swabs, cloth)
- appropriate cleaners and gentle scrapers
- containers and labels for disposing of waste solvents and paint
PPE and ventilation tips
When you’re getting paint off vinyl, protect yourself with the right PPE and good airflow:
wear chemical-resistant gloves, eye protection, and a respirator or mask rated for organic vapors if you’ll use solvents, and open windows or run a fan to keep fumes from building up.
Also wear long sleeves, non-slip shoes, and a disposable apron; keep a first-aid kit nearby and ventilate continuously.
Testing protocol for any cleaner
If you’re about to try any cleaner on your vinyl floor, test it first in an inconspicuous spot to avoid damage or discoloration.
Apply a small amount, wait the recommended dwell time, blot gently, and inspect for color change or finish dulling.
If no adverse effects appear after 24 hours, proceed.
Record product name and ratio in case you need to repeat.
Disposal of paint and used solvents
Because leftover paint and solvent waste can harm the environment and your plumbing, you need to dispose of them properly—never pour them down sinks, toilets, or storm drains.
Seal small amounts in labeled, airtight containers and take them to a household hazardous waste facility or community collection event. For large volumes, contact a licensed hazardous waste hauler.
Follow local regulations and wear gloves when handling.
Frequently Asked Questions (FAQ)
You probably have specific questions like whether acetone or paint thinner will damage vinyl, how long to wait after cleaning, and if textured stains can be fully removed.
I’ll cover when common solvents are safe, how to spot-test and wait to avoid harm, and when replacement is the better option.
Read on for clear, practical answers.
Can I use nail polish remover (acetone) on vinyl floors?
Wondering whether nail polish remover (acetone) is safe for vinyl floors? You should avoid using pure acetone — it can soften, discolor, or dull vinyl finish.
If you try a remover, pick one labeled non-acetone, test in an inconspicuous spot, and work gently with a soft cloth. Rinse thoroughly and stop immediately if the surface changes.
Will paint thinner ruin vinyl flooring?
Paint thinner can damage vinyl flooring if you use it, so proceed with caution: strong solvents like mineral spirits, turpentine, or lacquer thinner can soften, discolor, or strip the vinyl’s wear layer.
You shouldn’t apply them directly. Test in an inconspicuous spot, use minimal product on a cloth, blot rather than rub, and rinse thoroughly with mild soap and water to remove residue.
How long should I wait after using a cleaner to ensure no damage?
Because cleaners vary in strength and purpose, wait at least 24 hours before heavy use or placing furniture back on the area to guarantee the floor’s finish has fully dried and any residues dissipate.
For stronger solvents or heat-treated cleaners, extend drying to 48 hours.
Test a small hidden spot first, keep area ventilated, and avoid walking on it with shoes until you’re sure there’s no tackiness.
Can stains be completely removed from textured vinyl?
Can textured vinyl ever come completely clean?
You can often remove fresh or surface stains with gentle scrubbing, mild solvent, or a soft-bristled brush that follows the grain.
Deep-set or pigmented stains may fade but not vanish entirely.
Test methods in an inconspicuous spot, repeat cautiously, and stop if texture or color changes to avoid worsening the mark.
Is it better to replace damaged vinyl than try further removal?
When should you stop trying to remove a stain and just replace the vinyl? If paint deeply penetrates or textured patterns get damaged, or if multiple removal attempts dull or tear the surface, replacement is wiser.
Consider cost, match availability, and longevity; patching can work for small areas, but extensive damage warrants replacing the plank or sheet to restore appearance and durability.
Visual Guide and Step Demonstrations
Start by evaluating the paint—note its type (latex or oil), how much has stuck, and whether it’s dry or tacky—so you can choose the right removal method and tools.
Then follow step-by-step photos: test a small area, apply solvent or warm soapy water, gently scrape with a plastic blade, wipe residue, and rinse.
Include close-ups and before/after shots for clarity.