
DIY Concrete Floors: A Step-by-Step Guide for Beginners
You can install a durable, attractive concrete floor yourself by planning carefully, prepping the substrate, controlling moisture, and using the right tools. Measure and repair the base, install a vapor barrier, mix and pour in manageable sections, screed and consolidate, then float, trowel or texture as desired. Cure properly for at least a week, seal for protection, and maintain annually to prevent wear. Keep going to learn detailed steps, tool choices, and common troubleshooting tips.
Can You Do Concrete Floors Yourself?
You can tackle many concrete floor projects yourself if you’re comfortable with basic tools and can commit the time—expect modest material costs but a learning curve for finishes and prep.
Small repairs, simple slab pours, and staining are feasible DIY jobs, while large pours, structural work, or polished/concealed substrate issues are best left to pros.
If the job risks load-bearing integrity, requires specialized equipment, or you need a flawless finish quickly, hire an experienced contractor.
Short summary of feasibility, time, cost, and skill level
Although tackling a concrete floor project takes some prep and patience, you can definitely do much of the work yourself if you’re willing to learn basic techniques and invest reasonable time.
Feasibility: high for simple slabs.
Time: several weekends to a few weeks.
Cost: moderate—materials and basic tools.
Skill level: beginner to intermediate for do it yourself concrete floors.
When to hire a pro vs. DIY
Having covered feasibility, time, cost, and skill, it’s time to decide whether to take the DIY route or hire a pro for your concrete floor.
If you’re comfortable with heavy labor, basic finishing, and equipment rental, DIY can save money.
Hire a pro for complex layouts, structural repairs, polishing, or when warranty, speed, and flawless results matter more than cost.
Understanding Concrete Floors Basics You Need to Know
A concrete floor is a poured slab used in garages, basements, and commercial spaces. You’ll want to know the common types and uses before you start.
We’ll cover the pros and cons of tackling the job yourself and the essential terms and materials—slab, vapor barrier, screed, trowel, and sealer—so you’re not caught off guard.
With that foundation, you’ll be ready to decide whether DIY is right for your project.
What is a concrete floor? Types and common uses
Concrete floors are poured or formed slabs of cementitious material that give you a durable, low-maintenance surface for everything from garages and basements to retail spaces and industrial plants.
You’ll encounter slab-on-grade, suspended and polished types, plus overlays and decorative stained or stamped finishes. Use them for workshops, warehouses, living areas, patios and commercial flooring where strength, easy cleaning and longevity matter.
Pros and cons of DIY concrete floors
While DIY concrete floors can save you money and give you control over the finish, they also demand skill, time, and the right tools.
You’ll gain customization, lower labor costs, and satisfaction, but face risks: uneven pours, cracking, long curing, and potential costly mistakes.
Consider your experience, schedule, and willingness to learn before committing to a DIY project.
Key terms and materials (slab, vapor barrier, screed, trowel, sealer)
Think of this section as your toolbox: you’ll learn the essential terms and materials—slab, vapor barrier, screed, trowel, and sealer—that shape how your floor performs and looks.
The slab is the poured concrete base. A vapor barrier prevents moisture.
Use a screed to level wet concrete, and a trowel to finish surfaces.
Finish with a sealer to protect and enhance appearance.
Planning Your Project Assessment and Preparation
Before you start, inspect the substrate and any existing floor for cracks, moisture, and level issues so you know what repairs or prep are needed.
Measure the area precisely and calculate materials, then check local permits, building codes, and safety requirements that apply to your project.
Finally, make a tools-and-materials checklist so you’ve got everything on hand before you begin.
Inspecting the substrate and existing floor condition
Start by thoroughly inspecting the substrate and existing floor so you know what you’re working with and what repairs are required.
Check for cracks, delamination, moisture, and unevenness. Note coatings, adhesives, or contaminants that affect bonding.
Prioritize repairs and surface prep before proceeding.
- Identify defects and moisture sources.
- Assess structural soundness.
- Document coatings and contaminants.
Measuring area and calculating materials
Measure the space carefully so you order the right amount of materials and avoid costly delays. Measure length and width, note irregular shapes, and calculate square footage. Account for slab thickness when estimating volume and add a 10% waste factor. Use the table below to organize measurements and material totals.
| Item | Value | Notes |
|---|---|---|
| Length | feet | |
| Width | feet | |
| Thickness | inches | |
| Area | sq ft | |
| Volume | cu yd |
Permits, building codes, and safety considerations
Because local rules can vary widely, check permits and codes early so you don’t hit costly delays or have to redo work.
Contact your building department to confirm permit needs, inspection schedules, and required concrete specs.
Follow ventilation, dust control, and noise restrictions.
Prioritize personal protective equipment, safe lifting techniques, and clear emergency plans to protect you and your neighbors.
Tools and materials checklist
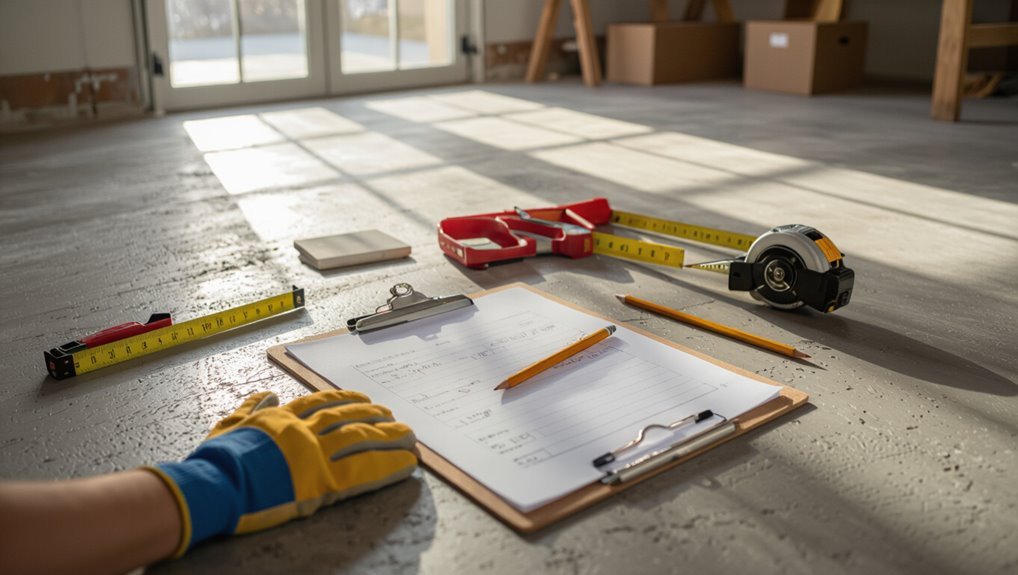
Before you order supplies, make a concise checklist of the tools, consumables, and safety gear you’ll need so you can compare costs, rental options, and delivery times.
Prioritize quality basics, estimate quantities, and plan disposal. Check local rental rates for heavy tools and verify material lead times.
- Tools: mixer, trowels, screed
- Materials: concrete, sealer, reinforcement
- Safety: respirator, gloves, eye protection
Step-by-Step Installation From Prep to Finish
You’ll start by clearing and cleaning the space to create a solid work area.
Next, you’ll repair cracks, install moisture and vapor barriers, then mix and pour the concrete or overlay.
Finally, you’ll screed, level, and consolidate the surface for a smooth, durable finish.
Step 1: Clearing and cleaning the space
Step 1: clear everything out of the room and sweep or vacuum thoroughly so dust, debris, and loose paint won’t interfere with your concrete work.
Remove furniture, hardware, and wall hangings; bag fine dust. Mop with a degreasing cleaner if needed and let dry completely before proceeding.
- Clear all items
- Remove dust and residues
- Guarantee full dryness
Step 2: Fixing cracks and repairing substrate
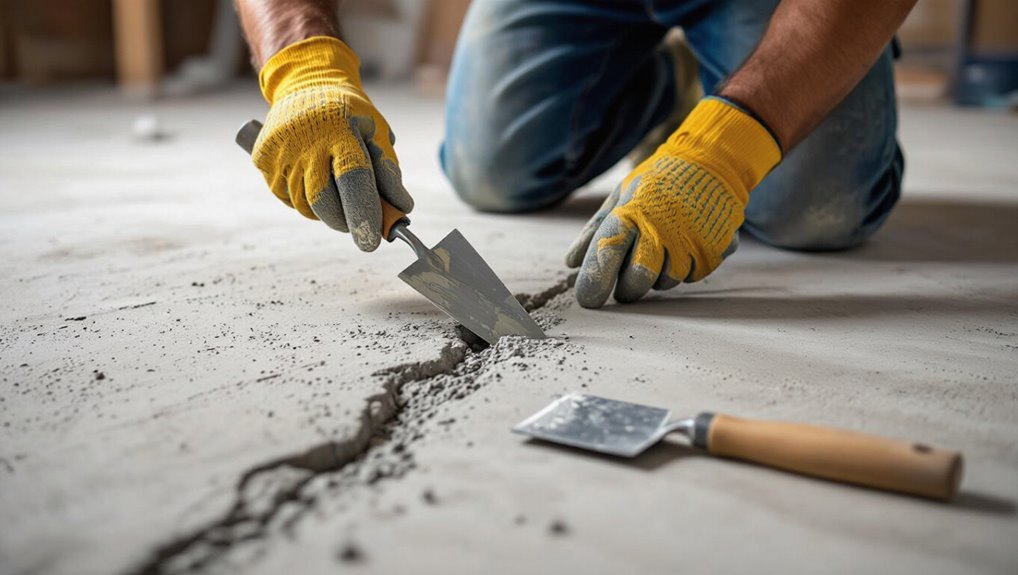
Now that the room’s clean and dry, inspect the concrete for cracks, chips, and soft spots so you can repair the substrate before any coatings go down.
Remove loose debris, widen hairline cracks with a chisel, and vacuum.
Fill cracks with suitable epoxy or polymer repair mortar, patch spalls, and level low areas with a thin cementitious overlay.
Allow full cure before proceeding.
Step 3: Installing moisture and vapor barriers
Before any coating goes down, make sure you install an appropriate moisture and vapor barrier so trapped humidity can’t ruin your new floor; proper preparation here prevents bubbling, adhesion failure, and mold.
Choose a compatible membrane or vapor-retardant primer, follow manufacturer instructions, overlap seams, seal penetrations, and tape edges.
Test moisture with a meter before proceeding to the next step.
Step 4: Mixing and pouring concrete (or overlay)
1. You’ll mix per manufacturer ratios, keeping consistency smooth but not soupy; use a drill mixer and measured water.
Pour steadily, working small areas to maintain control. Protect edges and joints.
- Measure precisely
- Maintain workable consistency
- Pour in manageable sections
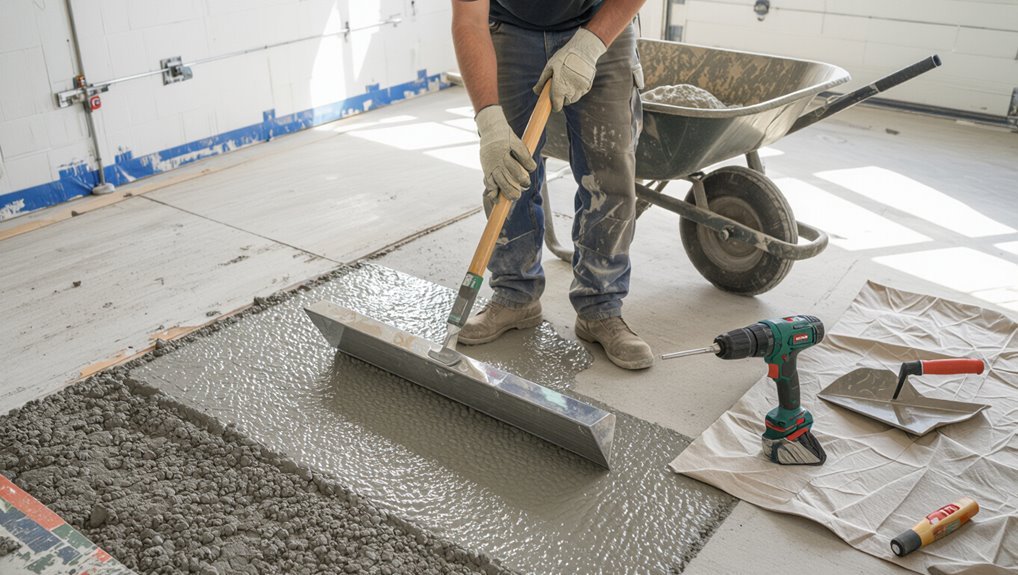
Step 5: Screeding, leveling, and consolidation
Step 5 brings the concrete into true shape: you’ll screed to establish grade, level to remove high and low spots, and consolidate to eliminate voids and bleed water.
Use a straightedge or screed board, work in overlapping passes, and strike off excess.
Follow with a magnesium float or darby to even the surface and tap with a concrete vibrator or tamping tool to close gaps before curing.
Step 6: Finishing techniques broom, trowel, stamped, polished
Once the screeding, leveling, and consolidation are complete and the surface has settled enough to hold an impression, you’ll choose and apply the finishing method that matches your design and performance goals.
Use a broom finish for traction, trowel for smoothness, stamp for patterns, or polish for sheen.
Work methodically, control timing, clean tools, and correct minor flaws before sealant.
Step 7: Curing process and timing
Curing concrete correctly is essential to achieving its designed strength and durability. You’ll need to keep the slab moist and protected for a specified period—typically at least 7 days for ordinary mixes and up to 28 days for full strength—while avoiding rapid drying, freezing, or heavy loading.
Cover with wet burlap, plastic sheeting, or use a curing compound; monitor moisture and temperature, and delay heavy traffic until strength targets are met.
Step 8: Applying stains, dyes, and decorative treatments
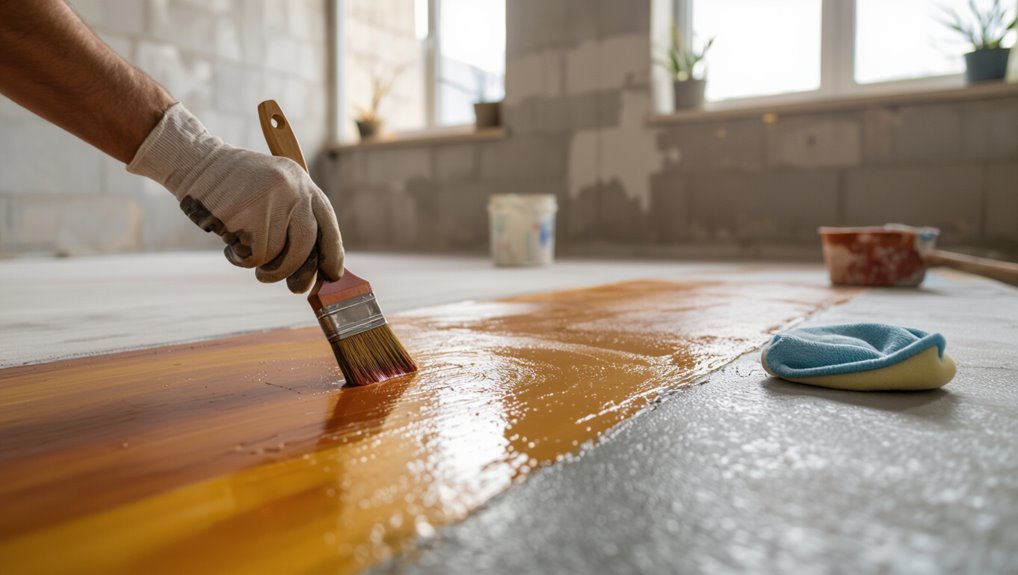
With the slab properly cured and protected, you can start adding color and character to the surface.
Choose between acid stains for variegated tones, water-based dyes for vivid hues, or pigmented overlays for designs.
Test samples first, work in small sections, and follow manufacturer instructions for dilution and application.
Use rags, sprayers, or brushes to blend and create desired effects.
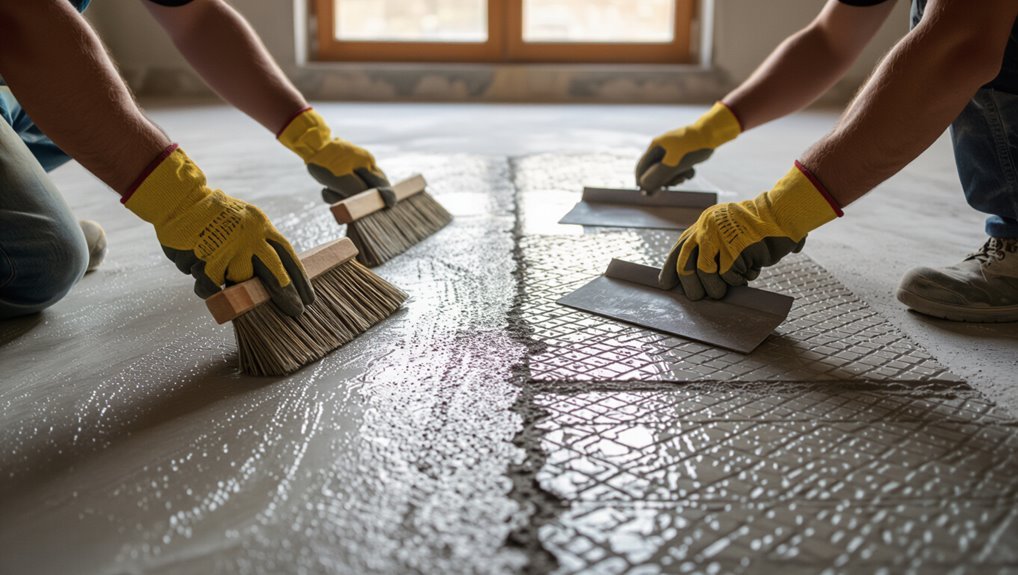
Step 9: Sealing and topcoats types and application
After your decorative treatments are dry and you’ve removed any dust or residues, it’s time to choose and apply the right sealer and topcoat to protect appearance and durability.
Select penetrating sealers for matte look, film-forming acrylics or polyurethanes for gloss and chemical resistance.
Test first, apply thin even coats with a roller, allow proper cure between coats, and ventilate well.
Variations and Alternatives Choose the Right Method
Now you’ll weigh variations like a thin concrete overlay versus a full pour to match your budget, thickness needs, and substrate condition.
You’ll also consider finishes—polished concrete for a sleek look, stained or acid-dyed for rich color, or decorative touches like exposed aggregates, stencils, and epoxy overlays.
Each method has different prep, tools, and durability, so pick the one that fits your skill level and planned use.
Concrete overlay vs full pour
When deciding between a concrete overlay and a full pour, you’ll weigh cost, thickness, installation time, and the condition of the existing slab; overlays work well for resurfacing or cosmetic upgrades, while full pours replace damaged slabs or create new, load-bearing floors. Choose overlay for thin cosmetic fixes; choose full pour for structural needs.
| Overlay | Full pour |
|---|---|
| Thin, cheaper | Thick, costly |
| Quick, cosmetic | Durable, structural |
Polished concrete workflow
If you’re weighing overlays against full pours, you’ll also want to contemplate how the surface gets finished — polished concrete offers a different set of workflows and outcomes.
You’ll prep by grinding to expose aggregate, repair cracks, densify with a chemical hardener, then progressively polish with finer diamond pads.
Finish choices, sheen levels, and sealers affect durability and maintenance, so plan steps and equipment carefully.
Stained/acid-dyed concrete workflow
Choose the staining method that matches your design goals and substrate condition, because acid dyes and water-based stains behave differently and require distinct prep and safety steps.
Test small areas, then clean, etch, or neutralize as required.
Apply stain evenly, work in sections, blot runs immediately, and allow proper drying.
Seal with compatible sealer and follow manufacturer cure times for durability and maintenance.
Decorative options: aggregates, stencils, epoxy overlays

Texture and color options like exposed aggregates, stenciling, and epoxy overlays let you tailor concrete to the look and performance you want; pick the technique that matches traffic, substrate condition, and maintenance tolerance.
You’ll expose or broadcast aggregates for texture, use stencils for patterns, or apply epoxy overlays for durability and color.
Assess prep, bonding, and finish requirements before choosing.
Common Problems and How to Fix Them
You’ll run into issues like cracking, crazing, and hairline fractures, and you’ll need to know when to repair versus replace the damaged area.
Prevent and correct uneven finishes and trowel marks, diagnose moisture and efflorescence, and address adhesion failures with overlays or coatings.
I’ll walk you through causes, quick fixes, and when to call a pro.
Cracking, crazing, and hairline fractures causes and repairs
When small cracks, crazing patterns, or hairline fractures show up in your concrete floor, they usually point to one or more mix, curing, or substrate issues that you can diagnose and address; knowing the cause narrows your repair options and helps prevent recurrence.
Inspect for plastic shrinkage, rapid drying, poor consolidation, or settlement.
Repair with epoxy or flexible filler, reprofile edges, and improve curing and jointing practices.
Uneven finish and trowel marks prevention and correction
Uneven finishes and visible trowel marks come from inconsistent finishing speed, improper blade angle, or overworking the surface while the slab’s still too wet or too dry.
So you need to identify the timing and technique errors before repairing.
To fix, lightly re-float with correct blade angle, feather edges, or grind high spots.
Prevent recurrence by practicing steady passes, adjusting mix slump, and timing your finish.
Moisture and efflorescence issues diagnosis and solutions
Surface texture and timing aren’t the only finish threats—you also need to spot and stop moisture and efflorescence problems that can damage look and performance.
Test moisture with a plastic sheet or RH meter, fix leaks, improve drainage and ventilation.
Remove efflorescence by dry brushing or mild acid wash, then allow full drying.
Use vapor barriers or moisture-tolerant sealers before finishing.
Adhesion failures with overlays or coatings
If an overlay or coating peels, bubbles, or flakes off, it usually means the substrate, prep, or product choice was wrong for the job.
You should remove failed material, diamond grind to sound concrete, fix cracks, and test for moisture and contaminants.
Choose compatible primers and coatings, follow manufacturer cure times, and guarantee proper ambient conditions.
Reapply only after proper prep and testing.
Best Practices and Pro Tips
Keep an eye on timing, temperature, and weather so your pour and cure go smoothly.
Pick a sealer that matches your traffic and maintenance plan, and follow a realistic schedule to protect your work.
Use cost-saving strategies that don’t cut safety—wear protective gear and use ergonomic tools to avoid injuries.
Timing, temperature, and weather considerations
When you schedule your pour, plan around temperature swings and forecasted moisture so the concrete cures evenly and attains full strength; extreme heat speeds evaporation and can cause cracking, while cold delays hydration and risks freeze damage.
Aim for 50–70°F for 48–72 hours post-pour, shield from wind and sun, use wet curing or curing compounds, and delay traffic until strength tests confirm readiness.
Choosing the right sealer and maintenance schedule
Although picking a sealer can feel technical, focus first on the concrete’s use and exposure—high-traffic or exterior slabs need tougher, breathable sealers while decorative indoor floors can use glossier, denser films.
Match the sealer type (penetrating, film-forming, or topical) to wear, UV, and moisture conditions, then schedule reapplication based on manufacturer guidance and observed performance.
- Inspect annually.
- Clean before recoat.
- Address wear spots immediately.
Cost-saving tips without compromising quality
If you plan ahead and prioritize tasks, you’ll cut costs without sacrificing durability or finish—buy quality materials in bulk for core supplies, schedule work to avoid rush labor, and tackle prep and simple repairs yourself while leaving specialized steps (like polishing or major patching) to pros.
Compare product performance per unit, rent rather than buy occasional tools, reuse forms when possible, and follow manufacturer coverage rates to avoid waste.
Safety tips and ergonomic practices for DIYers
Saving money matters, but so does keeping yourself safe and working smart—proper safety and ergonomic practices prevent injuries that would erase any cost savings.
Wear respirator, goggles, gloves, knee pads, and steel-toe boots. Use mechanical aids, lift with legs, and take regular breaks.
Keep workspace tidy, ventilated, and well-lit. Know emergency procedures and avoid rushing; your body is your most valuable tool.
Tool and Product Comparison Guide
You’ll compare mixing equipment—hand mixers for small batches versus mortar mixers for larger jobs—to match your project size and effort.
Then weigh finish tools, since a steel trowel, magnesium float, and power trowel each give different textures and labor requirements.
Finally, pick a sealer or coating by pros and cons: acrylic for budget and UV resistance, polyurethane for abrasion and chemical resistance, or epoxy for durability and adhesion.
Mixing equipment: hand mixer vs mortar mixer
Deciding between a handheld paddle mixer and a mortar (pan) mixer comes down to the size of your job, how often you’ll mix, and how much effort you want to put in—hand mixers suit small batches and touch-ups, while mortar mixers handle larger volumes faster and with less strain. You’ll choose based on volume, portability, and budget.
| Mixer Type | Best Use |
|---|---|
| Handheld | Small batches, repairs |
| Mortar (pan) | Large pours, frequent mixing |
Finish tools: steel trowel vs magnesium float vs power trowel
Once your mix is ready and poured, the tools you pick will determine the surface quality and how much finishing work you’ll need afterward. You’ll use a magnesium float for open texture, a steel trowel for smooth dense finish, and a power trowel for large areas. Compare quickly:
| Tool | Scale | Result |
|---|---|---|
| Magnesium float | Small/hand | Matte, textured |
| Steel trowel | Small/hand | Smooth, dense |
| Power trowel | Large/machine | Uniform, fast |
Sealers and coatings comparison: acrylic vs polyurethane vs epoxy
Although each sealer type protects concrete, choosing between acrylic, polyurethane, and epoxy changes appearance, durability, and maintenance needs. You’ll pick acrylic for quick, affordable gloss; polyurethane for UV resistance and toughness; epoxy for chemical resistance and thickness. Match sealer to use, traffic, and look.
| Type | Feel | Best for |
|---|---|---|
| Acrylic | Warm | Light traffic |
| Polyurethane | Confident | Sunlit areas |
| Epoxy | Secure | Garages and workshops |
Estimated Cost and Time Breakdown
You’ll get ballpark material costs for common room sizes—like a 10×10, 12×12, and garage—so you can budget accurately.
I’ll outline typical DIY time per stage (prep, pour, cure, finish) so you know what to schedule.
Then we’ll note when hiring pros makes sense and how that changes total cost.
Material cost examples for common room sizes
For common room sizes—like a 10×10 bedroom, a 12×12 kitchen, or a 20×20 living area—this section breaks down typical material costs and how long each stage will take so you can budget and schedule accurately. You’ll see cement, primer, sealant, and additives listed with rough costs and stage durations to plan purchases and timelines.
| Item | Estimate |
|---|---|
| 10×10 materials | $120–$220 |
| 12×12 materials | $180–$320 |
| 20×20 materials | $480–$800 |
| Typical stages time | 2–5 days |
Labor time estimates for DIY stages
When planning labor for a DIY concrete floor, break the project into discrete stages—prep, pouring/patching, finishing, curing, and sealing—so you can assign realistic hours and costs to each.
Most homeowners handle a 10×10 room in a weekend of active work but should budget several additional days for curing and cleanup.
Expect roughly:
- prep 4–8h
- pour 2–4h
- finish 4–6h
- seal 2–3h
Plus passive curing time.
When professional help changes the cost picture
Although hiring a pro raises your upfront bill, it can cut total time and risk—you’ll pay for labor, expertise, and equipment, but save hours on prep and finishing and avoid costly mistakes.
You’ll trade DIY hours for predictable schedules and warranty coverage.
Compare bids: itemize labor, materials, sealing, and cleanup.
Factor travel, disposal, and potential delays to gauge true cost and value.
Maintenance and Longevity
Keep your concrete floors looking great with simple routine cleaning and prompt stain removal to prevent permanent damage.
Watch for dulling or water absorption and reseal or refinish before the surface shows wear.
With regular care and timely touch-ups, you’ll extend the floor’s lifespan and preserve its appearance.
Routine cleaning and stain removal
A regular cleaning routine will keep your concrete floors looking great and extend the life of any sealer or finish you’ve applied; tackle dirt, grit, and spills before they embed or cause wear.
You should sweep/dust daily, mop with pH-neutral cleaner weekly, and address stains immediately with appropriate cleaners.
- Sweep/dust daily
- Mop weekly (pH-neutral)
- Spot-treat stains promptly
When to reseal or refinish
Regular cleaning will protect your sealer, but wear still adds up—so plan to reseal or refinish once you notice signs of breakdown rather than waiting for obvious damage.
Check annually for dullness, water beading failure, increased staining, or surface abrasion. High-traffic areas may need attention sooner.
Test a small patch to confirm adhesion and choose appropriate sealer or finish based on existing coating and usage.
Extending lifespan and preserving appearance
If you want your concrete floors to look good and last, follow a few simple maintenance habits: sweep and dust-mop daily, clean spills promptly, use pH-neutral cleaners, and avoid harsh chemicals.
Place mats at entrances, use felt pads under furniture, and reapply sealer every 2–5 years depending on wear.
Inspect for cracks and repair promptly to prevent moisture damage and staining.
Frequently Asked Questions
You probably have a few quick questions before you start, like how long a DIY concrete floor takes and whether you can overlay tile or wood.
You’ll also want to know if polishing is realistic for a DIYer, which sealer holds up in high-traffic areas, and how to prevent basement moisture issues.
Below are clear, practical answers to each.
How long does a DIY concrete floor take to complete?
How long will your DIY concrete floor take from start to finish? It typically spans several days to a few weeks.
Prep and framing take a day or two, pouring and finishing one to two days, and initial cure 24–48 hours before light use.
Full strength and sealing require 7–28 days depending on mix and conditions.
Plan extra time for repairs or unexpected delays.
Can I install a concrete overlay over tile or wood?
Wondering whether you can lay a concrete overlay over existing tile or wood? Yes — often you can, but proper prep is critical.
Remove loose tiles, fill gaps, sand glossy surfaces, and guarantee structural stability. Use a bonding primer or a latex-modified overlay designed for adhesion to substrates.
Follow manufacturer instructions for curing and thickness to avoid cracking or delamination.
Is polishing concrete a DIY-friendly task?
Curious whether polishing concrete is something you can tackle yourself? Yes—if you’re prepared to rent proper equipment, learn grit progression, and invest time for prep and safety.
Small areas and basic finishes suit DIYers; large or heavily damaged floors may need pros.
Start with practice, follow manufacturer guidance, and don’t rush cutting, grinding, or burnishing steps for best results.
What sealer is best for high-traffic areas?
Which sealer will hold up best under constant foot traffic and wear?
For high-traffic areas, choose a high-solids, two-component epoxy or a polyurethane sealer.
Epoxy offers excellent abrasion and chemical resistance; polyurethane adds superior UV and scratch resistance.
Apply per manufacturer’s instructions, guarantee proper surface prep, and allow full cure before use.
Recoat as needed to maintain protection and appearance.
How do I prevent moisture problems in basement concrete floors?
If you want to keep basement concrete dry and odor-free, start by controlling water at and below the slab: fix exterior grading and gutters, install exterior drains or a sump pump where needed, and seal cracks and joints with appropriate hydraulic cement or urethane injections.
Inside, use a vapor barrier under new slab, apply a moisture-mitigating primer before coatings, and guarantee good interior ventilation and dehumidification.