How Much Does It Cost to Install Heated Floors? Full Pricing Guide
You’ll typically pay $5–$20+ per square foot to install heated floors, depending on system type, labor, and project complexity. Electric mats or cables are cheapest for small retrofits, often $3–$12/ft² with DIY options lower, while hydronic systems cost more upfront—materials, tubing, pumps, and higher labor push prices higher, especially for whole-home installs. Insulation, thermostat upgrades, and regional rates affect totals. Keep reading for a full breakdown, cost drivers, and tips to save.
How Much Does It Cost to Install Heated Floors? Quick Answer
You can expect heated floors to run roughly $5–$12 per square foot on the low end, about $12–$20/sq ft for typical projects, and $20+/sq ft for high-end or complex installs.
Major cost drivers are materials (electric mats vs. hydronic systems), labor, your location, and whether you’re retrofitting or building new.
Keep these factors in mind as we break down what influences the final price.
Typical cost ranges (low, average, high)
Expect wide price variation: low-end DIY electric mats can start around $3–$8 per square foot, typical professional installations land in the $8–$20/ft² range, and high-end hydronic systems or major remodels can push costs to $20–$40+/ft² once labor, controls, and new flooring are included.
| Range | Example |
|---|---|
| Low | DIY electric mats |
| Average | Professional electric |
| High | Hydronic systems |
Cost drivers at a glance (material, labor, location, installation type)
Four main factors drive heated-floor costs: materials (electric mats, loose wire, or hydronic tubing), labor (installation complexity and electrician/plumber rates), location (climate, accessibility, and local labor prices), and installation type (new construction, retrofit, or tile/wood-specific methods).
You’ll choose based on budget, existing floor, and desired efficiency — each shifts total price markedly.
- Materials
- Labor
- Location
- Installation type
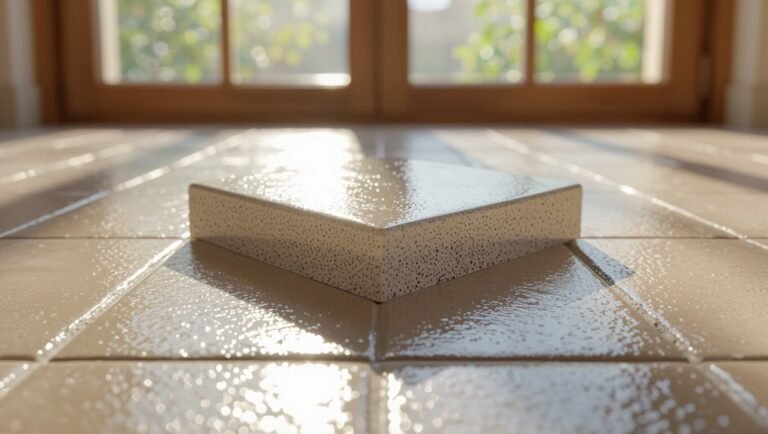
What Are Heated Floors and Why Choose Them?
Heated floors use either electric mats or cables and hydronic tubing to warm your rooms from the ground up.
You’ll enjoy even, efficient warmth that boosts comfort, can lower energy use, and may raise your home’s resale appeal.
They make the most sense in tile or stone rooms, basements, bathrooms, or in colder climates where consistent, radiant heat pays off.
Types of heated flooring systems (electric vs hydronic)
When you’re choosing between electric and hydronic systems, think about how you’ll use the space, your budget, and installation constraints. Electric mats suit small areas and retrofit installs; hydronic systems work best for whole-home projects and lower long-term operating costs.
| System | Best for | Installation |
|---|---|---|
| Electric | Bathrooms | Thin, quick |
| Hydronic | Whole floors | Deeper, plumber |
| Hybrid | Mixed zones | Custom work |
Benefits of heated floors (comfort, efficiency, resale value)
If you want warmth that feels natural underfoot and cuts cold spots, radiant floor systems deliver both comfort and efficient heat distribution.
You’ll enjoy steady, draft-free warmth, lower operating costs versus forced air, improved indoor air quality, and stronger resale appeal.
Consider these benefits:
- Consistent, cozy heat
- Energy-efficient operation
- Cleaner indoor air
- Increased home value
When heated floors make sense (room types and climates)
Because they target the floor where people stand and sit, radiant systems make the most sense in rooms where you want steady, hands-on warmth—bathrooms, kitchens, mudrooms, and basements are prime candidates—while colder climates or homes with high heat loss also benefit more from underfloor heat than mild, well-insulated regions.
You’ll also favor heated floors in tile or stone rooms, high-traffic entryways, and renovation zones where ductwork isn’t practical.
Cost Breakdown by System Type
You’ll compare electric and hydronic systems by looking at typical materials and labor costs for each.
I’ll also point out how prices change for retrofits versus new construction and give cost-per-square-foot and per-room examples.
That way you can see which setup fits your budget and project.
Electric radiant floor heating materials and labor costs
When comparing electric radiant floor systems, you’ll find material and labor costs vary widely by type—loose-fill cable, pre-spaced mats, and thin-film panels each bring different price points and installation effort. You’ll pay more labor for cable layout, moderate for mats, and less for thin film. Choose based on floor type, access, and budget.
| Type | Materials | Labor |
|---|---|---|
| Cable | $$ | High |
| Mats | $$$ | Moderate |
Hydronic (water-based) radiant heating materials and labor costs
Hydronic radiant systems circulate warm water through tubing in the floor, and their material and labor costs depend on the system type you choose—embedded slab, thin-slab/overpour, or staple-up/flush-floor in a retrofit. You’ll pay more for embedded slabs; thin-slab balances cost and performance; staple-up is cheapest for accessible joists. Consider manifold, pump, and installation complexity.
| Item | Typical Cost |
|---|---|
| Tubing | $1–$3/ft |
| Manifold | $200–$800 |
| Pump/Boiler | $800–$4,000 |
| Labor | $4–$12/sq ft |
| Overpour/slab | $6–$15/sq ft |
Cost differences for retrofit vs new construction
Retrofits usually cost more per square foot than new construction because you’re working around existing finishes, joists, and obstructions, while new builds let installers integrate tubing or electric mats directly into the subfloor or slab. You’ll pay for demo, height adjustments, and access. New construction saves time and labor but adds slab or embedding costs.
| Scenario | Main extra cost | Typical benefit |
|---|---|---|
| Retrofit | Demo & access | Minimal disruption |
| New build | Embedding slab | Better efficiency |
| Both | Materials | Varies by system |
Cost per square foot vs per room examples
You’ll usually see costs quoted two ways—per square foot for precise budgeting and per room for quick estimates—so it helps to understand both what each number includes and which better fits your project. Use per‑sqft for layouts and material takeoffs; use per‑room for quick quotes. Compare examples below.
| System | Per sq ft | Typical per room |
|---|---|---|
| Electric mat | $8–$15 | $300–$900 |
| Hydronic | $6–$12 | $400–$1,200 |
Detailed Cost Factors (What Affects the Price)
Before you pick a system, consider the specific factors that drive price: the condition and type of your floor (including subfloor prep, removal, and any height build-up), whether you add insulation or other energy-efficiency upgrades, and the cost of thermostats, controls, and zoning.
For hydronic systems also account for plumbing, manifolds, and potential boiler or boiler-upgrade expenses.
Finally, labor rates, permits, and regional price variation can shift the total considerably.
Floor surface and preparation (subfloor, removal, height build-up)
Because a heated floor system has to sit on a stable, level surface, the condition and type of your existing subfloor strongly influence labor and material costs.
If you need old flooring removed, joists repaired, or uneven concrete leveled, expect higher charges.
Raising floor height to accommodate mats or wiring adds materials and trim work.
Prep complexity directly raises installation time and price.
Insulation and energy-efficiency upgrades
While good insulation won’t lower your upfront installation cost much, it can cut long-term energy bills and sometimes changes what kind of system you should choose.
Adding under-floor insulation, subfloor barriers, or higher-R attic and wall insulation raises material and labor costs but improves heat retention.
You’ll recoup expenses through lower energy use; factor payback time into your budget decisions.
Thermostats, controls, and zoning
Choosing thermostats, controls, and zoning can sharply affect both your installation cost and ongoing energy bills.
You’ll pay more for smart, programmable thermostats and multi-zone controllers, but they let you target rooms, reduce waste, and optimize comfort.
Simpler manual thermostats cost less up front but may raise long-term bills.
Factor wiring, sensor locations, and installer time into your budget.
Plumbing, manifolds, and boiler/boiler upgrade needs (hydronic)
After you pick controls and zones, you’ll need to plan the hydronic plumbing: piping layout, manifolds, pumps, and whether your boiler can handle the extra load.
You’ll size loop lengths, select manifold locations for balanced flow, and choose circulator pumps and mixing valves.
If your boiler lacks capacity or modulation, factor in replacement or upgrade costs to maintain system efficiency and reliable heating performance.
Labor rates, permit costs, and regional price variation
Labor rates, permit fees, and regional pricing can swing your heated-floor bill by thousands, so you should factor them in early.
Labor hourly rates vary widely; urban areas and certified installers cost more. Permit fees depend on local codes and can add several hundred dollars.
Travel, local labor supply, and inspection schedules also affect timelines and total cost, so get multiple local quotes.
Material quality and brand premiums
While you can buy budget-friendly mats and cables, premium brands and higher-grade materials considerably raise the upfront price—often for better durability, warranty coverage, and performance consistency.
You’ll pay more for thicker heating elements, superior insulation, and certified components. That premium often reduces long-term maintenance and energy waste, so weigh immediate cost against expected lifespan, warranty terms, and reliable temperature control.
Step-by-Step Cost Estimation Guide (How to Estimate for Your Home)
Start by measuring the floor area to find usable heated square footage. Then decide whether electric or hydronic systems and which components suit each space.
Get multiple line-item quotes so you can compare materials, labor, and extras, and factor in operating costs to estimate payback time.
For example, calculate separately for a 100 sq ft electric bath and a 500 sq ft hydronic living room to see total upfront and long-term costs.
Step 1: Measure the area and determine usable heated square footage
Before you pick a system, measure the room and mark out the actual usable floor area you’ll heat — exclude built-ins, cabinets, and areas under permanent fixtures where mats or cables can’t go.
Use a tape measure, sketch layout, and subtract unusable zones to get heated square footage. This gives accurate material and labor estimates.
- Measure length and width
- Sketch obstacles
- Subtract exclusions
- Calculate total sqft
Step 2: Choose system type and components
Now that you’ve nailed the usable heated square footage, pick the system and components that match your budget, floor type, and heating goals.
Decide between electric mats/cables for thin floors or hydronic tubing for larger areas.
Choose thermostat type (programmable, smart), wiring, insulation, and any subfloor prep.
Factor material quality and warranty—these drive performance and cost.
Step 3: Get quotes and compare line-item estimates
Get at least three detailed quotes so you can compare real, line-by-line costs instead of vague totals.
Review labor, materials, controls, and permits; ask about warranties and timeline.
Don’t accept one-page estimates—request breakout pricing and clarify exclusions.
- Labor hours and rates
- Material types and quantities
- Permit and inspection fees
- Warranty and service terms
Step 4: Factor in operating costs and payback period
Because installation is only half the cost, you should estimate annual operating expenses and how long it’ll take to recover your investment. Calculate energy use, local rates, and expected run hours; include maintenance and potential savings from thermostat control. Use a simple table to compare scenarios and payback timelines.
| Item | Annual Cost | Payback (yrs) |
|---|---|---|
| Energy | $X | Y |
| Maintenance | $X | — |
| Savings | -$X | Z |
Example calculation: 100 sq ft bathroom (electric) and 500 sq ft living room (hydronic)
Let’s walk through a concrete estimate for a 100 sq ft electric bathroom and a 500 sq ft hydronic living room so you can see how materials, labor, and energy stack up; I’ll show assumptions and calculations step by step.
For the bathroom: $15/sq ft material+installation = $1,500; energy ~$50/year.
For the living room: hydronic $25/sq ft = $12,500; boiler tied costs ~$1,500.
Total ≈ $15,050.
Comparing Options: Electric vs Hydronic vs Alternatives
You’ll compare performance and efficiency, weigh installation complexity and timelines, and figure which system fits each room and budget.
Electric mats are quick to install and cost less up front but can be pricier to run, while hydronic systems are more efficient long-term but need more work and time to install.
We’ll also look at alternatives and room-by-room recommendations so you can pick the best option for your needs.
Performance and efficiency comparison
How do heated-floor systems really stack up when it comes to performance and efficiency? You’ll feel electric mats heat fast but cost more long-term; hydronic runs slower, holds heat, and saves on big installations; alternatives vary. Choose based on room use and energy rates.
| Option | Emotion |
|---|---|
| Electric | Immediate comfort |
| Hydronic | Cozy, economical |
| Alternatives | Curious, cautious |
Installation complexity and timeline comparison
Because installation methods differ so much, you’ll want to weigh how invasive each system is and how long the job will take. Electric mats are quick, minimal disruption; hydronic needs more work and plumbing; retrofit options vary. Compare at a glance:
| System | Typical timeline |
|---|---|
| Electric | 1–2 days |
| Hydronic | 3–7 days |
| Retrofit | 1–5 days |
| Radiant air | 2–4 days |
Best choice by room and budget
Whether you’re renovating a small bathroom on a tight budget or outfitting a whole-house remodel, pick the system that matches the room’s size, floor type, and your spending limits:
Electric mats work best for single rooms and straightforward retrofits because they’re cheap to install and heat quickly; hydronic systems pay off for large areas or new construction where long-term energy savings matter despite higher upfront and installation costs.
Alternatives like heated baseboards or radiant air can be practical where floor changes aren’t possible or when you need faster, lower-cost warmth in open spaces.
- Bathroom: electric mats
- Whole house: hydronic
- Retrofit: heated baseboards
- Open spaces: radiant air
Common Installation Scenarios and Estimated Costs
When planning heated floors, you’ll want to look at a few common scenarios—like a small tiled bathroom retrofit, a full-floor replacement in an existing home, a whole-house install in new construction, and basement or slab-on-grade projects—because each has different scopes and price ranges.
For each case I’ll summarize typical scope, materials, labor, and ballpark costs so you can compare what to expect.
Next, we’ll go through the specific considerations and estimated costs for each scenario.
Small bathroom retrofit (tile) typical scope and cost
For a small tile bathroom retrofit, you’ll typically remove the old tile, inspect and possibly replace the subfloor, lay the heating mat or cable, and reinstall tile — a scope that usually takes a contractor one to three days of on-site work.
Expect materials and labor to run roughly $800–$2,500 depending on mat vs. cable, thermostat quality, subfloor repairs, and local labor rates.
Full-floor replacement in existing home typical scope and cost
A full-floor replacement in an existing home typically means tearing out the current floor down to the subfloor, addressing any rot or leveling issues, installing underfloor heating (mat, cable, or hydronic tubing), and then putting down new finished flooring.
This process commonly takes several days to a week and costs markedly more than a localized retrofit.
You’ll pay for demo, repairs, materials, labor, and possible electrical or plumbing upgrades.
New construction whole-house install typical scope and cost
New-construction whole-house installs generally let you integrate heated floors into the design from the start, which cuts labor and retrofit headaches and often lowers per-square-foot costs compared with retrofits.
You’ll coordinate with builders and HVAC/plumbing for electric or hydronic systems, run manifolds and wiring during framing, choose insulation and controls, and expect faster install timelines and bulk-material savings versus piecemeal retrofits.
Basement and slab-on-grade specific considerations
When you move from whole-house installs to basement or slab-on-grade projects, different constraints and costs show up.
You’ll face insulation and moisture barriers, thicker slabs for tubing or conduits, and possible concrete cutting.
Electric systems can be simpler but may need higher amperage; hydronic installs require embedded manifolds and freeze protection.
Expect higher labor and material costs per square foot than typical upstairs rooms.
Typical Mistakes and Costly Pitfalls to Avoid
Don’t underestimate how much subfloor prep and insulation affect performance and long-term costs.
Make sure the system you choose matches your floor covering, and don’t skimp on controls or zoning if you want efficient heating.
Also verify contractor qualifications and warranties so you’re not stuck with costly fixes later.
Underestimating subfloor prep and insulation needs
Because heated floors rely on even heat transfer, skimping on subfloor prep and insulation usually creates bigger problems down the road.
You’ll get uneven warmth, slower heat-up times, and higher energy bills if gaps, moisture barriers, or inadequate insulation aren’t addressed.
Budget for leveling, vapor barriers, and proper underlayment—doing it right now prevents costly repairs, poor performance, and warranty voids later.
Mismatching system type to floor covering
If you pick the wrong type of heating—like pairing a low-output electric mat with thick engineered wood—you’ll lose efficiency, risk floor damage, and may void warranties.
Match system heat output and response time to your floor material. Tile and stone handle high temps; wood needs lower, evenly distributed heat.
Always check manufacturer limits, installation specs, and consult pros to avoid costly replacements.
Skimping on controls or zoning
When you cut corners on controls or skip zoning, you’ll pay for it in wasted energy, uneven comfort, and higher long-term bills.
Without proper thermostats, sensors, and separate zones, you’ll heat empty rooms, struggle to balance temperatures, and lose efficiency.
Invest in programmable thermostats and sensible zoning from the start to reduce runtime, lower operating costs, and improve overall comfort.
Ignoring contractor qualifications and warranties
Neglecting contractor qualifications and warranties can turn a smart investment in heated floors into an expensive headache. You’ll be left paying for mistakes that a licensed pro would have avoided.
Always verify licenses, insurance, and references, and get written warranties covering labor and materials. Without proper credentials and guarantees, you’ll face costly repairs, voided manufacturer warranties, and little recourse if problems arise.
Best Practices and Money-Saving Strategies
To save on both installation and long-term costs, prioritize good insulation and make sure your system is installed correctly from the start.
Use zoning and programmable thermostats to limit running time, weigh DIY against hiring a pro for complexity and warranty reasons, and check rebates, incentives, or financing that can lower upfront costs.
I’ll outline practical steps and questions to help you choose the most cost-effective approach.
Prioritize insulation and proper installation
Because proper insulation and installation determine how efficiently your heated floors perform, prioritize them before choosing systems or materials.
Seal subfloors, add underlayment and appropriate insulation to minimize heat loss, and guarantee installers follow manufacturer specs and local codes.
Proper layout, spacing and secure connections prevent hotspots and failures.
Investing here cuts energy use, extends system life, and reduces costly repairs.
Use zoning and programmable thermostats to limit operating costs
Once your insulation and installation are sorted, you can further cut operating costs by zoning your heated floors and using programmable thermostats.
Zone high-usage areas separately so you heat only occupied rooms. Set schedules and lower night or away temperatures, and use smart thermostats for remote control and learning.
This reduces runtime, improves comfort, and trims energy bills without sacrificing warmth.
When to DIY vs hire a pro
Deciding whether you should DIY or hire a pro depends on your skills, the system type, and local code requirements.
If you’re comfortable with electrical work and thin-set installations, you can save on labor by DIYing simpler projects.
Hire a licensed electrician or plumber for hydronic systems, complex wiring, or permits.
Factor time, warranty protection, and risk tolerance before deciding.
Rebates, incentives, and financing options
If you choose to hire a pro or tackle the job yourself, don’t overlook rebates, incentives, and financing that can greatly lower upfront costs.
Check federal, state, and utility rebates for energy-efficient systems, ask installers about manufacturer offers, explore zero-interest or home-equity loans, and consider tax credits.
Compare terms and stack savings where allowed to minimize net expense.
- Utility rebates
- Manufacturer offers
- Low-interest loans
- Tax credits
Maintenance, Operating Costs, and Lifespan
You’ll want to know how much energy heated floors use and what that translates to in monthly bills so you can budget accurately.
Compare maintenance needs—electric systems are mostly hands-off while hydronic systems may need occasional pump, manifold, or boiler service.
Also check expected lifespans and warranties, since electric mats often last decades with long warranties and hydronic components can vary depending on quality and maintenance.
Typical energy use and estimated monthly operating cost
Because heated floors warm a room from the ground up, they often run more efficiently than forced-air systems and can lower your thermostat setting without sacrificing comfort. You’ll typically see 30–60 watts per square meter for electric mats; hydronic varies by boiler efficiency. Estimated monthly cost depends on usage, local rates, and insulation.
| System | Power use | Approx. monthly cost |
|---|---|---|
| Electric | 30–60 W/m² | $10–$50 |
| Hydronic | Varies | $8–$40 |
| Insulation impact | High | Reduces cost |
Maintenance needs for electric vs hydronic systems
Lower monthly bills are only part of the story; maintenance needs, operating quirks, and expected lifespan will shape the true cost of heated floors.
Electric systems need virtually no routine upkeep—occasional thermostat checks suffice.
Hydronic systems require periodic boiler servicing, pump inspections, and fluid checks or flushing.
You’ll face higher maintenance time and potential repair costs with hydronic installations compared to simple electric setups.
Expected lifespan and warranty considerations
When weighing long-term value, consider both how long each system typically lasts and what the warranty actually covers.
Electric mats often last 25–30 years with minimal upkeep; hydronic boilers and tubing can exceed 30 years but need periodic servicing.
Check warranty length, what’s excluded (flooring, labor, damage), transferability, and required maintenance to keep coverage valid so you won’t face unexpected costs.
How to Get Accurate Quotes and Choose a Contractor
When getting quotes, ask for a detailed written estimate that breaks out materials, labor, timeline, and warranty so you can compare offers side-by-side.
Watch for red flags like vague scopes, unusually low bids, or contractors who pressure you to decide immediately.
Use a simple checklist—licensed and insured, reference checks, written estimate, payment schedule, and permit responsibility—to make sure quotes are reliable.
What to ask for in a written estimate
Curious how to tell a good bid from a vague one? Ask for scope, materials, labor hours, timeline, payment schedule, warranty, permit responsibility, and cleanup.
Get itemized costs and model numbers. Confirm change-order terms and inspection details are written.
- Scope and line-item breakdown
- Materials with brands/models
- Timeline and milestones
- Warranty and change-order terms
Red flags in bids and contractor selection
If a bid feels rushed, vague, or unusually low, don’t ignore it—those are common red flags that can cost you time and money.
Check for missing licenses, no insurance proof, unclear scope, or only cash requests.
Beware contractors who pressure for immediate decisions, lack references, or give changing timelines and prices.
Trust firms with transparent contracts, documented warranties, and verifiable reviews.
Checklist for receiving reliable quotes
Spotting red flags is only the first step; now you need a practical checklist to get reliable, comparable quotes.
Use this when contacting contractors so you can compare apples to apples and avoid surprises.
- Project scope, materials, and system type specified
- Labor hours, rates, and subcontractors listed
- Permits, inspection, and warranty details included
- Clear payment schedule and change-order terms
FAQ
You’ll likely have a few practical questions before you decide, like how long installation takes and whether running heated floors will bump your energy bills.
You might also wonder if they work under hardwood or carpet, if they’re safe for kids and pets, and whether you need special flooring materials.
I’ll answer each of these clearly so you can choose with confidence.
How long does installation typically take?
How long it takes to install heated floors depends on the system and the room size: electric mats in a single bathroom can be installed and ready in a day, while a full-house hydronic system often takes several days to a couple of weeks including subfloor work, plumbing, and commissioning.
Expect prep, tile or flooring reinstall, and final testing; plan for scheduling and inspections.
Will heated floors increase my energy bills?
Curious whether heated floors will raise your energy bills? They can be efficient if used smartly: radiant heat warms objects and people directly, letting you set lower thermostat levels.
Electric systems may cost more in high-rate areas; hydronic systems run cheaper for whole-home use.
Use zoning, timers, and good insulation to control runtime and keep operating costs reasonable.
Can heated floors be installed under hardwood or carpet?
Can you install heated floors beneath hardwood or carpet? Yes — but you’ll need compatible systems and proper installation.
Electric mats and low-profile hydronic tubing work under engineered hardwood; solid hardwood requires careful moisture control and often isn’t recommended.
Carpet needs low R-value padding and thin construction to transfer heat efficiently.
Always follow manufacturer guidelines and consult an installer to protect flooring integrity and warranty.
Are heated floors safe for children and pets?
Wondering whether heated floors are safe for your kids and pets? Yes — properly installed radiant systems pose minimal risk: they deliver gentle, even warmth without exposed hot surfaces or cords.
Maintain safe thermostat settings, use certified installers, and choose systems with consistent temperature control and overheat protection.
Regular inspections and following manufacturer guidelines keep your family and pets comfortable and safe.
Do heated floors require special flooring materials?
Do you need special flooring for heated floors?
You don’t need exotic materials, but you should use heat-tolerant, low-resistance surfaces. Tile and stone work best; engineered wood, some laminates, and vinyl can work if manufacturers approve them for underfloor heating.
Avoid thick carpets or dense underlays that insulate heat.
Always follow flooring and heater compatibility guidelines to guarantee efficiency and warranty coverage.