
How to Install Ceramic Floor Tile the Right Way on Any Subfloor
You can install ceramic floor tile correctly on most suitable subfloors by prepping the surface, choosing the right underlayment, and using proper adhesives and tools. First confirm your plywood or concrete is flat, dry, and structurally sound, repair or reinforce as needed, then add cement backerboard or an uncoupling membrane where required. Mix and trowel thin-set, press tiles with spacers, cut with a wet saw, grout, and seal. Keep going to get step-by-step tips and troubleshooting.
Can You Install Ceramic Floor Tile on Any Subfloor?
You can’t just lay ceramic tile over every subfloor—some surfaces need work first.
If your subfloor is plywood, concrete, or cement board and is flat, clean, and structurally sound, you’re usually good to go.
But if it’s uneven, water-damaged, or flexes, you’ll need to repair, reinforce, or add an appropriate underlayment before tiling.
Short, Direct Recommendation
One—no, not every subfloor is suitable for ceramic tile; you’ve got to check material, flatness, and moisture conditions first.
If the subfloor is plywood, concrete, or cement board and meets flatness and dryness standards, go ahead and follow how to install ceramic floor tile steps.
If it fails those checks, don’t tile until you correct the issues.
When and Why You Might Need Additional Preparation
Because not all subfloors are built the same, you’ll sometimes need extra prep before laying ceramic tile—especially to address moisture, structural movement, or unevenness.
You’ll test for moisture, fix rot, level dips with patching compound or a mortar bed, and install a decoupling membrane for movement.
These steps prevent cracking, adhesion failure, and mold, ensuring a durable, long-lasting tile floor.
Basic Understanding What Is Ceramic Tile and Why Subfloor Matters
Ceramic floor tile is a dense, water-resistant tile you’ll pick for durability and style, but it relies on a proper base to perform.
Different subfloors — concrete, plywood, OSB, existing tile, or vinyl — each have specific flatness, rigidity, and moisture characteristics you’ll need to address.
How those properties are managed determines whether your tile will stay bonded, stay level, and resist cracking or movement.
What Is Ceramic Floor Tile?
Tile offers a durable, water-resistant flooring option made from clay that’s been shaped, glazed (or left unglazed), and fired at high temperatures.
You’ll choose sizes, colors, and finishes that suit traffic and style.
Ceramic resists stains and humidity, cleans easily, and tolerates wear when installed correctly.
Its performance depends on proper substrate preparation, layout planning, and suitable adhesives and grout.
Types of Subfloors (Concrete, Plywood, OSB, Existing Tile, Vinyl)
Knowing how ceramic performs on its own helps you see why the subfloor matters: a stable, level base keeps the tiles from cracking, loosening, or looking uneven over time. You’ll choose concrete, plywood, OSB, existing tile, or vinyl based on condition and prep needs.
| Subfloor | Typical Use | Note |
|---|---|---|
| Concrete | Basements | Durable |
| Plywood | Joisted floors | Needs underlayment |
| Vinyl/Tile | Remodels | May need removal |
How Subfloor Properties Affect Tile Performance (flatness, rigidity, moisture)
Because the subfloor is the foundation for everything above, its flatness, rigidity, and moisture level directly determine how your ceramic floor will look and last.
You must guarantee flatness to prevent lippage, rigidity to avoid tile cracking, and controlled moisture to stop adhesive failure and mold.
Assess, repair, and use appropriate underlayment or waterproofing so your installation performs long-term.
Overview of Required Tools, Materials, and Safety
Before you start, gather a tools checklist—tile cutter, trowels, level, spacers, mixing bucket, and measuring tools—and a materials checklist that includes thinset or mortar, backerboard, any needed membranes, grout, and spacers.
Put on safety gear (gloves, eye protection, dust mask, knee pads) and clear and prep the site so you won’t be interrupted.
With everything organized and the area safe, you’ll work faster and avoid common mistakes.
Tools Checklist
Gather the right tools, materials, and safety gear so you can work efficiently and stay protected while installing ceramic tile. You’ll need quality hand and power tools, accurate measuring devices, and PPE.
Prioritize comfort and durability so the job feels manageable, even satisfying.
- Safety: gloves, goggles, knee pads.
- Measuring: tape, chalk line, level.
- Tools: trowel, wet saw, rubber mallet.
Materials Checklist (thinset, mortar, backerboard, membranes, grout, spacers)
Materials matter as much as tools when laying ceramic tile—you’ll need the right adhesives, underlayment, and finishing products to guarantee a durable, level installation.
Choose polymer-modified thinset, appropriate mortar, cement backerboard or uncoupling membrane, sanded or unsanded grout, and consistent spacers.
Follow product specs and match materials to your subfloor.
- Confidence
- Reliability
- Pride
Safety Gear and Site Preparation
Safety gear and a tidy worksite keep you safe and make the job faster: wear eye protection, a dust mask or respirator, knee pads, gloves, and sturdy shoes, and have a first-aid kit nearby.
Clear the area, remove trim, and protect adjacent surfaces with tape and drop cloths. Gather tools—trowels, tile cutter, level, sponge—and materials within reach.
Inspect subfloor for defects before starting.
Quick Pre-Installation Assessment Is Your Subfloor Ready?
Before you lay a single tile, you’ll want to check flatness and levelness with a straightedge and level and measure for any deflection that could violate tile limits.
Test for moisture using the appropriate method for your subfloor—calcium chloride, moisture meter, or RH probe—and mark soft spots, squeaks, or cracks that need repair.
Addressing these issues now keeps your tile from cracking or coming loose later.
Flatness and Levelness Testing Methods (straightedge, floor level)
If your subfloor isn’t flat and level within industry tolerances, your tiles won’t sit properly and grout lines can crack.
So you’ll want to run a few quick tests with a straightedge and a spirit (bubble) level to confirm it’s ready.
Lay a 6–10 ft straightedge across high and low spots, measure gaps with a feeler or ruler, and use the bubble level along multiple axes.
Structural Soundness and Deflection Limits
1 quick check you should do is evaluate the structural soundness and deflection of the subfloor—tiles and grout can crack when the floor bends under load, so you need to know whether joists, underlayment, and fasteners will hold up.
Walk the area, check for bounce, measure span/joist size, and verify underlayment thickness and secure fastening; stiffen or repair any weak spots before tiling.
Moisture Testing Procedures for Different Subfloors
Checking structural soundness is only part of the prep — you also need to confirm the subfloor’s moisture condition because excess dampness will ruin tile installations and adhesives.
Test plywood and OSB with a moisture meter (percent wood content), aiming below manufacturer limits.
For concrete, use a calcium chloride or relative humidity test per standards.
Record results, address high readings, and retest before tiling.
Identifying Problem Areas (soft spots, squeaks, cracks)
Before you lay a single tile, walk the entire floor and look for soft spots, squeaks, and visible cracks—these tell you where the subfloor isn’t supporting the tile system properly.
Press on suspect areas, mark and measure deflection, and listen while someone walks.
Tighten loose fasteners, sister joists, or replace damaged panels.
Address every flaw; tile won’t tolerate movement.
Step-by-Step Installation Guide
Now you’ll walk through the installation in clear, manageable steps, starting with stripping old coverings and cleaning the surface.
You’ll then handle structural fixes—sister joists, screw down squeaky areas, and flatten with patching or self-leveler as needed—before choosing and installing the right underlayment or backerboard and thinset method.
Finally, you’ll plan your layout, dry-fit tiles to set focal points, and mark cuts so the actual setting goes smoothly.
Step 1 Remove Existing Floor Coverings and Clean Surface
Start by stripping away any old flooring—vinyl, carpet, or loose tiles—until you reach the subfloor.
Then clean the surface thoroughly so it’s dry, flat, and free of debris, adhesive residue, grease, or mold.
Remove nails and staples, vacuum and sweep, and use a scraper or solvent for stubborn adhesive.
Let everything dry completely before proceeding to layout and underlayment checks.
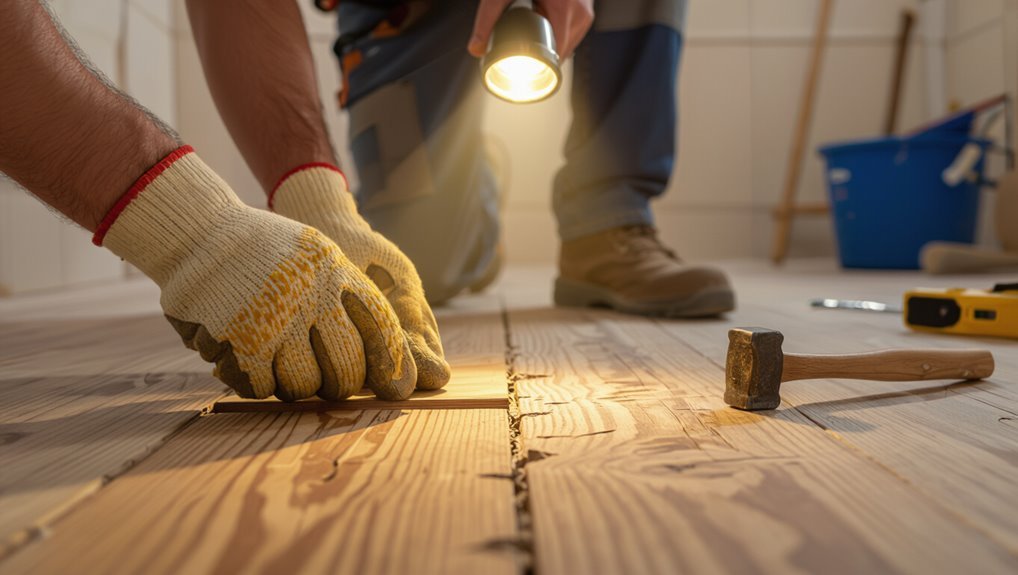
Step 2 Repairing and Reinforcing Subfloor (sistering joists, screwing down, addressing squeaks)
You’ll reinforce and repair the subfloor so it’s rigid, level, and quiet—critical for tile that won’t crack.
Inspect joists and decking, sister weakened joists with matching lumber, and tighten or replace loose screws with long decking screws.
Secure subfloor panels every 6–8 inches along seams, add blocking where needed, and test for squeaks, fixing them before proceeding to flatness corrections.
Step 3 Correcting Flatness (self-leveler, patching compounds)
Step 3 focuses on making the floor flat enough for tile by using self-leveling compound and patching products to fill low spots and feather changes.
Measure deviations with a straightedge or level, mark high and low areas, then choose the appropriate material and primer so the surface cures smooth, stable, and ready for tile.
Mix per instructions, pour or trowel, slope toward drains, sand high spots, and allow full cure before proceeding.
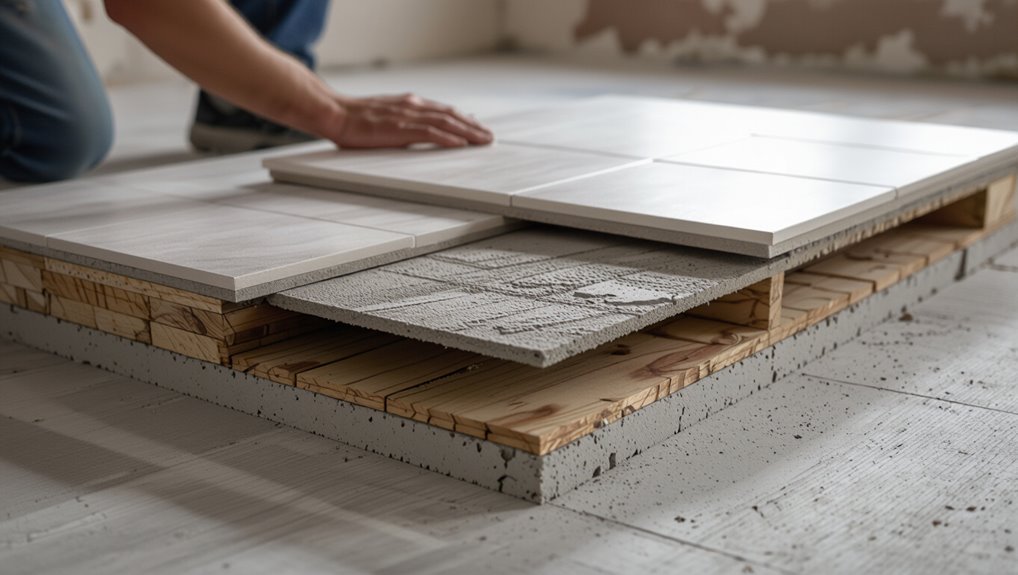
Step 4 Choosing and Installing Underlayment or Backerboard (cement board, uncoupling membrane, thinset techniques)
Although a smooth, level subfloor is essential, choosing and installing the right underlayment or backerboard is what gives your tile a stable, moisture-resistant foundation.
Pick cement board for durability, an uncoupling membrane to prevent cracks, or a waterproofing layer where needed.
Cut panels to fit, thinset-bedded and screwed per manufacturer specs, tape joints, and follow curing times before tiling.
Step 5 Layout Planning and Dry Fit (tile layout, focal points, cuts)
Before you spread a single bit of thinset, plan your tile layout and dry-fit the pieces so you can spot awkward cuts, align focal points, and minimize visible seam runs.
Snap chalk lines from room center, lay full tiles toward entrances and focal walls, measure edge tiles for balanced widths, and mark cuts.
Adjust layout until seams fall symmetrically and high-visibility cuts are minimized.
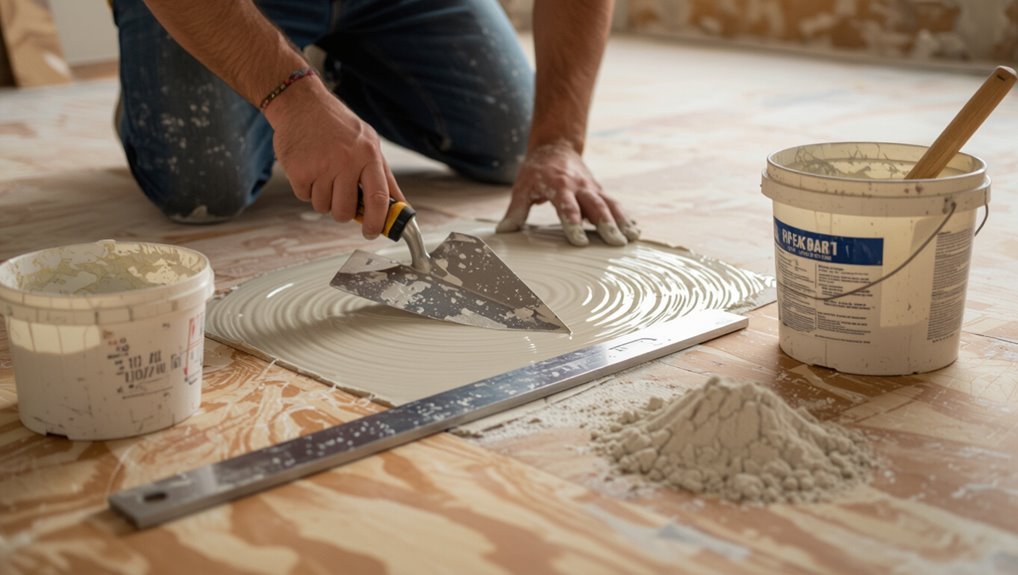
Step 6 Applying Adhesive and Setting Tile (notched trowel, buttering, spacing)
Mix your thinset to the manufacturer’s consistency, then spread it with a notched trowel and butter tile backs when needed so each piece gets full contact and consistent coverage; use the trowel’s notches to control mortar thickness.
Press tiles into place with a slight twist, and insert spacers to maintain even grout joints as you work.
Check alignment frequently, remove excess mortar, and keep a wet edge.
Step 7 Cutting Tiles and Dealing with Obstacles (wet saw tips)
Once you’ve laid the field tiles, you’ll need to cut pieces to fit edges, corners, and any obstacles like vents or pipes. A wet saw will make those cuts clean and safe; set it up with a diamond blade rated for ceramics.
Keep the water reservoir filled to cool and suppress dust, and wear eye and ear protection while you work. Mark cuts, support tiles, cut slowly, and use a rubbing stone to smooth edges before setting.
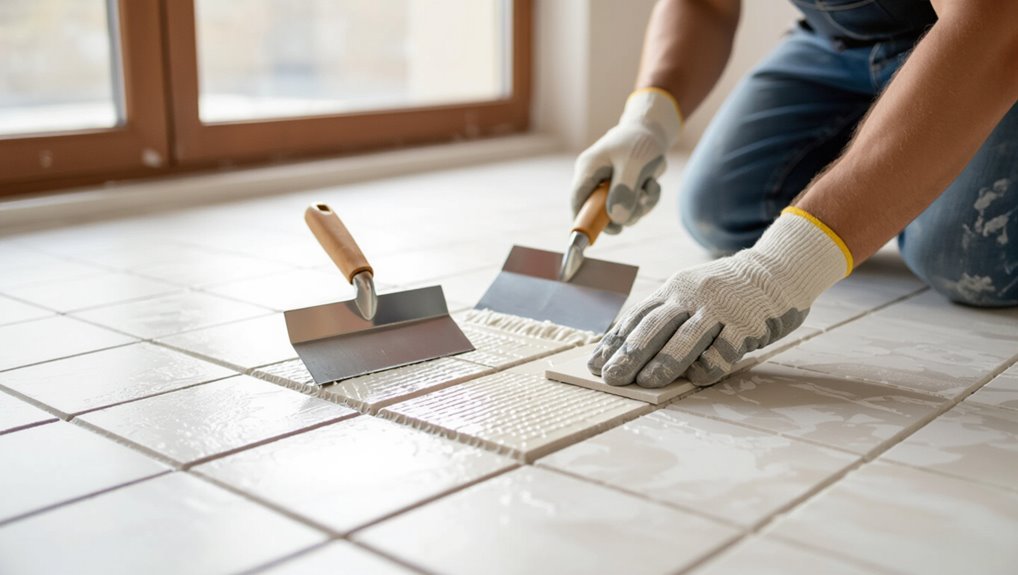
Step 8 Grouting, Sealing, and Finishing
With your tiles cut, smoothed, and firmly set, you’re ready to fill the joints and finish the floor.
Mix grout to a creamy consistency, force it into gaps with a rubber float, and wipe residue with a damp sponge.
After grout cures per manufacturer instructions, apply a penetrating sealer to grout lines and tile as recommended.
Then reinstall trim and border strips for a clean, finished look.
Step 9 Curing Time and Post-Installation Care
After the grout and sealer set, give the floor its required curing time before heavy use—this usually means staying off the tiles for 24–72 hours and avoiding wet cleaning for up to 7 days, depending on the products’ instructions.
Afterward, walk gently, avoid rugs or furniture for a week, clean with pH-neutral cleaner, and promptly address stains or grout haze to protect the finish.
Installing Tile Over Specific Subfloors Practical Variations
Before you start tiling, consider the specifics of your subfloor—new or old concrete needs different prep than plywood/OSB, and thickness plus deflection control matter for wood panels.
You’ll also need to decide whether to remove existing tile or vinyl or use an approved overlay.
If you have radiant heat, choose adhesives and joints that handle thermal movement.
Installing on Concrete Slabs (new vs. old slab considerations)
If you’re tiling over concrete, you’ll need to treat new and old slabs differently to guarantee a long-lasting installation.
For new slabs, wait for proper curing and check moisture with a meter; use a moisture barrier or epoxy primer if needed.
For old slabs, repair cracks, remove coatings, and grind high spots.
Always verify flatness and moisture before setting tile.
Installing on Plywood or OSB Subfloors (thickness, deflection control)
When you’re setting ceramic tile over plywood or OSB subfloors, the key is controlling deflection and using adequate thickness so the assembly behaves like a rigid, mortar-supported base; otherwise tiles and grout will crack.
Use minimum 5/8″ exterior-grade plywood or 3/4″ tongue-and-groove, joists spaced ≤16″ o.c., and/or add a cement backerboard or cork underlayment.
Stiffen framing if needed.
Installing Over Existing Tile or Vinyl (when to remove vs. overlay)
After checking that your plywood or OSB subfloor is stiff and sound, you’ll next decide whether to remove old tile or vinyl or lay new ceramic over it.
Remove if surface is loose, cracked, or bonded to cushion-backed vinyl.
Overlay when existing is well-adhered, flat, and height won’t affect doors or junctions.
Always clean, degloss, and use appropriate thinset or membrane for bonding.
Installing on Radiant-Heat Floors (adhesive and thermal movement considerations)
Because radiant heat changes temperature and movement underfoot, you’ll choose adhesives and layout techniques that handle expansion without debonding.
Use a flexible, polymer-modified thinset rated for heated floors and follow manufacturer temperature limits.
Run a decoupling membrane if substrate movement is likely.
Leave proper perimeter and control joints, stagger tile to minimize lippage, and test the heating system gradually after installation.
Common Mistakes and Problems to Avoid
Before you set a single tile, check the prep: a subfloor that’s not flat or that holds moisture will cause problems down the line.
During installation, using the wrong adhesive, an improper trowel size, or uneven setting will lead to weak bonds and visible defects.
After the job, watch for cracked tiles, lippage, and grout failure so you can address causes rather than just symptoms.
Mistakes During Preparation (insufficient flatness, ignoring moisture)
When you skip proper prep—leaving subfloors uneven or overlooking moisture—you set the stage for tiles that crack, lift, or grout that fails.
Check flatness with a straightedge, level low spots, and remove high spots.
Test and mitigate moisture with a reliable meter and vapor barriers or primers.
Don’t assume dryness; address issues before tiling to prevent costly repairs.
Installation Errors (wrong adhesive, improper trowel size, uneven setting)
If you pick the wrong adhesive, use the wrong trowel, or set tiles unevenly, the finished floor won’t hold up and you’ll be fixing problems sooner than you’d like.
Match adhesive to tile size and subfloor, use the correct notch trowel to achieve full coverage, and check each tile for level and alignment as you go to prevent gaps and movement.
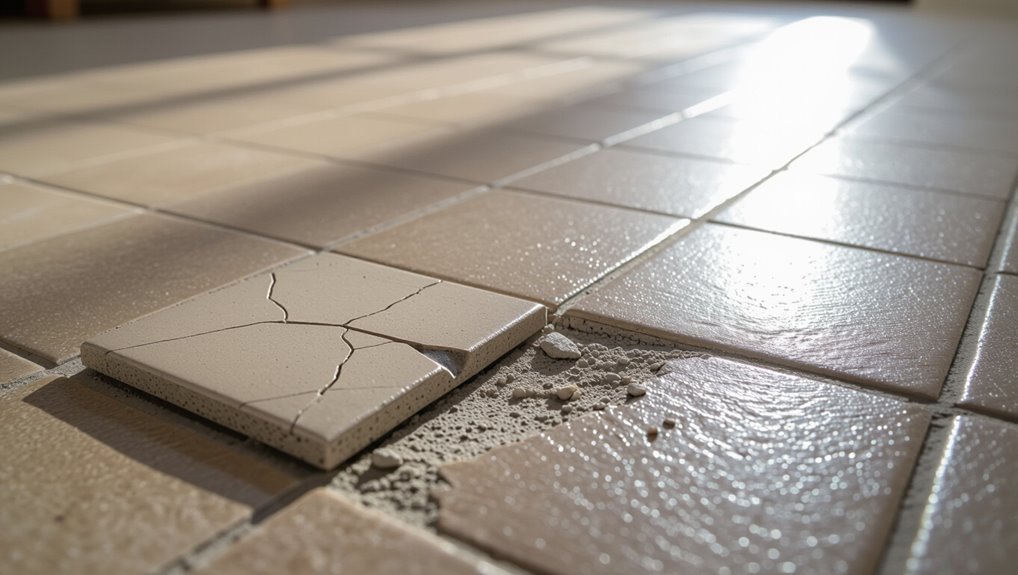
Problems After Installation (cracked tiles, lippage, grout failure)
Even with proper adhesive, trowel choice, and careful setting, problems can still show up after the grout dries.
Cracked tiles often mean movement or inadequate bedding; replace and address subfloor flex.
Lippage signals uneven setting—re-set high tiles and use leveling clips.
Grout failure stems from improper mix, sealing, or movement—regrout, seal, and control joints to prevent recurrence.
Prevention, Tips, and Best Practices
Before you start, make sure your subfloor is solid, level, and properly prepared so the tiles last.
Pick materials that suit your room’s moisture and traffic levels, and learn simple maintenance steps to protect tile and grout over time.
If the job’s scope or your skill level exceeds your comfort, hire a pro to avoid costly mistakes.
Best Practices for Subfloor Preparation
When you prepare the subfloor correctly, you prevent future tile failures and save time on repairs; start by checking for level, cleanliness, and structural soundness so you can address issues before setting tile.
Remove debris, fix squeaks, patch low spots, and secure loose boards.
Make certain moisture is controlled, seams are tight, and the surface is rigid and flat for reliable adhesive bonding and long-lasting tile.
Choosing the Right Materials for Your Situation
Choosing the right materials will save you time and prevent costly repairs, so match tile type, mortar, backer board, and grout to your room’s use and substrate.
Pick porcelain for high-traffic or wet areas, use thin-set-rated mortar for your substrate, install cement backer board over wood subfloors, and choose sanded or unsanded grout based on joint width and movement.
Long-Term Maintenance Tips to Protect Tile and Grout
You’ve picked the right tile and materials, now keep them performing and looking good with regular, targeted care.
Sweep or vacuum weekly, mop with pH-neutral cleaner, and blot spills immediately.
Reseal grout every 1–3 years, repair cracks promptly, and use felt pads on furniture.
Maintain consistent humidity and avoid harsh abrasives to prevent staining, etching, and premature wear.
When to Hire a Pro vs. DIY
How do you know whether to tackle a ceramic tile project yourself or call a pro? Assess skill, time, and subfloor condition.
DIY suits simple layouts, sound subfloors, and patience for learning.
Hire a pro if the subfloor needs repair, layout is complex, changes or slopes exist, or you need a flawless finish quickly.
Factor cost, warranty, and risk tolerance.
Troubleshooting Guide Diagnosing and Fixing Post-Install Issues
After installation you’ll want to check for common problems like loose or hollow-sounding tiles, cracked tiles or grout, and movement-related failures around expansion joints or membranes.
I’ll show how to diagnose each issue—tap tests and probe checks for hollows, visual and strike tests for cracks, and inspection of joints and underlayment for movement.
Then we’ll cover the practical fixes: re-bedding or replacing loose tiles, repairing or regrouting cracked areas, and correcting joints or membranes to restore stability.
How to Fix Loose or Hollow-Sounding Tiles
A hollow or loose tile usually means the thinset beneath it failed or never fully adhered, and you’ll want to diagnose the cause before repairing.
Tap tiles to locate hollows, remove grout around affected edges, then lift the tile.
Clean old mortar, check subfloor stability, apply appropriate thinset or adhesive, bed the tile back in place, and grout once set.
Test for firm seating.
Repairing Cracked Tiles and Grout
Cracked tiles and crumbling grout don’t just look bad—they can let moisture reach the substrate and cause bigger problems, so you’ll want to diagnose the cause before patching.
Inspect for impact damage, loose bedding, or edge cracks.
Replace broken tiles: remove grout, lift tile, clean cavity, apply thinset, set new tile.
Repoint grout with matching mix and seal when cured.
Addressing Movement-Related Failures (expansion joints, membranes)
If you’ve fixed broken tiles and repointed grout but keep seeing gaps, buckling, or new cracks, movement-related failures are likely to blame and need a different approach.
Inspect joints, verify proper expansion gaps at perimeters and connections, and guarantee uncoupling membranes or movement joints were installed.
Replace failed membranes, add or widen expansion joints, and use flexible sealant to absorb substrate movement.
Cost, Timeframe, and Project Planning
Before you start, you’ll want a clear budget that reflects differences in subfloor prep—concrete, plywood, or cement board each change labor and material costs.
Plan a realistic schedule by estimating time for demolition, subfloor work, tiling, grout curing, and trim so you’re not rushed.
Also check local permit and code requirements and confirm manufacturer warranties so your work stays compliant and protected.
Typical Cost Breakdown by Subfloor Type
Costs, timelines, and prep vary a lot depending on your subfloor—concrete, plywood, or existing tile each change materials, labor, and scheduling. Expect higher costs for plywood prep and tile removal; concrete usually needs leveling; existing tile can save time if sound. Budget per square foot and include contingency for unexpected repairs.
| Subfloor | Typical Cost/sq ft | Key Consideration |
|---|---|---|
| Concrete | $2–$6 | Leveling may be needed |
| Plywood | $4–$10 | Subfloor reinforcement required |
Estimated Timeframe for Each Major Step
A realistic schedule breaks the tile job into clear steps—subfloor prep, layout and dry-fitting, adhesive setting, grouting, and curing—so you can plan costs, trades, and downtime around each stage.
Expect subfloor prep 4–8 hours, layout 2–4 hours, adhesive setting 24–48 hours, grouting 2–6 hours, and curing 48–72 hours.
Adjust for room size, tile type, and ventilation.
Permits, Codes, and Warranty Considerations
When your project affects structural elements or involves significant plumbing or electrical work, check local building codes and pull the required permits so you don’t face fines or forced rework; also confirm any HOA rules.
Keep receipts and inspection records, follow manufacturer installation and substrate requirements to maintain warranties, and factor permit costs and inspection timelines into your schedule so you don’t delay completion or void coverage.
FAQ
You probably have a bunch of practical questions before you start—like whether you can lay tile over plywood, how thick the subfloor must be, and if you need a moisture barrier.
You’ll also want to know the difference between cement backerboard and an uncoupling membrane, plus how long to wait before walking on and grouting.
Read on for clear answers to each of these common concerns.
Can I install ceramic tile directly over plywood?
Wondering if you can lay ceramic tile directly over plywood? You can, but only with proper preparation: stiff, well-supported plywood, exterior-grade or underlayment plywood, and a decoupling membrane or cement backerboard secured per manufacturer instructions.
Glue and thinset over an appropriate underlayment, validate flatness and screw every panel to prevent movement, and follow tile manufacturer recommendations for warranties and performance.
How thick does a subfloor need to be for tile?
How thick should your subfloor be for ceramic tile?
You need a stiff, minimum 1 1/8-inch thickness for plywood (¾-inch subfloor plus 3/8-inch cement board or equivalent) over joists spaced 16 inches on center.
For 24-inch spacing, use at least 1 1/4–1 1/2 inches total or add reinforcement.
Thicker, stiffer assemblies prevent cracking and grout failure.
Do I need a moisture barrier under tile?
When installing tile, do you need a moisture barrier beneath it?
You usually do in moisture-prone areas—bathrooms, laundry rooms, basements—or over wood subfloors to protect adhesives and subflooring.
On concrete slabs, a vapor barrier may be unnecessary if the slab is dry and tested.
Always test moisture, follow manufacturer specs, and install a suitable barrier when recommended to prevent failures.
What is the difference between cement backerboard and uncoupling membrane?
Two common substrates you’ll encounter are cement backerboard and uncoupling membrane, but they serve different jobs: backerboard gives a rigid, water-resistant surface for thinset and tile, while an uncoupling membrane isolates tile from subfloor movement to prevent cracks.
Use backerboard when you need stiffness and moisture resistance; choose uncoupling membrane to protect tiles over plywood or radiant-heat floors and reduce cracking.
How long before I can walk on and grout my tile?
Want to know when you can walk on and grout your tile? Wait at least 24 hours for thinset to cure for light foot traffic; manufacturers sometimes recommend 48 hours.
For full grout application and heavy use, wait 48–72 hours. Faster-setting mortars can shorten times—follow product instructions and ambient conditions.
Always test a small area before proceeding across the room.