How to Fit Vinyl Flooring in a Bathroom Around Fixtures and Edges
You can fit vinyl flooring around bathroom fixtures and edges by measuring carefully, choosing a water‑appropriate vinyl, and prepping a clean, level subfloor with a moisture barrier. Start from a straight line, use templates for toilets and pipes, cut holes undersized and trim for a snug fit, and leave tiny expansion gaps at walls and fixtures. Secure and seal seams with adhesive and caulk to prevent water entry, then reinstall fixtures for a finished look — continue on to learn step‑by‑step techniques and tips.
Quick Answer Can You Fit Vinyl Flooring in a Bathroom Around Fixtures and Edges?
Yes—you can fit vinyl around toilets, sinks, and edges with a few simple steps: measure and cut around fixtures, dry-fit and trim for tight seams, then seal edges with caulk or trim.
You’ll handle most straight cuts and trims as a DIY weekend project, but call a pro if you’re uncomfortable with complex cuts, plumbing removal, or ensuring watertight seals.
If a tight finish around irregular shapes matters, hiring an experienced installer can save time and prevent leaks.
Short direct steps summary
You can fit vinyl flooring neatly around bathroom fixtures and edges by planning cuts, using the right tools, and sealing seams; follow these short steps to learn how to fit vinyl flooring in bathroom spaces efficiently.
- Measure and map the room
- Remove or loosen fixtures
- Cut precise templates
- Dry-fit planks/sheets
- Seal seams and trim edges
When to call a pro vs. DIY
If your bathroom layout is straightforward and you’re comfortable with measuring and cutting, you can usually fit vinyl around fixtures yourself; call a pro when plumbing removal, uneven subfloors, or complex cuts around toilets and tubs exceed your skill or tools.
You should also hire help if you lack proper tools, worry about waterproofing, or need code-compliant plumbing work—pros save time and prevent costly mistakes.
Basic Understanding Vinyl Flooring Types and Bathroom Suitability
You’ll choose between sheet vinyl, luxury vinyl plank or tile (LVP/LVT), and peel-and-stick, each with different fit and durability for bathrooms.
Pay attention to water resistance and how seams, underlayment, and subfloor prep control moisture.
You’ll also need basic tools and materials—utility knife, straightedge, adhesive or click system, and waterproof sealant—to get a lasting result.
Types of vinyl for bathrooms (sheet, luxury vinyl plank/tile, peel-and-stick)
There are three common vinyl options for bathrooms—sheet, luxury vinyl plank/tile (LVP/LVT), and peel-and-stick—each offers different levels of water resistance, durability, and ease of installation, so pick the one that matches your moisture exposure, budget, and DIY skill.
- Sheet: continuous, fewer seams
- LVP/LVT: realistic look, sturdy
- Peel-and-stick: easy DIY
- Glue-down: permanent bond
- Click-lock: floating installation
Water resistance and moisture concerns
Because bathrooms get constant moisture, you should match vinyl type and installation to how wet the room gets.
Choose fully waterproof sheet or rigid LVP for showers and high-humidity zones; peel-and-stick suits low-moisture areas.
Seal seams, perimeter, and penetrations with appropriate caulk or adhesive.
Verify subfloor is dry and use vapor barriers where recommended to prevent mold and adhesive failure.
Tools and materials overview
Tools and materials set the stage for a smooth vinyl install, so gather the right flooring type, underlayment, adhesives, and cutting and measuring tools before you begin.
You’ll choose waterproof luxury vinyl or sheet, appropriate underlayment, sealants, and trim. Check product specs for bathroom suitability and compatibility with subfloor conditions.
- Luxury vinyl planks/sheet
- Moisture barrier/underlayment
- Adhesive or click system
- Utility knife and saw
- Sealant and trims
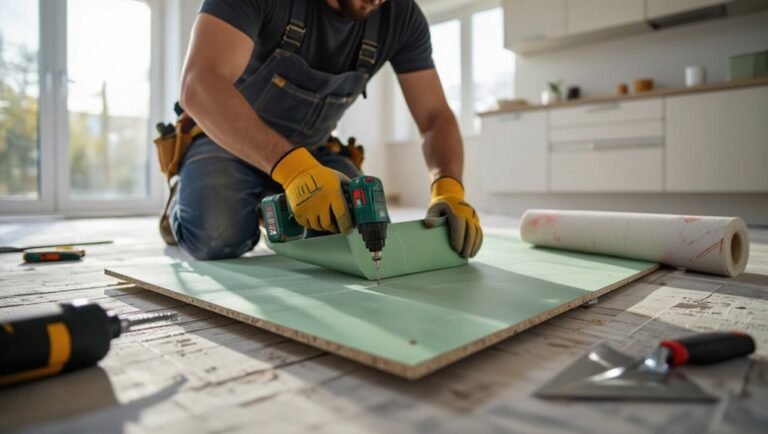
Preparation Measure, Remove, and Prep the Space
Start by measuring carefully around fixtures and odd edges so your cuts fit snugly and you avoid costly mistakes.
Remove old flooring and baseboards safely, then inspect the subfloor for damage and make any repairs so it’s dry and level.
Finally, choose and install an appropriate moisture barrier or underlayment to protect the floor before you lay the vinyl.
How to measure accurately around fixtures and irregular edges
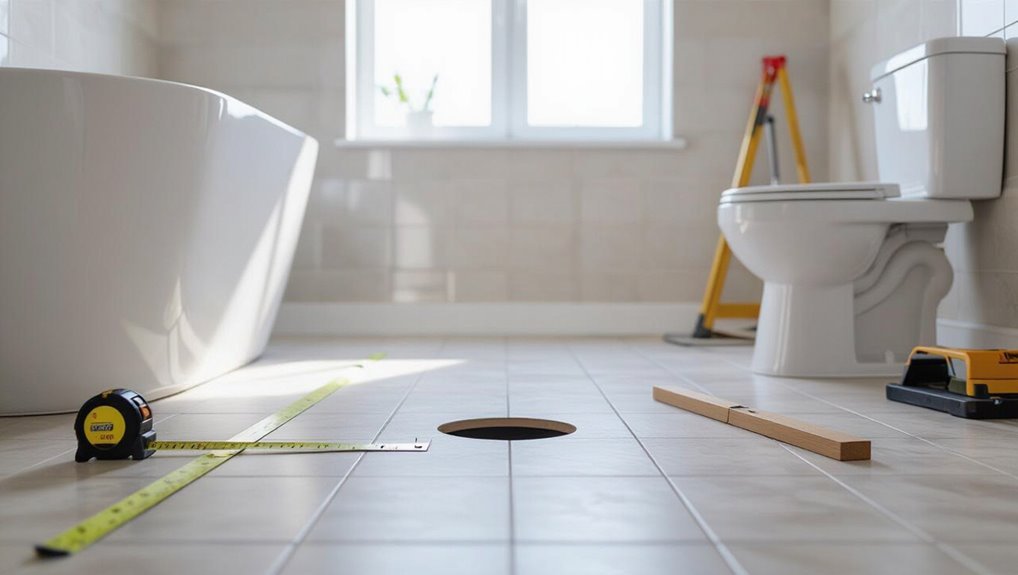
When you measure around fixtures and odd edges, work slowly and methodically so your cuts fit the first time; measure twice and transfer those exact dimensions to a paper or cardboard template you can trim against the vinyl.
Trace templates onto the flooring, mark cut lines and reference points, and fit-test before cutting.
Use a flexible ruler or contour gauge for curves, noting offsets for trim and gaps.
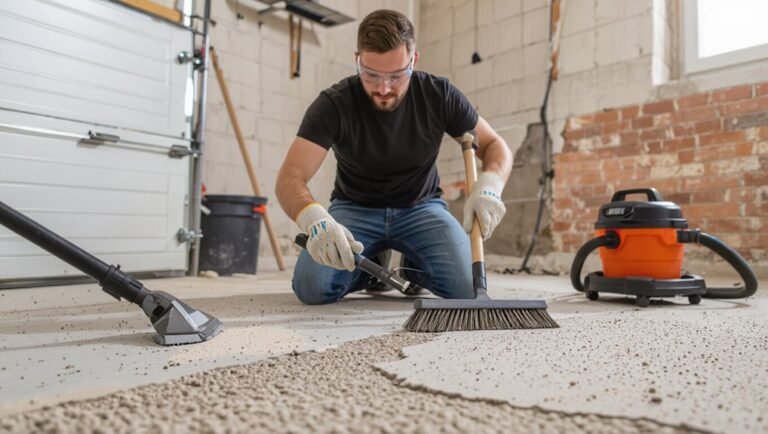
Removing old flooring and baseboards safely
Begin by clearing the room and protecting fixtures and vents so you can work safely and access every edge; wear gloves and eye protection, shut off any nearby water and power, and move toiletries and furniture out of the way.
Remove trim and baseboards carefully with a pry bar, score caulk, and pull up flooring in manageable sections.
Dispose materials and vacuum debris for a clean workspace.
Subfloor inspection and necessary repairs
1 key step before laying vinyl is a thorough subfloor inspection so you can spot and fix issues that’ll ruin the new floor.
Check for rot, soft spots, loose or squeaky boards, and mold. Measure flatness and note gaps or nails sticking up.
Replace damaged plywood, secure loose areas, and patch small holes.
Verify structural soundness before proceeding.
Drying and leveling the subfloor; moisture barrier options
Dry and level the subfloor thoroughly before you lay any vinyl—moisture and unevenness will warp or separate the flooring.
Remove debris, sand high spots, and fill low areas with a cement-based leveling compound.
Dry the area with fans and dehumidifiers until moisture reads below manufacturer limits.
Install a compatible moisture barrier—plastic sheeting, peel-and-stick membrane, or primer—following product instructions for a stable, long-lasting base.
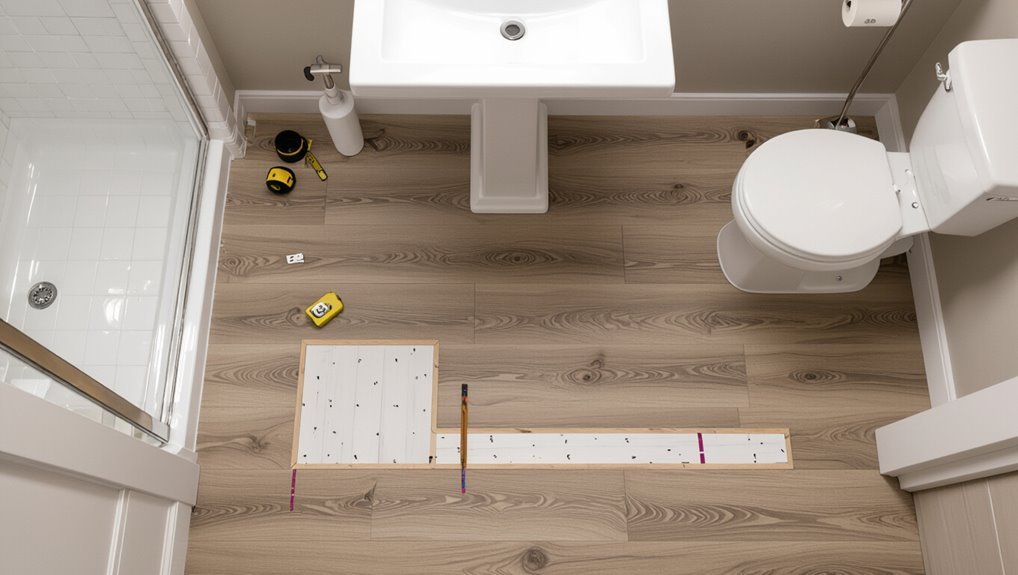
Planning Layout Around Fixtures and Edges
Decide on a starting point and plank orientation, then sketch a cutting plan so pieces around fixtures fit cleanly.
Leave appropriate expansion gaps at walls and plan junction strips where the vinyl meets other floor surfaces.
Mark exact locations of the toilet, vanity, shower, tub, and floor drains so you can cut and fit around them accurately.
Creating a cutting and layout plan (starting point, plank orientation)
Start by identifying a clear starting point and plank orientation that let you work toward the room’s main focal wall or doorway so cuts fall where they’re least noticeable.
Measure rows across, mark full and partial planks, and sketch a cutting plan for fixtures like toilets and vanities.
Number each plank, note cut dimensions, and sequence installation to minimize complex cuts and waste.
Accounting for expansion gaps and transitions
With your cutting plan in hand, plan for expansion gaps and how planks meet fixtures and edges so the floor can move without buckling.
Leave manufacturer‑recommended gaps (usually 1/4″–1/2″) at perimeter and around fixed fixtures.
Use trim or border strips at doorways and between different floor heights.
Keep gaps consistent, concealed, and accessible for future adjustments to prevent crowding or buckling.
Marking locations of toilet, vanity, shower, tub, and floor drains
Before laying any planks, mark the exact locations of the toilet, vanity, shower, tub and floor drains on the subfloor so you can cut around them accurately and maintain proper clearances.
Use a pencil and tape to outline fixtures, measure center points and bolt locations, and note drain diameters.
Transfer marks to planks, allowing expansion gaps and trim for tight, neat fits.
Step-by-Step Installation Process
Now you’ll work through the installation step by step, starting with cutting and fitting vinyl around freestanding fixtures and then handling built-in cabinets and vanities.
Next you’ll seal edges around tubs, showers, and stalls, install thresholds and connections, and finally reinstall toilets and make finishing touches.
Follow each step carefully to guarantee tight fits and watertight seals.
Step 1 Cutting and fitting vinyl around freestanding fixtures
You’ll learn simple techniques for cutting tight circular holes for toilets and pipes so the vinyl sits snug without gaps.
Use a cardboard or paper template to transfer complex shapes accurately, then refine the cut with a utility knife or hole saw as needed.
Work slowly and test-fit frequently to avoid costly mistakes.
Techniques for tight circular cuts (toilets and pipes)
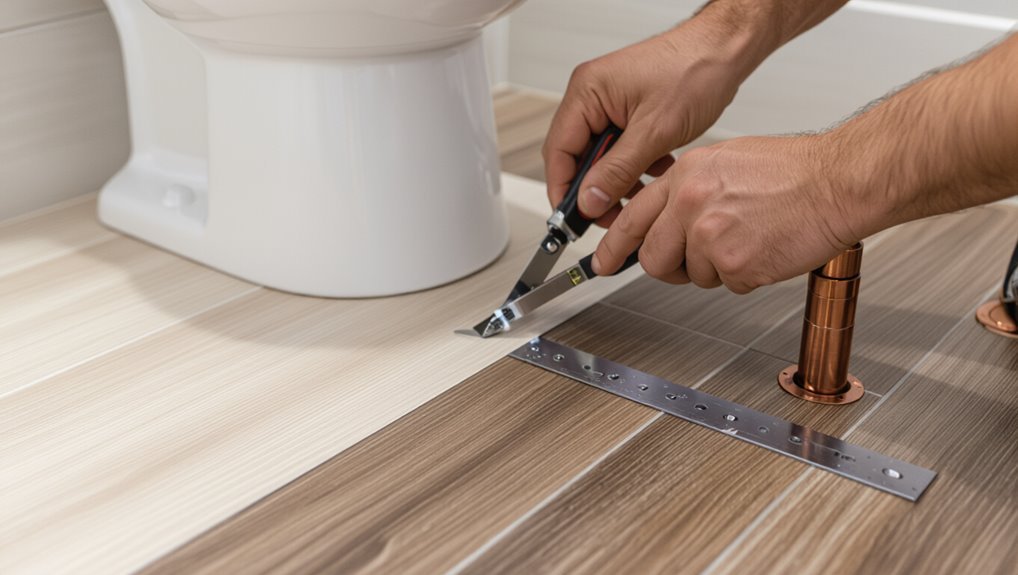
Measure and mark openings for toilets and pipes precisely so the vinyl will sit snug without gaps or bunching.
Cut initial holes slightly undersized, then enlarge gradually with a utility knife in small radial slices. For a tight fit, use a round file or rotary cutter to refine edges.
Stretch and heat-vinyl slightly if needed, then trim to fit before securing and sealing around penetrations.
Using templates for complex shapes
After fitting vinyl around toilets and pipes, use templates to handle more complex freestanding fixtures like pedestal sinks, tubs, and ornate bases.
Trace, cut, and test-fit templates to guarantee accuracy. Use cardboard or kraft paper, mark reference points, and transfer to vinyl carefully.
- Choose sturdy template material
- Mark centerlines and bolt locations
- Cut slightly oversized
- Test-fit and refine
- Transfer and cut vinyl
Step 2 Fitting vinyl around built-in fixtures (vanities, cabinets)
When you work around built-in vanities and cabinets you’ll need to scribe and notch the vinyl for a tight, professional fit.
Remove or loosen toe kicks so you can slide the flooring underneath and hide edges neatly.
Take careful measurements and trim gradually to avoid overcutting.
Scribe cuts and notching for snug fits
Get a tight, professional-looking fit by scribing and notching the vinyl to match the contours of vanities and cabinets.
Hold a template strip against the fixture, mark the profile with a pencil, then transfer it to the vinyl. Cut slowly with a utility knife or jigsaw for rigid boards.
Test fit, trim small amounts, and seal edges with caulk for a clean, watertight finish.
Removing/reinstalling toe kicks to slide flooring under
Remove the toe kicks to slide the vinyl underneath for a seamless, water-resistant edge that looks factory-installed.
Gently pry off toe kicks with a putty knife or trim pull, noting screw locations.
Slide and tape vinyl under the cabinet, trim flush, then reattach toe kicks, countersinking screws if needed.
Caulk the bottom edge to seal moisture.
Test doors for clearance and adjust as required.
Step 3 Sealing edges around tubs, showers, and showers stalls
Now you’ll seal the gap where the vinyl meets tubs, showers, and stalls to keep water out.
Use a high-quality silicone or polyurethane caulk rated for bathrooms, and apply a bead that’s smooth and continuous for lasting durability.
Make sure the connection between wall and floor is fully waterproofed so moisture can’t seep under the flooring.
Recommended sealants and caulks for durability
When you’re sealing vinyl around tubs, showers, and stall edges, choose caulks and sealants formulated for wet, high-movement areas to guarantee a long-lasting bond and flexible waterproofing.
Use these options and tips:
- 100% silicone mildew-resistant for flexibility
- Polyurethane for strong adhesion to vinyl
- Hybrid MS polymer for paintability
- Low-VOC formulations for indoor air quality
- Match color to trim for discreet seams
Waterproofing transitions between wall and floor
Because water always finds seams, you’ll want to create a continuous, flexible barrier where the wall meets the floor—this keeps moisture out of the subfloor and prevents mold.
Run a bead of high-quality silicone or polyurethane caulk into the joint, smooth it for full contact, and press a waterproof backer strip or flexible vinyl trim against it.
Check for gaps and cure fully.
Step 4 Installing thresholds and transitions to other rooms
Now you’ll choose the right connector strip for each doorway so the vinyl meets adjoining floors cleanly and safely.
Use reducer strips where the bathroom vinyl is higher than the next floor. T-molding is for two floors of similar height, and threshold bars or ramp strips are for exterior doorways or long gaps.
Pick a type that matches height differences and traffic level, and secure it per the manufacturer’s instructions.
Types of transition strips and when to use each
You’ll choose from several common junction strips—T-molding, reducer, stair nose, and threshold—each designed for a specific height difference and traffic condition between rooms. Pick T-molding for equal heights, reducers for higher vinyl to lower flooring, stair noses for step edges, and thresholds for doorways and moisture barriers.
| Strip | Use |
|---|---|
| T-molding | Equal heights |
| Reducer | Vinyl to lower floor |
Step 5 Reinstalling toilets and fixtures; finishing touches
Now that the floor and changes are in place, you’ll need to reinstall the toilet and other fixtures, making sure the flange and wax ring sit correctly over the new vinyl to prevent leaks.
Tighten the toilet bolts evenly and test for wobble before trimming any excess wax.
Finally, reattach baseboards and trim for a neat, watertight finish.
Proper flange and wax ring fitting over new flooring
Before you set the toilet back down, make sure the flange sits flush with the new vinyl height and the wax ring is the correct type—either a standard ring for a level floor or an extra-thick or flange-height ring if the vinyl raises the toilet flange above the finished surface.
Center the bowl, press evenly to compress the wax, tighten bolts alternately, and check for wobble and leaks.
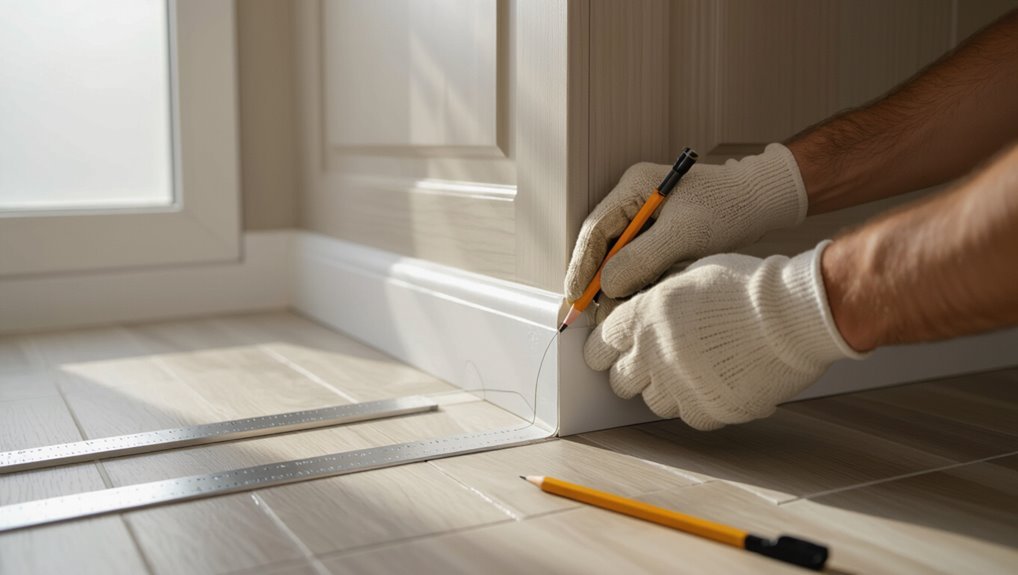
Reattaching baseboards and trim for a clean finish
Reattach baseboards and trim carefully so the room looks finished and the new vinyl edge stays protected.
Measure and dry-fit each piece, trim as needed, and use finishing nails or adhesive suitable for damp areas.
Seal gaps with waterproof caulk, especially at floors and corners.
Reinstall outlet covers and fixtures, then clean surfaces—your trim should sit snugly without pinching the vinyl.
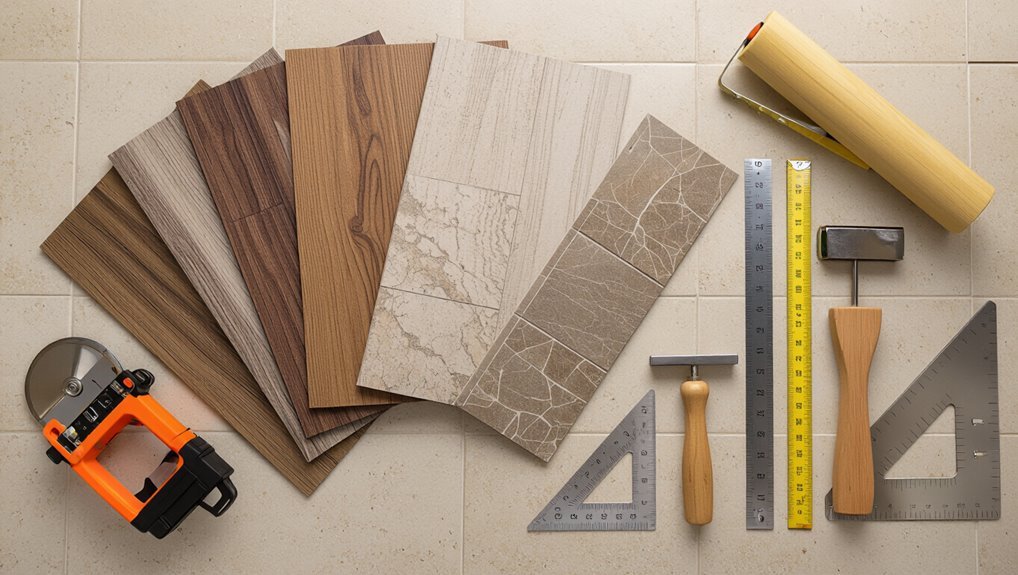
Tools, Materials, and Templates Checklist for the Job
Before you start cutting, you’ll want a clear checklist of essential tools (tape measure, utility knife, straightedge, roller) and a few optional specialty items that can make tricky areas easier.
I’ll show how to calculate material needs and include a sensible waste allowance so you don’t run short.
Keep your templates and measurements organized to save time and avoid costly mistakes.
Essential tools and optional specialty tools
Gathering the right tools makes the job faster and prevents costly mistakes, so you’ll want a mix of essential hand tools and a few optional specialty items for tricky cuts and seams.
- Utility knife with spare blades
- Straightedge and measuring tape
- Floor roller and seam roller
- Jigsaw or rotary cutter (optional)
- Heat gun for shaping around fixtures (optional)
Material calculator and waste allowance tips
Now that you’ve lined up the tools, you’ll want a clear plan for how much vinyl to buy: Use a tape measure and map the room, adding 10–15% for cuts and errors, 20% for complex layouts. Buy whole rolls or boxes matching grain direction. Check seams and pattern repeats before ordering.
| Item | Allowance |
|---|---|
| Straight run | 10% |
| Complex cuts | 20% |
| Pattern match | 15% |
Common Problems and How to Fix Them
You’ll run into a few common issues like gaps, buckling, or edges that lift, and each has quick fixes if you act fast.
Prevent water intrusion and mold by sealing seams, using proper underlayment, and keeping edges well caulked.
For isolated damaged planks or sheets you can often patch or replace sections without redoing the whole floor.
Gaps, buckling, and lifting causes and remedies
If gaps, buckling, or lifting appear after you install vinyl, they usually point to moisture, improper acclimation, or installation errors—issues you can diagnose and fix without ripping out the whole floor.
Check subfloor moisture, re-acclimate and relock loose planks, add adhesive where seams separate, trim edges that bind, and use weighted boards while adhesive cures.
Replace warped pieces if needed.
Water intrusion and mold prevention
Because bathrooms get wet, preventing water intrusion and mold starts with a clear plan and the right materials: seal all seams and edges, maintain proper substrate moisture levels, and guarantee alterations and penetrations are waterproofed.
Check and replace failing caulk, use waterproof underlayment, slope showers to drains, and fit tight connections around fixtures.
Ventilate well and dry spills promptly to stop mold growth.
Repairing damaged planks or sheets without full replacement
Repairing a damaged plank or sheet often saves time and money compared with ripping out the whole floor. Many common issues—scratches, small gouges, lifted seams, or isolated water damage—can be fixed with basic tools and materials.
You can patch with matching vinyl pieces, glue loose seams, fill scratches with color-matched filler, and replace single planks using a cut-and-fit technique without disturbing surrounding flooring.
Best Practices and Professional Tips
You’ll pick up time-saving cutting and fitting tricks that keep edges tight and measurements accurate.
I’ll also cover simple maintenance, cleaning, and ventilation steps to prevent future damage.
Finally, you’ll learn when it’s worth upgrading fixtures or repairing the subfloor before laying vinyl.
Speed tricks for accurate cutting and fitting
Start by setting up a straight, clean workline and gather the right cutting tools—utility knife with fresh blades, a sharp jigsaw or circular saw with a fine-tooth blade for thicker vinyl, and a metal or plastic straightedge—so you can cut quickly and accurately without backtracking.
Score shallow guide cuts, cut slightly oversized, trim to fit, use template pieces for fixtures, and clamp guides for repeatable accuracy.
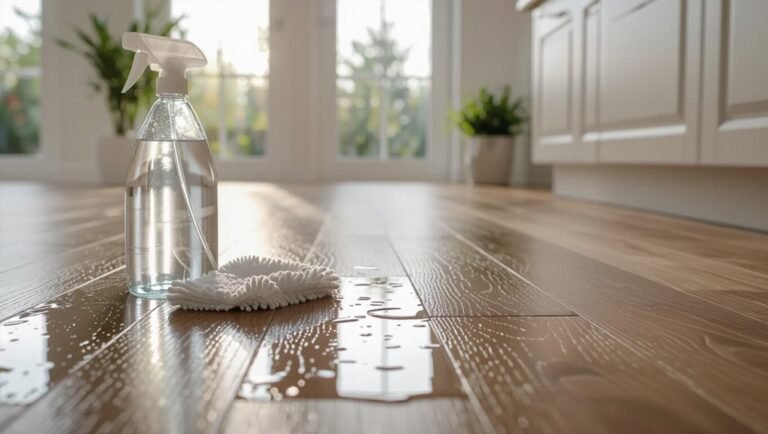
Preventing future damage (maintenance, cleaning, ventilation)
Once the cut pieces sit perfectly, shift focus to keeping the floor that way: routine maintenance, proper cleaning, and good ventilation will stop most future problems before they start.
You should:
- Wipe spills immediately with a damp cloth.
- Use pH-neutral cleaners, not harsh chemicals.
- Add mats at entries to trap grit.
- Run exhaust fans during showers.
- Inspect seams and caulk annually for breaches.
When to upgrade fixtures or subfloor before installing vinyl
If your bathroom shows signs of old plumbing, uneven floors, or stubborn water damage, consider upgrading fixtures or the subfloor before laying vinyl to avoid trapping problems under the new surface.
Inspect joists, plywood, and drains; replace rot, reinforce sagging areas, and swap leaking or corroded fixtures.
Doing this prevents premature vinyl failure and simplifies a neat, watertight installation.
Cost, Timeframe, and When to Hire a Pro
You’ll want to compare typical DIY costs (materials and tools) against professional quotes to see what fits your budget.
Plan for a weekend for a small bathroom, a couple of days for a medium, and several days for a large one, plus extra time for subfloor prep or drying.
Consider hiring a pro if you spot uneven subfloors, extensive water damage, or if cutting and sealing details feel beyond your skill set.
Typical DIY vs professional cost breakdown
Comparing DIY and professional vinyl installation comes down to three clear factors: cost, time, and the complexity of your bathroom—each affects whether you save money or invite headaches. You can save on labor but must buy tools and expect a learning curve; pros cost more but reduce risk and warranty gaps.
| DIY | Professional |
|---|---|
| Lower labor cost | Higher upfront cost |
| Tool purchase | No tool hassle |
| Longer time | Faster completion |
| Risk of mistakes | Warranty/quality assurance |
Estimated project timeline for bathroom sizes (small/medium/large)
For a small, medium, or large bathroom, expect different costs and timelines that change whether you should tackle the project yourself or hire a pro.
You’ll plan prep, removal, fitting, and cleanup; complexity dictates time and hiring.
- Small: 1 day DIY, less than a weekend
- Medium: 1–2 days, consider pro
- Large: 2–4 days, pro likely
- Fixtures add time
- Subfloor repairs extend schedule
Signs the job is beyond DIY
If the project will push your budget, schedule, or skillset, consider calling a pro instead of tackling it yourself.
Hire help if uneven subflooring, extensive plumbing moves, or waterproofing concerns exceed your tools or experience.
Also call a pro if deadlines are tight or mistakes would be costly.
Get quotes, check references, and compare warranties to avoid surprises and guarantee a durable, watertight finish.
FAQ Fitting Vinyl Flooring Around Bathroom Fixtures and Edges
You’ll run into a few common questions when fitting vinyl around fixtures and edges, like whether it can go under a toilet flange or if peel-and-stick works next to a shower.
You’ll also need clear techniques for cutting around a curved tub, deciding whether to remove a vanity, and how big a gap to leave at walls and fixtures.
I’ll answer each so you can plan and install the floor cleanly and waterproof where it matters.
Can vinyl go under a toilet flange?
Can vinyl go under a toilet flange? Yes, you can slide vinyl beneath the flange if you remove the toilet and flange, lay the sheet or plank, then reinstall the flange on top.
That creates a proper seal and allows caulking. If flange removal isn’t possible, trim vinyl closely around the flange and use a gasket or ring to guarantee a tight, water-resistant fit.
How do you cut vinyl around a curved tub?
Removing or trimming around the toilet flange gives you practice working close to fixtures, and cutting vinyl around a curved tub follows the same careful measuring and patience.
Trace the tub’s curve with cardboard or use a flexible ruler, transfer the line to vinyl, cut outside the line, then trim gradually for a snug fit.
Use a utility knife and fine sanding for clean edges.
Is peel-and-stick vinyl OK for bathrooms with showers?
Wondering whether peel-and-stick vinyl can handle a shower bathroom? Yes, it can be suitable if you choose a high-quality, waterproof product and install it properly.
Expect best results on flat, dry subfloors and in low-splash zones. Seal seams and edges with waterproof caulk, keep shower surrounds watertight, and avoid direct constant standing water to prevent lifting and mold.
Do I need to remove the vanity to install vinyl?
Do you have to pull the vanity out to fit vinyl flooring? Not always.
You can often slide planks underneath or cut neatly around the base for floating or glue-down vinyl, especially with removable toe kicks.
Remove the vanity if it’s nailed down, old, leaking, or you want a seamless finish.
Weigh effort, access to plumbing, and desired appearance before deciding.
How much gap should I leave at walls and fixtures?
How much gap should you leave at walls and around plumbing fixtures? You should leave a 1/4-inch to 3/8-inch expansion gap around walls and fixed fixtures for floating vinyl; glued vinyl can be tighter but still benefits from about 1/8-inch.
Around pipes and protrusions, cut a snug hole, then seal gaps with caulk or trim escutcheons to allow movement and prevent water ingress.