How to Install Glue Down Vinyl Plank Flooring Step by Step
You’ll prep the subfloor, test and fix moisture or flatness issues, then acclimate planks for 48–72 hours. Lay a straight starter line, spread manufacturer-approved adhesive with the correct trowel notch, and place planks tight to each other while keeping expansion gaps. Stagger end joints, use a rubber mallet and pull bar for snug seams, then roll the floor with a 100–150 lb roller. Follow curing times and cleanup, and read on for full step-by-step guidance.
How to Install Glue Down Vinyl Plank Flooring Quick Answer
You can glue down vinyl planks by prepping a clean, level subfloor, spreading adhesive, and firmly pressing each plank in place for a tight seam.
If you work steadily, a typical 200–400 sq ft room takes about a day for prep and installation, plus 24 hours for the adhesive to set before light use.
With proper tools and patience, you’ll end up with a durable, low-profile floor that holds up well.
One-paragraph direct answer with outcome and time estimate

If you prep the subfloor properly and work methodically, you can glue down vinyl plank flooring yourself and end up with a smooth, durable floor that looks factory-made; follow manufacturer instructions, spread adhesive, lay planks tightly, trim edges, and roll the floor.
You’ll get a professional-looking result in one to two days for a typical room, depending on size and adhesive cure time.
What Is Glue Down Vinyl Plank Flooring and Why Choose It
Glue-down vinyl plank flooring is installed by adhering each plank to the subfloor with a pressure-sensitive or wet-set adhesive. It comes in both engineered rigid core and flexible vinyl sheet-style planks.
You’ll choose glue-down when you want a low-profile, stable floor that resists shifting and can handle higher temperatures better than floating options.
Compared with click-lock and loose-lay systems, glue-down offers superior sound dampening and permanence but is harder to remove and more sensitive to subfloor imperfections.
Definition and types of glue-down vinyl planks
While many homeowners appreciate floating and click-lock floors for DIY ease, glue-down vinyl plank flooring bonds each plank directly to the subfloor for a low-profile, firmly anchored surface that resists movement and sound.
You’ll find solid vinyl sheets reformatted as planks, luxury vinyl tiles, and cushioned or rigid-core glue-down planks. Choose based on thickness, wear layer, and flexibility for your subfloor.
Pros and cons vs. other vinyl installation methods
Because it’s adhered directly to the subfloor, glue-down vinyl plank flooring gives you a lower-profile, more stable surface than floating or click-lock systems, but it also demands more prep and permanence. You get better sound control and durability, yet removal is harder and moisture-sensitive subfloors need fixing.
| Advantage | Drawback | Best use |
|---|---|---|
| Stability | Permanent | Commercial areas |
| Sound control | Hard removal | High-traffic rooms |
Tools, Materials, and Preparations
Before you start, gather the right tools and materials—saws, spacers, adhesive, primers, and enough planks and trims for your layout.
Check your subfloor for flatness, moisture, and compatibility with glue-down vinyl using a simple checklist, and make any repairs or leveling adjustments first.
Put on safety gear and set up a clean, well-lit workspace with good ventilation and clear access to power.
Tools needed
Gathering the right tools sets you up for a smooth vinyl plank installation, so lay everything out before you start:
- Utility knife with extra blades for precise plank cuts.
- Tapping block and pull bar to snug seams without damaging edges.
- Chalk line and tape measure for accurate layout and straight rows.
- Rubber mallet and carpenter’s square to seat planks and guarantee right angles.
Materials and consumables
Materials and consumables are what keep the project moving once you’ve got your tools laid out: you’ll need quality adhesive, primer if required, underlayment or seam tape, and plenty of cleaning supplies.
Plan quantities, ventilation, and disposal. Keep extras for cuts and mistakes.
- Adhesive and primer
- Underlayment/seam tape
- Cleaning and prep supplies
- Spare planks and trim
Subfloor requirements and compatibility checklist
You’ve stocked adhesives, underlayment, and spare planks—now check that the subfloor will support them.
Verify flatness, dryness, and structural integrity before you glue. Confirm material compatibility and moisture limits with the manufacturer.
- Flatness within manufacturer tolerance
- Moisture test passed (RH or moisture meter)
- Firm, clean, level surface (no loose areas)
- Suitable substrate type (concrete, plywood, OSB)
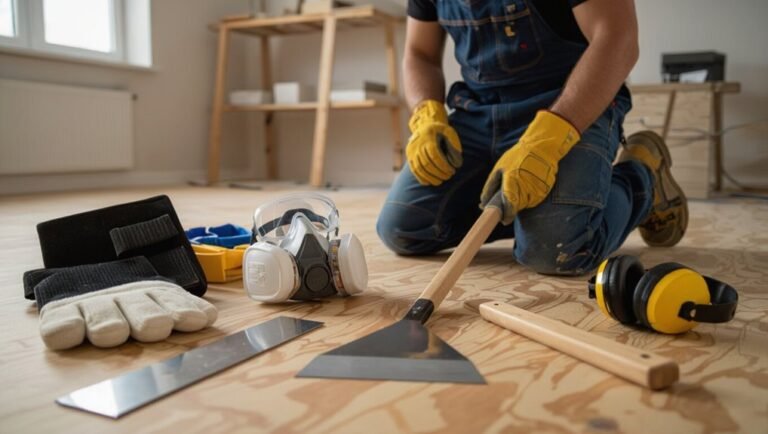
Safety gear and workspace setup
Before you begin laying planks, equip yourself with basic safety gear—knee pads, safety glasses, a dust mask or respirator, work gloves, and hearing protection—and clear the room so you’ll have unobstructed space to cut, move, and fit boards.
- Gather tools: utility knife, straightedge, pry bar, adhesive.
- Ventilate the area well.
- Protect surfaces and trim baseboards.
- Position lighting and a waste bin for scraps.
Pre-Installation Assessment and Site Preparation
Before you start laying planks, measure the room and calculate how much material and waste allowance you’ll need.
Inspect the subfloor—whether concrete, wood, or plywood—for level, damage, and moisture. Make necessary repairs, and perform moisture tests using a meter or probe to confirm readings are within the product’s thresholds.
Finally, acclimate and store the planks on-site per manufacturer guidelines so they reach the room’s temperature and humidity before installation.
Measuring the room and calculating materials
When planning your vinyl plank install, take exact measurements of the length and width of each space and note alcoves, closets, and doorways so you order the right amount of material and avoid costly shortfalls.
- Calculate total square footage.
- Add 5–10% waste for cuts and pattern matching.
- Count plank boxes and check coverage per box.
- Note changes, thresholds, and trim needs.
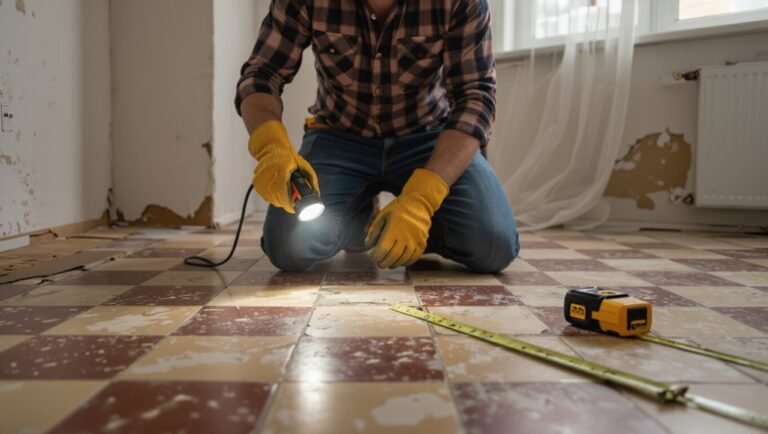
Inspecting and repairing subfloor (concrete, wood, plywood)
After you’ve measured and ordered your materials, inspect the subfloor to make certain it’ll support the new vinyl planks — different substrates need different prep.
- For concrete, fill cracks and level high spots with patching compound.
- For wood joists, tighten squeaks and replace rotten boards.
- For plywood, confirm panels are secure and gaped correctly.
- Remove debris, sand rough areas, and vacuum thoroughly.
Moisture testing (methods and acceptable thresholds)
Because excess moisture can wreck vinyl plank installations, you’ll want to test the subfloor thoroughly and use methods suited to the substrate.
- Use a moisture meter for wood; accept ≤12% or manufacturer spec.
- Perform calcium chloride or RH probe tests on concrete; accept ≤3 lbs/1000 ft²/24 hrs or RH ≤75% unless otherwise stated.
- Check for visible dampness, efflorescence, or leaks.
- Fix sources and retest before gluing.
Acclimating planks and storage guidelines
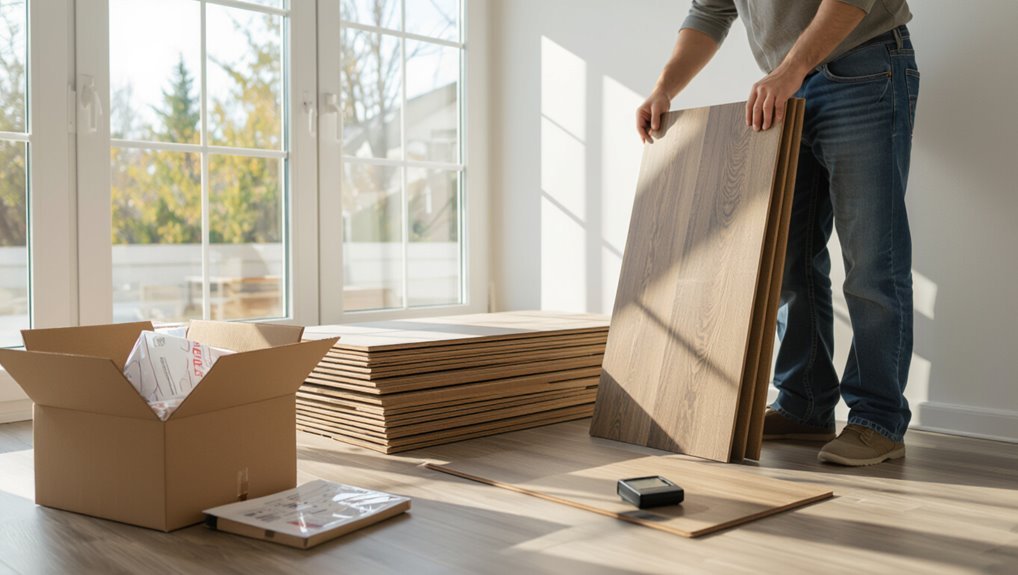
If the planks will be bonded or floated on-site, let them acclimate in the installation area for at least 48 hours (72 hours is safer) and keep the cartons flat and unopened; this lets the material reach the room’s temperature and humidity so expansion and contraction are minimized during and after installation.
- Store cartons flat, off concrete, on pallets.
- Maintain 60–80°F and stable humidity.
- Avoid direct sunlight and drafts.
- Inspect for damage and match batches before installing.
Step-by-Step Installation Process
Now you’ll follow a clear, step-by-step installation process that starts with layout planning and choosing the right orientation for the room.
You’ll snap a straight starter chalk line, learn adhesive types and trowel patterns, then position the first row with proper spacing from walls.
Finally, you’ll handle seaming and stagger end joints to guarantee a secure, natural-looking floor.
Step 1 Layout planning and orientation
Start by deciding the direction and pattern of your vinyl planks—this determines how the room will look and how many cuts you’ll make.
Walk the space, note light sources, focal walls, and traffic flow. Measure and sketch the room, marking doorways, vents, and obstacles.
Plan plank sequencing to minimize narrow edge pieces and stagger end joints for a balanced, professional appearance.
Step 2 Establishing a straight starter line and chalk line
1 Begin by finding your reference line: sight down the longest straight wall or across the main traffic path to pick the edge that’ll guide every row.
Snap a chalk line parallel to that reference, allowing for expansion gap at walls.
Check with a square at each end, adjust until perfectly straight, and mark starter plank positions to guarantee consistent, even rows throughout installation.
Step 3 Applying adhesive: types, coverage patterns, trowel choices
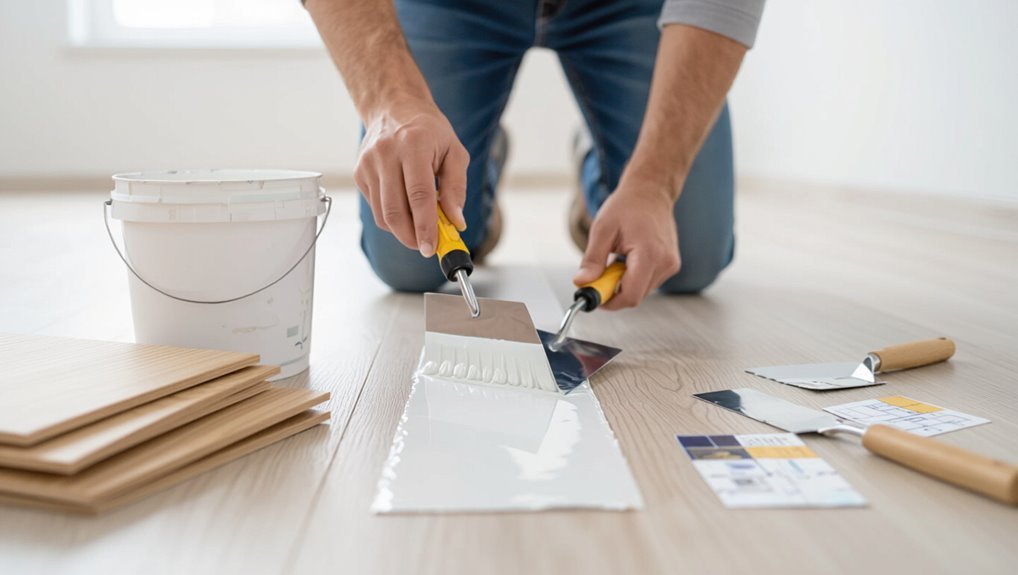
Because the right adhesive and trowel pattern determine bond strength and longevity, you’ll choose products based on your plank type, subfloor, and room conditions before laying a single piece.
Select manufacturer-recommended adhesive (pressure-sensitive or wet-set), match trowel notch size for coverage, follow open/working time, and spread in consistent directional patterns.
Check transfer and achieve 90–100% coverage for a secure bond.
Step 4 Installing first row: positioning and spacing from walls
Before you lay the first plank, position it so the tongue faces the room’s center and leave the manufacturer’s recommended expansion gap—typically 1/4″ to 1/2″—between the plank edge and the wall; use spacers to hold that gap consistently along the entire row.
Press the plank into adhesive, align it straight with a chalk line, and check spacing frequently as you proceed.
Step 5 Seaming and end-joint staggering best practices
When you start the second and subsequent rows, stagger end joints so adjacent seams are at least 6–8 inches apart (check the manufacturer’s recommendation).
Snap each plank securely into the previous row and tap ends with a rubber mallet and pull bar to eliminate gaps.
Alternate plank lengths, inspect seams for tightness, trim short starter pieces to maintain pattern, and clean any adhesive squeeze-out promptly.
Step 6 Rolling and pressing planks for proper adhesion
Roll a 100– to 150‑pound floor roller slowly and evenly over newly laid planks to press them into the adhesive and eliminate air pockets; follow with hand‑pressure along seams and use a J‑roller or seam roller in tight areas to guarantee full contact and tight joints without crushing edges.
Work in overlapping passes, check for adhesive squeeze‑out, wipe excess, and re‑roll high spots until uniform adhesion is achieved.
Step 7 Cutting planks for edges and around obstacles (tools & techniques)
Measure and mark each plank carefully for cuts around walls, doorways, and obstacles so your finished edges fit snugly.
Use a straightedge and pencil for straight cuts, a jigsaw for curves or pipe notches, and a utility knife with multiple scoring passes for thin vinyl.
Cut slightly oversized, dry-fit, then trim for a precise fit.
Wear eye and hand protection.
Step 8 Installing last row and ensuring expansion clearance
8. Fit the last row carefully: measure each plank’s required width, account for the tongue, and cut precisely.
Dry-fit pieces before applying adhesive. Maintain the manufacturer’s recommended expansion gap along walls and fixed objects—use spacers to hold clearance.
Press adhesive and plank firmly, rolling if necessary. Check alignment frequently so seams remain tight and consistent across the floor.
Step 9 Trimming, transitions, and perimeter finishing
Now you’ll tackle trimming, changes, and perimeter finishing to make the installation look polished and function correctly.
Measure and trim planks for vents, doorways, and irregular edges using a straightedge and utility knife.
Install connector strips at thresholds and between floor types, securing them per manufacturer instructions.
Fit quarter round or shoe molding to cover expansion gaps, nailing to baseboard, not flooring.
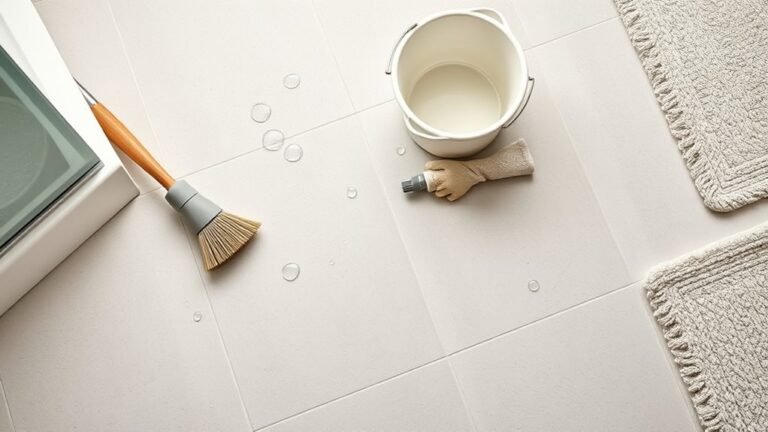
Step 10 Cleanup, adhesive removal, and initial curing time
With trims, thresholds, and moldings in place, clean-up and adhesive removal come next to make the floor ready for use.
Remove excess adhesive with recommended solvent and a soft cloth, avoiding damage.
Wipe seams and edges, then allow the manufacturer’s specified initial curing time—usually 24–48 hours—before light traffic.
Keep area ventilated and avoid heavy furniture until full cure.
Common Problems During Installation and How to Fix Them
As you install, you’ll run into issues like air bubbles or delamination, uneven seams or height differences, and adhesive transfer or failure — each has a simple fix if you know what to look for.
You’ll also need clear techniques for trimming around doorways, vents, and irregular layouts to keep the floor flat and secure.
In the next section, we’ll cover causes and step-by-step remedies so you can prevent and correct these problems quickly.
Air bubbles and delamination causes and remedies
Air bubbles and delamination happen when the adhesive, subfloor, or plank itself fails to bond properly, and you’ll usually spot them as raised areas, hollow sounds, or peeling edges soon after installation.
To fix them, remove affected planks, clean and level the subfloor, apply recommended adhesive evenly, and roll planks firmly.
Prevent with proper acclimation, moisture testing, and correct adhesive coverage.
Uneven seams or plank height differences prevention and correction
Fixing bubbles and delamination often uncovers another common issue: uneven seams or plank height differences that make the floor feel bumpy and look unprofessional.
To prevent this, dry-fit rows, verify subfloor flatness, and trim high edges.
If you find height differences, lift affected planks, clean adhesive, level with a thin underlayment or sanding, then reapply adhesive and press firmly for a seamless finish.
Adhesive transfer or adhesive failure troubleshooting
When adhesive transfers to plank surfaces or the glue simply fails to hold, you’ll end up with loose boards, sticky residue, or gaps that ruin the installation; diagnosing the cause quickly lets you choose the right fix.
Check substrate cleanliness, moisture, and recommended adhesive type.
Remove residue with manufacturer-approved solvent, reapply correct adhesive, press with roller, and allow full cure.
Test adhesion before finishing.
Working around doorways, vents, and irregular layouts
Doors, vents, and odd room shapes demand patience and planning, so measure openings and obstacles before cutting planks.
You’ll scribe and dry-fit pieces, trim with a jigsaw for curves, and undercut door jambs so planks slide beneath.
For vents, cut precise openings and seal edges.
In complex layouts, work from the focal point outward, maintaining consistent expansion gaps and alignment.
Best Practices, Tips, and Time-Saving Strategies
Plan your layout to cut waste and hide seams, pick the right adhesive and trowel notch for your plank width, and consider temperature and humidity so the glue sets correctly.
You’ll save time by staggering joints, pre-mixing adhesive for large areas, and keeping a moisture meter on hand.
Finish with maintenance-friendly details—proper trim, flooring connectors, and a final clean so the floor looks great and stays easy to care for.
Layout tips to minimize waste and visible seams
Although you’ll want to work quickly, take a few minutes to sketch the room and dry-lay rows so you can see how boards will align at doors, corners, and focal points; this helps you choose a starting wall and board widths that minimize short pieces and awkward seams.
Stagger end joints at least 6–8 inches, plan continuous runs through open spaces, and trim borderline pieces to avoid tiny slivers.
Choosing adhesive and trowel size for different plank sizes
When you’re matching adhesive and trowel size to plank dimensions, pick a system that gives full, consistent contact without excess squeeze-out.
For narrow planks, use a smaller V-notched trowel (e.g., 1/16″ x 1/16″ x 1/16″) and for wider planks choose larger notches (1/8″ or 3/16″) per manufacturer.
Test coverage rate, work in small sections, and maintain open time for proper bonding.
Temperature and humidity tips for optimal adhesion
Because adhesive performance depends heavily on environmental conditions, you should control both temperature and humidity before and during installation to guarantee proper bonding and avoid issues like gassing or poor cure.
Keep room temperature between 65–80°F (18–27°C) and relative humidity 35–65%.
Condition planks and adhesive in the space 48 hours prior.
Use HVAC or dehumidifiers to stabilize conditions.
Maintenance-ready finishing techniques
1 simple finishing routine will keep your vinyl plank floor looking new and make future maintenance fast: seal seams where recommended, trim thresholds flush, and apply protective edge treatments so dirt and moisture can’t sneak in.
Finish with border strips, install proper baseboards, and add felt pads to furniture.
Clean with manufacturer-approved products, avoid harsh chemicals, and inspect seals yearly to catch issues early.
Costs, Time Estimates, and When to Hire a Pro
You’ll get a quick breakdown of typical DIY material and tool costs so you can budget accurately.
I’ll give estimated labor times for small, medium, and large rooms to help plan your schedule.
You’ll also learn clear signs that mean it’s smarter to hire a professional.
Typical DIY material and tool cost breakdown
Estimating costs and time up front helps you decide whether to DIY or hire a pro: vinyl plank materials typically run $1.50–$6.00 per sq ft, underlayment and trim add another $0.25–$1.00, and basic tools plus consumables can push your outlay higher if you don’t already own them.
| Item | Typical cost |
|---|---|
| Materials | $1.50–$6.00/ft² |
| Tools/consumables | $50–$300 |
Estimated labor time by room size
Although room size and layout dictate most of the work, a typical DIYer can expect to spend about 2–6 hours on a small 100–150 ft² room, 6–12 hours for a medium 200–400 ft² space, and 12–24+ hours for larger or irregular rooms once you factor in prep, cutting, fitting, and finishing; hire a pro if your schedule, skill level, or the job complexity makes those timeframes unrealistic.
Plan breaks, allow extra time for repairs, and work methodically to avoid costly mistakes.
Signs you should hire a professional
Sometimes a project looks simple on paper but quickly becomes overwhelming once you start—if your subfloor is uneven, moisture levels are high, or trim and connections are complex, it’s time to think about hiring a pro.
You should also call a pro if budget constraints for tools and repairs exceed DIY costs, or if tight timelines, warranty concerns, or structural issues demand experienced, insured installers.
Care, Maintenance, and Warranty Considerations
After installation you’ll need to follow the initial curing guidelines and limit heavy traffic during the first week to let adhesives and seams settle.
Regular cleaning, prompt stain removal, and knowing how to replace a damaged plank will keep the floor looking and functioning its best.
Finally, document the installation and keep receipts and photos so you can follow warranty requirements if an issue arises.
Initial curing period and first-week use guidelines
When your new vinyl plank floor is down, give it time to cure: for the first 48–72 hours avoid heavy furniture, rolling loads, and area rugs so adhesive and seams set properly;
during week one walk on the floor with clean, dry feet or soft-soled shoes and keep humidity and temperature within the manufacturer’s recommended range to prevent gaps or buckling.
After day three, gradually reintroduce furniture using protective pads.
Routine cleaning and stain removal
Once you’ve reintroduced furniture and the floor has settled, keep a simple cleaning routine to protect the finish and your warranty.
- Sweep or vacuum daily with a soft-brush attachment to remove grit.
- Damp-mop weekly using manufacturer-approved cleaners; avoid excess water.
- Wipe spills promptly with a soft cloth and mild detergent.
- Treat stains with recommended stain removers, testing in an inconspicuous spot first.
Repairing damaged planks and spot replacement steps
Spot-replace damaged planks promptly to prevent moisture intrusion and keep your warranty intact.
First, remove grout or trim, cut out the damaged plank without harming neighbors, and clean the subfloor.
Apply recommended adhesive, position the new plank, and roll to guarantee bond.
Seal seams if needed and inspect edges.
Test stability before resuming normal use.
Warranty tips and documenting the installation
Although warranties vary by brand and installation type, you should document every step of the job so you can prove proper installation and maintenance if a claim arises.
Take dated photos of subfloor prep, adhesive spread, and plank layout. Keep receipts, product codes, and adhesive batch numbers.
Record cleaning methods and schedules. Register the product with the manufacturer and retain all warranty paperwork.
Frequently Asked Questions
You’ll likely have questions like whether glue-down planks can go over existing flooring, how long to wait before returning furniture, or what to do if the subfloor fails moisture tests.
You’ll also want to know if glue-down vinyl is appropriate for bathrooms or basements and how to remove planks later if you replace them.
Below are clear, practical answers to each of these common concerns.
Can glue-down vinyl planks be installed over existing flooring?
Yes — in many cases you can install glue-down vinyl planks over existing flooring, but the success depends on the type, condition, and flatness of what’s already down.
You should remove loose, cushioned, or water-damaged materials, repair cracks, and guarantee a smooth, clean surface.
Porous or textured floors may need primer or leveling compound to achieve proper adhesion and a stable finish.
How long before you can move furniture back onto the floor?
How soon can you move furniture back onto new vinyl plank flooring?
Wait at least 24–48 hours for the adhesive to set under normal conditions; heavier pieces may need 72 hours.
Keep foot traffic light during initial cure.
Use furniture pads or lift pieces instead of dragging.
Follow manufacturer cure-time recommendations and allow longer if humidity or temperature are outside the ideal range.
What to do if the subfloor fails moisture tests?
If your subfloor fails moisture tests, don’t install the planks—you’ll risk buckling, mold, or adhesive failure.
Stop work, identify moisture source, and fix it: repair leaks, improve drainage, or add ventilation.
Dry the subfloor fully and retest.
If levels remain high, apply an appropriate moisture barrier or use a moisture mitigation system per manufacturer instructions before proceeding with glue-down vinyl.
Can glue-down vinyl be used in bathrooms or basements?
Can you use glue-down vinyl in bathrooms or basements? Yes, but only if the subfloor is fully dry, clean, and flat, and you use a waterproof adhesive and compatible vinyl rated for wet areas.
Seal seams and perimeter, maintain proper slope and ventilation, and follow manufacturer moisture limits.
Avoid installing over active moisture or on surfaces prone to frequent standing water.
How do I remove glue-down vinyl planks if I want to replace them?
When you decide to replace glue-down vinyl—perhaps because moisture damaged it or you want a new look—you’ll find removal is more labor-intensive than floating or click-lock planks.
Start by scoring and heating sections to soften adhesive, then pry up planks with a floor scraper and putty knife.
Remove residual adhesive with a grinder, adhesive remover, or heat and scrape, then clean and level the subfloor.