How to Install New Floors: A Room-by-Room Beginner’s Guide
You can install many floors yourself—vinyl planks and basic laminate are easiest—while hardwood and tile often need pros. Start by choosing moisture-appropriate materials per room (waterproof for baths/basements, cushioned for bedrooms). Prep carefully: remove old flooring, level and test the subfloor, acclimate materials, and gather underlayment and tools. Expect a weekend for simple rooms, longer for complex jobs, and budget for waste and trim; keep going and you’ll get room-by-room guidance and step-by-step tips.
Can You Install New Floors Yourself and What to Expect
You can install some floors yourself—like vinyl planks or basic laminate—while hardwood, tile, and complex subfloor work usually call for pros.
Expect DIY projects to take a weekend to a few days and cost from a few hundred to a couple thousand dollars in materials and tools, whereas professional installs add labor that can double or triple the total.
Difficulty varies: click‑and‑lock and sheet options are easier, hardwood and tile are time‑consuming and technical, and subfloor or moisture issues make any job harder.
One-paragraph direct answer summarizing DIY vs. professional, time, cost range, and difficulty by floor type
While some floors are straightforward enough for a confident DIYer, others are best left to pros: vinyl plank and floating laminate can usually be installed by homeowners in a weekend for $1–5 per sq ft in materials (plus tools or rental).
In contrast, solid hardwood, tile, and stone are more time-consuming, costly ($5–20+ per sq ft installed), and require skill for subfloor prep, moisture control, and finishing.
Expect a DIY project to take a few days to a week for easy types, but plan several days to weeks and higher labor costs when hiring pros for complex installs or when structural work, leveling, or specialized finishes are needed.
You can learn how to install floors, but choose pro help when precision, warranties, or moisture mitigation matter.
Basics: Types of Flooring and When to Choose Each
You’ll pick flooring based on room use, moisture risk, and how much subfloor prep you’re willing to do.
Compare hardwood (solid vs engineered) for warmth and refinishing, laminate for budget and limited moisture tolerance, vinyl (LVP/LVT or sheet) for waterproof performance, tile for durability and grout needs, and carpet for comfort with the right padding and pile.
I’ll explain pros, cons, and the subfloor or moisture considerations that steer each choice.
Hardwoods (solid vs engineered) pros, cons, subfloor needs
Because hardwood brings warmth and value to a home, choosing between solid and engineered boards matters more than you might think: you’ll weigh durability, refinishing, and moisture tolerance. Solid sands well but hates humidity; engineered resists moisture and fits over concrete. Check subfloor: plywood/OSB for nail-down, moisture barrier or leveling for float/adhere.
| Type | Pros | Cons |
|---|---|---|
| Solid | Refinishable | Moisture-sensitive |
| Engineered | Stable | Limited refinish |
Laminate pros, cons, moisture considerations
If hardwood isn’t the right fit—due to cost, moisture, or installation limits—you might prefer laminate, which mimics wood or tile at a lower price and with easier upkeep.
It’s durable, scratch-resistant, and DIY-friendly, but can’t be sanded and can swell if exposed to standing water.
Use moisture barriers, acclimate boards, and avoid high-humidity areas unless manufacturer permits.
Vinyl (LVP/LVT and sheet) pros, cons, waterproof use cases
When moisture or budget rules your choices, vinyl—available as luxury vinyl planks/tiles (LVP/LVT) and sheet vinyl—gives you a waterproof, low-maintenance alternative that still mimics wood or stone.
You’ll enjoy easy installation, durability, and affordability; thin options fit over imperfect subfloors.
Downsides: lower resale appeal, potential for gouging, and seams in sheet installations.
Ideal for bathrooms, kitchens, and basements.
Tile (ceramic/porcelain) durability, subfloor, grout considerations
Although tile feels solid underfoot, ceramic and porcelain vary widely in durability and installation needs, so pick the right type for the room and traffic.
You’ll need a flat, rigid subfloor and proper underlayment; cement backer board or thin-set over concrete works best.
Use grout suited to moisture and stain resistance, seal porous grout, and allow correct curing times to prevent cracks.
Carpet padding, pile types, room suitability
Because carpet padding affects comfort, insulation, and longevity, you’ll want to choose the right thickness and material for each room.
Use denser, thicker pads in living rooms for cushioning and sound control; choose low-profile, firm pads for stairs and heavy-traffic halls to prevent matting.
Match pile: loop for durability, cut pile for softness.
Bedrooms favor plush piles; basements need moisture-resistant padding.
Specialty floors (bamboo, cork, polished concrete) brief notes
After choosing the right carpet pile and padding for each room, you may want to contemplate specialty surfaces like bamboo, cork, and polished concrete for specific needs and styles.
Bamboo is durable, eco-friendly, and suits high-traffic areas.
Cork adds warmth, sound absorption, and comfort underfoot, ideal for bedrooms.
Polished concrete offers industrial durability and low maintenance for basements or modern kitchens.
Room-by-Room Considerations and Recommended Flooring Choices
Think about each room’s needs before you pick a floor: living and dining rooms prioritize aesthetics, traffic tolerance, and sound control, while kitchens need moisture resistance and high durability.
For bathrooms and laundry areas you’ll want fully waterproof surfaces and the right underlayment, and bedrooms benefit from softer, insulating options for comfort.
In basements focus on moisture mitigation and proper subfloor systems to support water-resistant choices.
Living Room and Dining Room aesthetics, traffic, sound
When you choose flooring for your living and dining rooms, balance aesthetics with durability and sound control to match how you use each space.
Pick materials that suit foot traffic, furniture weight, and noise reduction. Consider rugs for zones and visual warmth.
- Prioritize scratch resistance
- Use underlayment for soundproofing
- Match style to furnishings
- Plan connections for flow
Kitchen moisture resistance, durability, best options
Because kitchens face spills, steam, and heavy foot traffic, you’ll want flooring that stands up to moisture and everyday wear without sacrificing style.
Choose waterproof or water-resistant materials with durable surfaces and easy maintenance. Consider wear ratings and warranties, and match finish to cleanup needs.
- Luxury vinyl plank: waterproof, forgiving
- Porcelain tile: highly durable, low maintenance
- Engineered hardwood: stable, stylish
- Cork with sealant: resilient, comfortable
Bathroom and Laundry waterproofing, underlayment, best options
Bathrooms and laundry rooms demand the highest level of moisture protection, so you’ll need waterproof materials, proper underlayment, and careful floor changes to prevent water damage.
Choose waterproof vinyl, ceramic or porcelain tile, or sealed engineered wood. Install a moisture barrier and sloped substrate where needed, and seal joints.
- Waterproof vinyl or tile
- Cement backer or waterproof underlayment
- Raised floor drains/slope
- Silicone-sealed seams
Bedroom comfort, insulation, best options
If you want a bedroom that feels cozy year-round, focus on insulation, underlayment, and floor materials that trap warmth and reduce noise.
Choose options that balance comfort, durability, and aesthetics. Consider thermal underlay, soft surface finishes, and soundproofing to improve sleep quality.
- Engineered hardwood with insulated underlay
- Thick carpet or wool rugs
- Cork for warmth and sound absorption
- Luxury vinyl with thermal pad
Basement moisture mitigation, subfloor solutions, best options
You’ve picked warm, comfortable options for bedrooms, but basements need a different focus: moisture control and proper subfloor systems will determine which flooring performs best.
You should test humidity, install a vapor barrier, and choose water-resistant surfaces. Consider raised subfloors to air out dampness and use mold-resistant adhesives.
- Test and seal concrete
- Use vapor barriers
- Choose waterproof flooring
- Install raised subfloor
Entryway and Mudroom abrasion resistance, slip resistance, best options
Because your entryway and mudroom take the brunt of wet shoes, grit, and heavy foot traffic, pick flooring that resists abrasion and won’t become dangerously slick when wet.
You’ll want durable, low-maintenance surfaces with texture for traction and water resistance. Consider these practical options:
- Porcelain tile with textured finish
- Luxury vinyl plank with wear layer
- Sealed natural stone
- Rubber or commercial-grade matting
Preparing for Installation Tools, Materials, and Site Prep
Before you start, gather a tools checklist tailored to your floor type and stock up on materials and consumables like underlayment, adhesives, fasteners, and trim.
Measure the room carefully, calculate waste allowances, and order the correct amount of flooring.
Finally, prep the subfloor by cleaning, leveling, and moisture-testing so installation goes smoothly.
Tools checklist by floor type
One clear tools checklist can save you hours and prevent costly mistakes when installing new floors:
You’ll need different core tools per floor type—measure, cut, fit, and finish—so prepare accordingly and check power, safety, and layout gear before starting.
- Tape measure, chalk line, and square
- Flooring saw or utility knife (type-specific)
- Pry bar, mallet, spacers
- Safety gear: goggles, ear protection, knee pads
Materials and consumables (underlayment, adhesives, fasteners, trim)
Having the right tools lined up is only half the job; the materials and consumables you choose will determine how well the floor performs and how long it lasts.
Choose underlayment for moisture and sound control, adhesives or nails per flooring type, corrosion-resistant fasteners, and matching trim.
Store materials dry and at room temp before installation.
- Underlayment type
- Adhesive selection
- Fastener grade
- Trim profile
Measuring the room and ordering the right amount of flooring (waste allowances)
Measure the room carefully so you know exactly how much flooring to order and how much extra to budget for waste. Measure length and width, account for alcoves and closets, and add waste: 5–10% for straight lays, 10–15% for patterns or diagonal installs. Order slightly more to cover mistakes and future repairs.
| Item | Recommendation |
|---|---|
| Straight | 5–10% |
| Pattern | 10–15% |
| Diagonal | 12–15% |
| Repairs | +1–2 boxes |
Preparing the subfloor (leveling, cleaning, moisture testing)
Before you lay any flooring, get the subfloor clean, dry, and perfectly level so your new surface sits flat and lasts.
Sweep and vacuum, remove old adhesive, and repair gouges or loose boards.
Test moisture with a meter or tape method for concrete and plywood.
Use self-leveling compound or sanding to correct low/high spots, then recheck moisture before installing.
Step-by-Step Installation Guide: General Workflow
Start by removing the old floor and inspecting the subfloor for damage.
Fix and level any issues, address moisture, then roll out the underlayment or vapor barrier and let your flooring acclimate.
Finally, plan your layout, pick a starting line, and account for staggering and expansion gaps before you begin installing.
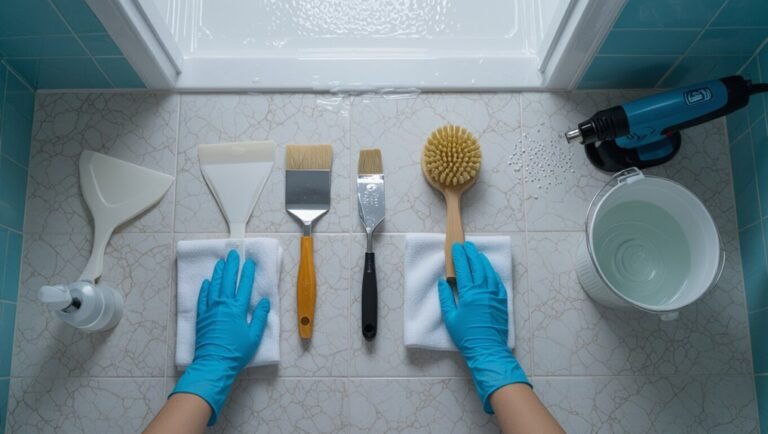
Step 1 Remove old flooring and inspect subfloor
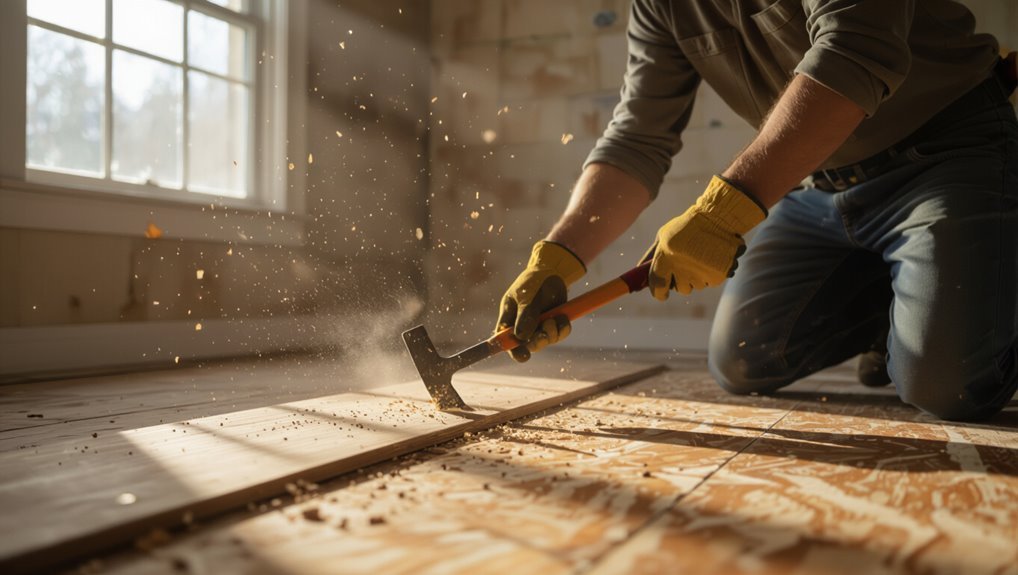
Tear out the old flooring carefully and check the subfloor for damage, moisture, and uneven spots before you lay anything new.
Remove trim, nails, adhesives, and debris; vacuum thoroughly.
Look for rot, soft spots, mold, stains, or structural gaps.
Note junctions, seams, and squeaks so you can address them in the next step.
Photograph issues for reference and planning.
Step 2 Repair and level the subfloor; moisture mitigation
A solid subfloor is essential, so you’ll repair damage, level low spots, and address moisture before laying new flooring.
Remove loose boards, fasten squeaks, and replace rotten sections. Use patching compound or plywood to level dips, then sand high areas.
Test for moisture with a meter; fix leaks, improve drainage, and allow drying.
Confirm surface is clean and structurally sound.
Step 3 Install underlayment or vapor barrier
Now you’ll lay down the underlayment or vapor barrier that protects your new floor from moisture and evens out minor subfloor imperfections.
Roll or cut sheets to fit, tape seams per manufacturer instructions, and trim around obstacles.
Use a vapor barrier in moisture-prone areas and a foam or cork underlayment for sound and comfort.
Smooth wrinkles and secure edges before installing flooring.
Step 4 Acclimate flooring materials (wood, LVP, laminate)
Because wood and synthetic floors respond to humidity and temperature, you’ll let your materials acclimate on-site before installation so they settle to the room’s conditions; this prevents gaps, buckling, and other issues after you lay the floor.
Store boxes flat, unopened if possible, in the installation room 48–72 hours (longer for solid hardwood).
Keep HVAC running and measure moisture to confirm stable readings.
Step 5 Layout planning and starting line (staggering, expansion gaps)
Before you lay a single plank, plan the layout so runs look balanced and joints stay secure: measure the room, decide the direction (usually parallel to the longest wall or main light source), and pick a starting wall that minimizes visible cut pieces.
Establish stagger patterns to avoid aligned end joints, maintain manufacturer-recommended expansion gaps at walls and thresholds, and snap a starting chalk line for straight rows.
Step 6 Installation techniques by floor type (nail, glue, click-lock, thinset)
With your layout set and a chalk line snapped, pick the installation method that matches your floor type and subfloor—nail-down for solid hardwood over plywood, glue-down for engineered planks or some vinyls, click-lock for floating floors, and thinset for ceramic or stone tile. Use correct fasteners, adhesive, or mortar; follow manufacturer specs; work row by row.
| Floor type | Quick tip |
|---|---|
| Hardwood | Nail securely |
| Tile | Use thinset correctly |
Step 7 Cutting and fitting around obstacles, doorways, cabinets
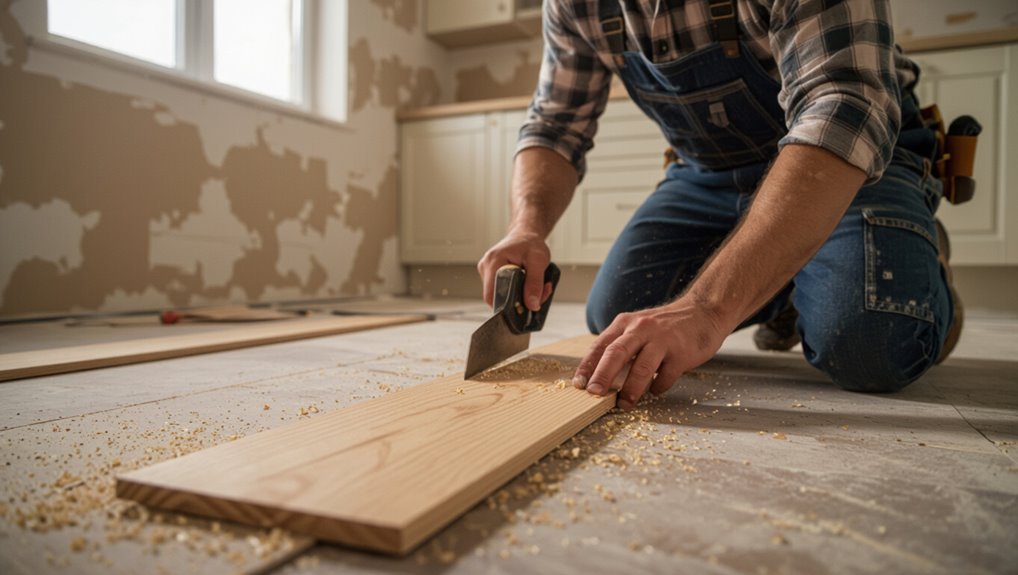
Measure and mark each cut carefully so boards fit snugly around doorways, pipes, cabinets and other obstacles.
Use a coping saw, jigsaw, or pull saw for curves and notches; test-fit pieces before final cuts.
Leave recommended expansion gaps, scribe boards to uneven walls, and trim cabinet toe kicks as needed.
Keep scrap pieces for templates and verify alignment as you progress.
Step 8 Finishing touches: transitions, baseboards, thresholds, sealing
Finish strong by installing changes, baseboards, thresholds, and sealing to protect your new floor and create a polished look.
Fit junction strips at room joins, nail or adhesive-mount baseboards leaving expansion gaps covered by quarter round, and trim thresholds to height.
Caulk gaps where appropriate and apply manufacturer-recommended sealant on edges.
Check alignment and secure everything so seams sit tight and even.
Step 9 Clean-up, curing time, and initial maintenance
Now that your trims and seals are in place, turn attention to cleanup, curing time, and the first maintenance tasks to protect that polished look.
Remove debris, vacuum, and mop with manufacturer-approved cleaner. Avoid heavy traffic and rugs until adhesives or finishes cure—usually 24–72 hours.
Inspect seams, tighten junctions, and apply recommended maintenance products. Keep humidity stable for the first week.
Detailed How-To Sections by Flooring Type
Now you’ll get step-by-step instructions tailored to each flooring type so you can pick the right method for your project.
You’ll learn hardwood techniques (nail, float, or glue-down engineered), laminate click-lock best practices, vinyl plank/tile options (glue-down, click, or loose lay), tile installation with thinset, spacers, grout and sealing, and carpet with tack strips and stretching.
Follow the specific procedures and tips for the material you choose to get a durable, professional result.
How to install hardwood (stepwise: nail/float/engineered glue)
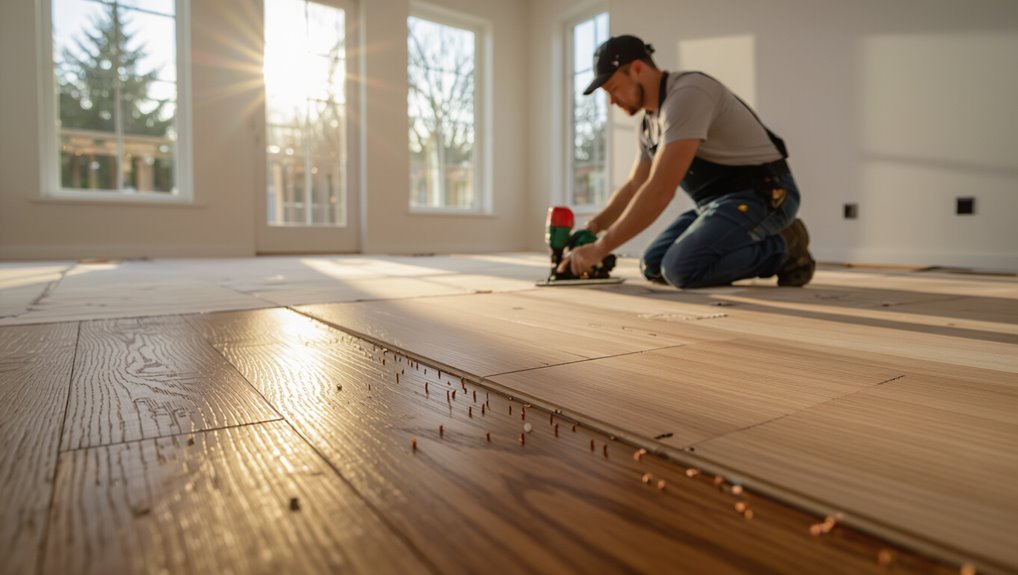
Installing hardwood involves three main approaches—nailing, floating, and gluing engineered boards—each suited to different subfloors, room conditions, and budget.
So before you begin, decide which method matches your floor type, acclimation needs, and long-term maintenance goals.
For nailed solid, staple or cleat into plywood/joists.
For floating engineered, use manufacturer tongue-and-groove or click system.
For glue-down, spread recommended adhesive and press boards firmly.
How to install laminate (click-lock, floating floor best practices)
1 simple way to get a durable, attractive floor is to install click-lock laminate as a floating system, and with the right prep and techniques you can do it efficiently yourself.
Acclimate boards 48 hours, level subfloor, install underlayment for moisture and sound, stagger end joints, leave expansion gaps at walls, use spacers, tap panels with a block, and trim doorjambs for a snug finish.
How to install vinyl plank or tile (glue-down vs. click vs. loose lay)
Laminate’s click-lock method works well for many rooms, but vinyl plank and tile give you more waterproofing and design options—and they come in different installation methods you should weigh before you start.
Choose glue-down for permanent, low-profile installations; click-lock vinyl for DIY-friendly floating floors; loose-lay when you need fast, replaceable coverage.
Prep, moisture testing, and proper underlayment remain essential.
How to install tile (thinset, spacers, grout application, sealing)
Tile installation breaks down into clear, repeatable steps you’ll follow whether you’re laying ceramic, porcelain, or natural stone: prepare a flat, clean substrate, mix and apply the correct thinset, set tiles with consistent spacers, let the mortar cure, grout, and then seal where needed.
Cut edge tiles to fit, clean grout haze before it hardens, and apply sealer for porous stone or grout protection.
How to install carpet (tack strips, stretching, trimming)
Once your hard-surface work is done, switch gears to carpet installation, which has its own set of tools and techniques: tack strips, power stretching, and careful trimming.
Remove old flooring, install tack strips around the perimeter leaving a gap, roll underlay, stretch carpet with a power stretcher toward strips, trim excess with a carpet knife, and tuck edges for a clean, secure finish.
Common Problems and How to Fix Them
You’ll run into issues like buckling, gaps, and cupping and you should learn the common causes and quick remedies for each.
Check for telegraphed subfloor imperfections, moisture problems, and uneven seams or lippage so you can detect and correct them before they get worse.
I’ll also show how to diagnose moisture-related failures and fix adhesive or seam failures step by step.
Buckling, gaps, and cupping causes and remedies
Because floors respond to moisture, temperature, and installation mistakes, problems like buckling, gaps, and cupping can show up quickly or develop over time.
You should identify causes—excess humidity, rapid drying, inadequate acclimation, or improper fastening—and address them: control indoor climate, allow boards to acclimate, replace warped planks, re-secure loose boards, and maintain expansion gaps.
Regular monitoring prevents recurrence.
Telegraphed subfloor imperfections detection and correction
A smooth subfloor is your best defense against telegraphed imperfections—those bumps, ridges, and depressions that show through new flooring—so inspect and address any issues before you lay down boards or planks.
Walk the area, mark high and low spots, sand or plane highs, and fill lows with leveling compound.
Secure loose panels and replace damaged sections to guarantee a flat, stable base.
Moisture-related failures diagnosis and mitigation
If moisture’s allowed to linger beneath or within your subfloor and flooring, it can warp boards, lift adhesives, cause mold, and ruin finishes—so diagnose sources quickly by checking humidity, performing moisture tests (calcium chloride or in-situ probes), and inspecting for leaks, poor drainage, or vapor barrier failures.
Stop damage by fixing leaks, improving ventilation, adding vapor retarders, drying with dehumidifiers, and replacing compromised materials.
Uneven seams, lippage (tile), and adhesive failures troubleshooting steps
Moisture problems can create movement that shows up as uneven seams, tile lippage, or failing adhesives.
So once you’ve dealt with wetness, you need to tackle how the materials actually meet. Inspect gaps, sinusoidal lippage, and adhesive bond.
Remove loose tiles or planks, clean substrate, level or shim low spots, reapply proper adhesive or thinset, clamp and grout, then allow full cure before traffic.
Mistakes to Avoid and Best Practices
Don’t rush preparation: failing to acclimate flooring, skipping a moisture test, or using the wrong underlayment will cost you time and money.
Follow manufacturer-recommended installation steps to protect your floor’s longevity and keep the warranty valid.
If you’re dealing with complex room layouts, structural issues, or unclear warranty terms, call a pro.
Top DIY mistakes (insufficient acclimation, skipping moisture test, wrong underlayment)
Because new flooring reacts to its environment, skipping proper acclimation, moisture testing, or the right underlayment can turn a weekend project into costly repairs.
You should let materials acclimate per manufacturer specs, test subfloor moisture before installation, and choose underlayment matched to floor type and subfloor.
Ignoring these steps causes warping, mold, gaps, or voided warranties—don’t rush them.
Installation best practices for longevity and warranty compliance
Those prep steps set the stage, but how you install the floor determines how long it lasts and whether the warranty stays valid.
Follow manufacturer instructions, maintain proper expansion gaps, use recommended underlayment and fasteners, and keep a clean, level substrate. Mistakes void warranties and shorten life.
- Read and follow manufacturer guidelines exactly
- Maintain specified expansion gaps
- Use approved underlayment/fasteners
- Confirm substrate is clean, dry, level
When to call a pro complex rooms, structural issues, warranty concerns
If your room has unusual layouts—angled walls, multiple doorways, stairs, or frequent moisture, you should call a pro rather than tackling the job yourself.
Also hire one for structural concerns, suspected rot, uneven subfloors, or complex changes.
Pros protect warranties by following manufacturer specs and using proper tools.
Saving money now can cost more later if mistakes void coverage or cause damage.
Cost, Time, and ROI: Budgeting and Planning
Before you start, know the typical cost ranges for each floor type and how room size will change the price.
You’ll also want realistic time estimates for installation by material and room so you can schedule work and minimize disruption.
Finally, consider how different floors affect home value and resale appeal to weigh ROI against upfront costs.
Typical cost ranges by floor type and room size
When planning new flooring, you’ll want clear cost expectations by material and room size so you can budget accurately and compare options side‑by‑side. Below is a quick cost guide per room size; use it to estimate materials and installation and adjust for local labor.
| Floor Type | Typical Cost Range |
|---|---|
| Laminate (per room) | $200–$1,200 |
| Vinyl plank | $300–$1,500 |
| Hardwood | $1,000–$4,000 |
| Tile | $800–$3,000 |
Time estimates for each floor type and for common room sizes
Estimating installation time helps you schedule the project and anticipate disruption; most room installs take from a few hours to several days depending on material and room size.
Expect vinyl plank or laminate in a 10×12 room in 3–6 hours, engineered hardwood or tile in 1–2 days, and solid hardwood or extensive tile with prep in 2–4+ days.
Allow extra for demolition.
How flooring affects home value and resale considerations
Although new floors won’t guarantee a higher sale price, they can boost buyer interest and speed up a sale if you choose materials and finishes that match your neighborhood and target market.
Prioritize durable, low-maintenance options in kitchens and baths, favor neutral tones, and document upgrades with receipts.
Balance upfront costs and installation time against expected local ROI to avoid over-improving your home.
Tools and Materials Comparison Chart
You’ll find a simple comparison chart helpful for weighing installation methods, their difficulty, and cost per sq ft.
It’ll show which options suit your skill level and budget at a glance. Use it to narrow choices before you buy tools or materials.
Quick comparison of installation methods, difficulty, and cost per sq ft
Pick the method that matches your skill level, timeline, and budget: this chart compares common floor installations—floating click-lock, glue-down, nail-down, and loose-lay—by typical tools needed, installation difficulty, and average cost per square foot so you can decide at a glance which approach fits your project.
| Method | Notes |
|---|---|
| Floating | Easy, basic saw, ~$1–3/ft² |
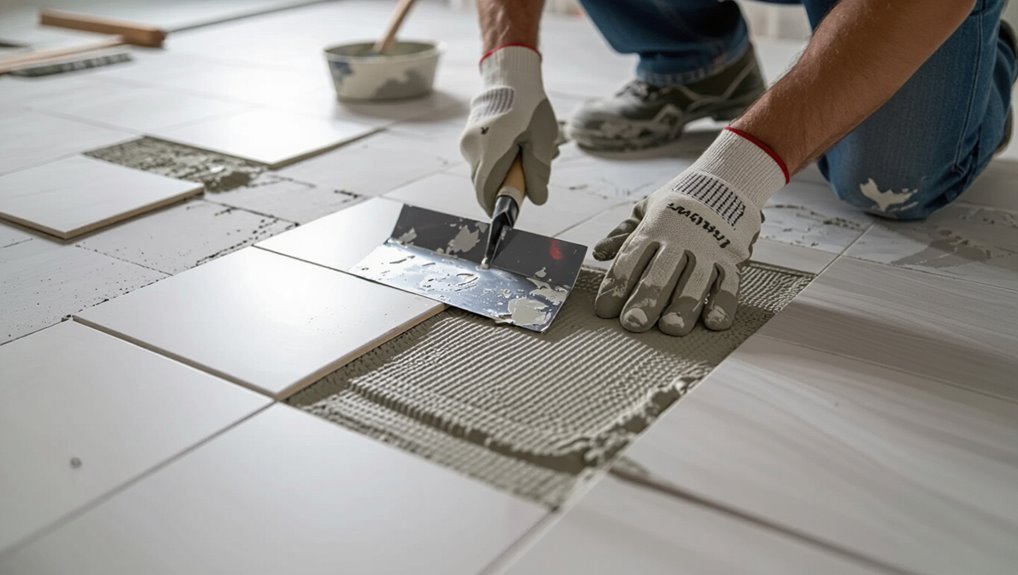
| Glue-down | Moderate, trowel, ~$2–5/ft² |
| Nail-down | Harder, nailer, ~$3–6/ft² |
Maintenance After Installation
Now that your new floors are in, you’ll want simple daily and weekly cleaning routines tailored to the material—vacuum or sweep carpets, dry-mop hardwood, and mop tile with a pH-neutral cleaner.
Plan for long-term care like refinishing hardwood, sealing or regrouting tile grout, and addressing wear spots before they worsen.
Use preventive measures such as entry mats, felt furniture pads, and proper humidity control to extend the life of your floors.
Daily/weekly cleaning routines by floor type
Because different floor materials react to wear and cleaners in distinct ways, you should follow tailored daily and weekly routines to keep them looking their best and to extend their life.
Sweep or vacuum debris daily; microfibre mop spills on hardwood and laminate, avoiding excess water.
Use pH-neutral cleaners for vinyl and tile weekly.
Dry promptly and protect high-traffic zones with rugs.
Long-term maintenance and refinishing (hardwood, tile grout care)
While daily care keeps floors clean, long-term maintenance and occasional refinishing are what preserve their appearance and structural integrity over years.
For hardwood, sand and refinish worn areas every 7–15 years depending on traffic; spot-sand sooner.
For tile, deep-clean grout annually, reseal grout and tiles as recommended, and repair cracked grout promptly.
Schedule inspections and address moisture sources quickly.
Preventive measures to extend floor life (mats, furniture pads)
Protect floors from everyday wear by using entry mats, area rugs, and felt or rubber furniture pads—these simple barriers cut down on grit, moisture, and drag that cause scratches and abrasion.
You should also rotate rugs, avoid rubber-backed mats on wood, clean under furniture regularly, and replace pads when compressed.
Promptly remove spills and sand or grit to preserve finish and prevent premature damage.
FAQ
You probably have practical questions like how long a 12×12 room takes, whether you can install over existing flooring, or if the new material needs acclimating.
Also consider how much extra to buy for waste and cuts and whether new floors will boost your home’s resale value.
I’ll answer each clearly so you can plan time, materials, and expectations.
How long does it take to install floors in a standard 12×12 room?
Wondering how long it’ll take to install flooring in a standard 12×12 room?
Expect a full-day job for straightforward materials like vinyl or laminate if subfloor is sound and you work efficiently.
Hardwood or tile can take 1–3 days due to acclimation, layout, and adhesive or grout curing.
Allow extra time for trim, changes, and cleanup to finish properly.
Can I install new flooring over existing flooring?
Can you install new flooring over existing flooring? Yes, in many cases you can—provided the current floor is flat, dry, secure, and compatible with the new material.
Remove loose or damaged sections, address height changes, and follow manufacturer guidelines.
Some types (like certain vinyl or laminate) allow overlays, but tile or uneven subfloors often require removal for proper adhesion and longevity.
Do I need to acclimate flooring before installation?
Why acclimate? You should for wood and some engineered floors: materials expand or contract with humidity and temperature.
Bring boxes into the installation room 48–72 hours (or manufacturer-recommended time) so planks adjust. This prevents gaps, cupping, and warranty issues.
Keep HVAC and normal room conditions during acclimation, and follow the flooring maker’s specific instructions closely.
How much extra flooring should I buy for waste and cuts?
Once you’ve acclimated your flooring, plan how much extra material to buy for cuts, mistakes, and pattern matching.
Aim for 5–10% extra for straightforward layouts, 10–15% for diagonal or multi-angle rooms, and 15–20% when matching complex patterns or ripping boards for junctions.
Always round up to the nearest full box, keep leftover planks for repairs, and document lot numbers.
Will installing new flooring increase my home’s resale value?
How much value you’ll add with new flooring depends on the type, quality, and how well it suits your market.
You’ll recoup more by choosing durable, neutral finishes—hardwood or engineered wood often add the most appeal.
Match upgrades to neighborhood expectations, keep installation professional, and avoid trendy colors.
Smart, well-executed flooring can boost resale value and speed a sale.