How to Level a Floor for Laminate: Tools, Tips, and Process
You can level a floor for laminate by first measuring flatness with a straightedge or laser level, noting highs and lows. For shallow dips use self-leveling compound; patch localized low spots with a polymer patch; use plywood overlay or shims for structural issues. Gather a laser, straightedge, trowels, primer, compound, screws, and safety gear. Work clean, prime, follow cure times, and keep within laminate tolerances. Continue to learn the step-by-step tools and techniques.
Quick Answer Can You Level a Floor for Laminate and How Long It Takes
Yes—you can level most floors for laminate; start with self-leveling compound for shallow dips and floor patch or plywood for deeper issues.
Expect a small, quick job (a few hours plus drying) for minor low spots, a day or two for larger areas, and several days if you need to install plywood or wait multiple compound cures.
Choose the simplest method that brings the floor within the laminate manufacturer’s tolerance to save time.
One-paragraph direct answer with recommended approach
If your subfloor has only minor dips and gaps, you can level it for laminate by sanding high spots, filling low areas with a floor-leveling compound, and using thin plywood underlayment or shims where needed.
A simple room (up to ~200 sq ft) usually takes a day or two for prep and drying, while larger rooms or deeper repairs can take several days because self-leveling compounds need 24 hours (or more) to cure before you install laminate.
For how do you level a floor for laminate, start by evaluating, clean thoroughly, sand edges, apply compound per instructions, then lay underlayment and check with a straightedge before installing.
Fast timeline estimates for common scenarios
Because timing depends on how bad the unevenness is and what method you use, expect small, medium, and large repairs to take very different amounts of time.
You’ll plan, work, and cure; here are quick estimates:
- Small: 1–3 hours (sanding/spot leveling).
- Medium: 1–2 days (self-leveling compound).
- Large: 2–5 days (subfloor repair or joist work).
Basic Understanding Why Floor Leveling Matters for Laminate
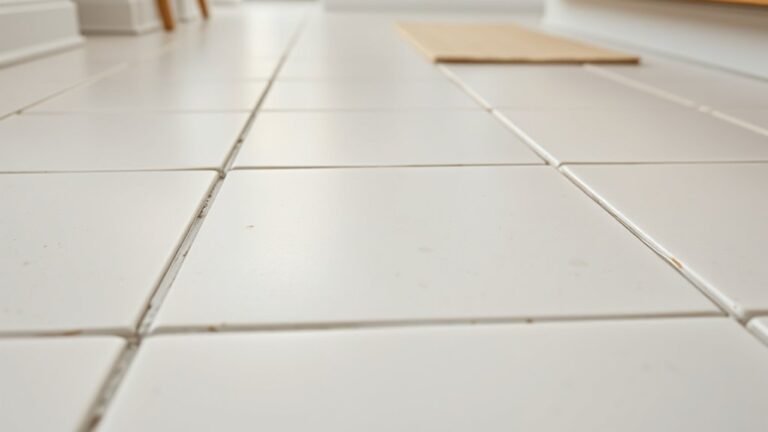
Before you start installing laminate, you need to know the difference between “level” (no slope) and “flat” (no high or low spots) because both affect how the planks lock and wear.
If the subfloor isn’t properly level and flat, you can get gaps, premature damage, squeaks, and voided warranties that undermine performance.
Different subfloors—concrete, plywood, OSB, or joisted floors—each require specific leveling approaches, so you’ll want to match the method to the material.
What “level” and “flat” mean for laminate installation
When you lay laminate, “level” refers to the floor’s overall pitch—how much it slopes from one end of the room to the other—while “flat” describes local evenness, meaning there are no high or low spots that cause rocking or gaps.
Both matter because laminate needs a consistent plane to interlock properly and avoid stress, squeaks, or premature wear. You’ll check both with a level and straightedge.
Consequences of an unlevel subfloor (damage, warranty, performance)
If your subfloor isn’t flat and level, your new laminate won’t sit or click together properly and you’ll start seeing problems quickly.
You’ll face issues like gaps, buckling, and finish failure that worsen over time. Fixing them costs more than prepping first, and manufacturers may void warranties for poor subfloor prep.
- Structural damage
- Visible performance issues
- Warranty denial
Types of subfloors (concrete, plywood, OSB, joisted floors) and leveling implications
Different subfloor materials—concrete, plywood, OSB, and joisted assemblies—each demand specific leveling approaches because their stiffness, moisture behavior, and fastening options affect how laminate will perform. You’ll treat each: concrete needs moisture barrier and patching, plywood/OSB require sanding or screwing, joisted floors may need sistering or leveling strips.
| Material | Issue | Fix |
|---|---|---|
| Concrete | Moisture | Seal/patch |
| Plywood | Flex | Screw/overlay |
| Joists | Bounce | Sister/bridge |
Tools, Materials, and Safety Equipment You’ll Need
Before you start, gather the measurement and leveling tools you’ll use most: a laser level, straightedge, and floor roller.
Pick materials that match your chosen method—self-leveling compound or floor patch for small low spots, plywood and shims for structural fixes, plus underlayment for the finished laminate.
Don’t forget safety gear and prep supplies like a respirator, knee pads, and plastic sheeting.
Essential tools for measuring and leveling (laser level, straightedge, floor roller)
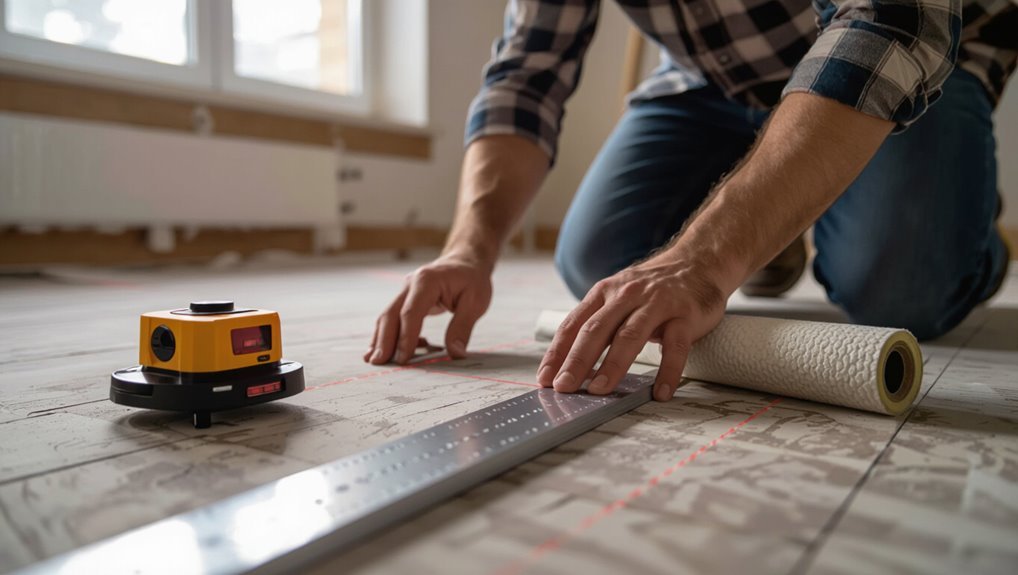
Tools matter when you’re getting a floor ready for laminate, and three pieces you’ll rely on are a laser level, a straightedge, and a floor roller.
Use each to measure and correct surfaces precisely, not to replace proper prep.
- Laser level — projects accurate reference lines across the room.
- Straightedge — identifies dips and high spots.
- Floor roller — flattens underlayment and removes bubbles.
Materials by method (self-leveling compound, floor patch, plywood, shims, underlayment)
Now that you’ve got the measuring and leveling gear lined up, you’ll pick materials that match the repair method you plan to use.
Choose based on depth and substrate:
- Self-leveling compound or floor patch for shallow to moderate dips.
- Plywood or cement board for structural rebuilds and large deflections.
- Shims and underlayment for localized high/low adjustments and final cushioning.
Safety gear and prep supplies (respirator, knee pads, plastic sheeting)
When you’re ready to work, wear proper safety gear and lay out prep supplies so dust, debris, and accidental damage stay contained.
You’ll need a respirator for dust and compound fumes, knee pads for prolonged kneeling, and plastic sheeting to protect nearby surfaces.
Choose PPE that fits, keep a trash bin handy, and tape edges to prevent movement.
- Respirator
- Knee pads
- Plastic sheeting
How to Assess Your Existing Floor Step-by-Step Inspection
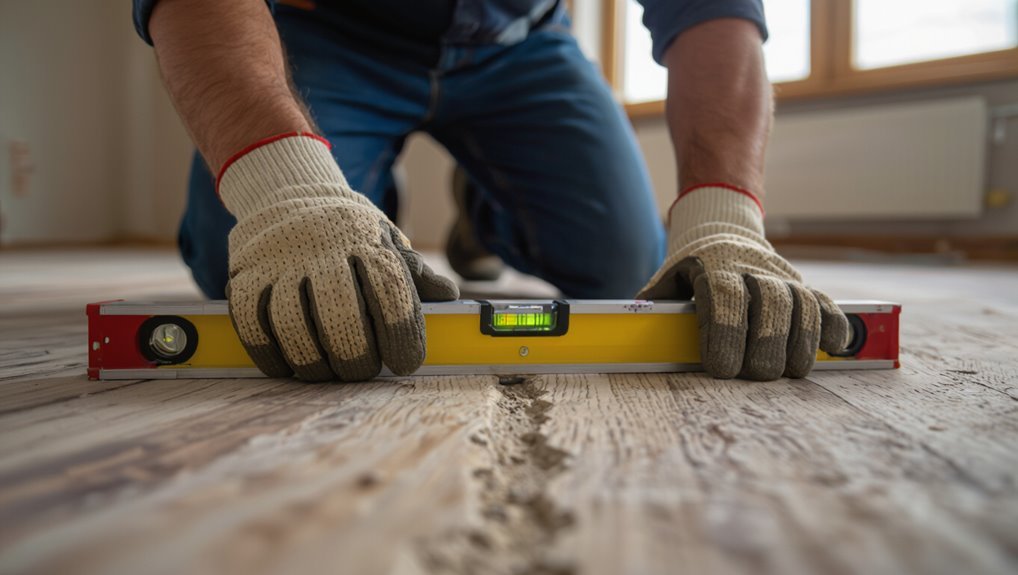
Start by measuring flatness and level with a straightedge, long level, or laser and compare the results to laminate tolerances (typically 3/16″ over 6 ft).
Walk the room to spot dips, humps, ridges, soft spots, and any signs of moisture, noting their size and location.
Use a simple checklist to decide whether local repair, self-leveling compound, or full subfloor replacement is required.
Measuring flatness and level: tools and tolerances for laminate
Before you plan any fixes, check how flat and level your subfloor really is using the right tools and clear tolerances so you don’t waste time or materials.
Use a 6–10 foot straightedge, spirit level, and laser level. Measure deviations every few feet; laminate tolerates about 3/16″ over 6 feet (5 mm/2 m tolerances vary).
Record high and low spots for repair.
Identifying types of defects: dips, humps, ridges, soft spots, moisture
Inspection is key: walk the room slowly and look, feel, and mark every irregularity—dips (low spots), humps or ridges (high spots), soft or spongy areas, and any signs of moisture—so you can prioritize repairs and choose the right fix for each defect.
- Dips: note depth and extent.
- Humps/ridges: mark high runs.
- Soft spots/moisture: probe, dry, and trace source.
Determining whether repair, leveling, or full replacement is required (decision checklist)
You’ve already mapped every dip, hump, soft spot, and moisture sign; now use those notes to decide whether you can repair locally, need to level the subfloor, or must replace it entirely. Inspect severity, extent, moisture, and structural integrity. Use this quick checklist:
| Issue | Action |
|---|---|
| Small localized dip | Spot repair |
| Widespread unevenness | Leveling compound |
| Rot/moisture damage | Replace subfloor |
| Structural sag | Consult pro/rebuild |
Main Methods to Level a Floor for Laminate (Overview)
Now that you’ve inspected the floor, you’ll choose a leveling method based on the type and extent of unevenness.
For concrete or plywood you can use self-leveling compound, patch and feather small low spots, lay new plywood or an overlay, adjust joists by screwing/planing or sistering, or build a level surface with sleepers or shims.
Each option has different prep, tools, and cost, so pick the one that fits your subfloor and skill level.
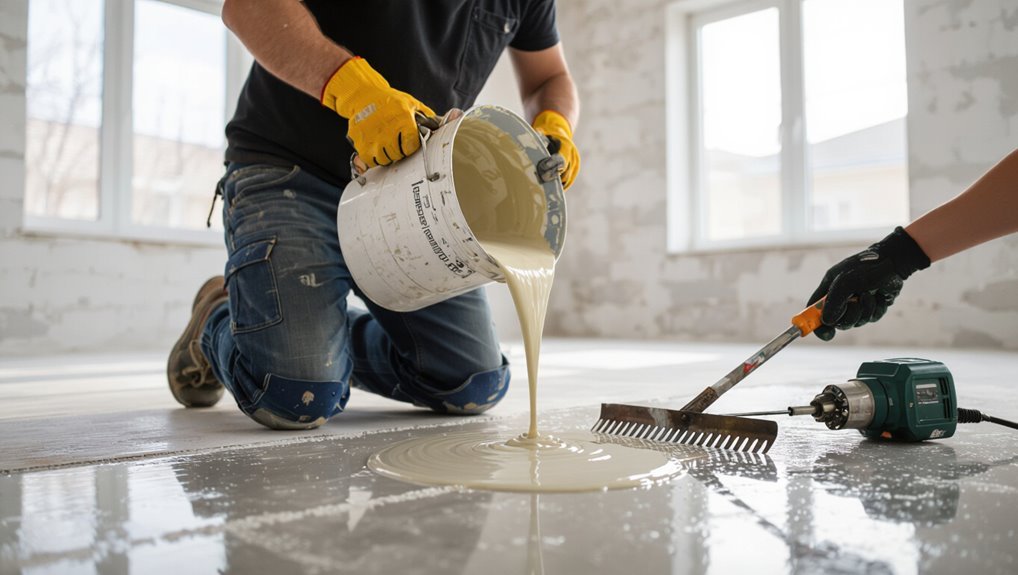
Method 1 Self-leveling compound on concrete or plywood
Self-leveling compound gives you a fast, reliable way to smooth out low spots on concrete or sturdy plywood before installing laminate.
Mix per instructions, prime the substrate if required, then pour and spread the compound with a gauge rake or trowel. It flows to create a flat surface quickly.
Allow proper cure time, sand any high edges, and you’re ready for underlayment.
Method 2 Patching and feathering for localized low spots
If you’re dealing with a few small dips or gouges rather than a whole-slab issue, patching and feathering gives you a precise, economical fix.
Clean and dry the low spots, remove loose material, then apply a polymer-modified patching compound.
Trowel the mix smooth, feather edges into surrounding surface, let cure, then sand or grind high edges.
Check with a straightedge before laying laminate.
Method 3 Installation of new plywood or subfloor overlay
Install a new plywood layer when your subfloor has widespread unevenness or structural problems that patching can’t fix.
Remove flooring, inspect joists, and fasten 3/4″ or 5/8″ tongue-and-groove plywood perpendicular to joists with construction adhesive and screws.
Stagger seams, fill gaps with wood filler, and sand high spots.
Guarantee a flat, stiff base for laminate and proper moisture barrier underneath.
Method 4 Screwing/planing joists and sistering for joisted floors
When patching or adding a plywood overlay won’t correct uneven joists, you’ll need to address the framing itself by screwing, planing, or sistering joists.
Inspect joists with a straightedge, mark high and low spots, then plane or shim highs and sister new lumber alongside low or damaged joists.
Secure with structural screws and construction adhesive, recheck level, and allow connections to settle before installing laminate.
Method 5 Using sleepers or shims to create a new level surface
Choose sleepers or shims when the subfloor needs a new, uniformly level surface but joist repair or a thick plywood overlay isn’t practical.
You’ll attach sleepers across joists, pack shims to correct low spots, and secure a new plywood layer to create a stable, flat plane.
Space sleepers for insulation/ventilation, trim shims tight, and fasten everything firmly before installing underlayment and laminate.
Step-by-Step Process Leveling a Concrete Subfloor with Self-Leveling Compound
Before you pour self-leveling compound, you’ll need to thoroughly clean the concrete, test for moisture, and apply the correct primer so the mix bonds properly.
Mix to the manufacturer’s recommended consistency, work within the pot life, and pour and spread using a gauge rake and smoothing tool to get an even surface.
Let it cure fully, sand any high spots, verify flatness with a straightedge, and watch for common pitfalls like overwatering, poor priming, or working too slowly.
Preparation: cleaning, priming, and moisture testing
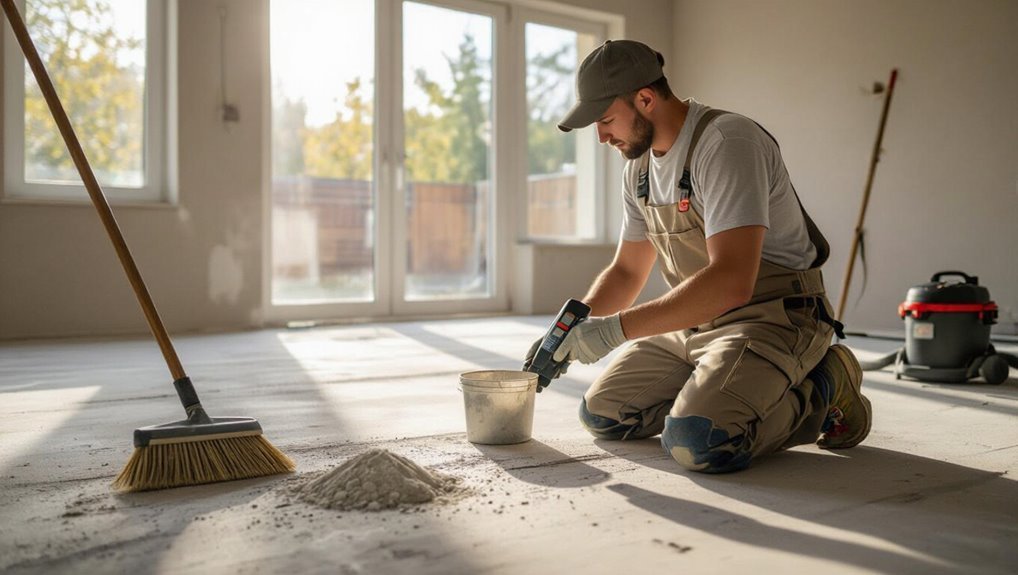
Start by clearing the concrete surface of all debris, grease, and loose material so the self-leveling compound can bond properly; sweep and vacuum, scrub stubborn spots with a degreaser, and rinse away residue, allowing the slab to dry.
Then:
- Prime per manufacturer instructions to seal and improve adhesion.
- Perform a calcium chloride or RH moisture test.
- Repair cracks and fill voids before leveling.
Mixing and pouring: consistency, working time, and techniques
Once you’ve primed and repaired the slab, mix small, manageable batches of self-leveling compound to the manufacturer’s specified consistency—usually a pourable, lump-free slurry—and pour immediately, since most formulas give you only 10–30 minutes of workable time.
- Use a drill mixer, pour steadily, and avoid air pockets.
- Spread with a gauge rake or smoother to encourage flow.
- Work in zones, keeping pace with pot life and cleanup.
Finishing: curing time, sanding, and verifying flatness
After the last pour, let the self-leveling compound cure fully according to the manufacturer’s time—typically 24 to 48 hours for light foot traffic and up to 7 days for heavier loads—while keeping the room temperature and humidity stable to prevent cracking or shrinkage.
Once cured, sand high spots with a floor sander or hand block, vacuum thoroughly, then verify flatness with a 6-foot straightedge and a string line before installing underlayment.
Common pitfalls during pouring and how to avoid them
Although the mix can seem forgiving, several common mistakes during pouring will ruin your finish if you don’t watch for them—poor mixing, working too slowly, improper primer, and failing to control moisture are the usual culprits.
Follow these steps to avoid problems:
- Mix thoroughly, use recommended water ratio.
- Pour continuously; don’t wait between batches.
- Use proper primer and test moisture before pouring.
Step-by-Step Process Leveling a Wood Subfloor (Plywood/OSB)
Before you start, walk the floor to find soft spots and squeaks so you can repair movement with new fasteners or blocking.
Plane, sand, or screw down any high spots, and use floor patch or feathering compound to fill small depressions.
If the subfloor is too uneven or thin, you’ll install a plywood overlay—choose the proper thickness and follow a tight fastening pattern for a stable base.
Fixing movement: locating and repairing soft spots and squeaks
Start by walking the room and marking any areas that feel spongy, bounce underfoot, or squeak when you press or walk over them; these are the spots you’ll need to repair before installing laminate.
For each, remove flooring to expose joists, inspect for rot or loose fasteners, replace or sister damaged joists, add blocking, and firmly screw or toe-screw the subfloor to eliminate movement and noise.
Planing, sanding, or screwing down high spots
Identify and address high spots next so your laminate will sit flat and lock properly.
Walk the floor, mark humps with chalk, then choose a method: plane or use a belt sander to remove raised edges, or drive screws through subfloor into joists to pull peaks down.
Check frequently with a straightedge, remove only what’s needed, and vacuum debris before continuing.
Using floor patch or feathering for small depressions
Small low spots in a plywood or OSB subfloor can be leveled quickly with a floor patch or feathering compound so your laminate lays flat and the joints lock properly.
Clean debris, prime per product instructions, then trowel or spread the patch, feathering edges thinly to match surrounding height.
Let cure fully, sand any high ridges, and recheck with a straightedge before installing underlayment.
Installing a plywood overlay: thickness choices and fastening pattern
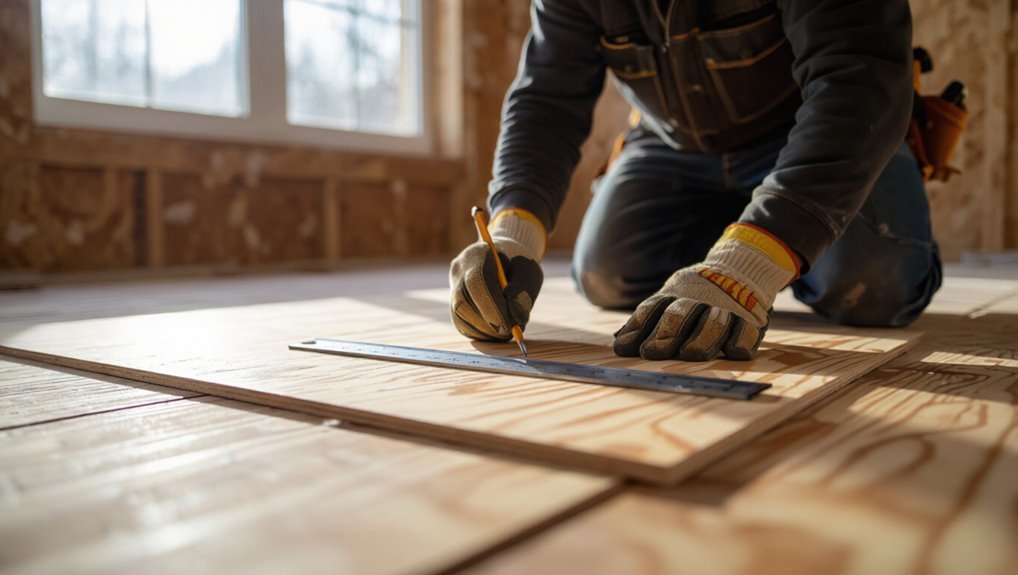
When your subfloor has widespread deflection or more than a few uneven spots, installing a plywood overlay gives you a stable, uniform surface for laminate.
You’ll choose thickness and a fastening pattern based on joist spacing, existing subfloor condition, and the laminate manufacturer’s requirements.
Use 3/8″ to 1/2″ over existing 3/4″, or 5/8″ over thin panels.
Stagger seams, screw every 6–8″ at edges, 8–10″ field.
Step-by-Step Process Leveling Joisted Floors and Suspended Floors
Start by checking for joist-related deflection and bounce so you can pinpoint sagging spans that need attention.
You’ll then decide whether to sister joists, add blocking, or jack sagging members — or, if damage is extensive, add sleepers or build a new substructure.
Finally, make sure you install the correct underlayment and moisture barrier before laying your laminate.
Diagnosing joist-related deflection and bounce
Before you fix anything, you need to pinpoint where the floor is actually failing: walk the room, press on suspected spots, and note any areas that sag, bounce, or creak.
Use a straightedge or long level across joist spans to find dips, measure deflection between supports, tap joists to locate loose connections, and mark problem locations for targeted repair planning.
Sistering joists, adding blocking, or jacking sagging joists
Assess the best correction method for each problem joist: sistering adds strength by fastening a new joist alongside the old one, blocking ties adjacent joists to share load and prevent twisting, and jacking raises a sagging joist back to plane so you can secure it permanently.
Choose based on access, extent of damage, and deflection. Sister when rot is localized, block for stability, jack for simple sag.
When to add sleepers or build a new substructure
When your joists are too far out of plane or their tops are uneven and you can’t feasibly sister, block, or jack them all into alignment, it’s time to contemplate adding sleepers or building a new substructure.
Sleepers give you a quick, level surface for floating or glued-down underlayment on existing joists, while a rebuilt substructure — new joists or a full platform — is the right call for widespread rot, severe deflection, or when you need a perfectly level, load-bearing base for heavy finishes.
Use sleepers where joists are mostly sound; rebuild for systemic damage, large spans, or strict load and level requirements.
Ensuring correct underlayment and moisture barrier
Once you’ve decided to add sleepers or rebuild the substructure, make sure the underlayment and moisture barrier are specified and installed correctly for joisted and suspended floors.
You’ll choose underlayment with proper compression resistance and R-value, install a continuous vapor barrier over concrete or between joists, seal seams and penetrations, and fasten materials per manufacturer specs so laminate stays flat and moisture-free.
Choosing the Right Underlayment for Laminate After Leveling
Now that your floor’s level, you’ll want to pick an underlayment that matches the job—foam for basic cushioning, cork for sound reduction, or a combination underlayment with a built‑in vapor barrier.
Choose thickness based on how much minor unevenness you need to mask without compromising the laminate’s locking system.
If you’re over concrete or a damp crawl space, always use an underlayment with a proper moisture barrier to protect the floor.
Types of underlayment (foam, cork, combination with vapor barrier)
Several common underlayments—foam, cork, and hybrid options with built-in vapor barriers—can affect your laminate’s comfort, sound, and moisture protection, so pick the one that matches your subfloor and climate.
- Foam: affordable, good cushioning, limited moisture resistance.
- Cork: natural, excellent sound reduction, resists mold.
- Hybrid (foam+cork with vapor barrier): combines cushioning and moisture protection for basements or concrete slabs.
Underlayment thickness and suitability for minor imperfections
1 key factor after leveling is choosing an underlayment with the right thickness and compressibility, because that determines how well it hides small dips and smooths minor subfloor imperfections while supporting your laminate’s locking system.
Choose 2–3 mm foam for minimal gaps, 3–6 mm for slightly uneven areas, and denser options when you need extra support; test under planks before full installation.
Moisture barriers for concrete and crawl spaces
Because concrete slabs and crawl spaces can trap moisture, you’ll want an underlayment with an integrated or separate vapor barrier to protect your laminate from swelling and mold.
Choose 6–20 mil polyethylene or foil-backed foam for concrete; use breathable but moisture-resistant options in ventilated crawl spaces.
Seal seams, extend barrier up walls, and check local codes and manufacturer specs before installation.
Common Problems and Mistakes When Leveling for Laminate
Don’t skip moisture checks or ignore a failed test, because trapped damp will ruin laminate fast.
Make sure you measure slopes to the required tolerance, mix and apply leveling compound exactly as directed, and allow full curing time before you lay flooring.
Also confirm you’re using the correct overlay thickness and underlayment type for your subfloor and laminate.
Overlooking moisture and failing moisture tests
When you skip proper moisture checks or ignore failing test results, you risk serious damage to your laminate flooring and the subfloor underneath.
Don’t assume dry conditions—use a reliable moisture meter and follow manufacturer limits. If tests fail, halt installation, dry the area, fix leaks or vapor barriers, and retest.
Installing over wet subfloors leads to warping, mold, and costly repairs.
Incorrect slope/tolerance assumptions and consequences
If you assume your subfloor meets the wrong slope or tolerance, you’ll end up with gaps, uneven wear, and a laminate surface that looks and performs poorly.
Measure with a straightedge and level, check manufacturer tolerances, and don’t ignore local high/low spots.
Incorrect assumptions cause clicking joints, buckling, and expedited plank failure.
Fix slopes or use connector strips where necessary.
Poor mixing/application of leveling compound
Because a self-leveling compound only performs as well as the way you mix and apply it, sloppy preparation leads to waves, weak spots, and bonding failures.
You must follow powder-to-water ratios, mix to a lump-free, pourable consistency, and work steadily before skin forms.
Avoid overmixing, adding extra water, or thin spreads that trap air—those cause delamination, unevenness, and premature wear.
Inadequate curing times before installing laminate
Although it’s tempting to rush, you must let leveling compounds fully cure before laying laminate to avoid trapped moisture, weak bonds, and surface failures.
If you install too soon, seams can swell, adhesive fails, and panels buckle.
Follow manufacturer cure times, check dryness with a moisture meter or tape test, and wait longer in cool or humid conditions to guarantee a stable substrate.
Using wrong thickness or type of overlay or underlayment
When you pick the wrong thickness or type of overlay or underlayment, the whole laminate system can perform poorly—gaps, squeaks, and premature wear often follow.
You should match underlayment to subfloor and laminate specs, control moisture, and guarantee cushioning.
Consider:
- Thickness: prevents locking issues.
- Material: foam, cork, or rubber suitability.
- Vapor barrier: moisture protection.
Tips, Best Practices, and Cost-Saving Strategies
Decide whether to DIY or hire a pro by weighing your skill level, project size, and typical cost ranges so you don’t overspend or create problems that need rework.
Rent time-saving tools and learn quick techniques—like using a self-leveler pump or a long screed—to speed the job without buying expensive gear.
For long-term performance pick proper fasteners, acclimate the laminate, leave correct expansion gaps, and consider eco-friendly, low-VOC leveling compounds and adhesives.
When to DIY vs hire a pro decision factors and cost ranges
If your subfloor has only minor dips or isolated high spots and you’re comfortable with basic carpentry and a few tools, you can probably level it yourself and save a lot on labor; however, call in a pro for extensive damage, major slope, moisture problems, or when local code or warranty requirements demand certified work.
| Factor | DIY | Pro |
|---|---|---|
| Complexity | Low | High |
| Cost range | $50–$500 | $300–$2,000 |
| Risk | Manageable | Reduced |
Time-saving techniques and tool rental tips
Save time and money by planning which high-impact tools you’ll rent versus buy, and by batching tasks so you run the rental shop just once.
Prioritize a good laser level and floor grinder rental for accuracy; buy consumables like sandpaper and putty.
Schedule work in logical stages—demo, repair, screed—so helpers and rentals align.
Inspect tool condition before checkout to avoid delays.
Long-term durability tips (fasteners, acclimation, expansion gaps)
While you’re prepping the subfloor and laying boards, focus on three durability cornerstones: correct fasteners and adhesive, proper acclimation of the laminate, and consistent expansion gaps.
Use manufacturer-recommended screws or nails and adhesive spots where needed.
Let planks acclimate in the room 48–72 hours.
Maintain uniform expansion gaps at walls, thresholds, and around pipes to prevent buckling and noise over time.
Eco-friendly and low-VOC material suggestions
Beyond fastening, acclimation, and expansion gaps, you should also consider the materials you bring into your home—choosing low-VOC and eco-friendly options reduces indoor pollutants and often improves long-term performance.
Use these suggestions when leveling and underlayment choices:
- Recycled cork underlayment for insulation and sound damping.
- Cement-based, low-VOC self-leveler mixes.
- Water-based primers and sealers with Green Certification.
Project Checklist and Timeline for a Typical Room
Before you start, run through a quick pre-project checklist: gather tools, perform moisture and level tests, and check for any permits.
Estimate the timeline based on your chosen method—self-leveling can take a day or two, overlays a couple of days, and joist repairs may take several days to a week.
Finish with a verification checklist to confirm flatness, dryness, and secure subflooring before laying the laminate.
Pre-project checklist (tools, tests, permits if needed)
Get a solid plan and the right gear before you touch the subfloor: list tools (tape measure, straightedge, level, floor scraper, sander or grinder, patch compound, trowels, caulk, underlayment, spacers, safety gear), run essential tests (moisture, flatness, adhesion), and check local codes or HOA rules for permits so you won’t hit delays once work starts.
- Inspect tools and materials.
- Perform moisture and flatness tests.
- Verify permits and access.
Estimated timeline by method (self-leveling, overlay, joist work)
Choose the method that matches your subfloor condition and schedule, because each approach has very different time requirements: expect a single afternoon to a full day for minor overlay work, one to two days (plus overnight cures) for self-leveling compound in a typical 12×12 room, and several days to a week or more for joist repairs or releveled framing depending on drying times and access.
| Method | Typical duration |
|---|---|
| Overlay | Afternoon–1 day |
| Self-leveling | 1–2 days (+ cures) |
| Joist work | Several days–1+ week |
Final verification checklist before laying laminate
Now that you’ve matched the method to your schedule and subfloor condition, run through a short verification checklist to make sure nothing will slow you once you start laying boards.
Check moisture, flatness, and clean substrate; confirm acclimation and junctions; gather tools and spacers.
- Measure flatness and moisture.
- Verify acclimation and thresholds.
- Stage tools, underlayment, and spacers.
Frequently Asked Questions
You probably have a few practical questions before you start, like whether self-leveling compound works over plywood and how flat the subfloor needs to be for laminate.
You’ll also want to know what to do about slopes, how long to wait after leveling, and whether the compound will change finished floor height or thresholds.
I’ll answer each of those clearly so you can plan the job and materials.
Can I use self-leveling compound over plywood?
Wondering whether you can pour self-leveling compound over plywood? Yes — but prep matters.
You’ll need exterior-grade or tongue-and-groove plywood that’s rigid, clean, and securely fastened.
Prime the surface with a manufacturer-recommended primer, fill large gaps or seams, and use lathe or mesh reinforcement where specified.
Follow drying times and thickness limits to guarantee a stable substrate for your laminate.
How flat does a floor need to be for laminate?
How flat does a floor need to be for laminate? You should aim for no more than 3/16 inch deflection over a 10-foot span and no high/low spots greater than 1/8 inch within a 6-foot radius.
Check with a straightedge and level. Minor irregularities can be corrected with patching or underlayment; larger deviations need proper leveling before installation.
What if my floor has a slope can laminate be installed?
Can laminate be installed on a sloped floor? Yes, but you need to measure the slope and decide if it’s within acceptable limits (typically under 3/16″ per 6″).
Small slopes can be corrected with underlayment or floor leveling compound. Larger slopes require screeding or joist adjustments.
Always guarantee a stable, flat substrate and follow manufacturer tolerance to prevent locking or wear issues.
How long should I wait after leveling before installing laminate?
After you’ve leveled the floor, wait until the leveling material has fully cured and any moisture has dropped to acceptable levels—typically 24 to 72 hours for most self-leveling compounds, but up to 7 days for thicker pours or cement-based screeds.
Check manufacturer cure and moisture specs, use a moisture meter, and confirm the surface is firm and dry before laying underlayment and laminate to prevent bonding issues or warping.
Will leveling compound affect floor height and transitions?
Yes — leveling compound will change the finished floor height, so you’ll need to plan changes and thresholds accordingly.
Measure added thickness, including underlayment and adhesive, to guarantee laminate connections align with adjacent rooms.
Use tapered or adjustable transition strips where heights differ.
Keep door clearances in mind and trim jambs if needed.
Account for total build-up before installation to avoid surprises.