How to Fix a Cracked Concrete Floor Before It Gets Worse
You can stop a cracked concrete floor from getting worse by first evaluating crack size and cause, then cleaning and drying the area, and choosing the right repair: epoxy for structural cracks, polyurethane for moving joints, or patch mix for shallow gaps. Prep properly—route and remove loose material, use a bonding agent, and follow cure times—while fixing drainage and moisture issues to prevent recurrence. Keep going to learn step-by-step methods, tools, and when to call a pro.
Can You Fix a Cracked Concrete Floor and How Fast?
You can often fix small hairline or surface cracks yourself with epoxy, concrete patch, or resurfacer, while wider structural cracks usually need stronger repair methods.
Fast DIY fixes can take a few hours to a day, but deeper or settling-related cracks may require days of prep and curing or a pro’s evaluation.
Call a professional if the crack is wider than 1/4 inch, repeating, or paired with sinking, because they’ll assess underlying issues and use the right long-term solution.
Short summary of solutions by crack type
Although some cracks are cosmetic and easy to repair, others signal structural issues and need faster, more involved fixes.
You’ll assess crack size and pattern, then choose materials and timing for how to fix a cracked concrete floor. Quick vs. permanent approaches depend on severity; act before moisture or movement worsens damage.
- Hairline: clean, epoxy fill
- Shrinkage: caulk, surface patch
- Structural: stitch, underpin
When to call a professional vs. DIY
When deciding whether to tackle a cracked concrete floor yourself or call a pro, weigh the crack’s size, pattern, and the risk of ongoing movement or moisture—because small, stable cracks you can clean and fill quickly, but wide, running, or sinking cracks usually need a specialist.
If you lack tools or see structural or drainage issues, call a contractor; otherwise, follow proper prep and repair steps.
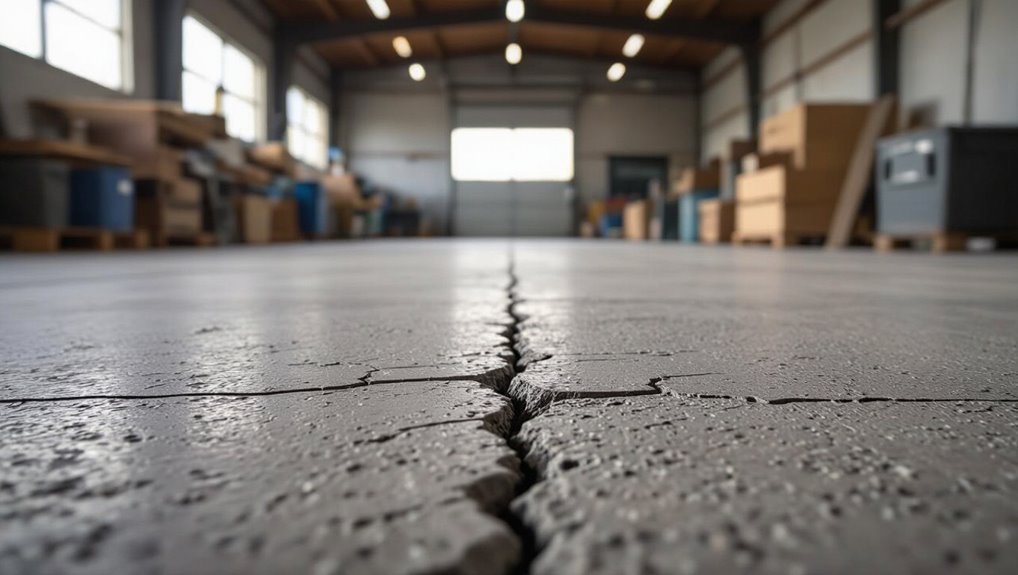
Understanding Concrete Floor Cracks What They Are and Why They Happen
You’ll first want to know the common crack types—hairline, shrinkage, settlement, structural, and surface—so you can spot what you’re dealing with.
Match what you see to likely causes like temperature swings, moisture changes, heavy loads, or foundation movement to narrow down the problem.
Then make a quick severity check—width, length, pattern, and whether it’s active or affects structure—to decide if it’s a simple repair or needs a pro.
Common types of cracks (hairline, shrinkage, settlement, structural, surface)
Because cracks vary in size, cause, and seriousness, identifying the type is the first step in deciding how to fix them. You’ll spot hairline lines, wider shrinkage cracks, settlement steps, structural splits, and surface crazing.
Match repair method to crack type to avoid wasted effort.
- Thin spiderweb hairlines across a slab
- Jagged, offset settlement breaks
- Wide, deep structural fissures
Causes mapped to symptoms (temperature, moisture, load, foundation movement)
Although cracks look similar, their causes leave distinct clues you can spot:
| Symptom | Likely cause | What to look for |
|---|---|---|
| Jagged, offset | Foundation movement | Sudden shifts, gaps at joints |
| Wide during heat | Temperature stress | Expansion gaps missing |
| Rising damp stains | Moisture | Efflorescence, soft subfloor |
| Concentrated under load | Overload | Cracks under heavy equipment |
How to assess severity at a glance
How severe is that crack, and can you safely ignore it?
Check width: hairline (<1/8") is usually cosmetic; 1/8–1/4" needs monitoring and sealing; over 1/4" or stepped, jagged, or widening cracks indicate structural issues.
Look for displacement, moisture, efflorescence, or nearby settling.
If uncertain, photograph, measure, and consult a pro to avoid bigger repairs.
Tools, Materials, and Safety Precautions You Need Before Starting
Before you start, gather essential tools and materials—chisel, wire brush, concrete patch, epoxy or filler, trowel, and a moisture meter—so you won’t stop mid-job.
Put on safety gear like gloves, eye protection, a dust mask, and clear and ventilate the workspace.
If the crack looks deep, wide, or caused by ongoing moisture or settling, test with a moisture meter and consider a structural inspection before repairing.
Essential tools and materials for DIY repairs
If you’re tackling a cracked concrete floor yourself, gather the right tools, materials, and safety gear so the job goes smoothly and safely.
You’ll need a sturdy mix of items for cleaning, repair, and finishing. Keep everything organized and within reach to work efficiently.
- Trowel, chisel, wire brush
- Concrete patch mix, bonding agent, epoxy
- Bucket, mixing paddle, caulk gun
Safety gear and workspace preparation
While you’ll be working with dust, debris, and potentially hazardous chemicals, equip yourself with proper safety gear and clear the workspace so you can work confidently and efficiently.
Wear safety glasses, N95 or respirator, chemical-resistant gloves, knee pads, and sturdy boots.
Ventilate the area, remove trip hazards, lay down drop cloths, and keep a fire extinguisher and first-aid kit nearby.
When to test for underlying issues (moisture meter, structural inspection)
How do you know when a crack is just cosmetic and when it signals deeper problems? Use a moisture meter for damp readings, especially after seasonal changes or musty odors.
If cracks widen, offset, or run across slabs, get a structural inspection.
Don’t guess: testing pinpoints subsurface moisture or settlement so you choose repairs that stop recurrence and protect your foundation.
Step-by-Step Repair Methods by Crack Type
Now you’ll get step-by-step methods tailored to the crack type so you can choose the right fix.
Start with epoxy or filler for hairline and small surface cracks. Use polyurethane or vinyl patch for moderate cracks and joints.
Reserve routing, stitching, or epoxy injection for wide or structural breaks.
Finally, learn how to level and resurface uneven floors with grinding, overlays, or self-leveling compound.
Use basement/garage-specific moisture controls when needed.
Step 1: Repairing hairline and small surface cracks epoxy and filler method
1. You clean the crack, squeeze epoxy or filler into it, smooth the surface, and let it cure; this prevents moisture and dirt from widening the crack.
Visualize the repair:
- a thin knife spreading epoxy like icing over a hairline gap
- a damp brush wiping away dust before filling
- a cured seam blending into the concrete, barely visible and weatherproof
Step 2: Fixing moderate cracks and joints patching with polyurethane or vinyl concrete patch
While hairline cracks can be sealed with epoxy, moderate cracks and joint gaps need a more flexible patch like polyurethane or vinyl concrete patch to handle movement and prevent re-cracking.
You’ll first assess the width and depth, clean and undercut the edges if necessary, then choose a patch material rated for the joint or crack size.
Remove debris, blow or vacuum, apply primer if required, gun or trowel the patch, tool smooth, and cure per manufacturer instructions.
Step 3: Addressing wide or structural cracks routing, stitching, and epoxy injection
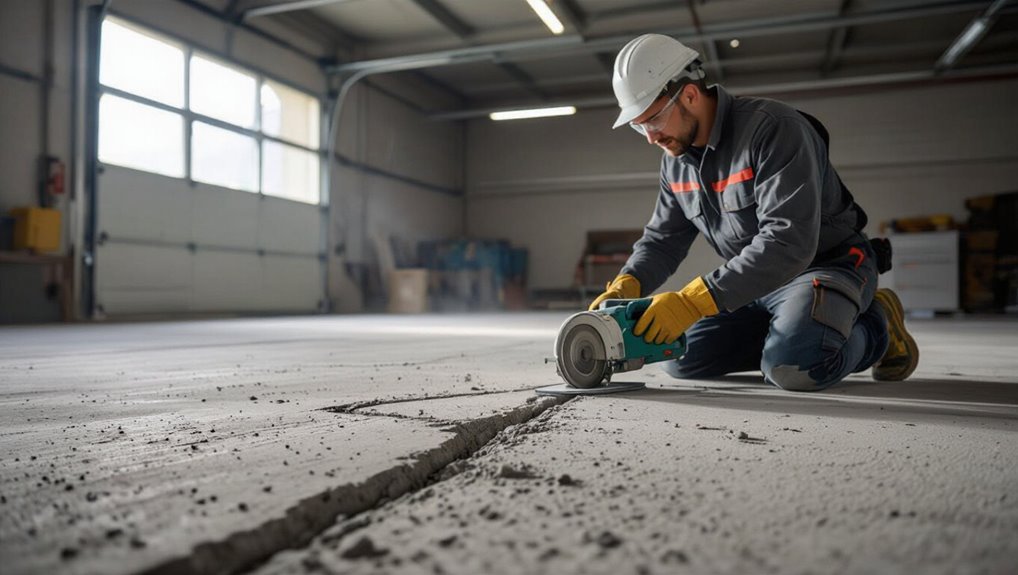
If polyurethane or vinyl patching can’t accommodate the width or movement of a crack, you’ll need a more robust approach for wide or structural cracks: routing and sealing for surface control, stitching to restore tensile strength, or epoxy injection to bond the concrete internally.
You’ll route to create a clean U-shaped groove, install staples or dowels for stitching, then inject epoxy to penetrate and lock fractured concrete together.
Step 4: Leveling and resurfacing uneven floors grinding, overlay, or self-leveling compound
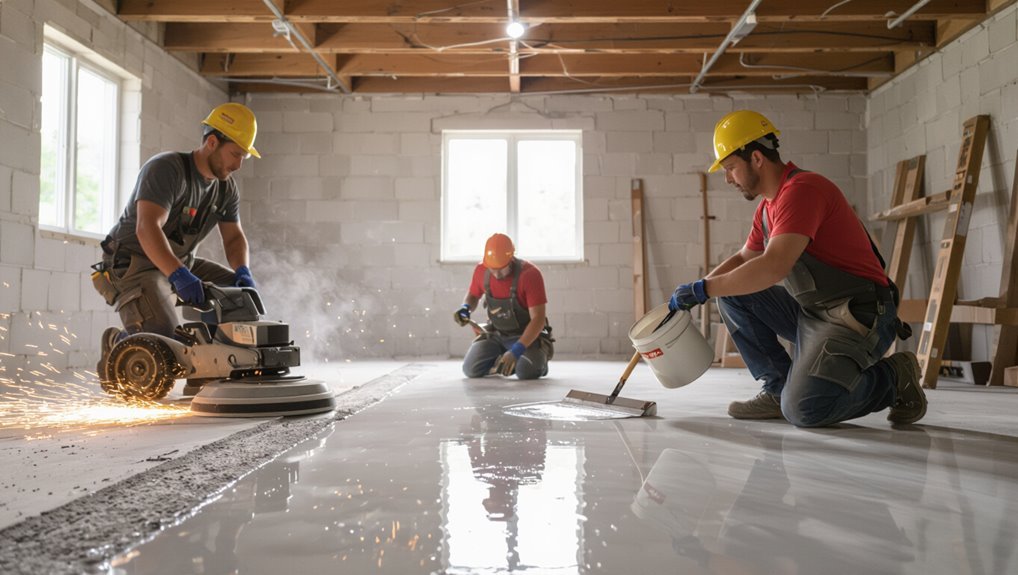
Step 4 brings three practical options to make an uneven concrete floor safe and usable again: grinding high spots, applying a thin overlay, or pouring a self-leveling compound to create a flat plane.
Choose grinding for localized humps, overlay for cosmetic fixes and thin repairs, or self-leveler for broader flatness.
Clean, prime, follow manufacturer mix and cure times for durable results.
Step 5: Basement/garage-specific methods for moisture-affected cracks
After you’ve leveled and resurfaced the slab, address cracks that keep showing up because of moisture—common in basements and garages.
Dry the area, run a humidity and vapor test, then install a vapor barrier or epoxy moisture mitigation system if readings are high.
Use hydraulic cement for active leaks, flexible polyurethane for moving cracks, and improve drainage and grading to prevent recurrence.
Comparison of Repair Materials and Pros/Cons
Now you’ll compare common repair materials—epoxy, polyurethane, hydraulic cement, and concrete patch—so you can pick the right one for your crack.
Consider cost, durability, and the best use case for each: epoxies are strong and costly, polyurethanes flex for moving cracks, hydraulic cement stops active leaks, and concrete patch is cheap for surface repairs.
I’ll outline pros and cons of each to help you decide.
Epoxy vs. polyurethane vs. hydraulic cement vs. concrete patch
When you’re choosing a repair material for a cracked concrete floor, consider how each option handles moisture, movement, strength, and appearance—because epoxy, polyurethane, hydraulic cement, and concrete patch all excel in different situations. You’ll pick epoxy for surface wear, polyurethane for flexible joints, hydraulic cement for active leaks, and patch mixes for simple fills.
| Material | Strength | Flexibility |
|---|---|---|
| Epoxy | High | Low |
| Polyurethane | Medium | High |
| Hydraulic Cement | High | Low |
| Concrete Patch | Medium | Low |
Cost, durability, and best use case for each material
Pick the right repair material by balancing upfront cost, long-term durability, and the specific demands of the crack you’re fixing.
You’ll choose epoxy for strong, permanent bonds in structural cracks, polyurethane for flexible, waterproof joints, hydraulic cement for fast, emergency stops, and concrete patch for shallow cosmetic repairs.
Visualize application and finish to match performance needs.
- Epoxy: rigid, high cost, structural
- Polyurethane: flexible, waterproof, mid-cost
- Hydraulic cement: fast, short-term seal
Common Mistakes to Avoid When Repairing Concrete Floors
Don’t skip proper surface prep or cleaning, because dirt and loose material will keep repairs from bonding.
Make sure you use the right filler for the crack type and address underlying causes like poor drainage, shifting soil, or structural issues instead of just patching symptoms.
Also follow correct curing practices and mind temperature limits to avoid weak or prematurely failed repairs.
Skipping proper surface prep or cleaning
Although it might seem quicker to dive straight into filling a crack, skipping proper surface prep and cleaning is the fastest way to make a repair fail; you need a clean, sound surface so patching material bonds correctly and lasts.
Remove dust, loose concrete, oil, and efflorescence, and let the area dry. Proper prep prevents delamination and wasted time and materials.
Using wrong filler for crack type
When you use the wrong filler for the crack type, the repair will look fine at first but fail quickly. Flexible sealants are for hairline or moving joints, while rigid patching compounds suit static, wider cracks.
Match filler elasticity to crack behavior, follow product instructions, and don’t overfill.
Choose epoxy or polymer for structural repairs and silicone or urethane for movement to extend longevity.
Ignoring underlying causes (drainage, soil, structural)
If you skip diagnosing the root cause of a crack—like poor drainage, shifting soil, or a structural issue—you’ll just be treating a symptom and the problem will come back.
Don’t patch blindly: inspect grading, gutters, and foundation movement.
Address water flow, compact or stabilize soil, or consult a structural pro before repairing.
Fix causes first so your concrete repair lasts.
Poor curing practices and temperature mistakes
Because concrete gains most of its strength through proper curing, rushing the process or ignoring temperature control will undo your repair before it sets.
You should keep the patch moist, protect it from freezing or overheating, and follow manufacturer cure-time recommendations.
Use insulating blankets in cold weather, shade and misting in heat, and don’t load the floor until it’s fully cured to prevent new cracks.
Prevention and Best Practices to Keep Cracks from Worsening
To keep small cracks from turning into bigger problems, follow a simple routine maintenance checklist that you can do seasonally.
Make sure your landscaping and drainage direct water away from the foundation, and consider French drains or grading if runoff pools near the slab.
Also use properly placed expansion joints and limit heavy loads where possible to reduce stress on the concrete.
Routine maintenance checklist
A simple, regular checklist will keep small concrete cracks from turning into costly problems: inspect surfaces monthly, clear debris and standing water, monitor crack width and length, and address drainage or load issues promptly so you catch changes early.
You should note changes, schedule repairs, and keep records to spot trends.
- Scrape loose concrete and sweep dust
- Photograph and measure cracks
- Apply sealant to hairline gaps
Landscaping and drainage solutions to protect foundations
If you want to keep small cracks from turning into structural problems, plan your landscaping and drainage to move water away from the foundation, not toward it.
Grade soil to slope away, extend downspouts, install gutters and splash blocks, and use permeable hardscaping to reduce runoff.
Plant shallow-rooted, drought-tolerant vegetation and avoid planting large trees near foundations to prevent moisture changes and root damage.
Expansion joints and load management recommendations
You’ve already reduced moisture and root pressure around the foundation, so now focus on controlling how the slab moves and bears weight: install properly spaced expansion joints to accommodate thermal and shrinkage movement, and manage loads to prevent concentrated stresses that widen cracks.
Use joint sealants, maintain flexible filler, redistribute heavy equipment, add steel plates under point loads, and monitor for new movement.
When to Hire a Professional Red Flags and Cost Considerations
If cracks are widening, shifting, or accompanied by doors and floors that no longer sit level, you should get a professional inspection because those are signs of possible structural failure.
Expect pros to recommend solutions from epoxy or polyurethane injections to slab stabilization or replacement, depending on the cause.
Costs vary widely—small repairs can be a few hundred dollars, while stabilization or replacement can run into the thousands, influenced by access, repair method, and underlying soil issues.
Signs a crack indicates structural failure
When cracks show widening gaps, sudden shifts, or stair-step patterns along block joints, they’re likely signaling structural trouble and you should call a professional right away.
Also watch for doors/windows that stick, floors that slope, new vertical cracks wider than 1/4 inch, or moisture seeping through.
These red flags suggest foundation movement; don’t delay inspection to avoid higher repair costs.
Typical professional solutions and what to expect
Because serious foundation issues can escalate quickly, hire a professional as soon as you spot red-flag signs like widening or stair-step cracks, sticking doors, or moisture through the slab.
They’ll assess, recommend fixes like epoxy injection, slab jacking, or underpinning, and manage permits. Expect clear timelines and warranty terms.
- epoxy seal filling hairline cracks
- hydraulic jacks lifting settled slab
- steel piers stabilizing footings
Rough cost ranges and factors that affect price
Repair costs for cracked concrete can vary widely, so you’ll want a quick sense of typical ranges before calling a pro. Small patching: $50–$300. Epoxy/sealants: $200–$800. Structural repair or slab replacement: $1,000–$5,000+. Factors: crack size, depth, location, moisture, reinforcement, accessibility, permit needs, and labor rates.
| Item | Typical Cost |
|---|---|
| Patching | $50–$300 |
| Epoxy/sealant | $200–$800 |
| Structural/slab | $1,000–$5,000+ |
FAQ Common Questions About Fixing Cracked Concrete Floors
You probably have a few quick questions before you start repairs, like how long a patch takes to fully cure and whether hairline cracks will worsen if ignored.
You’ll also want to know if you can paint or epoxy over a repair, how to tell if a crack signals foundation damage, and whether there are safe temporary fixes while you wait for a pro.
Let’s answer those common concerns clearly so you can decide your next steps.
How long until a repaired crack is fully cured?
A repaired concrete crack typically needs about 24 to 72 hours to set for light foot traffic and up to 28 days to reach near-full strength, depending on the repair material, temperature, and humidity.
For epoxy or polyurethane injections you’ll often see functional cure in a day or two; cement-based patches take longer.
Follow manufacturer cure times and avoid loading the area until fully cured.
Will a hairline crack get worse if left alone?
While a hairline crack might seem harmless at first, it can widen or multiply over time if underlying causes like settlement, moisture, or freeze-thaw cycles aren’t addressed.
You shouldn’t ignore it: small cracks let water and debris in, exacerbating damage and risking structural issues.
Assess causes, monitor changes, and repair promptly to stop progression and avoid costlier repairs later.
Can I paint or epoxy coat a repaired floor?
Want to make the repaired slab look good and last? Yes — you can paint or epoxy coat a repaired floor if the patch and surrounding concrete are clean, dry, and properly profiled.
Use breathable concrete paints or high-quality epoxy primers and topcoats rated for floors.
Follow manufacturer cure times and avoid sealing over active or unsettled cracks to prevent adhesion failure and peeling.
How do I know if a crack is a sign of foundation damage?
How can you tell if a crack signals foundation trouble? Look for wide, growing, or stair-step cracks in walls or floors, doors and windows that stick, uneven or sloping floors, and gaps between walls and floor.
Hairline surface cracks that don’t change are less worrying. If you notice movement, document changes and consult a foundation pro for inspection and diagnosis.
Are there temporary fixes while waiting for professional help?
If you can’t get a professional right away, you can take a few temporary steps to limit water entry, reduce tripping hazards, and slow further deterioration.
Clean debris, dry the area, and apply concrete crack sealant or exterior caulk for small gaps.
Use epoxy or polyurethane filler for wider cracks, and cover with waterproof tape or a tarp during heavy rain until pros assess and repair.