How to Clean Shower Floor Tile and Banish Grime for Good
Start by rinsing or sweeping the floor to remove loose debris, then apply a fast-acting, pH-balanced cleaner and let it sit briefly. Scrub grout with a stiff nylon brush and tiles with a soft brush or sponge, targeting soap scum with baking soda paste or enzyme spray for hard water. Rinse well and dry with a microfiber cloth, then squeegee after showers and reseal grout every 1–3 years to prevent return—keep going for specific stain fixes and routines.
Clean Shower Floor Tile in Minutes
You can get your shower floor clean in minutes with a simple, step-by-step routine: sweep or rinse, apply a fast-acting cleaner, scrub grout lines, then rinse.
Keep a few quick-clean products on hand—a spray grout cleaner, a non-abrasive scrub brush, and a daily shower spray—to speed the job.
Follow the order and use the right tools, and you’ll cut cleaning time without sacrificing results.
Direct, step-by-step summary for fast cleaning
Start by gathering a few quick supplies—baking soda, white vinegar or a mild tile cleaner, a stiff brush or scrub pad, a spray bottle, and a microfiber cloth—so you can finish the job without hunting for tools.
Sprinkle baking soda, spray vinegar or cleaner, let fizz for a minute, scrub grout and tiles, rinse thoroughly, dry with the microfiber cloth.
This is how to clean shower floor tile efficiently.
Best quick-clean products to keep on hand
Keep a short list of go-to products so you can clean shower tile in minutes without thinking twice.
You’ll want essentials that tackle soap scum, mildew, and daily touchups.
- pH-balanced tile spray for daily shine.
- Baking soda paste for grout spot treatment.
- Microfiber scrub brush and squeegee for quick rinses and drying.
Why Shower Floor Tile Gets Grimy
You’ll notice grime builds up from soap scum, hard water deposits, and mold or mildew that love damp, soapy surfaces.
Mineral buildup can film over tiles, and porous grout or rough tile textures hold dirt more than smooth, sealed surfaces.
Knowing what causes the grime helps you choose the right cleaners and maintenance.
Common causes: soap scum, hard water, mold, mildew, and mineral buildup
Several common culprits make shower floors look grimy: soap scum, hard water deposits, mold and mildew, and mineral buildup from your water supply.
You’ll notice soap scum films from cleansing products, calcium and lime from hard water, and dark patches where moisture lingers that feed mold and mildew.
Regular drying, targeted cleaners, and venting will prevent most buildup before it sets.
How tile type and grout affect grime retention
Because different tiles and grout trap dirt in different ways, the materials you choose play a big role in how quickly grime builds up.
Porous stone and unglazed ceramic absorb soap and water, feeding mildew. Wide or cracked grout holds residue and stains faster than sealed, narrow lines.
Choose nonporous tiles and seal grout regularly, and you’ll cut cleaning time and prevent persistent buildup.
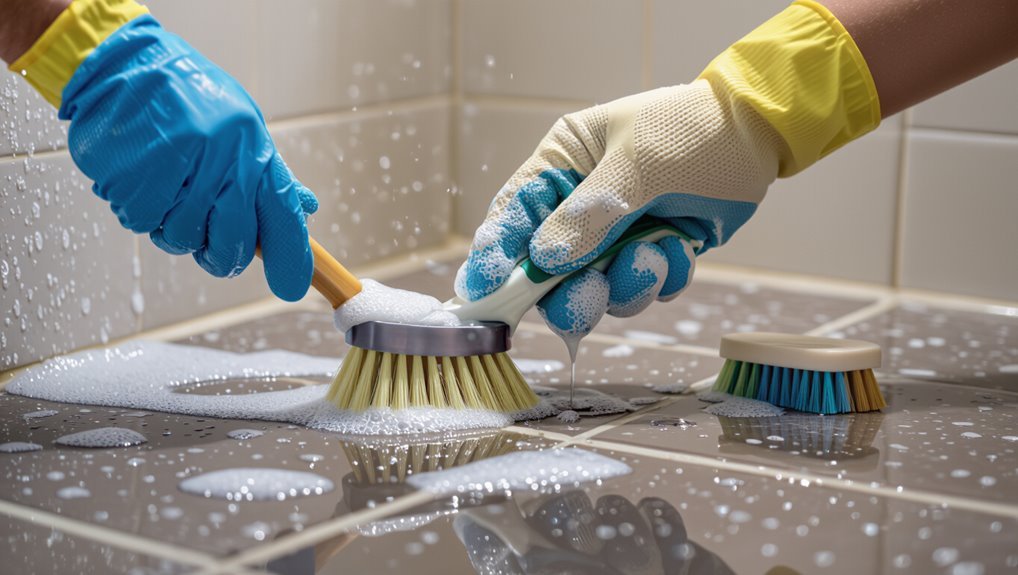
What You Need Tools, Cleaners, and Safety Gear
Before you start scrubbing, gather the right tools—stiff and soft-bristled brushes, a grout brush, a bucket, and a scrub pad—to make the job efficient.
Decide on a cleaner (you can use a simple DIY mix like baking soda and vinegar for mild grime or a commercial grout cleaner for tougher buildup) and know how to apply it safely.
Protect yourself with ventilation, chemical-resistant gloves, and eye protection, and follow product instructions to avoid hazards.
Essential tools and brushes
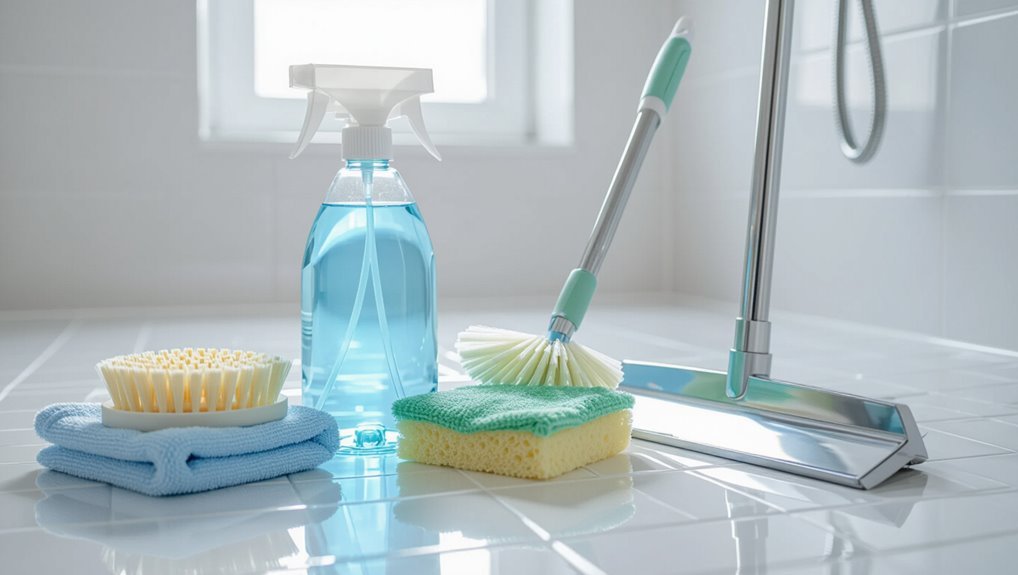
You’ll need a handful of basic tools, a few targeted cleaners, and simple safety gear to get the job done effectively and without harm.
Gather sturdy items and brushes that reach grout and corners, plus gloves and goggles.
- Stiff nylon brush for grout and textured tile
- Soft-bristle brush or sponge for smooth tile
- Small detail brush or old toothbrush for edges and drains
Recommended cleaners: DIY vs. commercial
When deciding between DIY solutions and commercial cleaners, consider the soil type, tile material, and your tolerance for harsh chemicals—each option has distinct pros and trade-offs. You’ll choose baking soda/vinegar for mild soap scum, oxygen bleach for grout, or a commercial tile cleaner for stubborn buildup. Compare cost, effectiveness, and surface safety:
| Type | Best for | Notes |
|---|---|---|
| DIY | Light soil | Cheap, gentle |
| Oxygen bleach | Grout | Stronger, non-chlorine |
| Commercial | Heavy buildup | Fast, pricier |
Safety precautions and PPE (ventilation, gloves, eye protection)
Because cleaning products and scrubbing can kick up fumes, dust, and stray splashes, take basic safety steps: run a fan or open a window for ventilation, wear chemical-resistant gloves, and put on eye protection to prevent irritants from contacting your skin or eyes.
Also avoid mixing cleaners, read labels, test a small area first, use non-slip shoes, and keep children and pets out until the floor’s dry and fumes dissipate.
Step-by-Step Deep Clean
Start by clearing the shower, cracking a window for ventilation, and testing your cleaner on a small patch.
Remove loose debris and pre-rinse, then apply the cleaner and let it dwell for the recommended time while you prepare to scrub.
Agitate tile and grout with the right tools, rinse thoroughly, and inspect to repeat any stubborn spots.
Prep: clear, ventilate, and test cleaner
Before you scrub, clear the area, open a window or run the exhaust fan, and spot-test your cleaner on a hidden tile so you know it won’t damage grout or finish.
Remove bottles, mats, and personal items. Ventilation reduces fumes and speeds drying.
Test for discoloration or dulling; wait the product’s recommended time. If safe, proceed with your chosen cleaner.
Step 1 Remove loose debris and pre-rinse
Sweep or vacuum the floor to lift loose hair, soap scum and grit, then give the tiles a quick rinse with warm water to loosen surface grime.
- Remove drain covers and pull out hair clumps by hand or with tweezers.
- Use a soft brush or broom to dislodge grit from grout lines.
- Rinse again, directing water toward the drain so debris washes away.
Step 2 Apply cleaner and let dwell (timing and tips)
Apply a suitable cleaner evenly across the tiles and grout, then let it sit so it can break down soap scum and mildew—timing matters: mild cleaners usually need 5–10 minutes, while stronger or enzyme-based formulas may require 10–20 minutes.
Keep ventilation on, avoid mixing products, and cover stubborn spots with a small amount of cleaner.
Check labels for safe dwell times and rinse thoroughly afterward.
Step 3 Agitate tile and grout (techniques for efficiency)
Scrub the tiles and grout systematically to loosen trapped soap scum and mildew—work in small sections so agitating stays effective and you don’t let cleaner dry.
Use a stiff nylon brush for grout and a softer brush or sponge on tile. Apply firm, circular motions along grout lines, tip brushes into corners, and reapply cleaner to stubborn spots until residue lifts evenly.
Step 4 Rinse thoroughly and inspect
Once the grout and tile look loosened, rinse away loosened residue with warm water so you don’t leave cleaner or grime behind.
Use a detachable showerhead or a bucket to flush corners and grout lines, working downhill.
Squeegee or towel-dry to prevent water spots, then inspect closely for missed areas or dull grout.
Note any stubborn spots for targeted treatment.
Step 5 Repeat spot treatments for stubborn stains
Target stubborn stains with repeat spot treatments so they don’t keep ruining your deep clean.
Apply a concentrated cleaner or a paste of baking soda and water, scrub with a nylon brush, then let it sit 10–15 minutes.
Rinse and inspect. Repeat once or twice for persistent spots, avoiding harsh scrubbing that can damage grout.
Finish with a final rinse and dry.
Targeted Solutions for Specific Problems (Problem-Solution)
Now you’ll target specific problems with tailored fixes: the best soaps and tools for soap scum, acids or chelators for hard water and mineral buildup, and safe approaches for killing mold versus removing lingering stains.
You’ll also learn stain-specific tactics for rust, discoloration, and dye transfer so you can choose the right product and method.
Follow the guidance to treat each issue effectively without damaging tile or grout.
Soap scum removal techniques and best products
When soap scum builds up, it can dull tile and grout quickly, but you don’t have to scrub endlessly to remove it; targeted cleaners and a few simple techniques will speed the job and protect surfaces.
Use a nonabrasive bathroom cleaner or enzyme spray, let it sit, then agitate with a soft brush. Rinse, repeat for stubborn areas, and finish with a daily squeegee.
Removing hard water stains and mineral buildup
Although hard water stains can look permanent, you can dissolve and lift most mineral buildup with the right acids and a little elbow grease.
Apply white vinegar or a commercial descaler, let sit 10–20 minutes, then scrub with a nylon brush. Rinse thoroughly and repeat stubborn spots.
For calcium deposits, use diluted muriatic or citric acid cautiously, wearing gloves and ventilating the area.
Mold and mildew: killing vs. removing stains safely
Curious whether you should kill mold or just remove the stain? You’ll want to kill active mold and mildew to prevent health risks and regrowth, using a bleach or hydrogen peroxide solution with good ventilation and gloves.
For leftover discoloration, scrub with a baking soda paste or oxygen bleach. Rinse thoroughly and dry to stop recurrence; repair grout if mold returns.
Stain-specific fixes: rust, discoloration, and dye transfer
If you’re dealing with rust, general discoloration, or dye transfer, each stain needs a specific approach to avoid damaging tile or grout.
Use targeted cleaners and test in an inconspicuous spot first.
- Rust: apply a commercial rust remover, rinse thoroughly, repeat if needed.
- Discoloration: use oxygen bleach paste, scrub gently, let sit.
- Dye transfer: try diluted acetone or specialized remover, spot-test.
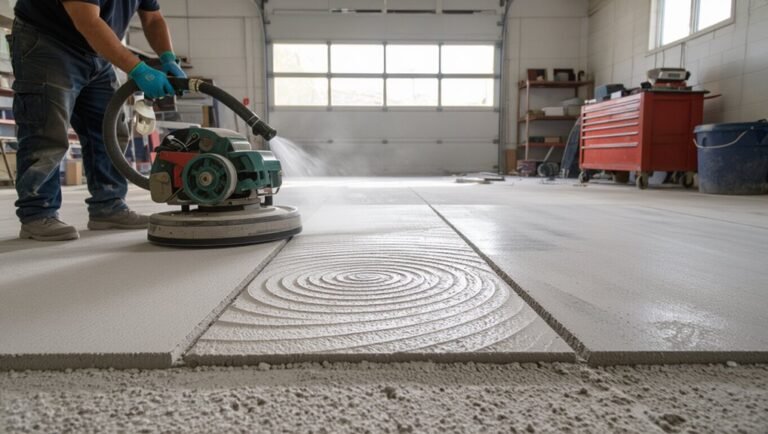
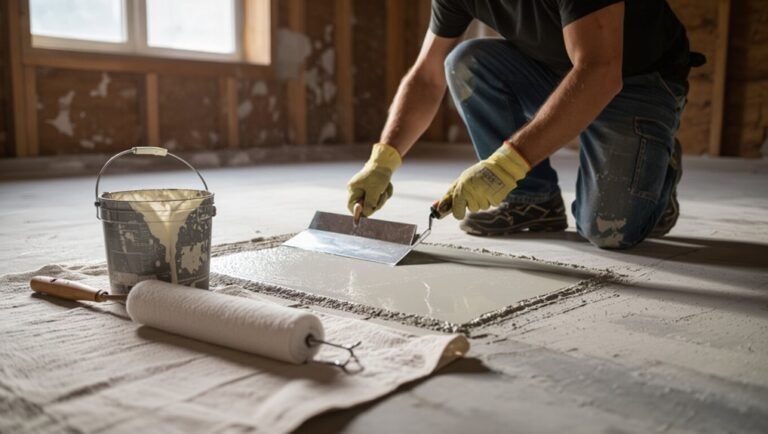
Grout Cleaning and Restoration
You’ll learn how to deep-clean grout safely so you don’t damage the surrounding tile or finish.
I’ll explain when to choose re-grouting versus grout whitening based on condition and cost.
Finally, you’ll get straightforward guidance on sealers, how to apply them, and how long they typically last.
How to deep-clean grout without damaging tile
When grout looks dingy or stained, deep-cleaning it will revive the whole shower without harming the tile—if you use the right methods and products.
Mix a pH-neutral cleaner or baking soda paste, test a small area, scrub gently with a nylon brush, rinse thoroughly, and dry.
Avoid harsh acids or metal brushes; repeat spot treatments as needed until grout looks fresh.
Re-grouting vs. grout whitening when to choose each
Although both re-grouting and grout whitening can brighten your shower, choosing the right approach depends on the grout’s condition and how long you want results to last. If grout is crumbling or mold has penetrated, re-grout. If it’s stained but sound, whiten. Choose based on durability, cost, and time.
| Situation | Recommendation |
|---|---|
| Crumbling grout | Re-grout |
| Surface stains | Whitening |
| Mold penetration | Re-grout |
| Budget/time limits | Whitening |
Sealing grout: products, application, and lifespan
Sealing grout locks out moisture, soap scum, and stains so your restored tile stays cleaner longer.
Choose a penetrating or surface sealer—penetrating preserves breathability, surface offers stronger sheen.
Clean and dry grout, apply with brush or applicator, wipe excess, cure per label (usually 24–72 hours).
Reapply every 1–3 years depending on traffic, water exposure, and product durability to maintain protection.
Speed-Clean Routine for Weekly Maintenance
Keep grime from coming back with a quick 5-minute checklist you can do each week.
You’ll use a few lightweight cleaners—mild tile spray or diluted vinegar—and simple tools like a squeegee, soft brush, and microfiber cloth.
Follow this routine and you’ll cut down on deep cleans and keep tiles looking fresh.
5-minute checklist to prevent grime return
A five-minute weekly sweep can stop soap scum and mildew from coming back—do it right after your longest shower while tiles are still damp.
- Squeegee water toward drain, wiping grout lines with a microfiber strip.
- Spray a light mist (no heavy tools) and let sit 60 seconds, then scrub grout with a soft brush.
- Rinse, squeegee dry, and ventilate the bathroom until fully aired out.
Best lightweight cleaners and tools for weekly use
When you want fast, reliable results without heavy scrubbing, choose lightweight cleaners and a few simple tools designed for weekly maintenance.
Use a pH-neutral tile spray or diluted white vinegar for soap scum, a spray bottle, microfiber cloth, soft-bristled brush, and squeegee.
Keep products labeled, test grout first, and wipe tiles after each shower to prevent buildup and reduce deep cleaning.
Common Mistakes That Make Grime Worse
Don’t mix cleaners or grab abrasive pads that can etch tile or react dangerously with each other.
Make sure you ventilate the space and rinse thoroughly—leftover residue and poor airflow let grime and mildew come back fast.
Also match your brush and product to your specific tile and grout so you’re removing dirt, not wearing the surface down.
Harmful cleaner combinations and abrasive tools to avoid
Mixing household cleaners can be dangerous, and using harsh scrubbing tools can actually damage your tile and grout instead of fixing it.
Don’t combine bleach with ammonia or acids — toxic gases result. Skip wire brushes, steel wool, and gritty powders that scratch surfaces.
Use pH-appropriate cleaners, soft-bristled brushes, or microfiber pads to remove grime safely without etching tile or degrading grout.
Overlooking ventilation and incomplete rinsing
Because cleaners release fumes and loosened grime can settle back in, skipping proper ventilation and thorough rinsing often makes shower dirt worse, not better.
You should open windows or run the fan while cleaning, and rinse tiles until suds and residue are gone.
Otherwise trapped moisture promotes mildew and leftover cleaner attracts more dirt, undoing your work and irritating skin or lungs.
Using wrong brush or product for tile type
If you grab a stiff brush or a harsh cleaner without checking your tile type, you can scratch glazed surfaces or strip natural stone’s protective seal, making grime stickier and staining worse.
Always match tools and cleaners: soft-bristled brush and pH-neutral cleaner for stone, firmer nylon for ceramic, nonabrasive pads for grout.
Test in an inconspicuous spot first to avoid permanent damage.
Long-Term Prevention and Best Practices
To keep your shower floor looking good, adopt simple habits like squeegeeing after each use and using low-residue soaps to cut soap scum and mineral buildup.
Consider installing a water softener or point-of-use filter if hard water is a chronic issue.
And know when to call a pro—schedule professional deep cleaning if stains or grout damage persist despite regular maintenance.
Simple habits to reduce soap scum and mineral buildup
When you make a few small habits part of your routine—like rinsing the walls after each shower and wiping puddles with a squeegee—you’ll cut down soap scum and mineral deposits before they form.
Also wipe tiles dry, hang soap to drain, use a microfiber cloth weekly for stubborn spots, clean grout lines monthly, and ventilate to speed drying.
Consistency prevents buildup.
Installing water-softening or filtration options
Rinsing and drying after each shower will cut down on immediate buildup, but tackling hard water at the source makes maintenance even easier over time.
Install a whole-house softener or a point-of-use filter for your shower to reduce minerals that cause staining and soap scum.
You’ll spend less time scrubbing, protect grout and fixtures, and extend tile life with consistent, softened water.
When to schedule professional cleaning
Although regular DIY care keeps most buildup at bay, you should schedule professional cleaning if grout is consistently discolored, tiles feel gritty despite scrubbing, or stains and mineral deposits won’t budge with household methods.
Call a pro annually for deep cleaning if you have hard water, persistent mold, or uneven grout deterioration. They’ll restore sealant, repair damaged grout, and prevent recurring problems.
Cost and Time Estimates
For a quick clean you’ll usually spend 15–30 minutes, while a deep clean with grout scrubbing can take 1–3 hours depending on the size and condition of the shower.
DIY supplies like cleaners, brushes, and sealant typically cost $10–50, whereas hiring a pro often runs $100–300 or more.
We’ll compare time, expense, and when it’s worth paying someone versus doing it yourself.
Typical time required for quick clean vs. deep clean
A quick clean of a shower floor usually takes 10–20 minutes and gets rid of surface soap scum and loose grime, while a deep clean can take 45–90 minutes depending on grout condition, required scrubbing, and drying time.
For routine maintenance, plan brief weekly sessions. Reserve longer deep-clean sessions every few months or after staining, and factor in ventilation time for drying.
Estimated costs: DIY supplies vs. professional service
You can expect big price differences between DIY cleaning and hiring pros: basic supplies for a DIY deep clean (cleaner, grout brush, scrub pad, gloves, and vinegar or bleach alternatives) usually run $10–$30, while specialty grout cleaners or steamers push that to $50–$150; a professional shower-floor cleaning service typically costs $100–$300 or more depending on size, grime level, and travel fees.
| Option | Cost | Notes |
|---|---|---|
| DIY basic | $10–$30 | Quick, low cost |
| DIY pro tools | $50–$150 | Steamers, specialty cleaners |
| Professional | $100–$300+ | Faster, guarantees |
Tools and Product Comparison
Now you’ll compare the tools and cleaners that make scrubbing easier and more effective.
You’ll weigh brush options—nylon for gentle grout, stiff for stubborn grime, and electric scrubbers for speed—against their pros and cons.
Then you’ll compare cleaners like bleach, vinegar, enzymatic formulas, and commercial blends so you can pick the safest, most effective option for your tile.
Brush types: nylon, stiff, electric scrubbers pros and cons
Because different scrubbing tasks call for different tools, picking the right brush can cut cleaning time and effort dramatically. You’ll choose nylon for gentle grout, stiff for stubborn grime, and electric scrubbers for speed, though they can be bulky or pricey. Decide by tile type, stain level, and comfort.
| Brush | Feeling | Result |
|---|---|---|
| Nylon | Gentle | Preserves grout |
| Stiff | Firm | Removes buildup |
| Electric | Efficient | Saves time |
| Choice | Confident | Cleaner shower |
Cleaner comparison: bleach, vinegar, enzymatic, commercial blends
Choosing the right cleaner can cut scrubbing time and make stains easier to remove, so match the product to your tile, grout, and the soil you’re tackling. You’ll pick bleach for mold, vinegar for mineral soap scum, enzymatic for organic buildup, and commercial blends for stubborn grime—always test first and ventilate.
| Cleaner | Best use |
|---|---|
| Bleach | Mold/whiten grout |
| Vinegar | Soap scum/minerals |
| Enzymatic | Organic stains |
| Commercial | Heavy-duty grime |
Troubleshooting Common Scenarios
If your tile still feels slippery after cleaning, you’ll want to check for leftover soap scum or waxy residues and switch to a degreasing cleaner or a diluted vinegar rinse.
If mold odors linger after treatment, you’re likely missing spores in grout lines or drain traps—clean those areas and improve ventilation.
For grout that’s discolored after treatment, try a targeted grout cleaner or consider regrouting or sealing to restore an even appearance.
Tile still slippery after cleaning
When your shower floor still feels slippery after cleaning, you likely missed a residue source or used the wrong cleaner, and you’ll want to address it quickly to prevent falls.
Rinse thoroughly with hot water, wipe away soap or conditioner buildup, and scrub grout/edges where film hides.
Avoid oily or waxy products; finish with a vinegar rinse or a pH-neutral cleaner and dry.
Persistent odor after mold removal
Although you removed visible mold, a lingering musty odor often means spores, contaminated materials, or trapped moisture remain. You’ll want to track the source quickly to prevent recurrence.
Inspect grout lines, caulk seams, drains, and hidden joints. Remove and replace water-damaged caulk or flooring.
Deep-clean with enzyme cleaners, dry thoroughly, improve ventilation, and use a dehumidifier until the smell disappears.
Discolored grout after treatment
Since grout can react to cleaners, heat, or lingering stains, you may notice discoloration after treatment that ranges from lightening to dark blotches or a chalky residue.
Rinse thoroughly, neutralize cleaners with a vinegar-water rinse if safe for your grout, then let dry.
For stubborn changes, test a grout colorant or sealer on a small area, or consult a professional for restoration.
FAQ
Got questions about frequency, safe cleaners, or stubborn stains?
You’ll find quick answers on how often to deep-clean, whether vinegar or bleach is safe for your tile and grout, and how to tackle rust.
If a restoration sounds scary, I’ll also explain when it’s time to call a pro.
How often should I deep-clean my shower floor?
How often should you deep-clean your shower floor? Aim for a thorough deep clean every 1–3 months, depending on use, humidity, and visible buildup. High-traffic or poorly ventilated showers need monthly attention; occasional-use stalls can stretch to quarterly. Spot-treat soap scum and mildew as soon as you see them to prevent tougher scrubbing later and preserve grout and tile.
Is vinegar safe for all tile types?
Wondering if vinegar’s a safe choice for every tile? You should avoid vinegar on natural stone like marble, travertine, limestone, and some polished granite—acid damages their surface.
Vinegar is fine for glazed ceramic, porcelain, and many quarry tiles when diluted, but always test a hidden spot first.
Use pH-neutral cleaners for sensitive materials to protect finish and grout.
Can I use bleach on grout and tile?
Can you use bleach on grout and tile? You can, but carefully.
Use diluted bleach for mold or heavy staining on non-porous tiles and grout. Ventilate well, wear gloves and eye protection, and never mix with ammonia or acids.
Test a hidden area first; avoid bleach on natural stone, colored grout, or porous tiles to prevent damage and discoloration.
How do I remove rust stains from shower tile?
If bleach isn’t right for your grout or tile—especially on porous or colored surfaces—you’ll want a different approach for rust stains.
Try a commercial rust remover labeled safe for tile or a paste of oxalic acid or cream of tartar with water.
Test a small area first, apply, let sit per instructions, scrub gently with a nylon brush, then rinse thoroughly.
When should I call a pro for tile restoration?
When should you call a pro for tile restoration? If grout’s crumbling, tiles are loose or cracked, mold returns despite cleaning, or stains won’t lift, hire a pro.
Also call for extensive discoloration, waterproofing failures, or recurring odors.
A technician can assess structural issues, replace damaged tiles, regrout and seal properly, and prevent costly repairs down the line—saving time and ensuring lasting results.