How to Install Tile Floor on Concrete: the Right Way From Start to Finish
You’ll start by testing and prepping the slab—check moisture, levelness, and repair cracks—then clean and prime or apply a waterproof/crack-isolation membrane as needed. Use polymer-modified thinset for porcelain or ceramic, trowel with the correct notch, set tiles with spacers and tap with a rubber mallet, then grout after the adhesive cures. Seal grout where required and inspect for hollow spots or movement. Follow these steps and you’ll get durable, professional results; keep going to learn the full process.
How to Install Tile Floor on Concrete: and Overview
You can often tile directly over a sound, level concrete slab—this overview will cover the basic steps from prep and underlayment to setting and grouting.
You’ll also get guidance on when a DIY approach makes sense versus hiring a pro.
Finally, you’ll see a quick snapshot of time, cost, and essential tools so you can plan the job.
can you tile over concrete and the basic steps
Although concrete is a common and suitable base for tile, you’ll need to check and prepare the slab before you start.
You can tile over concrete if it’s clean, level, dry and crack-free.
For how to install tile floor on concrete: repair cracks, grind high spots, apply a primer or slurry, set tile with thinset, grout, and seal.
Follow curing times.
When to DIY vs. hire a professional
Thinking about tackling the tile job yourself or calling in a pro? You can DIY smaller, straightforward rooms if you’re comfortable with surface prep, cutting tiles, and grouting.
Hire a pro for complex layouts, uneven or damaged concrete, waterproofing needs, or if you lack time or confidence.
Pros also handle permits and warranties; you’ll avoid costly mistakes and get faster, polished results.
Time, cost, and tools at a glance
Before you start, get a realistic sense of the schedule, budget, and basic tools so you don’t get surprised mid-project. Plan 1–3 days for prep, 1–4 days for tiling; expect $3–10/sq ft materials plus tools or rental. Essential tools: trowel, level, wet saw or tile cutter, spacers, grout float.
| Task | Time | Typical Cost |
|---|---|---|
| Prep | 1–3d | $0–$50 |
| Tile | 1–4d | $3–10/ft² |
Understanding Tile Flooring on Concrete: Basics You Need to Know
You’ll choose from ceramic, porcelain, or natural stone based on durability and look, but each has different installation needs on concrete.
Check whether you’re working with a slab, slab-on-grade, or basement floor and assess cracks, level, and moisture before you start.
Proper prep is vital because it guarantees adhesion, controls moisture, and accommodates concrete movement.
Types of tiles suitable for concrete (ceramic, porcelain, natural stone)
Tiles come in several durable options that work well over concrete—ceramic, porcelain, and natural stone—each with distinct strengths you should weigh for your project.
You’ll pick based on wear, maintenance, and look: ceramic is affordable and glazed; porcelain is dense and frost-resistant; natural stone offers unique beauty but needs sealing.
Consider traffic, moisture, and aesthetic goals.
- sun-baked terracotta warmth
- polished marble veins
- slate’s textured grip
- dense porcelain slab
Concrete substrate types and conditions (slab, slab-on-grade, basement)
Concrete comes in different forms, and knowing which one you’re working with matters for a successful tile installation.
You’ll encounter poured slab, slab-on-grade, basement slab, and suspended concrete, each with unique load, drainage, and moisture profiles.
Assess surface finish, cracks, and slope before tiling.
- Smooth interior slab
- Exterior slab exposed to weather
- Slab-on-grade with soil contact
- Basement slab below grade
Why proper preparation matters: adhesion, moisture, movement
Because a tile job only performs as well as its base, preparing the concrete properly guarantees the adhesive bonds, keeps moisture from ruining the mortar or tile, and accommodates slight movement so grout and tiles don’t crack.
You’ll clean, level, and test for moisture, choose primers or membranes as needed, and add control joints or uncoupling mats so tiles stay bonded and intact over time.
Pre-Installation Assessment: Inspecting and Preparing the Concrete
Before you start tiling, inspect the slab for moisture using a calcium chloride test or a reliable moisture meter and check for vapor drive issues.
Measure flatness and level against tolerance standards, note cracks or low spots, and decide whether to fill, level, or install a crack-isolation membrane or moisture barrier.
Gather the right tools and materials—patching compound, self-leveler, membrane, trowels, and meters—so you’re ready to address any problems.
Checking for moisture and vapor drive (methods: calcium chloride, moisture meter)
When you’re preparing to install tile over a slab, checking for moisture and vapor drive is essential because excess moisture can ruin adhesives and grout.
Use a calcium chloride test for an industry-standard moisture transmission reading and a reliable moisture meter to spot-check surface conditions and pinpoint problem areas.
- damp patch beneath plastic overnight
- meter reading spikes near drain
- white efflorescence on surface
- puddled water after rain
Assessing flatness, cracks, and level (tolerance standards)
Flatness, cracks, and level are the foundation of a successful tile job, so you’ll need to measure the slab carefully to make sure it meets industry tolerances and to locate defects that require repair.
Use a straightedge and 3/16″ in 10′ (or local spec) tolerance, check for deviations with a level or laser, map hairline and structural cracks, and note slopes and shifts.
Repairing common concrete problems: filling cracks, leveling low spots
Since small flaws can become big problems after tile is set, you’ll want to fix cracks and low spots now so the substrate is stable and flat.
Clean debris, widen hairline cracks slightly, then fill with polymer-modified concrete repair or epoxy.
For low spots, feather in a cementitious floor patch or self-leveling compound per manufacturer directions.
Allow full cure before tiling.
When to apply a moisture barrier or crack isolation membrane
If your concrete shows moisture stains, efflorescence, or you’re unsure about its vapor drive, apply a moisture barrier before tiling; likewise, use a crack isolation membrane whenever hairline to active cracks remain after repairs or the slab is prone to movement.
Choose products rated for your substrate, follow manufacturer cure times, and guarantee full adhesion.
- Damp concrete sheen
- White mineral deposits
- Thin surface cracks
- Slight slab bounce
Tools and materials checklist for inspection and prep
Before you begin, gather the right tools and materials so you can inspect and prep the slab efficiently: a flashlight, straightedge, and moisture meter help reveal issues fast.
Bring a stiff brush, scraper, and vacuum for cleaning, plus concrete patch, primer, and crack repair kit for fixes.
- Flashlight and moisture meter
- 6–10 ft straightedge
- Stiff brush and vacuum
- Concrete patching kit
Materials, Tools, and Supplies Needed
Before you start tiling, gather the right tiles, grout, thinset, and any backer or underlayment that suits your tile type and size.
Choose the proper adhesives, primers, and waterproofing membranes, and make sure you have the essential tools—grinder, floor scraper, trowels, spacers, tile saw, and mixing equipment—on hand.
Wear appropriate safety gear and prep the workspace so you can work efficiently and safely.
Tile materials: tile type, size, grout, thinset, backer options
Choosing the right materials sets the tone for a durable, attractive tile floor on concrete: pick a tile type and size that suit the room’s traffic and style, select grout and thinset compatible with that tile and substrate, and decide whether you’ll use a cement backer board or a crack-isolation membrane where needed.
- Porcelain plank in high-traffic hallway
- 12×12 ceramic in bathroom
- Sanded grout for wider joints
- Cement backer under wet areas
Adhesives and membranes: thinset types, primers, waterproofing membranes
When you’re bonding tile to concrete, the right adhesives and membranes make the difference between a long-lasting floor and premature failure. Choose polymer-modified thinset for porcelain, use a concrete primer for dust and adhesion, and apply a waterproofing membrane in wet areas.
| Product | Use | Notes |
|---|---|---|
| Thinset | Tile bonding | Polymer-modified |
| Primer | Surface prep | Seals dust |
| Membrane | Waterproofing | Sheet or liquid |
Tools: grinders, floor scrapers, trowels, spacers, tile saw, mixing tools
A handful of quality tools will make installing tile on concrete faster, safer, and more precise: a grinder or scarifier to remove high spots and old coatings, a heavy-duty floor scraper for stubborn debris, notched trowels sized to your tile, spacers to keep grout joints even, a wet tile saw for clean cuts, and proper mixing buckets and drills or paddles for thinset.
- A concrete-dust-coated angle grinder
- A bent-steel floor scraper with long handle
- A set of polymer spacers and varied notched trowels
- A wet tile saw with diamond blade and water tray
Safety equipment and workspace prep
You’ve got the right tools laid out, but you’ll also need proper safety gear and a well-prepped workspace before you cut or grind concrete.
Wear N95 or P100 mask, safety glasses, ear protection, and knee pads. Keep the area ventilated, clear of debris, and well lit.
Contain dust with plastic sheeting and a shop vac.
- N95/P100 respirator
- Safety glasses and face shield
- Ear protection and knee pads
- Plastic sheeting and shop vac
Step-by-Step Installation Process (Start to Finish)
Now you’ll follow a clear, sequential process to get your tile floor down right.
Start by preparing and profiling the concrete, then dry-layout your tiles and snap chalk lines to set a starting point.
From there you’ll prime or apply a membrane if needed, mix and spread thinset with a notched trowel, and set each tile with proper spacing, tapping, and alignment.
Step 1 Prepare the concrete surface (cleaning, profiling)
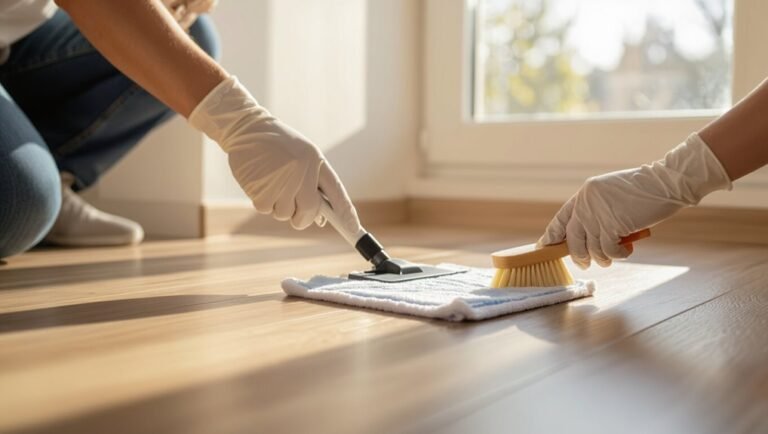
Start by thoroughly cleaning and profiling the concrete so your tile will bond properly and last. Remove dust, grease, and paint; repair cracks with patch; etch or grind glossy spots; vacuum and wipe with a concrete cleaner.
Confirm surface is flat, dry, and slightly roughened for adhesion.
- broom sweeping
- grinding sparks
- damp mop streaks
- patched hairline crack
Step 2 Lay out tiles and determine starting point (dry layout, chalk lines)

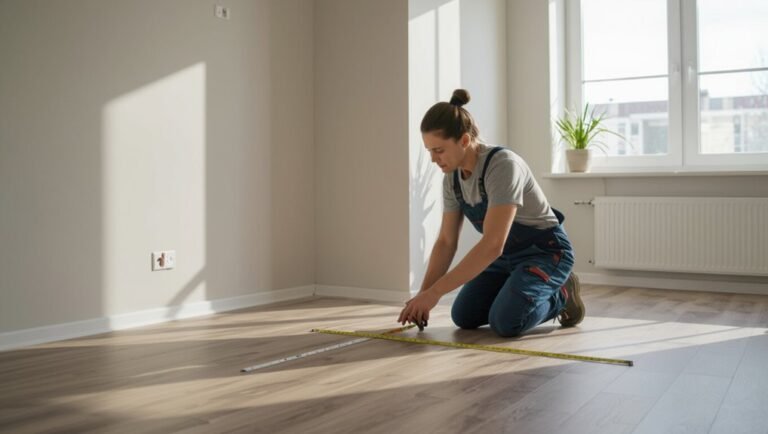
A dry layout lets you see how the tiles will fit and where you’ll need to cut, so measure the room, snap a pair of perpendicular chalk lines from the center, and dry-lay a few rows of full tiles along them to establish a balanced starting point.
Check edge tile widths, shift the center lines if needed for symmetry, and mark reference tiles to maintain alignment.
Step 3 Apply primer or membrane if required
Before you lay any thinset, decide whether the slab needs a primer or a membrane and apply it per the manufacturer’s instructions—this step prevents moisture issues and promotes proper adhesion.
Check concrete moisture levels and manufacturer recommendations.
Roll or trowel primer evenly, allow full cure time, or install an uncoupling/waterproof membrane per directions.
Verify seams and changes are sealed before proceeding.
Step 4 Mixing and applying thinset correctly (notched trowel technique)
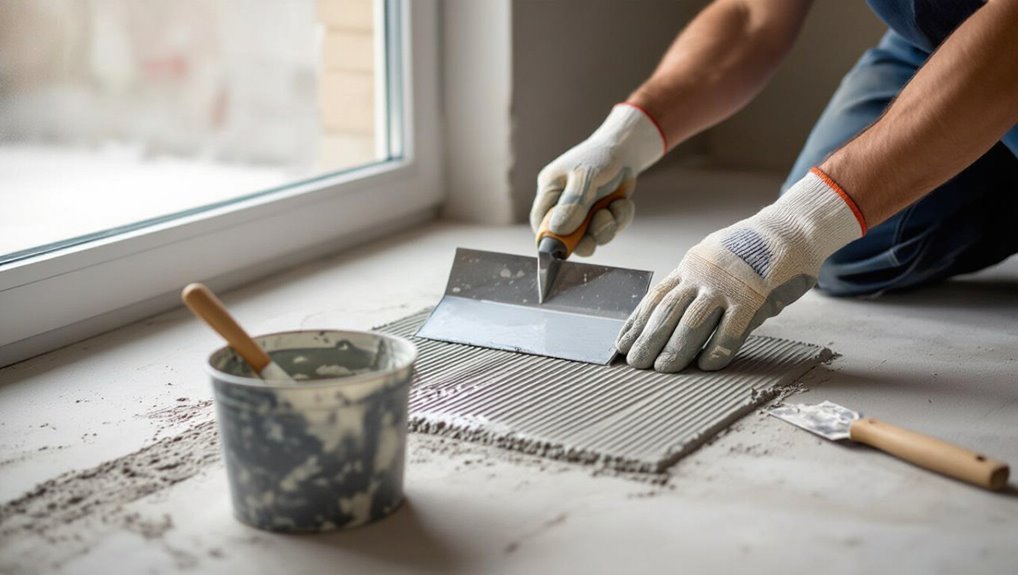
Once your primer or membrane has cured and seams are sealed, mix the thinset to the manufacturer’s specified consistency—usually a smooth, peanut-butter–like paste—and work in small batches you can use within the working time.
Spread thinset with the flat side of a trowel, then comb with the notched side at the correct notch size for your tile, maintaining uniform ridges and full coverage.
Step 5 Setting tiles: spacing, tapping, and alignment tips
Start by laying out a few tiles dry to confirm your grid lines and spacing. Then spread thinset on a small area and press the first tile into place with a firm, twisting motion.
Use consistent spacers, check alignment with a straightedge, and tap tiles lightly with a rubber mallet to seat them. Frequently verify level and joint width as you work outward.
Step 6 Cutting tiles for edges and obstacles (techniques for straight and plunge cuts)
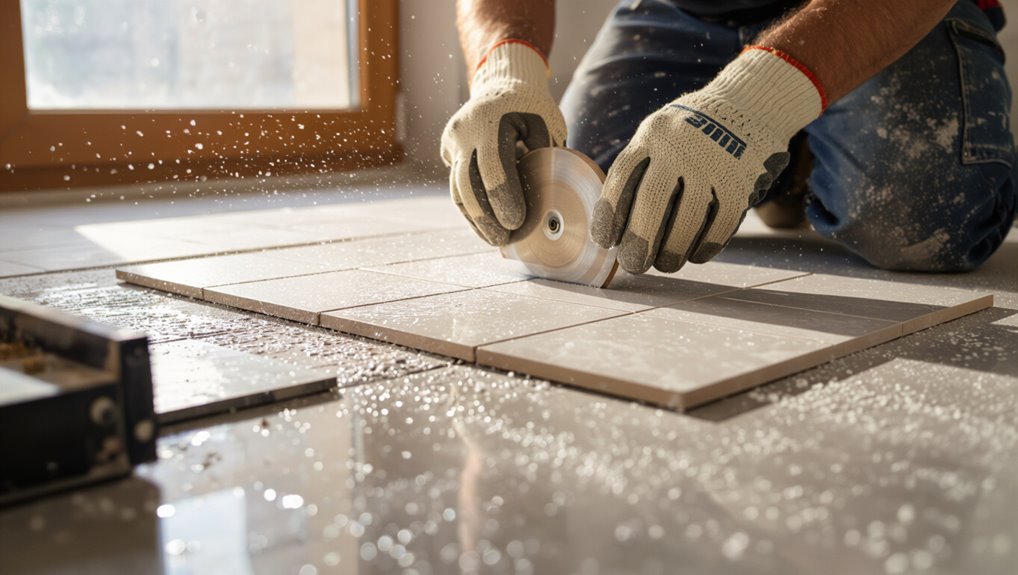
6. Measure and mark tiles for edges and obstacles precisely.
For straight cuts, score and snap with a manual cutter or use a wet saw for thick porcelain.
For plunge cuts and curves, use a wet saw with a guide or an angle grinder with a diamond blade, cutting slowly and cooling the blade.
Wear eye, ear, and respiratory protection; test-fit before setting.
Step 7 Allowing proper cure time before grouting (manufacturer guidelines)
Although the tiles may look set, you’ll need to respect the adhesive’s cure time before grouting to confirm a strong, lasting bond.
Check the adhesive manufacturer’s instructions for hours or days required, temperature and humidity limits, and any recommended weight restrictions.
Don’t rush: premature grouting can loosen tiles. If unsure, wait an extra day to verify full cure.
Step 8 Grouting: choosing grout type, mixing, application, and cleaning
Once the adhesive has fully cured, it’s time to grout the joints to lock the installation together and finish the look.
Choose sanded or unsanded grout based on joint width, mix to a creamy consistency, and work small areas with a rubber float at a 45° angle.
Remove excess diagonally, let set briefly, then clean haze with a damp sponge before final cure.
Step 9 Sealing grout and/or tile (which tiles need sealing and when)
Step 9 is sealing the grout and, if needed, the tile — a critical final step that protects joints from stains and moisture and can preserve the look of your floor.
Choose a penetrating sealer for porous stone and grout; many porcelain and glazed tiles don’t need sealing.
Apply per manufacturer directions, test a small area, and re-seal grout every 1–3 years depending on wear.
Step 10 Finishing touches: trim, transitions, cleaning, and inspection
With grout sealed and tiles protected, finish the job by installing trim and connections, performing a thorough clean, and inspecting for defects and loose edges.
You’ll attach transition strips, caulk gaps, and buff surfaces until grout haze is gone. Check alignment and press down any loose tiles before final walk-through.
- Polished metal threshold catching light
- Neat quarter-round along cabinets
- Damp sponge removing haze
- Careful finger checking grout joints
Common Problems and How to Fix Them
You’ll run into a few common issues—hollow spots or delaminated tiles that need sounding and re-bedding, efflorescence or discoloration that requires cleaning and prevention, and grout that can crack or stain and needs repair.
You’ll also watch for movement cracks in the substrate and decide where to place expansion joints and how to install them.
I’ll explain causes, quick checks, and practical fixes for each so you can keep the floor lasting and looking right.
Tile delamination and hollow spots causes and remediation (sounding, re-bedding)
Tile delamination and hollow spots happen when the adhesive bond between tile and concrete fails, and you’ll often notice them by tapping the surface and hearing a hollow sound.
To fix this, sound the floor systematically, mark hollows, remove affected tiles and old thinset, clean substrate, and re-bed with proper mortar and full coverage.
Allow correct cure before grouting and traffic.
Efflorescence and discoloration prevention and cleaning methods
If salts leach through the concrete and crystallize on the surface, they’ll leave a chalky white deposit called efflorescence that can stain grout and dull tiles.
Preventing it starts before you set any tile by controlling moisture, using vapor barriers or waterproofing membranes, and selecting low-alkali grout and mortars.
If efflorescence appears, dry-clean with a brush, neutralize with manufacturer-approved cleaners, then seal tiles and grout to reduce recurrence.
Grout cracking or staining repair techniques
When grout starts cracking or discoloring, it not only looks bad but lets moisture and dirt into joints, so acting quickly prevents bigger repairs.
Remove damaged grout with a grout saw, clean joints, then apply matching epoxy or cement grout.
For stains, try poultices or hydrogen peroxide first.
Seal cured grout to prevent recurrence and inspect periodically for new damage.
Movement cracks from substrate when to use expansion joints and how to install them
Because concrete slabs move with temperature and moisture changes, you need expansion joints to stop those movements from cracking your tile.
Install them at room perimeters, changes in substrate, long runs (>20–25 ft), and around fixed objects.
Cut joint channels, backer rod, and flexible silicone or polyurethane sealant. Maintain joint width per manufacturer.
- Doorway threshold gap
- Column base perimeter
- Long hallway seam
- Around floor drain
Best Practices, Tips, and Professional Shortcuts
Choose durable, slip-resistant tiles and proper grout for high-traffic or moisture-prone areas so your floor lasts longer.
Plan your layout to reduce cuts and waste, work in conditions that match the adhesive and concrete curing specs, and use a wet saw and spacers to speed accurate cuts.
Finally, follow simple maintenance routines—regular sweeping, timely grout sealing, and spot repairs—to keep the floor looking and performing its best.
Tile selection tips for high-traffic and moisture-prone areas
If you’re installing tile where lots of feet and moisture meet, pick durable, low-porosity tiles and a slip-resistant finish to keep them looking good and safe over time.
Choose porcelain or vitrified tiles rated for commercial use, prioritize PEI 4–5 for wear, and select glazed or matte textures with a high COF.
Match grout and sealants to resist staining and moisture.
Efficient layout and cutting strategies to minimize waste
When you plan your layout around focal points and room flow, you’ll cut far fewer tiles and save time; start by dry-laying full tiles along the main sightlines. Measure from center to walls to determine balanced edge cuts, and mark grout joints so you’re not forced into tiny slivers at opposing ends.
You’ll cut strategically and keep waste low.
- Full tiles centered on entry
- Balanced edge widths
- Stagger joints at doorways
- Group identical cuts
Climate and seasonal considerations for concrete and adhesive curing
Because concrete and adhesives cure differently depending on temperature and humidity, you should account for seasonal conditions before you start tiling: cold slows cure times and can prevent proper bond strength, while excessive heat or humidity can cause rapid drying, uneven set, or trapped moisture that leads to failures.
Schedule work during moderate conditions, use heaters or dehumidifiers as needed, and follow manufacturer temperature and substrate moisture limits.
Maintenance tips to keep tile floor durable and attractive
1 simple routine will keep your tile floor looking great and lasting longer: sweep or vacuum daily to remove grit, mop weekly with a pH-neutral cleaner, and attend promptly to spills and grout stains.
Seal grout annually, use felt pads on furniture, avoid harsh cleaners, and blot acidic liquids.
Inspect for loose tiles, regrout as needed, and clean grout lines with a brush and diluted cleaner.
Tools and Material Cost Comparison and Time Estimates
You’ll want to compare DIY vs. professional costs so you can decide if hiring help fits your budget or skill level.
I’ll break down typical tool and material expenses and give sample contractor quotes.
Then we’ll map expected timelines for small, medium, and large rooms so you can plan the job and your downtime.
DIY vs. professional cost breakdown
Whether you tackle the tile job yourself or hire a pro, cost and time add up in different ways: DIY saves on labor but means you’ll buy or rent tools, spend extra hours learning and prepping, and risk costly mistakes, while a contractor bundles expertise, tools, and speed into a higher upfront price.
| DIY | Pro |
|---|---|
| Lower labor cost | Higher labor cost |
| Tool rental/purchase | Tools included |
| Longer time | Faster completion |
| Learning curve risk | Experienced quality |
| Potential savings | Higher reliability |
Typical project timeline by room size (small, medium, large)
After weighing DIY versus hiring a pro, the next thing to pin down is how long a tiling job will actually take and what tools and materials you’ll need for different room sizes. Plan: small (1–2 days), medium (3–5 days), large (7–10 days). Budget tools: basic, intermediate, pro.
| Size | Time | Tools/Materials |
|---|---|---|
| Small | 1–2 days | Basic kit |
| Medium | 3–5 days | Mid kit |
| Large | 7–10 days | Pro kit |
Mistakes to Avoid
Don’t skip moisture testing or a vapor barrier, because trapped damp will ruin tile bonds.
Use the correct thinset and mix it to the manufacturer’s specs, and make sure the concrete is clean, flat, and within tolerance before you lay anything.
Finally, don’t rush cure times—wait the recommended period before grouting or sealing.
Skipping moisture testing or membrane installation
If you skip moisture testing or decline to install a moisture membrane, you’re inviting tile failure—adhesive breakdown, efflorescence, or loose tiles can show up months after installation.
You should test concrete RH or use calcium chloride kits, then install an appropriate vapor barrier or uncoupling membrane when levels exceed manufacturer limits.
Don’t gamble—address moisture now to avoid costly repairs later.
Using wrong thinset or improper mixing
Choosing the wrong thinset or mixing it poorly will ruin an otherwise solid tile job—adhesive that’s too weak, too stiff, or improperly hydrated won’t bond, cure, or handle movement the way it should.
Read manufacturer specs, match thinset to tile and substrate, measure water precisely, mix to the recommended consistency, and use within pot life.
Test small areas before full application.
Poor surface preparation or ignoring flatness tolerances
Because tiles rely on a solid, even base to stay put, skimping on surface prep or ignoring flatness tolerances will ruin the finished floor: uneven concrete causes lippage, cracked grout, and premature tile failures.
You must clean, repair spalls, remove high spots, and use a self-leveler or patch to meet flatness specs. Measure with a straightedge and correct before laying tile.
Rushing cure times before grouting or sealing
When you rush grout or sealer onto recently laid tile or fresh-setting thinset, you’re inviting weak bonds, discoloration, and grout that won’t cure properly.
Wait the manufacturer’s recommended cure times—usually 24–72 hours or longer for thinset and adhesives.
Test a small area before full grouting or sealing.
Patience prevents delamination, staining, and costly repairs; follow instructions and control humidity and temperature.
Quick Troubleshooting Checklist Before Finishing
Before you grout and seal, do a final adhesion and level check by pressing a few tiles and running a straightedge across the floor to catch any hollow spots or lippage.
Re-check moisture and movement—use a moisture meter and flex test at control joints to guarantee nothing will cause failure.
Finally, inspect grout lines, lippage, and edges for consistent spacing, clean joints, and tight shifts so you can fix issues now rather than later.
Final adhesion and level check (how to test)
After your tiles are set and the thinset has cured, you’ll do a quick adhesion and level check to catch problems before they become permanent.
Tap each tile with a rubber mallet—solid sound means good bond; hollow means lift.
Run a straightedge across rows to spot high or low tiles. Mark any defects, reseat or reapply thinset where needed, and verify grout joints remain even.
Moisture and movement re-check
You’ve checked adhesion and level; now confirm there’s no moisture or movement that could undo your work.
Tape a plastic sheet for 24–72 hours or use a moisture meter to verify dryness.
Walk the floor while someone watches for deflection.
Check control joints, expansion gaps, and substrate cracks; fix any damp spots, loose concrete, or movement before grouting to prevent failures.
Visual inspection checklist for grout lines, lippage, and edge details
Take a close, systematic look down each row to catch grout gaps, lippage, or imperfect edges before you finish—these small issues are much easier to fix now than after grouting.
You’ll check alignment, level, and joint consistency, correct high spots, and clean edges for a professional finish.
- Slightly raised tile creating a trip hazard
- Uneven grout widths between tiles
- Chips or irregular cut edges
- Mortar squeeze-out or gaps
Frequently Asked Questions (FAQ)
You probably have a few specific questions before you start, like whether you can tile over old adhesive or if you need a cement backer board on concrete.
We’ll also cover how long tile on concrete typically lasts, which thinset works best, and how to approach radiant-heated slabs.
Read on for clear, practical answers to each.
Can you tile directly over existing concrete adhesive or glue?
Wondering if you can tile directly over old adhesive on concrete? You generally shouldn’t.
Old glue can prevent proper bond, trap moisture, and cause lippage or delamination. Remove residue back to clean concrete using scrapers, grinders, or chemical strippers.
Once surface is sound, clean, and flat, use appropriate thin-set or bonding mortar recommended for concrete-to-tile installations. Test adhesion before tiling.
How long does tile on concrete last?
How long your tile on concrete lasts depends on the tile type, installation quality, and conditions it’s exposed to.
With proper prep, quality adhesive, correct grout sealing, and normal foot traffic, tile can last 20–50+ years.
Heavy impact, moisture issues, or poor installation shorten life.
Inspect grout/sealants regularly, repair cracks promptly, and you’ll extend the floor’s longevity considerably.
Do I need a cement backer board over concrete?
If your tile on concrete can last decades with proper prep, you’re right to ask whether a cement backer board adds value over a slab.
You generally don’t need backer board on sound, level concrete. Use it only if the slab is cracked, moves, or has a moisture problem you can’t fix.
Proper crack treatment and bonding thinset usually suffice.
What thinset is best for floors over concrete?
Which thinset you choose matters because proper adhesion and flexibility keep tile bonded to concrete for decades.
Use a polymer-modified, ANSI A118.4/A118.11 or A118.15 mortar for standard floor tile; it offers superior bond and flexibility.
For large-format or natural stone, pick a high-strength, modified large-and-heavy-tile mortar.
Always follow manufacturer guidelines and mix to the recommended consistency for best results.
How to handle radiant-heated concrete slabs?
Radiant-heated concrete slabs need special consideration because the heat and tubing affect adhesion, expansion, and curing.
You’ll test slab temperature, follow manufacturer limits, and use flexible, polymer-modified thinset rated for heated floors.
Allow proper cure time, decouple with an uncoupling membrane if needed, and keep heating off during installation.
Gradually ramp heat after grout cures to prevent thermal shock.
Appendix: Quick Reference Guides and Resources
You’ll find a compact appendix with links to tile installation standards and key manufacturer references so you can verify specs and warranties.
Use the quick measurement and material calculator cheat sheet to estimate tile, thinset, grout, and waste in minutes.
Also see our recommended products and tool rental tips so you can pick the right items without guesswork.
Tile installation standards and manufacturer reference links
Because proper installation depends on following current standards and manufacturer guidance, you’ll want quick access to the key references and links that tile pros use most often.
Keep these at hand for specs, warranty rules, and approved materials:
- ANSI A108/A118/A136 guidelines and summaries
- TCNA Handbook for ceramic, porcelain, and substrate prep
- Manufacturer installation and warranty pages (thinset, membranes)
- Tile & grout technical data sheets and SDS links
Quick measurement and material calculator cheat sheet
When you’re planning a tile job, a compact cheat sheet for measurements and material calculations saves time and prevents costly overordering; use it to quickly convert room dimensions into tile counts, estimate thinset and grout volumes, and account for waste and patterns. Use this quick guide to calculate needs, add 10–15% waste, and double‑check edges and patterns.
| Item | Rule of thumb |
|---|---|
| Tile count | Area ÷ tile area +10% |
| Thinset | 1.2–1.5 lb/ft² |
| Grout | 0.03–0.06 lb/ft² |
Recommended products and tool rental tips
1 essential rule: pick durable, proven products and rent specialty tools you’ll only use briefly. You’ll save money and get professional results by choosing reputable thinset, grout, and membrane brands, plus renting a tile saw or floor grinder for tricky concrete.
Follow manufacturer specs and don’t skimp on quality.
- Wet tile saw gliding ceramic
- 4″ angle grinder sparks
- Heavy-duty mixing paddle churning
- Rubber grout float smoothing