
How to Clean Oil off a Garage Floor With Simple Supplies
You can remove most fresh oil stains using simple supplies: blot pooled oil, cover the spot with kitty litter or baking soda to absorb, then sweep it up. Apply dish soap or a concrete degreaser, scrub with a stiff brush, rinse with hot water, and repeat as needed. Wear gloves, ventilate the area, and dispose of oily waste properly. For older or stubborn stains try a paste poultice or pressure washing, and keep sealers in mind if you want longer protection.
Quick Answer How to Clean Oil Off a Garage Floor Fast
For a fast cleanup, sprinkle an absorbent like cat litter or baking soda, let it sit, then sweep and scrub the residue with a degreaser.
Keep a small kit of absorbent, a stiff brush, gloves, and a fast-acting cleaner on hand for immediate spills.
Expect minutes to an hour for a visible cleanup and several cleanings or a stronger treatment for deep stains.
One-sentence summary of the most effective simple method
If you need the fastest simple fix, sprinkle kitty litter or an oil-absorbent over the stain.
Let it sit for several hours to soak up the oil, then sweep it up and scrub the residue with a degreasing cleaner and a stiff brush.
For a clear one-sentence summary of how to clean oil off garage floor: absorb, remove, then scrub with degreaser until the stain’s gone.
Best supplies to keep on hand for immediate cleanup
You can keep cleanup immediate and effective by stashing a few key supplies within reach: absorbent kitty litter or a commercial oil absorbent, a sturdy broom or push broom, a dustpan, disposable gloves, a stiff-bristled brush, a concentrated degreaser or concrete cleaner, and a bucket for mixing solution.
Grab them quickly to stop spread and protect the surface.
- Relief: quick control
- Pride: tidy space
- Confidence: ready tools
- Calm: no panic
Time and effectiveness expectations
Expect to spend anywhere from 10 minutes for a fresh drip to several hours for a deep, set-in stain, and plan follow-up checks over the next 24–48 hours to confirm full removal.
You’ll see immediate improvement with absorbents or dish soap; tougher stains need repeated scrubbing, poultices, or degreasers and may never vanish completely.
Track progress and repeat as needed.
Understanding Oil Stains on Garage Floors
When oil spills on concrete, it soaks into pores and can leave dark stains that get harder to remove the longer you wait.
Different oils—motor oil, transmission fluid, and grease—vary in thickness and additives, so some soak deeper and need stronger cleaners or scrubbing.
Acting quickly limits penetration and makes cleanup faster and more effective.
What causes oil stains and how they penetrate concrete
Because garage floors are porous and many automotive fluids are oily, stains don’t just sit on the surface—they soak in, spread, and bond with the concrete if you don’t act quickly.
You should know capillary action draws oil into tiny pores, while heat and repeated spills push it deeper.
Dirt and oxidation then lock stains, making prompt, proper cleaning essential to prevent permanent discoloration.
Types of oils and differences in cleanup difficulty (motor oil, transmission fluid, grease)
Although all automotive oils leave dark marks, they don’t clean up the same way—motor oil soaks in quickly and often needs stronger degreasers, transmission fluid is thinner and can spread farther but sometimes lifts easier with detergent, and grease is thick and sticky, clinging to pores and usually requiring hot water, scrubbing, or a solvent to break it down.
| Oil Type | Cleanup Tip |
|---|---|
| Motor oil | Strong degreaser |
| Transmission fluid | Dish soap, blot |
| Grease | Hot water, scrub |
| Mixed stains | Treat like worst oil |
Why acting quickly matters
If you act fast, oil stains stay much easier to remove because they haven’t had time to soak into the concrete’s pores or react with dust and heat.
You’ll limit staining depth, prevent dark halos, and reduce scrubbing or chemical needs.
Blot or absorb immediately, then apply detergent or a poultice. Quick action saves time, effort, and often avoids resurfacing.
Safety Precautions Before You Start
Before you start cleaning, put on gloves, a mask, and eye protection to keep chemicals and grime off your skin and out of your lungs.
Make sure the area is well ventilated and keep sparks, open flames, and hot engines away to reduce fire risk.
Plan to collect and dispose of oil-soaked rags and absorbents according to local environmental rules so you don’t contaminate soil or drains.
Personal protective equipment (gloves, mask, eyewear)
Put on proper personal protective equipment to keep oil, cleaners, and dust from harming your skin, eyes, or lungs.
You’ll want chemical-resistant gloves, a snug-fitting mask (N95 or better), and safety glasses or goggles.
Don’t use torn gloves or loose eyewear; replace contaminated gear promptly.
Stay alert to spills and wash exposed skin immediately.
- Fearless
- Confident
- Protected
- Ready
Ventilation and fire risk considerations
You’ve got your gloves, mask, and goggles on, so now pay attention to air flow and ignition sources: oil fumes can build up quickly and many cleaners are flammable.
Open doors and windows, run fans to exhaust vapors, and avoid sparks from tools, heaters, or pilot lights.
Keep a fire extinguisher nearby and never smoke while cleaning.
Environmental and disposal rules for oil-contaminated materials
While oil cleanup is often treated as a DIY chore, you’ll need to handle contaminated absorbents and rinse water responsibly to avoid fines and environmental harm; many localities classify oil-soaked rags, kitty litter, and used pads as hazardous waste and have specific disposal rules.
Check local regulations, use sealed containers, label waste, and take materials to a hazardous waste facility or approved collection event—never mix with regular trash.
Supplies and Alternatives: What You Need and What Works
You’ll want a few household basics on hand—cat litter for soaking, dish soap or baking soda for scrubbing, and hot water to rinse.
For tougher stains, consider stronger cleaners like trisodium phosphate, commercial degreasers, or poultice products.
Also have tools ready: a broom, stiff brush, scraper, and a pressure washer if you plan to use one.
Essential household supplies (cat litter, dish soap, baking soda, hot water)
If you don’t want to run to a store, several common household items will get most oil stains out of a garage floor: cat litter to soak up fresh spills, dish soap to break down grease, baking soda as a mild abrasive and deodorizer, and hot water to help lift residues.
You’ll feel empowered cleaning with what’s on hand.
- Relief: gritty cat litter absorbs panic.
- Confidence: dish soap cuts through grime.
- Freshness: baking soda neutralizes odor.
- Ease: hot water finishes the job.
Optional stronger cleaners (trisodium phosphate, commercial degreasers, poultices)
When household items don’t fully remove set-in oil, reach for stronger cleaners like trisodium phosphate (TSP), commercial degreasers, or a poultice made from absorbent powder and solvent; these options dissolve and lift stubborn residues that soap and baking soda can’t.
Use gloves, ventilate, test a small area, and follow label directions to protect concrete and yourself.
- Relief when stains finally fade
- Confidence using proven products
- Satisfaction restoring your garage
- Pride in a clean, safe space
Tools and equipment (broom, stiff brush, scraper, pressure washer)
Gather a few basic tools—broom, stiff-bristled brush, metal scraper, and a pressure washer if you have one—and you’ll handle most oil stains effectively.
Use the broom to clear debris, the scraper for stubborn globs, the brush to scrub cleaners in, and the pressure washer to rinse deeply.
These tools make the job faster, cleaner, and more satisfying.
- Relief
- Confidence
- Pride
- Calm
Step-by-Step Cleaning Method (Simple Supplies)
Start by containing the spill and blotting up as much fresh oil as you can so it doesn’t spread.
Sprinkle cat litter or sawdust to soak up the remainder, let it sit long enough to absorb, then scrape and sweep the used material into a trash bag.
Finish by applying a degreaser or dish soap, scrubbing with a stiff brush, and rinsing with hot water or a pressure washer—repeat until the stain is gone.
Step 1 Contain fresh spill and remove excess oil
1. When oil spills, act fast: block the spread with rags, cardboard, or a small berm of dirt.
Don gloves and use paper towels or absorbent cloths to blot up as much liquid as you can without rubbing.
Scoop or scrape pooled oil into a disposable container. Seal and dispose of contaminated materials per local hazardous-waste guidelines.
Step 2 Absorb with cat litter or sawdust (timing and technique)
After you’ve blotted up the excess, cover the stained area with a generous layer of clay cat litter or dry sawdust so it fully soaks up what’s left.
Let it sit undisturbed for at least 30 minutes for fresh spills, longer—several hours or overnight—for older, soaked-in stains.
Lightly press the absorbent into the stain to improve contact, then leave to work.
Step 3 Scrape and sweep away absorbent material
Grab a stiff broom or a flat-edged shovel and sweep or scrape the dried cat litter or sawdust into a dustpan, working from the edges toward the center so you don’t spread residue.
Dispose into a sealed trash bag. Tap remaining granules with the broom, then vacuum or sweep thoroughly.
Check for stubborn bits and remove them with the shovel before proceeding to the next cleaning step.
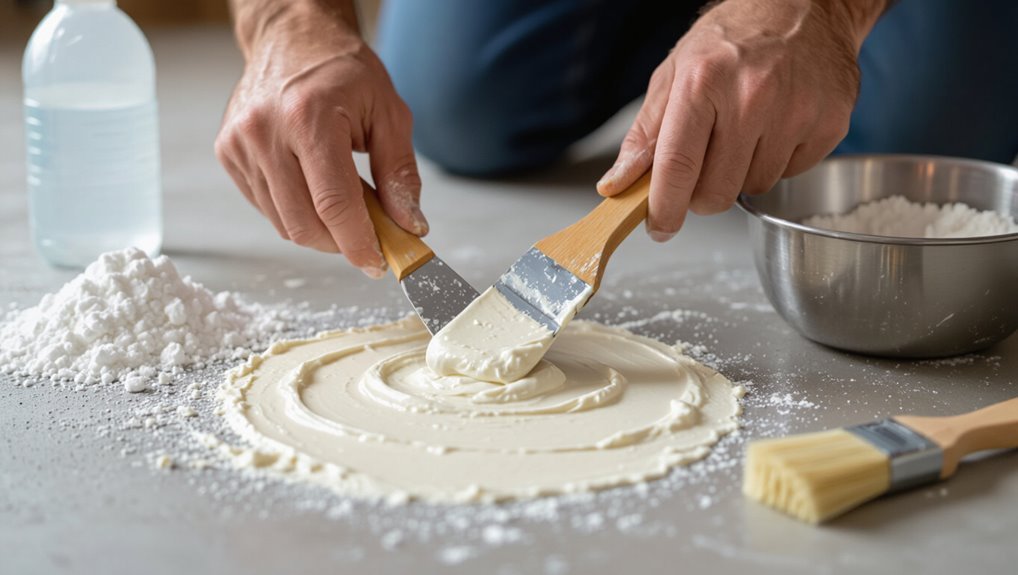
Step 4 Apply degreasing agent (dish soap or commercial) and scrub
With the loose absorbent swept up, it’s time to tackle the remaining oil with a degreasing agent.
Squirt dish soap or a concrete degreaser over stains, let it sit a few minutes, then scrub vigorously with a stiff brush or push broom.
Work in circular motions, reapplying product for stubborn spots, and blot excess residue with clean rags before rinsing.
Step 5 Rinse and repeat (using hot water and brush or pressure washer)
Rinse the area thoroughly with hot water while scrubbing again—either push a stiff brush across the wet surface or use a pressure washer on a low-to-medium setting—to lift remaining soap and oil residue; repeat application and scrubbing on any persistent spots, then rinse until the runoff runs clear.
Work outward from the stain, keep water flowing, and dry the floor with towels or let it air before evaluating results.
Step 6 Use a poultice for stubborn stains (baking soda or TSP paste)
If scrubbing and rinsing haven’t removed a stubborn oil ring, try a poultice to draw the stain out of the concrete.
Mix baking soda or TSP with enough water to form a thick paste, spread over the stain, cover with plastic, and tape edges.
Let sit 24–48 hours, then scrape, brush, and rinse.
Repeat once if needed.
Step 7 Final cleaning and drying
Once the stain’s lifted, give the whole area a final scrub with warm water and a mild detergent to remove residue.
Then mop or squeegee the surface toward a drain or collection point so no dirty water pools. Rinse thoroughly, then pat dry with clean towels or use a wet/dry vacuum.
Let the floor air-dry completely before parking; inspect and repeat spot-cleaning if needed.
Alternative Methods for Tough or Old Stains
If simple scrubbing doesn’t budge old or set-in oil, you’ll need stronger options like a pressure washer (use moderate PSI and stay several feet back) or a chemical degreaser used exactly per label instructions.
For extreme spots, abrasive approaches such as grinders or even acid etching can work but require protective gear and caution about surface damage.
And if stains are widespread, deep, or you’re unsure about safety, call a professional who can assess and use the right equipment.
Using a pressure washer effectively (settings and distance)
A pressure washer can be one of the fastest ways to loosen old, stubborn oil—set it to 1,200–2,000 PSI with a 25–40° nozzle and hold the wand about 12–24 inches from the concrete to avoid etching while still blasting away residue.
Move in consistent overlapping passes, keep the wand angle shallow, rinse until suds run clear, and let the slab dry before evaluating remaining spots.
Chemical degreasers: pros, cons, and safe use
When ordinary scrubbing and pressure washing won’t budge old oil, chemical degreasers can break down hydrocarbons and lift stains you can’t remove mechanically; you’ll want to weigh their power against safety and environmental impact before using them. Use gloves, goggles, ventilation, spot-test, and follow label disposal. Compare products:
| Type | Strength | Safety |
|---|---|---|
| Citrus | Moderate | Low |
| Solvent | High | High |
| Enzymatic | Gentle | Low |
Abrasive methods: grinders, acid etching when to consider and cautions
Chemical degreasers can soften and lift many stains, but for deeply embedded or long-set oil you’ll often need abrasive techniques like concrete grinders, shot blasters, or acid etching to remove the contaminated surface layer.
You’ll choose grinders for precision, shot blasting for larger areas, and muriatic acid etching only with strong PPE and correct dilution.
Test a small area; expect dust, noise, and surface removal.
Hiring a professional: indicators you should call a pro
If your attempts haven’t budged deep, old, or spreading oil stains, call a pro—because they’ve the tools, experience, and safety protocols to remove contaminated concrete without making the problem worse.
Hire pros when stains are extensive, penetrated slabs, involve hazardous waste, or DIY risks structural damage.
They’ll assess, use industrial cleaners or hot-water extraction, and dispose of waste properly for lasting results.
Common Mistakes and How to Avoid Them
Don’t rush the job: if you use too little absorbent or rinse before the cleaner has worked, the stain will set and you’ll waste effort.
Never mix cleaners — that can create toxic fumes — and avoid over-scrubbing or strong acids without proper gloves and eye protection.
If a cleanup goes wrong, neutralize any chemicals safely, reapply an appropriate cleaner or absorbent, and consider calling a pro for severe damage.
Mistake Using insufficient absorbent or rinsing too soon
When you blot or sprinkle absorbent and then rinse too quickly, the oil hasn’t had time to lift from the concrete and you’ll just spread the stain instead of removing it.
Use plenty of cat litter or baking soda, let it sit several hours or overnight, then sweep and repeat if needed.
Only rinse once the spot looks dry and powdery.
Mistake Mixing incompatible cleaners (chemical hazards)
Although household cleaners can seem interchangeable, mixing products like bleach and ammonia creates dangerous gases you don’t want in your garage.
Don’t combine cleaners, especially acids, bleach, or ammonia-based formulas. Read labels, use one product at a time, ventilate, and wear gloves and eye protection.
If unsure, stick to mild detergent or a labeled concrete degreaser to avoid toxic reactions and unnecessary risk.
Mistake Over-scrubbing or using harsh acid without protection
If you scrub too hard or pour undiluted acid on a stain, you can damage the concrete and hurt yourself—skin burns, respiratory irritation, and etched or discolored patches are common results.
Wear gloves, eye protection, and a mask when using strong cleaners. Test a diluted solution in a small area, follow label directions, use gentle agitation with a stiff brush, and rinse thoroughly to avoid harm.
How to correct a botched cleanup
Because mistakes happen, you can still salvage a botched cleanup by acting promptly and choosing the right fixes.
Blot excess residue, rinse thoroughly, then neutralize any acid with baking soda and water.
Reapply absorbent (cat litter or baking soda) for stubborn stains, let sit, then sweep and pressure-rinse.
If damage persists, consult a professional for concrete remediation to prevent long-term staining or etching.
Prevention and Long-Term Protection
To keep stains from happening, adopt quick-response habits like blotting fresh drips and keeping absorbents handy.
Consider sealing or coating your floor—epoxy, polyaspartic, and concrete sealers each have trade-offs in durability and maintenance, so pick one that fits your use and budget.
Finally, stay on top of vehicle maintenance (fix leaks, change filters, check seals) to cut down on future spills.
Quick-response habits to prevent staining
When a drip hits the concrete, act fast: blot up fresh oil with rags or absorbent cat litter, then sprinkle more absorbent and let it sit so you can sweep it away without smearing.
Keep a small cleanup kit handy, check under vehicles often, and treat stains immediately to avoid lasting marks.
- Save your floor’s look
- Avoid stubborn stains
- Feel confident maintaining cleanliness
- Prevent costly repairs
Sealing and coating garage floors: options, benefits, and maintenance
One clear step you can take to protect your garage floor is sealing or coating it—choices range from simple concrete sealers to durable epoxy and polyaspartic coatings—each offering different levels of protection, appearance, and maintenance needs.
| Option | Benefit |
|---|---|
| Concrete sealer | Inexpensive, breathable |
| Epoxy | Tough, chemical-resistant |
| Polyaspartic | Fast cure, UV-stable |
| Maintenance | Clean, recoat as needed |
Best practices for vehicle maintenance to reduce future spills
If you want fewer oil stains and less cleanup, keep a regular maintenance routine that catches leaks early and minimizes fluid loss.
Check oil levels, tighten fittings, replace gaskets and hoses, and change filters and seals on schedule.
Use drip pans during repairs, inspect undercarriage for spots, and address engine or transmission leaks promptly to prevent persistent garage stains.
Tools and Supply Comparison (Simple vs. Professional)
You can often lift fresh stains with household items like dish soap, baking soda, or kitty litter, but commercial degreasers usually remove set-in oil more reliably.
Expect to pay more for professional products and to spend less effort and time when they work.
We’ll weigh effectiveness against cost and time so you can pick the best approach for your situation.
Effectiveness comparison of household items vs. commercial degreasers
While many household items can tackle fresh drips, commercial degreasers usually outwork them on old, set-in stains; they’ll cut through heavy oil faster and rinse away residue without repeated scrubbing. You can use pantry products for light spots, but for embedded stains you’ll prefer formulated solvents that emulsify oil and resist redeposition.
| Household | Commercial |
|---|---|
| Baking soda | Solvent degreaser |
| Dish soap | Industrial formula |
Cost and time trade-offs
Having chosen between pantry fixes and commercial degreasers, you’ll weigh cost against time and effort when picking tools and supplies. DIY options save money but need more scrubbing and retries; pro cleaners cost more but work faster and need less elbow grease. Choose based on budget, schedule, and stain severity.
| Option | Cost | Time |
|---|---|---|
| DIY | Low | High |
| Pro | High | Low |
Maintenance Routine and Seasonal Checklist
Keep a simple monthly routine to sweep, spot-clean fresh stains, and check for new oil spots, and schedule a deeper clean once a year.
Each season, inspect the concrete for cracks, persistent stains, and fading sealant so you can address problems before they worsen.
Reseal the floor when you notice wear or water no longer beads on the surface—typically every 2–5 years depending on traffic and exposure.
Monthly and yearly cleaning tips
Set aside an hour each month and a longer block every season to inspect and maintain your garage floor so small stains don’t turn into permanent damage and safety hazards don’t accumulate.
You’ll prevent buildup, catch leaks early, and keep the space safe and tidy. Do quick spot cleans monthly and deep cleans yearly to restore appearance and function.
- Relief knowing stains won’t spread
- Pride in a cared-for space
- Confidence in safety
- Satisfaction from simple upkeep
What to inspect and when to reseal the floor
Now that you’ve kept up with monthly spot cleans and seasonal deep scrubs, it’s time to get specific about what to inspect and when to reseal so small issues don’t become costly repairs.
Inspect for cracks, spalling, oil stains, and faded sealer every six months.
Reseal worn areas or entire floor every 2–4 years, sooner in high-traffic or harsh climates, after repairs or deep stains.
Frequently Asked Questions
You probably have a few quick questions before you start, like whether bleach will lift oil stains or if old, deep spots can ever come out completely.
We’ll also cover whether cat litter actually works (and which type), how to dispose of oil-soaked absorbents safely, and whether a pressure washer is safe on painted or sealed floors.
Read on for clear, practical answers.
Can I use bleach to remove oil stains?
Wondering if bleach will lift that oil stain? You shouldn’t rely on bleach alone: it won’t break down oil and can discolor concrete or react with other cleaners.
Instead, absorb fresh oil, use a degreaser or dish soap and hot water, scrub with a stiff brush, then rinse.
Reserve bleach for sanitizing surrounding areas after the stain cleanup, not as the primary remover.
Will oil stains come out completely from old, deep stains?
Bleach aside, the age and depth of an oil stain largely determine whether it can be removed completely.
You might lift newer, surface stains with degreaser, scrubbing, and repeated treatments.
Deep or long-soaked stains often fade but rarely vanish entirely; you can reduce visibility with poultices, pressure washing, or concrete resurfacing, but plan for imperfect results or restorative options.
Is cat litter actually effective, and which type to use?
Although it’s not a miracle cure, cat litter can be an effective first-aid absorbent for fresh oil spills, and choosing the right type matters for ease of cleanup and performance.
Use clumping clay or silica gel litter—both soak quickly and form removable clumps. Avoid dusty or biodegradable litters that smear or break down.
Sweep or scoop browned litter promptly to prevent tracking.
How to dispose of oil-soaked absorbents safely?
Once you’ve soaked up fresh oil with cat litter, you’ll need to handle the used material properly to avoid fire hazards and environmental harm.
Scoop damp litter into a sturdy, sealable container or heavy-duty bag.
Don’t throw it in regular trash if local rules forbid it—check municipal hazardous-waste guidelines.
Take it to a recycling center or hazardous-waste drop-off for safe disposal.
Can I use a pressure washer on painted or sealed floors?
Can you use a pressure washer on painted or sealed floors? You can, but be careful: high pressure can strip paint or damage sealers.
Use a wide-angle nozzle, lower pressure (1,200–1,800 PSI), keep the wand moving, and test a small area first.
Avoid close-range spraying and strong detergents that may lift coatings.
Reseal or touch up any damaged spots afterward.