How to Install Carpet Flooring: Everything You Need for a DIY Install
You can install carpet yourself in a day or over a weekend if you’ve got basic DIY skills, the right tools (carpet knife, knee kicker, power stretcher, seam iron), and materials (carpet, pad, tack strips, seam tape). Prep the subfloor, acclimate the carpet, lay pad, stretch and seam the carpet, then trim and finish with thresholds. Costs are lower than hiring pros but factor tool rental and time; keep going to pick up tips, tool choices, and step-by-step tricks.
How to Install Carpet Flooring: Quick Direct Answer
You’ll remove old flooring, prep the subfloor, stretch and trim the carpet, and finish with trim and junctions.
Expect a single room to take a few hours to a day depending on size and help; pros can do it faster.
Costs range from low-end DIY materials to $3–6 per sq ft for mid-range carpet plus $1–3 per sq ft for padding and tools, and the skill level is moderate—basic DIYers can handle it with patience or you can hire a pro for a guaranteed finish.
One-paragraph summary of the process
Before you start, measure the room and buy carpet plus padding and tack strips to fit; then remove old flooring, level the subfloor, and install tack strips around the perimeter.
Next, lay padding, stretch and attach the carpet to the strips with a power stretcher, trim edges, seam where needed, and tuck borders.
Finish by reinstalling trim and cleaning up debris.
Typical time, cost range, and skill level overview
Now that you know the main steps, here’s what to expect for time, cost, and skill.
You’ll spend 4–8 hours for a single room; expect $2–6 per sq ft for materials plus $50–200 for tools if you don’t own them.
Skill level: moderate—basic carpentry and patience.
Plan carefully and practice seam/trim cuts before committing.
| Time | 4–8 hours |
|---|---|
| Cost | $2–6/ft² (+ tools) |
| Skill | Moderate |
Basic Understanding What Is Carpet Flooring and Why Choose DIY?
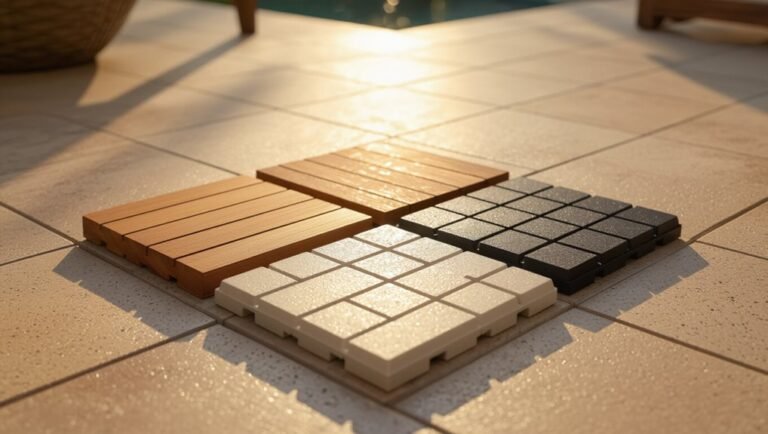
Carpet is made from different fibers and constructions—like loop, cut pile, berber, and frieze—so you’ll want to pick the style that fits your look and wear needs.
You’ll also need to understand the parts involved (face fiber, backing, padding, tack strips, and junction strips) before you start.
Weigh the savings and satisfaction of a DIY against the time, tools, and skill a pro brings to decide which route makes sense for you.
Types of carpet fibers and constructions (loop, cut pile, berber, frieze)
Choosing the right carpet starts with understanding the fiber and construction, since those two factors determine feel, durability, and maintenance. You’ll pick nylon or polyester for resilience, wool for luxury, looped berber for low profile, cut pile for softness, or frieze for disguise wear. Visualize options:
| Type | Impression |
|---|---|
| Nylon | Durable |
| Polyester | Soft |
| Wool | Luxurious |
| Berber | Sturdy |
| Frieze | Camouflaging |
Carpet components: face fiber, backing, padding, tack strips, transition strips
Think of a carpet as a layered system where each component — the face fiber, backing, padding, tack strips, and connection strips — plays a specific role in comfort, durability, and installation.
You’ll choose face fibers for look and wear, backing for stability, padding for cushioning and lifespan, tack strips to anchor edges, and threshold strips to join different floor surfaces neatly and safely.
Pros and cons of DIY carpet installation vs hiring a pro
While DIY installation can save you money and let you control every detail, it also demands time, tools, and some skill to get a professional-looking result.
You’ll weigh cost savings against risk of mistakes and warranty issues. Consider:
- DIY: lower cost, learning curve, potential uneven seams.
- Pro: higher cost, faster, guaranteed finish.
- Hybrid: pro for tricky areas, you handle simple rooms.
Tools, Materials, and Preparation Checklist
Before you start, gather the essential tools—carpet knife, knee kicker, power stretcher, seam iron—and note which items you can rent from a local tool shop versus buy.
Calculate materials by room size (carpet, pad, tack strips, adhesive) so you order the right amounts.
Don’t forget safety gear and prep: gloves, knee pads, mask, clear the workspace, and guarantee good ventilation.
Essential tools and where to rent or buy
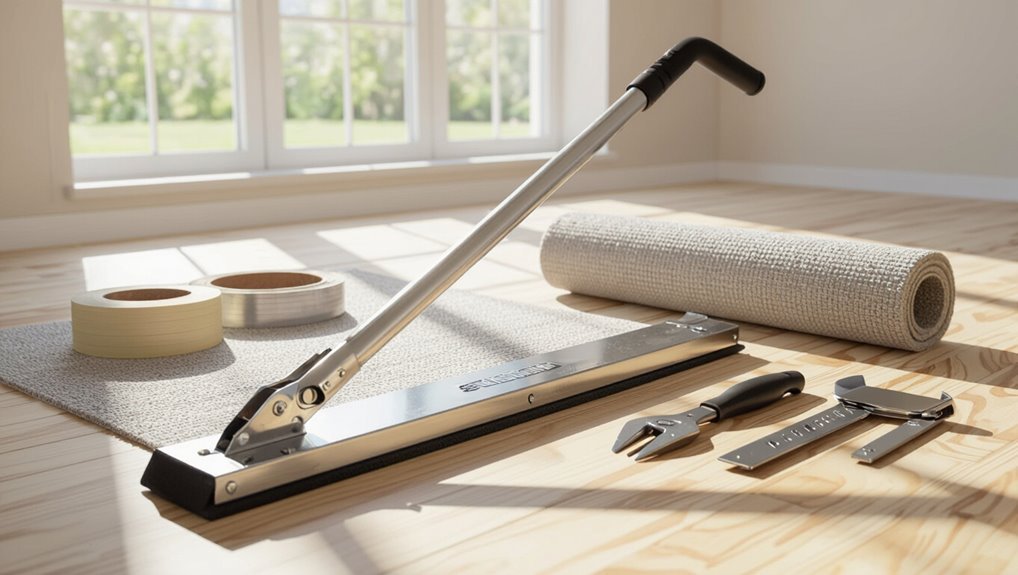
You’ll need a handful of specific tools to get carpet installed properly—some are worth buying, others you can rent for a day or weekend.
Buy hand tools (utility knife, knee kicker, seam roller).
Rent heavy gear short-term (power stretcher, carpet cutter).
Consider local rental centers or big-box stores for equipment and specialty shops for quality hand tools.
- Buy
- Rent
- Source
Materials needed by room size (carpet, pad, tack strips, adhesive)
Because room size determines how much carpet, padding, tack strips, and adhesive you need, measure each room (length × width) and add 10–15% waste for pattern matching and seams. Calculate carpet yards, pad thickness, tack strip linear feet, and adhesive type. Use the table to feel confident:
| Item | Quantity | Confidence |
|---|---|---|
| Carpet | yards | Ready |
| Pad | sq ft | Secure |
| Tack/Adhesive | ft/oz | Assured |
Safety gear and workspace preparation tips
If you want the job to go smoothly and stay safe, gather the right safety gear and prep the workspace first: safety glasses, knee pads, work gloves, a dust mask or respirator, and ear protection for power tools; clean, dry subfloors and good lighting; clear furniture and secure loose rugs; and drop cloths or trash bins for debris.
- Check ventilation and lighting.
- Wear PPE consistently.
- Keep a tidy waste station.
Pre-Installation Steps
Before you start, measure the room precisely, allowing extra for seams and waste so you order the right amount.
Inspect and prep the subfloor—clean, level, and check for moisture—then remove old flooring, thresholds, and door trims as needed.
Finally, let the carpet and padding acclimate in the room to the temperature and humidity they’ll be installed in.
Measure the room accurately (calculations for waste and seams)
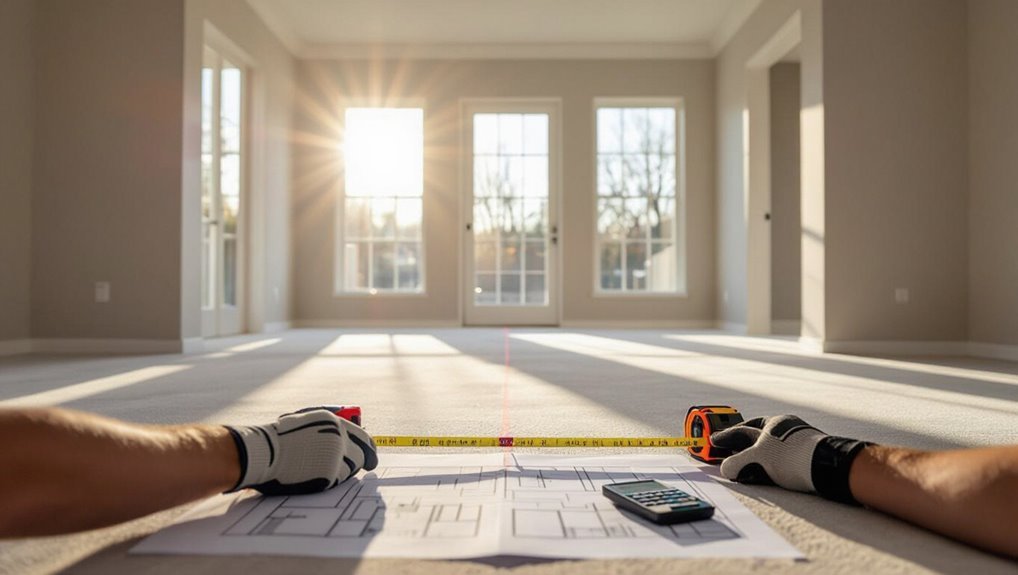
1 simple, accurate measurement can save you time and money when installing carpet.
Measure length and width at several points, use the largest values, and calculate square footage.
Add 5–10% for waste and 2–3 inches per seam for overlaps.
For patterned carpet, increase waste to 10–20%.
Round up to the nearest whole roll or broadloom width to guarantee coverage.
Inspect and prepare subfloor (cleaning, leveling, moisture check)
Start by thoroughly inspecting the subfloor so you’ll catch issues that can ruin your carpet later: clean away debris and adhesive, check for nails or loose boards, measure for flatness, and test moisture levels in concrete or plywood.
Patch low spots with floor patch, sand high spots, secure loose boards, and allow damp areas to dry or remediate before proceeding with underlay and carpet.
Remove old flooring and handle thresholds, door trims
Now that the subfloor’s clean and level, remove any existing flooring so the new carpet sits evenly and lasts.
Pull up old carpet, tack strips, vinyl or tile using pry bar and utility knife.
Remove thresholds and door trim carefully, label pieces, and store screws.
Verify junctions and door clearances match carpet-plus-pad height before proceeding with installation.
Acclimating carpet and padding to room conditions
A carpet and its padding need time to adjust to the room’s temperature and humidity before you install them, so unpack both and lay them flat in the space for at least 24–48 hours; this prevents shrinkage, buckling, and uneven seams once the pieces are stretched and glued down.
Check for visible defects, roll orientation, and seam alignment. Keep windows closed and maintain normal HVAC settings.
Step-by-Step Carpet Installation
Now you’ll follow a clear sequence to get the carpet fitted correctly.
Start by laying tack strips and trimming baseboards, then install and seam the padding before positioning the carpet and planning seams.
Finally stretch the carpet with a power stretcher and knee kicker, trim the excess, secure it to the tack strips, and tuck edges with a stair tool.
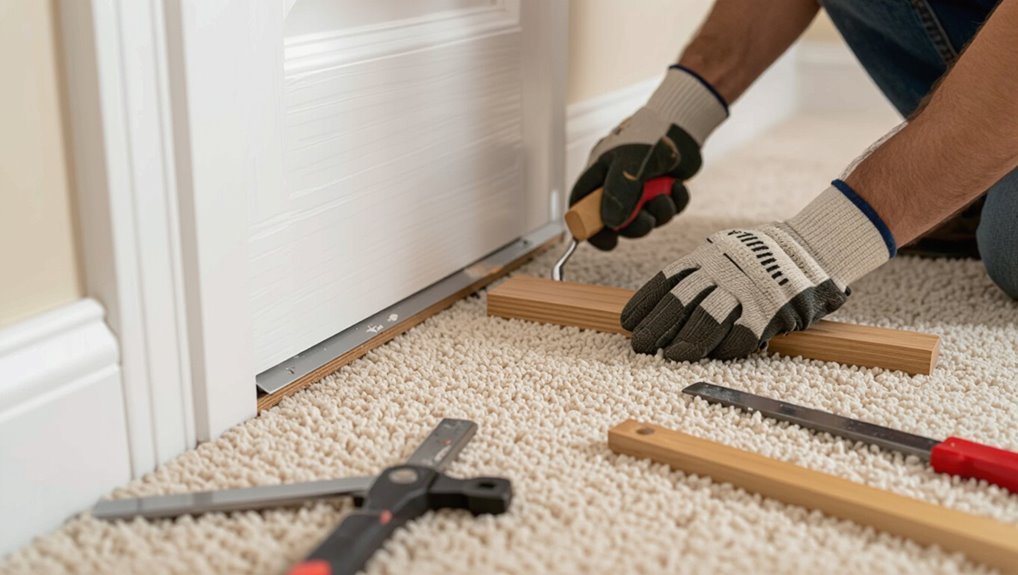
Step 1 Lay and secure tack strips and trim baseboards if needed

Measure and mark a 3/8- to 1/2-inch gap from the wall, then nail or glue tack strips into place with the pins facing the wall so the carpet will grip securely; if your baseboards need trimming to clear the carpet, cut them back and reinstall or trim the drywall return before laying the strips.
Check spacing at corners, miter strips for neat joints, and fasten every 6–8 inches.
Step 2 Install carpet padding correctly (seaming, staple patterns)
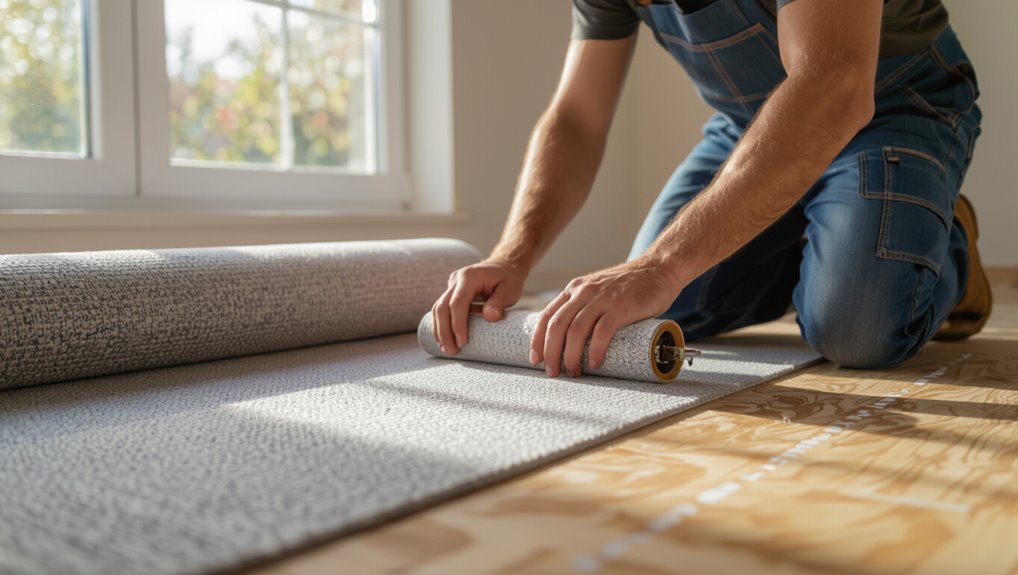
With your tack strips set, you’ll lay the carpet pad next—this gives cushioning and extends the life of the carpet.
Unroll pad perpendicular to carpet run, butt edges tightly, and glue or tape seams with manufacturer-approved seam tape.
Staple perimeter every 6–8 inches to the subfloor, avoiding staples in the middle.
Trim excess to sit just against tack strips for a flush fit.
Step 3 Position carpet and plan seam locations (seaming techniques)
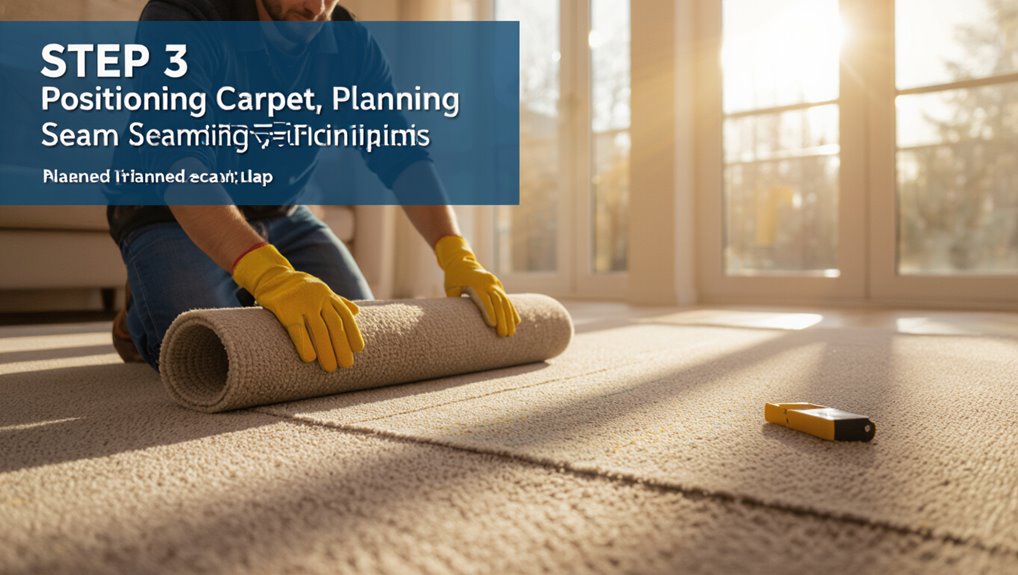
1. Lay carpet face-up, align pile direction toward main light source, and unroll to cover room. Trim selvage, leaving extra at walls.
Mark seam lines where joins will fall in low-traffic zones or along natural breaks. Use chalk to map seams, overlap edges slightly, then prepare for seam tape and hot iron or adhesive.
Double-check pattern match before seaming.
Step 4 Stretch carpet with power stretcher and knee kicker (technique tips)

Secure the carpet by working from one wall to the opposite, using a power stretcher for the bulk of the tension and a knee kicker for tight spots and doorways.
Anchor the carpet on the far tack strip, extend the stretcher to remove wrinkles, then set the knee kicker to seat edges.
Check seams align and pile direction; re-stretch any looseness before trimming.
Step 5 Trim excess carpet and attach to tack strips; tuck edges (use of stair tool)

Trim the excess carpet so it’s flush with the tack strip, then hook it onto the strip and tuck the edges neatly into the gap between the strip and baseboard using a stair tool or tucking tool.
Cut straight with a utility knife, leaving minimal overhang.
Work room by room, pressing edges firmly so fibers hide, and trim corners cleanly for a professional, secure finish.
Step 6 Seam sealer and joining seams (hot iron vs tape)

When your carpet pieces meet, you’ll need to join them so seams stay invisible and strong; choose between a hot-iron seam sealer and an adhesive tape method based on carpet type, room traffic, and your comfort with heat tools.
For hot-iron, melt seaming tape under edges and press with a seaming iron.
For tape, align edges, use double-sided seam tape, then roll seam with a carpet roller.
Step 7 Install transitions and finish trim; reattach baseboards and thresholds
With seams joined and rolled smooth, you’ll move on to finishing edges and reattaching trim so the room looks complete and the carpet stays put.
Install junction strips at doorways, trim excess carpet, and tuck edges into tackless strips.
Refasten baseboards and secure thresholds, making sure junctions are level and gaps are sealed.
Check for snags and trim fibers for a clean finish.
Step 8 Final inspection, vacuuming, and curing time
Before you declare the job done, walk the room slowly and inspect every seam, edge, and connection to catch missed staples, loose edges, or uneven joins.
Remove any debris, trim stray fibers, and re-secure edges.
Vacuum thoroughly with a beater brush, then avoid heavy traffic for 24–48 hours to let adhesive and carpet fibers settle and achieve a smooth, long-lasting finish.
Special Scenarios and Advanced Techniques
You’ll face a few special scenarios that need different cutting, safety, and fastening techniques—like stair treads where pattern matching and secure edges are critical.
For odd-shaped rooms, closets, and doorways you’ll plan templates and trim carefully to avoid waste and gaps.
When working across multiple rooms, radiant-heat systems, or concrete subfloors you’ll focus on seam alignment, suitable adhesives or underlays, and moisture or temperature considerations.
Installing carpet on stairs (cut patterns, safety considerations)

Several simple adjustments make installing carpet on stairs manageable and safe, but it still demands careful measuring, precise cutting, and attention to hardware.
Measure each tread and riser, transfer dimensions, and cut only as needed for tight seams.
Use stair nosing, tack strips, and a knee kicker for secure fit.
Always wear knee pads, eye protection, and guarantee good footing while working.
Handling rooms with odd shapes, closets, and doorways
When a room throws you odd angles, closets, or narrow doorways, approach the job with a plan that breaks the space into manageable sections and minimizes seams.
Measure each alcove, sketch cuts, and cut carpet slightly oversized for neat tucking.
Use templates for irregular shapes, trim with a sharp knife, secure edges with tack strips, and allow extra time for fitting and door clearance.
Multi-room installations and seam alignment strategies

If rooms flow together or you’re joining carpet across thresholds, plan seams so pile direction, pattern, and light reflection stay consistent; measure each room and layout to minimize visible joins.
Butt seams toward less noticeable walls, stagger seams away from focal areas, and use a quality seaming tape and iron.
Trim edges square, check pile nap, and stretch uniformly for an invisible finish.
Installing carpet over radiant heat or concrete subfloors
1 clear rule: confirm compatibility before you install carpet over radiant heat or concrete—choose materials and methods that handle temperature, moisture, and movement.
Check manufacturer specs for carpet, pad, and adhesives rated for radiant systems or concrete moisture.
Install a moisture barrier, use low-profile, heat-tolerant padding, and allow expansion gaps.
Test heat output and adhesive cure times before final installation.
Common Problems, How to Fix Them, and Preventive Measures
You’ll run into a few predictable issues when installing carpet, but most are preventable if you follow proper techniques and prep the subfloor.
If you spot wrinkles, buckling, or loose seams later, you’ll want to troubleshoot by checking tack strip placement, re-stretching, or spot-repairing seams and patches.
Routine maintenance—regular vacuuming and prompt spot cleaning—will keep repairs to a minimum and extend your carpet’s life.
Common mistakes during installation and how to avoid them
While carpet installation can transform a room, mistakes during the process can lead to visible seams, wrinkles, and premature wear that waste time and money. Knowing the common problems, how to fix them, and simple preventive steps will help you get a professional result.
- Measure twice: avoid short runs by confirming dimensions and nap direction.
- Prep subfloor: fix debris, moisture, and unevenness before laying carpet.
- Use proper tools: stretcher, seam tape, and sharp knife prevent sloppy joins.
Troubleshooting wrinkles, buckling, and loose seams
Even with correct measurements, prepared subfloors, and the right tools, carpets can still develop wrinkles, buckling, or loose seams after installation.
These issues usually stem from inadequate stretching, temperature or humidity changes, or improper seaming techniques.
- Check tension and re-tack edges to prevent movement.
- Monitor humidity/temperature; use humidifiers/dehumidifiers.
- Inspect seams; reseam with proper overlap and adhesive to stop gaps.
Repairing damage after installation (patching, restretching)
Repairing post-installation carpet damage means tackling common issues—stains, burns, tears, worn spots, and loose or bunched areas—quickly and correctly to avoid bigger problems later.
For tears or burns, cut out the damaged patch and glue or sew a matching scrap from a hidden area.
For buckling, restretch with a power stretcher and re-secure tack strips; trim seams and re-seam as needed.
Preventive maintenance to extend carpet life (vacuuming, spot cleaning)
Fixing tears or re-stretching buckled carpet will keep your floor usable, but regular care is what really keeps it looking and performing well over time.
Vacuum high-traffic areas twice weekly, use a HEPA or rotating-brush vacuum, and move furniture occasionally.
Tackle spills immediately with blotting and mild detergent, avoid scrubbing, and schedule professional deep cleaning every 12–18 months to preserve fibers and warranty.
Cost Breakdown and When to Hire a Professional
Compare DIY and professional costs—including materials, tools, and your time—so you know where savings end and hidden expenses begin.
If your rooms are oddly shaped, you need warranty coverage, or the install looks complicated, you should hire a pro.
Ask contractors about itemized quotes, timelines, cleanup, and guarantees so you can compare bids confidently.
DIY vs professional cost comparison (materials, tools, time)
If you’re weighing whether to tackle carpet installation yourself or hire a pro, the decision usually comes down to three things: materials, tools, and time—and how much you value your free hours. DIY saves on labor but you’ll buy/rent tools and spend weekends; pros cost more upfront but finish fast. Compare:
| DIY | Professional |
|---|---|
| Lower labor cost | Faster completion |
| Tool rental | Warranty/quality |
Signs you should hire a pro (complex rooms, warranties, guarantees)
You’ve weighed materials, tools, and time, but certain situations make hiring a pro the smarter choice.
You should call a contractor when:
- Rooms have complex layouts, stairs, or odd angles risking poor seams.
- You need manufacturer warranties or installer guarantees for coverage.
- Time constraints or lack of skill could lead to costly mistakes or wasted materials.
Questions to ask contractors and what to expect in quotes
Wondering what to ask contractors and how to read their quotes? Ask about timeline, insurance, and warranty; request itemized costs for labor, materials, padding, trim, and cleanup.
Compare per-square-foot rates and any disposal fees. Get a written contract.
- Confirm scope, start/end dates, and warranty length.
- Demand an itemized, signed quote.
- Check proof of insurance and references.
Best Practices, Tips, and Efficiency Hacks
You’ll save time by staging tools and materials in the order you’ll use them and planning a clear workflow for each room.
Take safety seriously: wear knee pads, use proper lifting techniques, and keep blades and stretchers maintained to avoid injuries.
Consider eco-friendly padding, low-VOC adhesives, and options for recycling or donating old carpet to cut waste.
Time-saving techniques and staging workflow
When you plan your staging and prep logically, you’ll shave hours off installation time and avoid costly mistakes. Set up a clear sequence—clear room, move furniture to a staging area, lay out tools and materials, and mark changes—so every step flows into the next.
- Measure and cut in batches.
- Assign tasks and timeline.
- Pre-roll and label carpet sections.
Safety tips and ergonomic recommendations
Good staging and prep cut downtime, but you still need to protect your body and crew once cutting, hauling, and tacking start.
Use proper PPE, rotate tasks, and maintain clear walkways. Lift with legs, not back, and use knee pads for prolonged kneeling.
Follow tool safety and ventilation guidelines.
- Wear PPE and ventilate
- Use lifting aids and rotate tasks
- Protect knees and posture
Eco-friendly options and recycling old carpet
Although ripping out old carpet can seem like just another mess to haul, choosing eco-friendly options and recycling saves landfill space and often cuts disposal costs.
You can reduce waste and choose sustainable materials by:
- Donating or selling usable carpet and padding.
- Dropping unusable pieces at fiber recycling centers.
- Picking low-VOC, recycled-content carpet and natural-fiber alternatives for your install.
Tools, Materials, and Brands Recommendation Guide
Now let’s look at the specific tools and materials you’ll need: which power stretchers, knee kickers, and seam irons perform best.
I’ll also recommend top carpet padding and carpet types for different budgets so you can match comfort, durability, and cost.
Finally, we’ll cover where to buy or rent gear and the pros and cons of each option.
Recommended power stretchers, knee kickers, and seam irons
Stretching tools make the difference between a long-lasting carpet and one that ripples or gaps, so you’ll want reliable power stretchers, knee kickers, and seam irons on hand.
Choose a rented or purchase-grade power stretcher (Roberts, Tucker), a sturdy knee kicker for tight spots, and a 1500W seam iron for clean joins.
- Power stretcher
- Knee kicker
- Seam iron
Top carpet padding and carpet types for different budgets
Padding and carpet choices matter as much as your installation technique, so pick options that match your budget, traffic levels, and comfort goals. Choose dense foam or rubber pad for durability; felt for comfort; or budget fiber for low-traffic. Loop pile for high wear, cut pile for softness, or synthetic for stain resistance.
| Budget | Padding | Carpet type |
|---|---|---|
| Low | Fiber | Synthetic |
| Mid | Foam | Cut pile |
| High | Rubber/felt | Loop pile |
Where to buy and rental considerations
You’ll find carpet, padding, and the specialty tools you need at big-box stores, local flooring centers, and online retailers—each has trade-offs in price, selection, and service.
Know where to buy and when to rent:
- Big-box: lower prices, tool rentals available.
- Local dealer: better service, expert fitting advice.
- Online: wide selection, watch shipping and returns.
FAQ
You’ll find answers to common concerns like how long a DIY install takes for a typical room and whether you can lay new carpet over existing carpet or padding.
We’ll cover how much extra carpet to buy for seams and mistakes, whether a DIY install affects the manufacturer’s warranty, and what maintenance you should do right after installation.
If you have a specific situation, mention room size or existing floor conditions and I’ll tailor the guidance.
How long does DIY carpet installation take for a typical room?
How long will installing carpet in a typical room take? Expect a full weekend for a 10×12–12×15 room: plan 6–10 hours for prep (removing trim, cleaning, measuring), 3–6 hours for laying tack strips and padding, and 4–8 hours for cutting, stretching, and finishing.
If you’re experienced or have help, you’ll finish faster; first-timers should allow extra time and breaks.
Can I install carpet over existing carpet or padding?
Wondering whether you can lay new carpet over old? You can in some cases, but only if the existing carpet and padding are thin, in good condition, and securely attached.
Thick padding or multiple layers cause poor seams, uneven wear, and premature failure.
Best practice is to remove old carpet and padding for inspection, repair, and proper installation of tack strips and new underlayment.
How much extra carpet should I buy for seams and mistakes?
Need extra carpet? Buy 5–10% extra for seams, pattern matching, and minor mistakes.
If your room has odd shapes, long runs, or patterned carpet, increase that to 10–15% to guarantee matching and allow for trimming.
For small rooms with straight cuts, 5% typically suffices.
Always keep leftover scraps for future repairs or testing adhesives and seams.
Will installing carpet myself void manufacturer warranty?
Can you install carpet yourself without losing the warranty? It depends.
Many manufacturers allow DIY installation if you follow their guidelines, use specified materials, and keep receipts. Others require certified installers.
You must read the warranty terms, register the product, and document your work. If rules are violated, claims can be denied, so confirm requirements before you start.
What maintenance is required immediately after installation?
Right after your new carpet’s in place, you’ll want to focus on protecting the fibers and ensuring proper settling: vacuum gently to remove loose fibers and installation dust, avoid heavy traffic for 24–48 hours (or as the installer recommends), and keep the room well-ventilated to help adhesives and padding off-gas.
After that, spot-clean spills promptly, use pads under furniture, and follow the manufacturer’s cleaning schedule.