How to Clean Concrete Floors for Staining: Prep Steps That Make or Break Results
You can get a durable, even stain only if you clean, degrease, profile, and fully dry the slab first. Clear the area, sweep and vacuum, then use a concentrated degreaser or mechanical abrasion for oil spots. Etch or grind to create a uniform profile, rinse and neutralize, and allow 12–48 hours to dry. Wear PPE and test for moisture and residue. Follow these steps closely and you’ll avoid common failures — more detailed guidance follows.
Can You Clean Concrete Floors for Staining and How Long It Takes
You can usually prep a concrete floor for staining in a few straightforward steps: clear debris, degrease with a cleaner, etch or grind if needed, rinse, and let it dry — plan on anywhere from a half-day for light cleaning to 1–2 days for heavy stains or grinding.
If the surface has deep oil stains, significant cracks, severe efflorescence, or you need a perfectly uniform profile for a large project, hire a pro who’s the equipment and experience.
Calling a contractor also makes sense if you’re short on time or unsure about proper etching and moisture testing.
Short, actionable summary of steps and time estimates
Start by sweeping and degreasing the floor, then etch or acid-wash, rinse thoroughly, neutralize if required, and allow full drying before staining — a straightforward sequence most DIYers can complete in stages over 1–3 days depending on floor size and condition.
For clear how to clean concrete floors for staining:
sweep (30–60 min),
degrease (1–2 hrs),
etch/rinse (2–4 hrs),
dry (12–48 hrs).
When to skip DIY and call a pro
If the job looks bigger than a weekend project—or if the slab has major cracks, heavy oil saturation, old coatings, or drainage and moisture issues—call a pro.
You’ll save time and avoid costly mistakes. Hire a contractor when you need diamond grinding, epoxy removal, structural repairs, moisture mitigation, or diagnostic testing.
Pros have equipment, experience, and warranties you won’t get DIY.
Basic Understanding Why Proper Cleaning Matters Before Staining
Before you stain, remember the concrete’s porosity, surface laitance, and any contaminants determine how well the color will absorb and bond.
Oil, grease, paint, salts, and old sealers can block penetration or cause blotches and uneven coloration.
If the floor has previous coatings, they’ll alter absorption and often need removal to get a consistent stain.
How stains adhere to concrete (porosity, laitance, contaminants)
Because concrete soaks up stains rather than letting them sit on the surface, you need to understand porosity, laitance, and contaminants to get an even, lasting finish.
You’ll assess porosity to know penetration depth, remove laitance so dyes bond to solid cement, and eliminate surface residues that block absorption.
Proper prep guarantees uniform color and durable adhesion.
Common contaminants that ruin stains (oil, grease, paint, salts, sealers)
Five common contaminants—oil and grease, paint, salts, sealers, and general dirt—can wreck a staining job by blocking penetration, altering color, or preventing adhesion.
So you’ll need to identify and remove each type before you stain.
Oil and grease repel stains; paint and sealers form barriers; salts cause efflorescence and blotches; dirt hides defects.
Remove contaminants thoroughly for even, lasting results.
How previous coatings affect stain absorption
Those contaminants don’t just sit on the surface—they can indicate prior coatings that will change how your stain soaks in.
If a sealer, paint, or epoxy remains, your stain won’t penetrate evenly and may blotch or peel.
You’ll need to test adhesion, strip or profile the coating, and clean thoroughly so the concrete is porous and receptive before staining.
Overview: Tools, Materials, and Safety Gear Needed
Before you start, gather the right tools—mop, scrubber, floor grinder or pressure washer—so the job goes quickly and evenly.
You’ll also need cleaning chemicals like acid etcher, degreaser, or trisodium phosphate and a neutralizer to balance the surface after treatment.
Wear proper safety gear—gloves, eye protection, respirator—and guarantee good ventilation when using strong cleaners.
Essential tools (mop, scrubber, floor grinder, pressure washer)
Tools matter: to get concrete ready for staining you’ll need a mop for routine rinsing, a stiff scrubber for spot cleaning, a floor grinder for removing old coatings and profiling the surface, and a pressure washer for deep, fast cleaning.
- Mop: rinse and remove loose debris.
- Scrubber: target stains and edges.
- Grinder/washer: profile and deep-clean for adhesion.
Cleaning chemicals and neutralizers (acid etcher, degreaser, trisodium phosphate)
Buckets of the right chemicals will do more to prepare your concrete for staining than any single tool.
You’ll choose etcher for profile, degreaser for oils, and TSP for heavy dirt; each needs proper dilution and rinsing.
Follow label mix rates, test a small area, and neutralize acids before staining to guarantee consistent absorption and color.
- Acid etcher
- Degreaser
- Trisodium phosphate
Safety equipment and ventilation requirements
Those chemicals will do the heavy lifting, but they also demand respect—so gear up properly before you mix or apply anything.
You’ll need PPE and good airflow to protect lungs and skin. Follow ventilation best practices and have emergency wash stations ready.
- Respirator, chemical-rated gloves, splash goggles
- Open windows, fans, exhaust ventilation
- Eyewash, clean water, first-aid kit
Preparation Steps That Make or Break Results Step-by-Step Process
Before you stain, you’ll want to follow a clear, step-by-step prep process that starts with inspecting and testing the concrete and ends with removing coatings and stubborn residues.
Clear the area, protect nearby surfaces, and remove loose debris by sweeping and vacuuming so nothing interferes with adhesion.
Then tackle oil spots with degreasers and strip paint, adhesives, or old coatings using the appropriate mechanical or chemical methods.
Step 1 Inspect and test the floor
Start by doing a thorough inspection and a few simple tests to confirm the concrete is ready for staining.
Check for cracks, spalling, oil stains, efflorescence, and previous coatings.
Perform a water drop test to gauge porosity and a tape peel to detect coatings.
Note moisture levels with a meter.
Document problems and plan repairs before you start cleaning and prepping.
Step 2 Clear the area and protect nearby surfaces
Now that you’ve inspected the slab and noted repairs, clear the room so you can work unobstructed: move furniture, appliances, and loose items out or to a protected staging area.
Then protect surrounding surfaces and pathways to prevent dust, splatter, or chemical damage.
- Cover baseboards, walls, and fixtures with plastic and tape.
- Lay drop cloths over thresholds and stairs.
- Seal vents and nearby openings.
Step 3 Remove loose debris and dust (sweeping, vacuuming)
Sweep and vacuum the slab thoroughly to remove loose debris and fine dust that will interfere with stain adhesion.
Use a stiff push broom first, then a shop vacuum with a floor attachment, working in overlapping passes.
Pay attention to corners, joints, and edges.
Replace filters if clogged and empty the canister often so suction stays strong for a clean, contaminant-free surface.
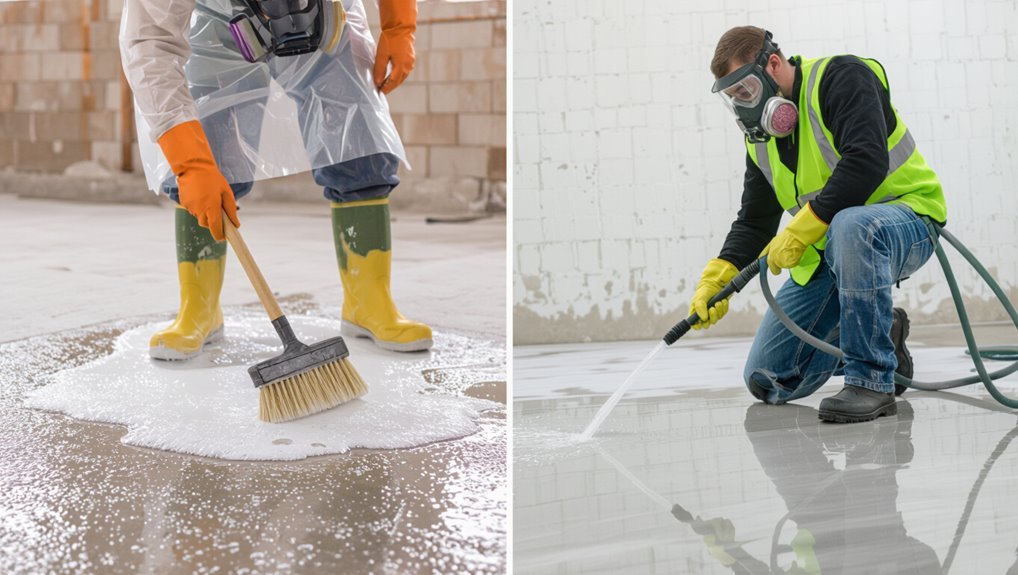
Step 4 Degrease oil and grease spots (spot treatment techniques)
Scrub stubborn oil and grease spots before you stain—these contaminants prevent the dye or acid stain from penetrating evenly and can cause blotches or adhesion failures.
Use a concentrated degreaser or trisodium phosphate, apply directly, agitate with a stiff brush, let dwell per instructions, then rinse thoroughly.
For deep stains, repeat or use a poultice. Dry completely before proceeding to staining.
Step 5 Remove paint, adhesives, and previous coatings (mechanical vs chemical)
Step 5 tackles removing paint, adhesives, and old coatings so your stain can bond and look uniform—choose mechanical methods like grinding or shot-blasting for heavy, stubborn layers, and chemical strippers for thin or intricate areas where you need more control.
| Method | Best use |
|---|---|
| Grinding | Thick coatings |
| Shot-blast | Large areas |
| Chemical stripper | Tight spots |
| Hand scraping | Detail work |
Step 6 Etch or profile the concrete for stain adhesion (acid etching vs mechanical profiling)
After you’ve stripped away paint and coatings, you’ll need to etch or mechanically profile the bare concrete so the stain can penetrate and bond properly.
Choose acid etching for uniform micro-porosity on sound slabs, but use mechanical profiling (grinding) for heavy contamination, thick coatings, or uneven surfaces.
Wear PPE, control dust, and follow manufacturer directions to create consistent texture for reliable stain adhesion.
Step 7 Neutralize and rinse thoroughly (pH check)
Neutralize the etched surface and rinse until the runoff shows a consistent, near-neutral pH—this guarantees acid residues won’t interfere with stain penetration or cause uneven coloring.
Use a bicarbonate solution or manufacturer-recommended neutralizer, scrub and rinse repeatedly, then test runoff with pH strips across several spots.
Don’t skip checks; lingering acid or alkaline spots will produce blotchy results once you stain.
Step 8 Drying time and moisture testing before staining (moisture meter methods)
Because moisture trapped in concrete will ruin stain adhesion and cause blotches, you need to confirm the slab is dry before you stain.
Allow 24–72 hours after rinsing, longer in cool or humid conditions.
Use a pin or non‑destructive moisture meter and perform multiple readings across the floor.
Target manufacturer’s acceptable moisture level; retest after drying longer if readings exceed limits.
Common Problems and How to Fix Them
You’ll run into a few common issues—stubborn oil stains that need advanced remediation, etching failures and how to fix them, and white efflorescence or salt bloom that requires treatment and prevention.
Learn when the concrete’s profile is too smooth for stain and whether to grind or sandblast.
I’ll walk you through practical fixes so your stain adheres and looks right.
Persistent oil stains advanced remediation methods
Tackle persistent oil stains with a targeted plan: when surface cleaners, degreasers, and poultices won’t budge deeply set oils, you’ll need more aggressive methods like mechanical abrasion, poultice replacement with stronger solvents, or chemical stripping to break the bond between oil and concrete.
Test a small area, start with low-speed grinding or shot blasting, escalate solvents safely, neutralize residues, and rinse thoroughly before staining.
Etching failures causes and corrective actions
If etching doesn’t open the concrete’s pores properly, your stain won’t penetrate evenly and you’ll see blotches, peeling, or poor color development; diagnose the cause quickly so you can correct it before moving on.
Check for residual sealers, wax, or curing compounds—strip them. Remove laitance and dust with mechanical abrasion.
Adjust acid strength, contact time, and rinse thoroughly. Test small areas before full staining.
White efflorescence and salt bloom treatment and prevention
When white powdery deposits—efflorescence or salt bloom—show up on your concrete after staining, they can mask color and cause flaking.
You need to remove and stop the salts at their source before refinishing. Scrub with a masonry cleaner or diluted muriatic acid, rinse thoroughly, dry, then identify moisture sources (plumbing, capillary rise).
Repair leaks, improve drainage, and apply breathable sealers to prevent recurrence.
Inadequate profile for stain when to grind or sandblast
After you’ve removed salts and fixed moisture sources, check the concrete’s surface profile before staining—the stain needs a properly etched, porous texture to penetrate and bond.
If the slab is too smooth or polished, grind or sandblast to achieve ICRI CSP 2–4.
Test with water: beads indicate insufficient profile.
Grind for control; sandblast for large areas or deep contamination.
Best Practices and Pro Tips for Optimal Stain Results
Before you stain, make sure temperature and humidity are within the product’s recommended range and pick a cleaner or etcher that matches your concrete type.
Always test the stain on a small, documented area so you have a baseline and can adjust technique, then keep the surface spotless while you work.
After staining, follow manufacturer care instructions and apply a compatible sealer to protect the finish.
Timing and environmental conditions for staining (temperature, humidity)
Although concrete stain can transform a floor quickly, getting the timing and environmental conditions right is essential to avoid blotches, poor penetration, or slow curing.
You should stain when temperatures are between 50–85°F and humidity is moderate; avoid rain or dew for 24–48 hours.
Work in the cooler morning or late afternoon, guarantee good ventilation, and wait for fully dry concrete after cleaning or etching.
Choosing the right cleaner/etcher for your concrete type
Getting the environmental conditions right sets you up to pick the proper cleaner or etcher for your concrete type, since surface composition and remaining moisture will affect how chemicals react and how well stains penetrate.
Match product to substrate—acid etchers for dense, unsealed concrete; alkaline cleaners for greasy, contaminated surfaces; enzymatic or biocleaners for organic stains.
Always follow label instructions and safety precautions.
Testing stain on small areas and documenting baseline
Start by testing stains on several small, inconspicuous areas so you can see true color, absorption, and reaction without risking the whole floor.
Note drying time, sheen, and any unexpected mottling. Photograph each spot with labeled notes on surface prep, product, dilution, and temperature.
Keep these records as your baseline so you can compare full-coverage results and adjust technique or product choice confidently.
Maintaining cleanliness during staining application
When you’re staining, keep contaminants off the surface so your work looks uniform and professional; dust, hair, and footprints will show up as blotches or sheen variations once the stain dries.
Work in sections, wipe with tack cloths, use clean gloves and shoe covers, and avoid drafts that blow debris.
Change applicators often and inspect under good light to catch imperfections immediately.
Post-stain care and recommended sealers
Although the stain may look finished as soon as it dries, you’ll need to follow specific post-stain care steps to protect the color and guarantee long-term durability.
Wait recommended cure time, avoid traffic, and clean gently.
Choose a sealer based on sheen and traffic: acrylic for ease, solvent-based for durability, or penetrating silane/siloxane for exterior protection.
Recoat when wear appears.
Comparison: Cleaning Methods and When to Use Each
You’ll choose between manual scrubbing, a floor scrubber, or a pressure washer based on floor size, dirt level, and access to power.
For surface preparation you’ll weigh acid etching, mechanical grinding, and sandblasting against factors like surface profile, dust control, and chemical use.
Each method has clear pros and cons that determine which one’s safest and most effective for your project.
Manual scrubbing vs floor scrubber vs pressure washer
Choosing the right cleaning method—manual scrubbing, a motorized floor scrubber, or a pressure washer—depends on the floor’s size, soil level, and your budget. You’ll pick manual for tight spots and light grime, a scrubber for large indoor areas, and a pressure washer for exterior heavy dirt. Compare options below:
| Method | Best use |
|---|---|
| Manual | Small, detailed areas |
| Scrubber | Large indoor floors |
| Pressure washer | Exterior heavy soil |
Acid etching vs mechanical grinding vs sandblasting pros and cons
When preparing concrete for stain, pick the surface prep that matches your goals and constraints: choose acid etching for quick, low-cost etch; mechanical grinding for control, flatness, heavy coatings; sandblasting for textured, outdoor surfaces. Balance dust, equipment, cost, and finish.
| Method | Pros | Cons |
|---|---|---|
| Acid etch | Fast, cheap | Limited depth |
| Grinding | Precise, smooth | Dusty, costly |
| Sandblast | Aggressive, textured | High dust, rough |
Cost, Time, and Effort Estimates
For a small room you can expect a few hours of work.
Medium areas a day, and large spaces may take several days with extra help.
DIY costs usually run low — mainly cleaners and rental gear — while hiring pros raises the price for labor and specialized equipment.
We’ll compare typical time/labor estimates and rough DIY vs. professional cost ranges so you can pick the right approach.
Typical time and labor for small, medium, and large areas
Most small garage or patio projects take a half-day to a day of hands-on work, while medium areas like a two-car garage or basement usually need a full day to two days, and large spaces or commercial slabs can require several days to a week — remember these estimates include prep, cleaning, repairs, and drying time, and assume one to two people working at a steady pace.
| Size | Time | Labor |
|---|---|---|
| Small | 0.5–1 day | 1 person |
| Medium | 1–2 days | 1–2 people |
| Large | Several days–1 week | 2+ people |
Rough cost ranges for DIY vs professional services
Those time-and-labor estimates help frame costs, so you can decide whether to tackle cleaning and prepping yourself or hire pros.
DIY supplies (degreasers, acid etch, scrubbers, rental grinders) typically run $50–$400 depending on size.
Professionals charge $1–$4 per sq ft for basic cleaning, $3–$8 for grinding/polishing, plus minimums; expect $200–$1,500 total.
You’ll save time but trade labor.
Frequently Asked Questions
You’ll find answers to common concerns like whether household cleaners are safe for prepping, how long concrete must cure, and if moisture will affect your stain.
You’ll also learn whether you should seal after staining and if stained concrete works for garages or patios.
Read on for clear, practical guidance.
Can I use household cleaners to prep concrete for staining?
Can you use household cleaners to prep concrete for staining? You can for light dust and grime, but avoid oil-based, waxy, or bleach-heavy cleaners—they leave residues that block stain penetration.
Use a pH-neutral cleaner or a concrete-specific degreaser for oil stains, rinse thoroughly, and let the surface dry.
Always test a small area to confirm no residue remains before staining.
How long should concrete be cured before staining?
How long should you wait before staining new concrete?
You should wait at least 28 days for standard concrete to cure before staining.
For fast-setting mixes or warm, dry conditions, you might shorten that to 7–14 days if manufacturer guidance allows.
Always confirm slab strength and dryness, perform a moisture test, and follow stain manufacturer instructions before proceeding to guarantee proper penetration and adhesion.
Will moisture rising through concrete ruin the stain?
Waiting the proper cure time helps, but moisture can still move up through a slab and affect your stain.
If vapor pressure reaches the surface it can cause discoloration, adhesion failure, or blotchy results.
Test with a plastic sheet or moisture meter before staining. If readings are high, delay work and address vapor barriers or drying methods so your stain performs reliably.
Do I need to seal concrete after staining?
Ultimately, yes—you’ll usually want to seal stained concrete to protect the color and ease maintenance.
Sealing locks in the stain, reduces wear, resists spills and stains, and makes cleaning simpler.
Choose a breathable sealer compatible with your stain type, apply per manufacturer instructions, and plan for reapplication every few years depending on traffic.
Proper sealing preserves appearance and performance.
Can stained concrete be used in garages or outdoor patios?
Wondering whether stained concrete holds up in garages or outdoor patios? Yes — with the right prep and sealers, stained concrete performs well outdoors and in garages.
Use penetrating stains, high-quality acrylic or polyurethane sealers, and choose slip-resistant finishes for wet areas.
Protect it from de-icing salts and heavy impact; reseal periodically. Proper maintenance extends color and durability greatly.
Visual Guide and Checklist
You can grab a printable step-by-step prep checklist to make sure you don’t miss any cleaning or etching tasks.
Compare before-and-after photos that show properly prepped floors so you know what results to aim for.
Keep the checklist and images handy as you work to stay on track and verify each step.
Step-by-step prep checklist for download/print
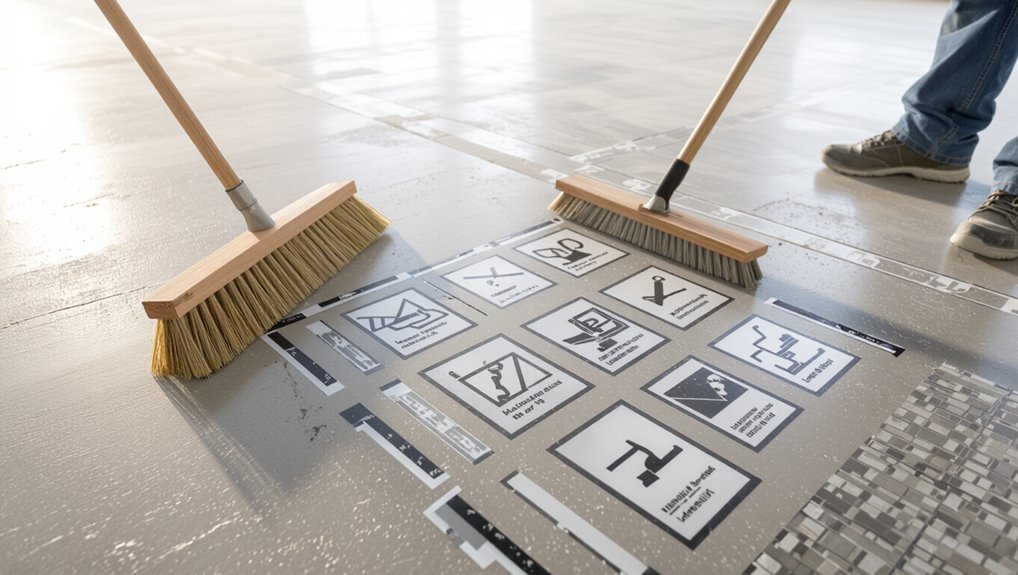
1 clear, printable checklist keeps your prep on track and makes staining your concrete faster and less stressful.
Use one-page steps, clear timings, and safety icons so you won’t miss details. Print it or save as PDF for job sites.
- Clear, sweep, and remove debris
- Degrease, scrub, and rinse
- Etch, neutralize, dry, and inspect
Before-and-after photo examples of properly prepped floors
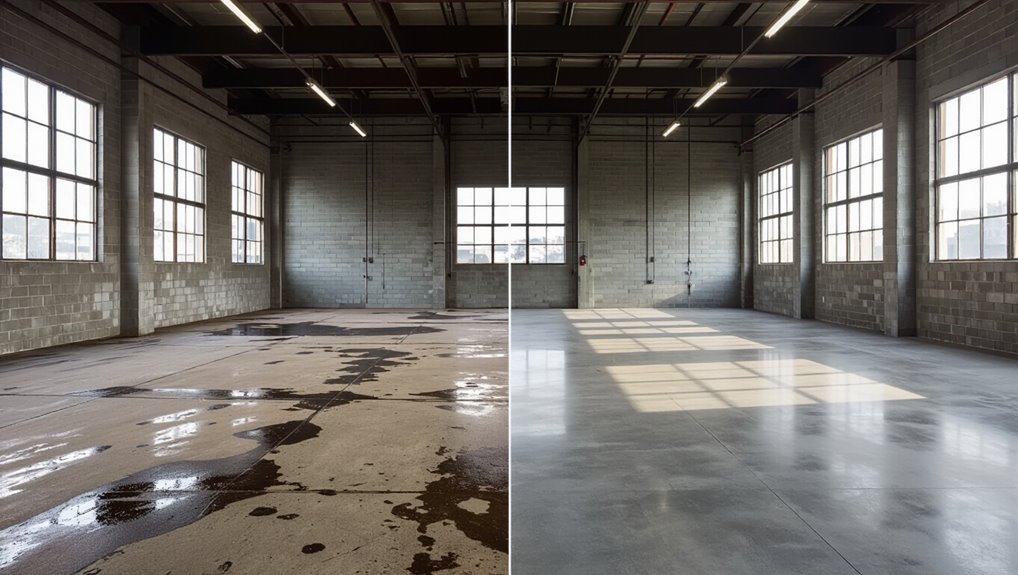
Before-and-after photos show exactly what to aim for and help you spot missed spots before staining begins. Use them as a visual checklist while you prep.
Photograph sections after degreasing, etching, and repairs. Compare images to examples showing uniform texture, no residue, and consistent porosity.
Mark trouble areas, adjust cleaning, and re-photograph until your floor matches the clean, ready reference.