How to Repair Laminate Flooring: Fix Damaged Boards Without Replacing Them
You can fix many laminate issues yourself without replacing boards by evaluating damage, cleaning the area, and using touch-up kits, fillers, or fine sanding for surface scratches and chips. For minor delamination or warping, dry the floor, glue and clamp edges, or reseat loose planks after relieving pressure. Match color carefully and seal repairs to blend finishes. Check moisture sources first to avoid repeats, and if you want step‑by‑step methods and tool lists, keep going.
Can You Repair Laminate Flooring Without Replacing Boards?
You can often fix surface scratches, chips, and small water stains with spot repairs like fillers, touch-up pens, or sanding and refinishing the wear layer.
If the core is swollen, boards are warped, or damage spans multiple planks, replacement is usually the only reliable solution.
Below we’ll cover quick fixes you can try and clear signs that call for swapping boards.
Short summary of repair options
Although some damage calls for full board replacement, many common laminate issues can be fixed without swapping out planks. You can remove stains, repair scratches with fill sticks, replace surface wear with laminate repair kits, fix minor warping by drying and resealing, and tighten loose joints.
Wondering how do you repair laminate flooring? Start with cleaning, assess damage depth, then choose a targeted repair method.
When repair is feasible vs when replacement is necessary
When damage is superficial—like light scratches, surface stains, or minor separation at a seam—you can usually repair the laminate without replacing boards.
Deep gouges, swelling from moisture, delamination, or warped boards need replacement. You’ll assess extent, check subfloor condition, and consider matching planks.
Repair saves time and money when structure and finish remain intact; otherwise swap affected boards.
Basic Understanding What Is Laminate Flooring and How It Fails
To fix laminate properly, you’ll first want to know what it’s made of—wear layer, printed decor, core, and backing—and how those layers affect its strength.
You’ll see familiar damage like scratches, dents, water stains, buckling, and delamination, each needing a different approach.
I’ll also list the basic tools and materials you’ll use so you’re prepared before you start.
Laminate construction and common layers
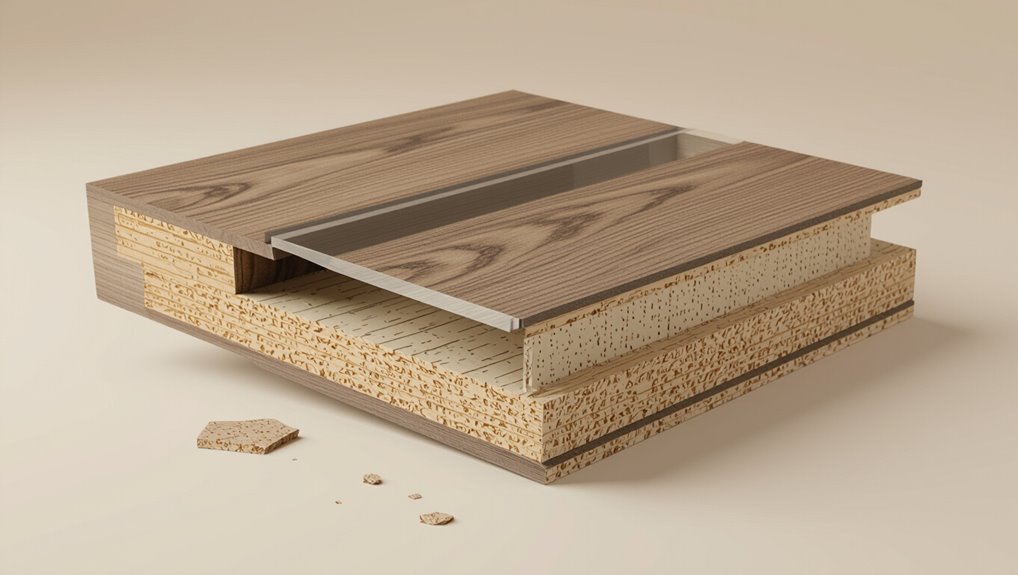
Think of laminate flooring as a multi-layered sandwich engineered for appearance and durability: a wear layer, printed design layer, core, and backing each play a specific role.
You rely on the clear, hard wear layer for scratch resistance, the printed layer for realistic visuals, the dense core for stability and impact support, and the backing for moisture balance and dimensional integrity.
Typical types of damage (scratches, dents, water damage, buckling, delamination)
Damage to laminate usually shows up in a few predictable ways: surface scratches, dents from dropped objects, water intrusion that swells and warps the core, visible buckling where boards lift, and delamination when the layers separate.
You’ll also see edge gaps, cupping from moisture, and finish wear that exposes the decorative layer.
Identifying the type guides appropriate repair steps.
Tools and materials overview
Tools and materials for laminate repair start with a few basics you’ll use for almost every fix: a pry bar, tapping block, rubber mallet, utility knife, sanding block or fine-grit sandpaper, wood filler or laminate repair putty, color-matched touch-up markers, and replacement planks or a repair kit for larger damage.
Choose quality tools, match colors, and keep safety gear handy.
- Prep
- Match
- Repair
- Finish
How to Assess Damage: Determine Repairability
Start with a clear visual inspection checklist: look for gaps, scratches, swelling, and loose seams.
Test for moisture and check the subfloor and any cupped boards to see if water or structural issues are the cause.
Remember that damaged neighboring boards or a compromised underlayment can make a simple plank replacement impossible.
Visual inspection checklist
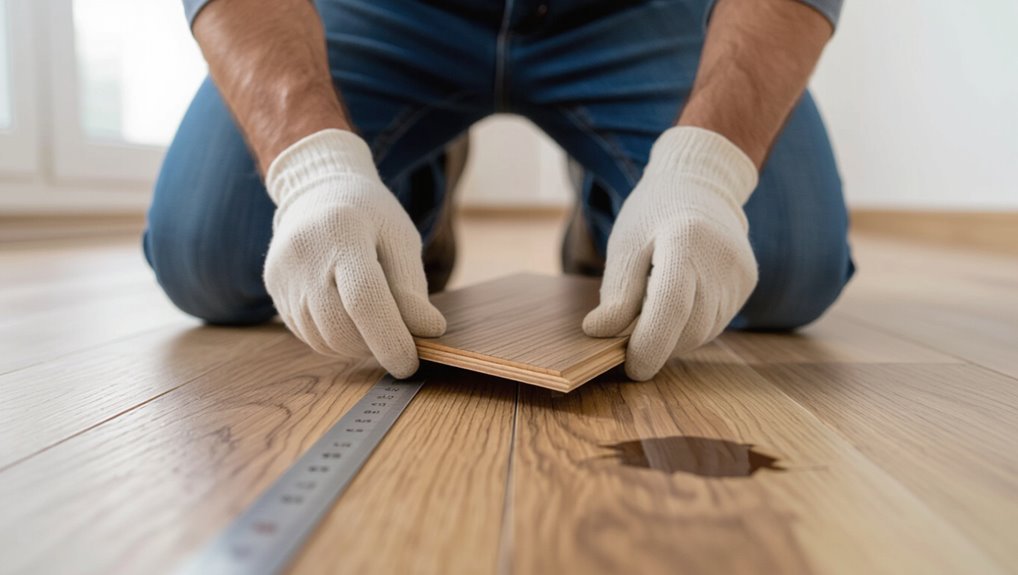
Before you decide on a repair, walk the room systematically and inspect each plank for gaps, lifting, buckling, deep scratches, swelling, or discoloration—note location, size, and whether the issue affects a single board, a few adjacent boards, or a larger area.
Use this checklist to record findings and decide if a simple fix will do:
- Visible surface damage
- Edge separation
- Finish wear
- Localized staining
Testing for moisture, subfloor issues, and cupping
If you suspect moisture, don’t guess—test it and inspect the subfloor to figure out if the problem’s localized or systemic.
Use a moisture meter across several boards and the subfloor, check seams, and look for discoloration or soft spots.
Measure cupping height with a ruler; minor cupping (<1/8") can often be flattened, but larger or widespread cupping signals underlying moisture or subfloor failure.
When neighboring boards or underlayment affect repairability
Once you’ve ruled out moisture or subfloor failure, check how neighboring boards and the underlayment will affect repair options.
If adjacent planks are locked, warped, or glued, you may need to remove a larger section or replace a whole row.
Inspect underlayment for compression or mold; damaged underlayment often means pulling flooring to repair beneath, increasing scope and cost.
Step-by-Step Repairs for Surface Scratches and Scuffs
You’ll want to gather the right materials and tools before you start, then thoroughly clean and prep the scratched area.
Use a laminate repair kit to fill shallow scratches, match and blend the color, and seal the repair for a seamless finish.
Finally, polish the area and consider a protective top coat to restore shine and prevent future scuffs.
Materials and tools needed
Gather a few basic tools and materials before you tackle surface scratches and scuffs on laminate flooring so the repair goes quickly and cleanly.
You’ll need items for filling, blending, and protecting the finish. Typical essentials include:
- Laminate repair kit (putty, markers)
- Fine-grit sandpaper or abrasive pad
- Soft cloths and microfiber towels
- Clear laminate sealer or finish pen
Cleaning and prepping the area
Before you start repairs, clear and clean the damaged area so fillers and markers adhere properly; remove loose dirt and grit with a soft broom or vacuum, then wipe the spot with a damp microfiber cloth to lift oils and residue.
Let the floor dry fully, degrease stubborn spots with isopropyl alcohol, and mask surrounding seams with painter’s tape to protect against accidental marks.
Filling shallow scratches with laminate repair kits
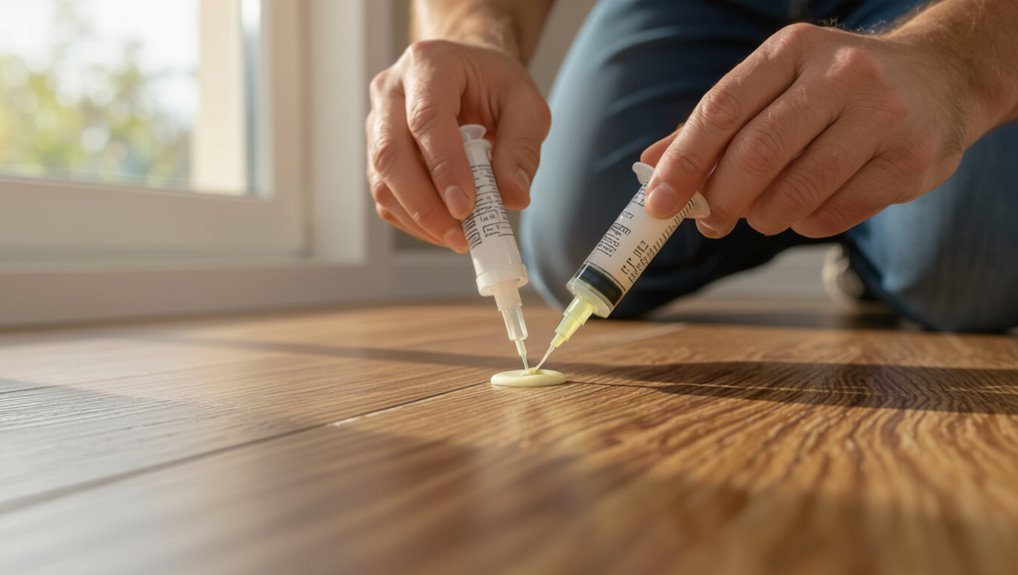
Once the area’s clean and dry, reach for a laminate repair kit to quickly blend shallow scratches into the surrounding surface; these kits include colored wax sticks, putty, or markers designed to match most laminate finishes.
Choose a matching shade, apply sparingly, press wax or smooth putty into the scratch, remove excess with a plastic scraper, then buff gently to even the texture.
Blending color and sealing for a seamless finish
After you’ve filled scratches with wax, putty, or a marker, you’ll want to blend the color and seal the repair so it disappears into the surrounding laminate.
Match tones with a fine-tipped color pencil or blended marker, feathering edges gently. Let dye dry, then apply a thin, compatible sealer with a cotton swab.
Buff lightly to unify sheen and inspect in natural light.
Polishing and protective top coat options
When you’ve matched color and sealed the repair, finish by choosing the right polish or protective top coat to restore sheen and guard against future wear.
Pick a laminate-specific polish or a water-based polyurethane recommended for laminate. Apply thin, even coats with a microfiber cloth or pad, let dry fully, and buff lightly.
Reapply as needed for longevity and uniform appearance.
Repairing Deep Gouges, Chips, and Edge Damage
When a scratch goes deeper than the wear layer or the plank edge is split, you’ll need to decide whether filler will hold or if replacing that plank is safer.
I’ll walk you through prepping the area, mixing and applying epoxy or wood filler, then sanding, shaping, and color-matching the repair so it blends with the floor.
Finally, we’ll cover how to stabilize or reinstall loose edges to prevent future damage.
When to use fillers vs replace part of the plank
If the damage is shallow and confined to the wear layer, you can usually fill and blend it; but if the core is exposed, the plank’s edge is crushed, or the board flexes at the break, you’ll want to replace the section.
Use fillers for cosmetic shallow chips, minor gouges, and edges with intact substrate.
Replace when structural integrity, moisture barrier, or locking seams are compromised.
Step-by-step technique for using epoxy or wood filler
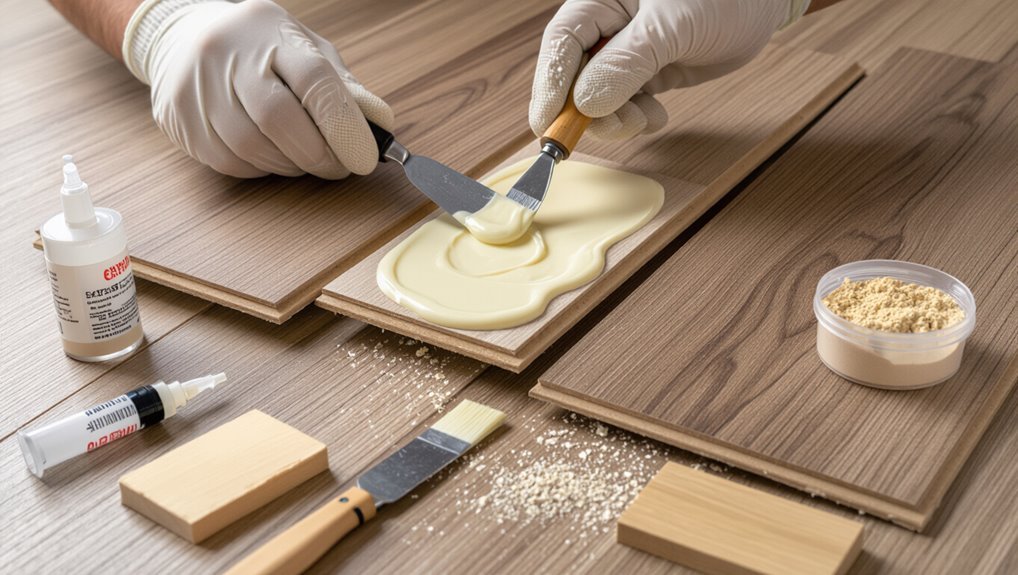
Once you’ve determined the damage needs more than a surface touch-up, prepare to fill and rebuild the area with epoxy or wood filler.
Clean debris, tape edges, and mix filler per instructions. Apply in layers, overfilling slightly. Let each layer cure, then trim excess with a sharp scraper.
Remove tape, inspect for voids, and repeat spot-filling until the profile is restored.
Sanding, shaping, and color-matching tips
Although the filler has cured, you’ll need to sand and shape the repair to match the surrounding surface precisely; use fine-grit sandpaper, work lightly, and follow the grain.
Blend edges with a small rasp or carving tool for contours.
Match color with layered stains or tinted fillers, testing on scrap.
Seal with a clear coat to even sheen and protect the repair.
Reinstalling or stabilizing loose edges
When laminate planks lift or chip along a seam, you’ll want to secure the loose edge before tackling cosmetic fixes so the repair holds under foot traffic.
Start by cleaning the joint, removing debris, and checking whether the plank can be reseated. If it won’t lock, apply a small bead of wood‑floor adhesive or construction adhesive under the edge, press, clamp with weights, and wipe excess immediately.
Fixing Water Damage and Delamination Without Full Replacement
Start by spotting delamination and tracing the moisture source so you know whether it’s a one-off spill or an ongoing leak.
You’ll need to dry the area thoroughly and cut humidity with fans, dehumidifiers, or by fixing the leak before attempting repairs.
For minor delamination you can often glue and clamp boards or replace just the damaged plank section when the core is still sound.
Identifying delamination and moisture source
Before you try any repairs, you need to confirm whether the boards are delaminating and where the moisture is coming from so you don’t waste time fixing the symptom instead of the cause.
Inspect seams, edges, and swollen joints for peeling layers. Check beneath trim, under appliances, and near windows for leaks.
Use a moisture meter to map damp spots and trace back to the source.
Drying techniques and moisture mitigation
Although you can’t always salvage every damaged plank, you can often stop delamination and mold growth by drying and stabilizing the area quickly and correctly.
Remove baseboards if needed, lift affected edges, and use fans, dehumidifiers, and gentle heat to evaporate moisture.
Monitor with a moisture meter, dry subfloor fully, and fix leaks or ventilation issues to prevent recurrence before any repair attempts.
Repair methods for minor delamination (gluing, clamping)
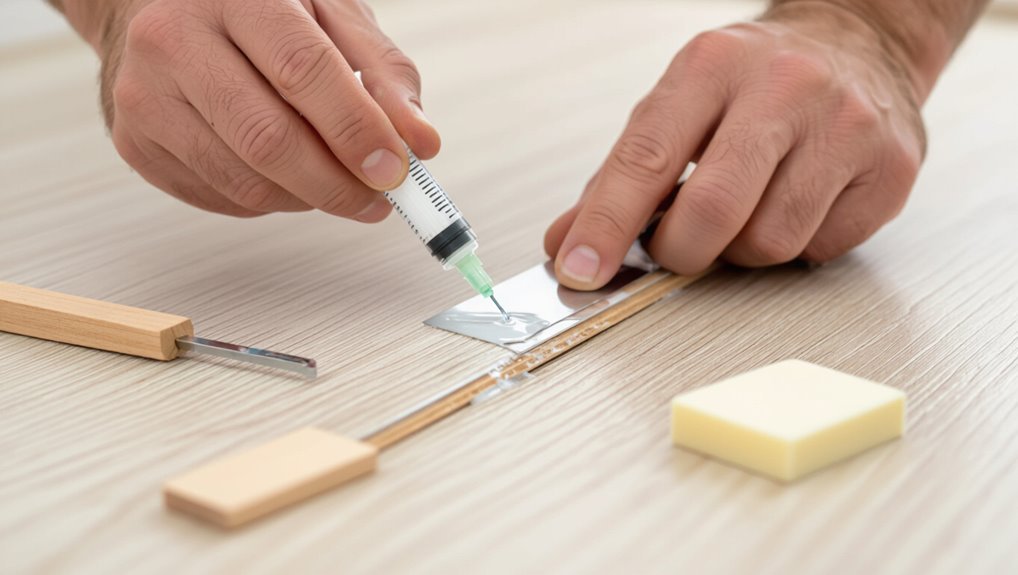
If the delamination is limited to a few small areas and the core hasn’t swollen, you can often salvage planks by gluing and clamping them back together.
Clean and dry the area, inject a thin wood glue or PVA into the split, press layers flat, and clamp with even pressure.
Wipe excess glue, let cure fully, then sand lightly and touch up finish as needed.
When partial plank repair is possible and how to execute it
Once you’ve handled small delamination spots with glue and clamps, you can often repair larger—but still partial—water damage without replacing the whole plank.
Cut out the softened area, keeping a clean rectangular patch.
Dry the cavity, fit a matching laminate insert or routed repair piece, glue and clamp, then sand edges lightly and apply matching finish.
Test stability before traffic.
Repairing Warps, Buckling, and Gaps
You’ll first learn what causes buckling and expansion so you can prevent it from coming back.
Then you’ll get a clear step-by-step for relieving buckles, reseating boards, filling gaps, and realigning planks.
Finally, you’ll see how to restore connector strips and thresholds so the repair looks and functions properly.
Causes of buckling and expansion issues
Because laminate planks are made from compressed wood fibers and glued surfaces, they expand and contract with changes in humidity and temperature. That movement is the main cause of buckling, warping, and gaps.
You’ll also see issues from improper acclimation before installation, insufficient expansion gaps at walls or fixtures, prolonged moisture exposure, and heavy point loads that stress joints, causing separation or lifting.
Step-by-step to relieve buckling and reseat boards
Start by identifying the problem areas so you can target repairs effectively: inspect the entire floor for buckled seams, lifted edges, and gaps. Note whether damage is localized or widespread, and check nearby doors, vents, and baseboards that might be restricting movement.
Then remove molding, relieve pressure by loosening adjacent planks, gently press and reseat boards, clamp if needed, and let the floor settle.
Filling gaps and realigning planks
Once you’ve eased pressure along the affected area, tackle gaps and misaligned planks by working from the widest open seam toward the nearest stable row:
gently lift the loose board ends, realign their tongues and grooves, and tap them back into place with a tapping block and soft mallet so joints close without cracking the laminate.
Fill remaining gaps with color-matched wood filler or silicone, then wipe smooth.
Fixing transition strips and thresholds
After you’ve realigned planks and filled seams, check the strips and thresholds where flooring meets doorways, stairs, or other surfaces—these areas often show warps, buckling, or gaps that can undermine a neat repair.
Loosen fasteners, remove damaged trim, sand or trim warped edges, then reinstall with appropriate adhesive or screws.
Use caulk or foam backing to seal remaining gaps and guarantee smooth changes.
Advanced Techniques Partial Plank Replacement Without Full Floor Removal
You’ll need the right tools and steady hands to replace just one plank in a floating laminate floor, from a circular saw or multi-tool for cuts to tapping blocks and pull bars for locking pieces.
Learn the cutting-and-lift method to remove the damaged plank without dismantling the whole floor, then fit and lock the replacement section while ensuring the grain, color, and bevels match for a seamless look.
Take time to test-fit and adjust mating edges so the new plank locks tightly and sits flush with surrounding boards.
Tools and skills required
Though it sounds tricky, replacing a few damaged laminate planks without ripping up the entire floor is doable if you have the right tools and steady hands.
You’ll need basic carpentry skills, patience, and careful measuring.
Essential items include:
- Tape measure and pencil
- Pull bar and tapping block
- Replacement planks and spacers
- Utility knife and wood glue
How to remove a damaged plank from a floating floor (cutting and lifting technique)
When you need to remove a damaged plank from a floating floor without pulling up the whole room, plan your cuts and lifting points so you can extract just the bad piece; this method uses a center cut and careful lifting to preserve surrounding planks and the locking profile.
Score the damaged plank lengthwise, cut a center strip, remove it, then gently lift remaining halves toward the cut to free tongue-and-groove joints.
Installing a replacement section and locking it in place
After you’ve removed the damaged center strip and freed the surrounding halves, prepare the replacement section to match the cut edges and locking profile; you’ll often need to trim a new plank into two halves that mirror the originals so they’ll rejoin cleanly.
Fit one half into the groove, angle the second, then lower and snap together. Tap seams gently with a block until the locking mechanism clicks securely.
Matching grain, color, and bevels
If you want a replacement to vanish into the floor, matching grain, color, and bevels is where precision matters most.
Inspect light direction, grain pattern, and bevel depth on adjacent planks. Choose a replacement from the same batch or a closely matched board.
Sand or stain edges sparingly, then test fit under real lighting. Minor bevel shaving can conceal seams for a seamless repair.
Comparison of Repair Methods: Cost, Time, Durability
You’ll find a quick-reference table comparing repair methods with clear pros and cons to help you pick the right approach.
The table also lists estimated time and cost ranges for common fixes like scratch repair, single-plank replacement, and partial plank replacement.
Use those figures to weigh speed, expense, and durability before you start.
Quick-reference table of methods and pros/cons
Here’s a compact comparison of common laminate-flooring repair methods so you can quickly weigh cost, time, and expected durability for each option. Pick based on damage severity and desired longevity.
| Method | Pros | Cons |
|---|---|---|
| Spot filler | Cheap, fast | Short-term |
| Board swap | Durable | Laborous |
| Refinish coating | Improves look | Limited depth |
| Glue repair | Simple | Not for large gaps |
Estimated time and cost ranges for common repairs
Most homeowners can expect repair time and cost to vary widely based on damage extent and the chosen method, so match the approach to your budget and timeline.
You’ll spend minutes to days and $10–$200+ depending on DIY vs pro, materials, and scope. Consider durability when choosing tradeoffs.
- Spot fill: 15–30 min, $10–$30
- Replace board: 1–3 hrs, $30–$100
- Refinish top layer: 2–6 hrs, $50–$150
- Subfloor repair: 4–24 hrs, $100–$500
Common Mistakes to Avoid When Repairing Laminate
When you repair laminate, avoid mistakes that can make damage worse, like forcing boards or using excessive sanding.
Don’t skip matching the color or over-sanding the surface, and be sure you’ve identified any moisture sources first.
Also use the correct adhesives and finishes for your specific product to prevent failures down the line.
Errors that cause further damage
Because a wrong fix can make damage worse, you need to avoid a few common mistakes when repairing laminate; otherwise small issues can turn into costly replacements.
Don’t force warped boards back in place, pry joints apart violently, or use excessive moisture. Avoid incompatible adhesives, random sanding, or skipping subfloor checks.
Test products first, follow manufacturer guidelines, and work patiently to prevent bigger problems.
Improper color matching and over-sanding
If you rush into repairs without matching tones and grain, the new piece will stick out like a sore thumb and undo all your careful work.
Pick replacement planks that match color, pattern, and finish under the room’s lighting.
Don’t over-sand to force a match—laminate has thin decorative layers.
Test swatches, sand minimally, and blend edges for a seamless look.
Ignoring moisture sources
Although you may focus on scratches and gaps, overlooking moisture sources will undo repairs fast.
You need to identify leaks, rising damp, and high humidity before fixing boards. Dry the area thoroughly, fix plumbing or ventilation, and use moisture barriers where appropriate.
Otherwise swelling, delamination, and recurring cupping will return, wasting time and requiring larger repairs later.
Using the wrong adhesives or finishes
When you grab the wrong adhesive or finish, repairs won’t hold and the floor’s appearance can suffer fast.
Pick products formulated for laminate; avoid wood glues, heavy varnishes, or water-based sealers that swell cores.
Test adhesion and color match on a scrap.
Use thin, flexible adhesives and manufacturer-recommended finishes to guarantee seams stay tight, the surface blends, and movement won’t split bonds.
Prevention and Best Practices to Extend Laminate Life
To keep your repaired laminate looking good, follow simple daily care and cleaning routines like sweeping and using a damp mop.
Use protective measures—area rugs, felt pads on furniture, and a humidifier or dehumidifier—to prevent scratches and moisture damage.
Adopt a seasonal maintenance checklist to spot issues early and maintain warranties.
Daily care and cleaning routines
A few minutes of daily care will keep your laminate floors looking new and prevent costly repairs down the road.
You should remove debris, wipe spills immediately, and use gentle cleaners to avoid buildup or damage. Consistent routines cut wear and hide issues early.
- Sweep or vacuum daily
- Wipe spills promptly
- Use pH-neutral cleaner
- Dry floors after mopping
Protective measures (rugs, felt pads, humidity control)
Several simple protective measures can greatly extend your laminate’s lifespan: place rugs in high-traffic and entry areas, fit furniture legs with felt pads, and keep indoor humidity steady.
Use breathable mats to avoid moisture traps, choose low-profile pads to prevent buckling, and maintain humidity around 35–55% with a humidifier or dehumidifier.
Inspect pads regularly and replace when worn to prevent scratches.
Seasonal maintenance checklist
When seasons change, you should adjust your laminate care routine to prevent warping, gaps, and surface wear; simple quarterly checks and seasonal tasks keep boards stable and looking their best.
Inspect seams, trim door seals, tighten connections, clean with recommended solutions, rotate rugs, check humidity (35–55%), and sand or replace felt pads.
Address minor issues promptly to avoid major repairs.
Tools and Materials Buyer’s Guide
You’ll want a compact set of essentials—pull bar, tapping block, rubber mallet, utility knife, and a good measuring tape—to tackle most DIY laminate repairs.
Pick repair kits and fillers matched to your floor’s color and finish, and choose adhesives and top coats that list laminate compatibility.
If damage is structural, widespread, or you’re unsure about matching materials, call a professional.
Essential tools for DIY laminate repair
Before you start any repair, gather a compact set of reliable tools and materials so you won’t stop mid-job to hunt for parts.
You’ll need basic tools to remove, clean, and reinstall laminate pieces safely. Keep everything within reach and choose quality items to avoid damaging boards.
- Pry bar and pull bar
- Utility knife and scraper
- Rubber mallet
- Measuring tape and straight edge
Recommended repair kits, fillers, adhesives, and finishes
Now that your tool kit is ready, pick repair products that match your laminate’s color, profile, and wear layer to get lasting, invisible fixes.
Choose water-based fillers, two-part epoxy for deep gouges, color-matching wax sticks for surface nicks, and clear matte finish for blended sealing.
Use adhesives rated for laminate seams and test colors on scrap.
- Water-based filler
- Two-part epoxy
- Wax sticks
- Clear matte finish
When to hire a professional
If damage goes beyond a small scratch or a loose plank, hire a professional who’s experienced with laminate—especially when the subfloor may be compromised, water damage is involved, or matching profiles and finishes is critical.
Call a pro if repairs need structural fixes, moisture mitigation, complex plank removal, or seamless color/texture matching. They’ll save time, prevent costly mistakes, and protect your warranty.
Troubleshooting Quick Fixes for Common Scenarios
If a scratch doesn’t disappear after filler, you’ll need to check that you used the right color and properly sanded and sealed the spot.
If buckling keeps returning after reseating, confirm the subfloor is dry, flat, and that expansion gaps weren’t compromised.
For visible seams or color mismatch, try gentle blending with stain pens or consider replacing the affected plank for a seamless match.
Scratch that won’t disappear after filler
When a scratch still shows after you’ve applied filler, don’t assume the repair failed—often it’s a surface mismatch, not the filler itself.
Check sheen and color: sand lightly, blend edges, then recoat with matching stain or clear finish.
If filler sank, reapply sparingly and level immediately.
For deep scratches, layer thinly, cure fully, and finish to match surrounding texture.
Persistent buckling after reseating
Although you reseated the plank, persistent buckling usually means an underlying issue—moisture, inadequate expansion gaps, or a compromised subfloor—that quick tweaks won’t fix.
Inspect moisture sources, check gap clearance around walls and thresholds, and test subfloor flatness.
You’ll likely need to address moisture intrusion, refit proper expansion space, or repair/replace subfloor sections before the laminate will lie flat and stay secure.
Visible seam or color mismatch after repair
Because light highlights slight differences, a repaired plank can show a visible seam or color mismatch that makes the fix obvious.
You can minimize this by sanding edges lightly, blending with stain markers or tinted wax, and feathering finish into surrounding boards.
If mismatch persists, replace the plank or swap nearby boards for better pattern flow.
Match room lighting to reduce contrast.
FAQ
You probably have quick questions like how long repairs last and whether water-damaged planks can be saved or must be replaced.
You’ll want to know if you can match old colors, whether fixes affect the manufacturer warranty, and if laminate can be sanded like hardwood.
I’ll answer each clearly so you can make the right repair decisions.
How long do laminate repairs typically last?
How long a laminate repair lasts depends on the damage type, repair method, and how you care for the floor afterward.
Minor surface fixes and scratch kits can hold for years with proper maintenance.
Deeper repairs or patched seams may last several months to multiple years, especially under heavy traffic.
Regular cleaning, protective pads, and prompt spot repairs will extend longevity.
Can water-damaged laminate be saved or does it always need replacement?
Can water-damaged laminate be saved, or do you have to replace it? You can sometimes salvage boards if damage is minor: dry area thoroughly, lift affected planks, and replace swollen underlayment.
If boards delaminate, warp, or mold appears, replacement’s safest. Always stop leaks immediately and dry quickly to increase chances of repair rather than full replacement.
Is it possible to match old laminate color exactly?
Want an exact match? You probably won’t get a perfect factory match. Fading, wear and finish changes alter original tones.
You can closely blend repairs by sourcing leftover planks, matching brand and batch, or using stain pens and blending techniques.
Test fixes in an inconspicuous spot, adjust color gradually, and accept subtle variation to maintain a cohesive look.
Will repairing laminate void the manufacturer warranty?
Matching color exactly is often impossible, and you’ll also want to know how repairs affect your warranty.
Check your warranty terms before repairing: some manufacturers allow DIY touch-ups for cosmetic damage, others require certified installers or void coverage.
Document damage, use approved products, and keep receipts.
If unsure, call the manufacturer; getting written approval protects your warranty and avoids disputes.
Can I sand laminate like hardwood to refinish it?
Why sand laminate like hardwood? You can’t.
Laminate has a thin decorative wear layer over fiberboard, so sanding will expose or destroy the print layer and ruin the plank.
Instead, address scratches with touch-up kits, colored markers, or replace individual boards.
For deep damage, swapping affected planks or installing new flooring is the proper solution.