How to Install Subfloor Over an Existing Floor Without Losing Ceiling Height
You can add a low-profile subfloor over your existing floor to stiffen, level, and prep for finish flooring while minimizing ceiling loss. Start by checking joist depth, spans, and thresholds, then pick thin overlay panels (1/4″–3/8″) or engineered underlayments and use construction adhesive plus countersunk screws to avoid extra height. Selective leveling treats low spots instead of full buildup. Seal seams, keep expansion gaps, and adjust trim—keep going to learn detailed steps, material choices, and pitfalls.
Can You Install a Subfloor Over an Existing Floor Without Losing Ceiling Height?
You can install a subfloor over an existing floor, but expect to lose about 3/4″ to 1-1/2″ of ceiling height depending on materials and underlayment.
It’s a good option when you need faster installation, better insulation, or to avoid tearing out a sound underlying structure.
Don’t do it if you’re already low on headroom, have multiple door thresholds to adjust, or need to meet strict finished-floor-to-ceiling clearances.
One-sentence summary of feasibility and typical height loss
Although it’s usually possible to add a subfloor over an existing floor, doing so will typically eat up about 3/4″ to 1-1/2″ of ceiling height depending on materials and installation method.
You can still learn how to install subfloor over existing floor without major loss, but plan for that typical thickness and choose thinner underlayment, low-profile adhesives, or screeding techniques to minimize impact.
When it’s recommended and when it’s not
When ceiling height is tight, weigh the trade-offs: installing a subfloor over an existing floor can solve unevenness, add insulation, or allow new finishes, but it usually costs you 3/4″–1½” of headroom.
Opt in only when those benefits outweigh the loss. Choose it for minor leveling, sound control, or radiant heat.
Skip it if headroom, door clearances, or stairs will be compromised.
Basic Understanding What Is a Subfloor and Why Add One Over an Existing Floor?
A subfloor is the structural layer beneath your finish flooring that evens out joists, supports loads, and provides a stable base for tiles, hardwood, or carpet.
You might add a subfloor over existing flooring to repair damage, level an uneven surface, or increase insulation and soundproofing.
Typical subfloor panels range from about 3/8″ to 3/4″ thick, so you’ll want to take into account how that added height affects ceiling clearance in lower rooms.
Definition and purposes of a subfloor
Think of a subfloor as the sturdy platform that sits between your existing floor and the finish flooring; it levels, stiffens, and provides a solid base for installation.
You’ll also use it to distribute loads evenly, reduce squeaks, and create a uniform surface for adhesives or fasteners.
Proper subflooring improves durability, supports finishes, and minimizes movement that can damage flooring over time.
Common reasons homeowners install a subfloor over existing flooring
Now that you know what a subfloor does, you’ll see why homeowners often add one over existing flooring: to fix problems or prepare for a new finish.
You might level uneven or sagging areas, cover damaged or noisy boards, improve structural rigidity, add insulation or soundproofing, or create a stable substrate for tile, engineered wood, or laminate.
Each goal guides material choice.
Typical thicknesses and how they affect ceiling height
Because every layer adds height, even a thin subfloor can change door clearances and ceiling proportions, so you should know typical thicknesses before you commit. You’ll usually choose 1/2″ plywood, 3/4″ plywood, or 1″ engineered panels. Each raises finished floor and may reduce overhead by that amount. Check trim, doors, and fixtures before installing.
| Type | Thickness | Effect |
|---|---|---|
| Thin plywood | 1/2″ | Minor |
| Standard plywood | 3/4″ | Noticeable |
| Engineered | 1″ | Significant |
Initial Assessment What to Check Before Installing a Subfloor Over Existing Flooring
Before you start, check the structure: verify joist depth, span, and load capacity to make sure the floor can support a new subfloor.
Measure overall height and door thresholds, inspect the existing surface for flatness, moisture, adhesion, and material compatibility.
Also confirm local building codes and whether permits or inspections are required.
Structural evaluation: joist depth, span, and load capacity
Structural soundness matters: you’ll need to inspect joist depth, span, and load capacity to confirm the existing framing can support the added weight of a new subfloor and any changes in use.
Check joist sizes vs. span tables, note any notches or damage, and calculate cumulative load (dead plus live).
If margins are tight, consult an engineer or plan reinforcement before proceeding.
Height constraints: measuring clearances and door thresholds
Once you’ve confirmed the framing can handle the extra weight, check vertical clearances: adding a subfloor will raise the finished floor and can affect door swings, thresholds, baseboards, and built-in fixtures.
Measure from finished floor to door heads, cabinets, appliances, and HVAC returns.
Account for threshold plates and connection strips. Subtract added thickness to guarantee doors open, thresholds align, and clearances meet code.
Condition of existing floor: flatness, moisture, adhesion, materials
If you’re planning to lay a subfloor over existing flooring, start by evaluating the current surface for flatness, moisture, adhesion, and material type, because each factor determines preparation steps and whether overlaying is viable.
Check flatness with a long straightedge, test moisture with a meter, verify existing adhesive and finishes bond or are removed, and identify materials (plywood, concrete, vinyl) for compatible underlayment.
Local building codes and permit considerations
After you’ve assessed flatness, moisture, adhesion, and material type, check local building codes and permit requirements before installing a subfloor over the existing surface.
Contact your municipal building department to confirm allowable thickness, fire and egress rules, and load ratings.
Ask whether a permit or inspection’s required, and get paperwork before starting.
Noncompliance can force costly rework or fines, so document approvals.
Options to Minimize Ceiling Height Loss (Direct Comparison)
You’ll compare strategies that keep finished floor thickness to a minimum, like using 1/4″–3/8″ overlay panels or engineered high-strength underlayment.
Consider selective leveling or screeding only where needed instead of a full overlay, and weigh floating systems against glued/nailed assemblies for thickness and performance.
I’ll lay out the key pros and cons so you can pick the best balance of height, strength, and cost.
Overlaying with thin subfloor panels (e.g., 1/4″ to 3/8″)
Using thin overlay panels like 1/4″ to 3/8″ plywood or OSB lets you raise and reinforce your floor with minimal ceiling-height loss, so you can keep trim lines and door clearances intact.
You’ll fasten panels to the existing floor with adhesive and screws, stagger seams, and gap edges for expansion.
This method’s low profile suits laminate or vinyl finishes without ripping out the old subfloor.
Using engineered lumber or high-strength underlayment
If you need a stronger, thinner base than standard plywood, engineered lumber and high-strength underlayments give you that without eating into ceiling height.
You’ll choose engineered panels for consistent thickness, stiffness, and easy fastening; pick cementitious or polymer underlayments where compressive strength and thin application matter.
Both cut build-up, improve load distribution, and let you maintain headroom while meeting structural and finish requirements.
Selective leveling and screeding vs full overlay
When you want to minimize ceiling-height loss, selective leveling and screeding target only low spots while a full overlay raises the entire floor surface—each trades off material and labor for thickness and uniformity.
You’ll choose selective leveling to keep thickness minimal and preserve door clearances, using patch compounds where needed.
Pick full overlay when the subfloor is irregular and you need a consistent, stable base.
Floating subfloor systems vs glued/nailed subfloors
Although both approaches let you add a level surface without ripping up the old floor, floating subfloors and glued/nailed overlays work differently and affect finished height in distinct ways.
You’ll choose floating when you want a low-profile, tongue-and-groove panel that rests over underlayment without adhesives.
Glued/nailed systems bond directly to the existing floor, often adding thickness but giving stiffer, more permanent support for heavy finishes.
Comparative pros and cons
Because ceiling height is often the deciding factor, weigh floating and glued/nailed subfloors by how much they raise the finished floor and what you’re willing to trade for stiffness and permanence. You’ll prefer floating for minimal build-up and easier removal; choose glued/nailed for rigidity and longevity despite added thickness.
| Option | Key trade-off |
|---|---|
| Floating | Less height, less stiffness |
| Glued/nailed | More height, more permanence |
Step-by-Step Installation Guide
Before you start, clear the room by removing trim, appliances, and baseboards so you can work from a clean surface.
Inspect and repair the existing floor, then pick the right material (plywood, OSB, cement board, DriCore, or plywood underlayment) and plan your layout to minimize buildup and shifts.
Only add sleepers or shims where needed to level the surface before fastening the new subfloor.
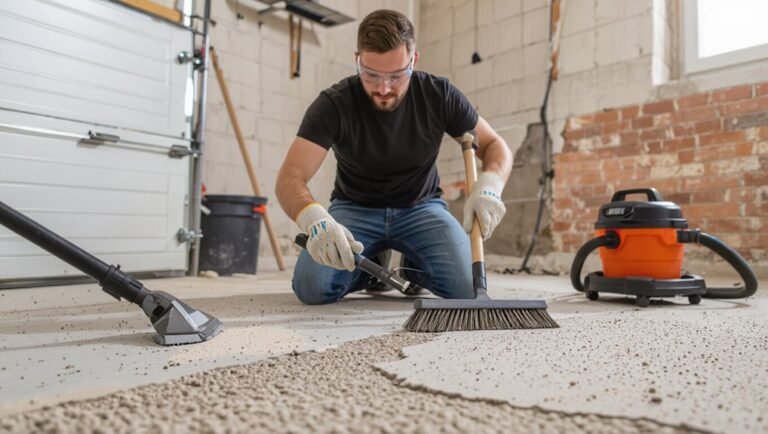
Step 1 Prepare the room: remove trim, appliances, and baseboards
Clear the room so you can work safely and accurately: remove furniture, appliances, and any loose items, then take off baseboards and trim that would interfere with the new subfloor.
Label and store removed pieces, protect doorways with rosin paper, and keep hardware in bags.
- Stack trim neatly and label.
- Unplug and move appliances.
- Bag screws and nails.
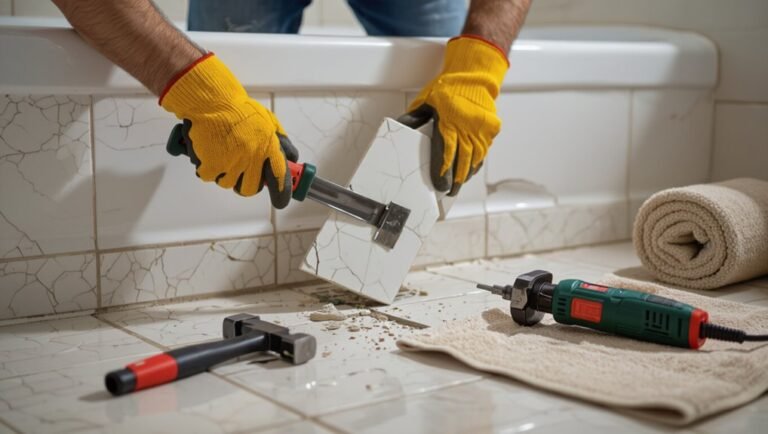
Step 2 Inspect and repair the existing floor surface
Once you’ve cleared the room, inspect the existing floor for damage, soft spots, warps, loose boards, and high or low areas.
These issues will affect how the new subfloor sits and performs. Pry up and refasten loose boards, replace rotten sections, fill gaps or low spots with leveling compound, and shim high areas.
Make certain the surface is clean, dry, and flat before proceeding.
Step 3 Choose materials (plywood, OSB, cement board, DriCore, plywood underlayment)
Now you’ll pick the right subfloor material for your room and finished floor—plywood and OSB are common structural choices.
Cement board works under tile, DriCore handles moisture-prone basements, and plywood underlayment creates a smooth surface for hardwood or vinyl.
Choose thickness to match joist spacing and load, prefer exterior-grade plywood for durability, stagger seams, and use appropriate fasteners and adhesive for a rigid, squeak-free installation.
Step 4 Layout plan to minimize buildup and transitions
Start by mapping the room and the existing floor height so you can plan seams, changes, and any necessary buildup to a minimum; this lets you place thicker sections where needed and avoid awkward thresholds at doorways.
Then, sketch panel runs to stagger joints, align seams with joists or supports, plan shifts at openings, and group heavier buildups away from visual sightlines for a cleaner, lower profile.
Step 5 Install sleepers or shims only where needed to level (if required)
After you’ve mapped seams and planned buildup locations, address uneven spots by installing sleepers or shims only where they’ll correct the floor to level. You’ll want to avoid adding a continuous layer that raises the entire subfloor height.
Check with a long level or straightedge, install sleepers across joists where low, pack tapered shims to fine-tune, and trim flush before laying the subfloor panels.
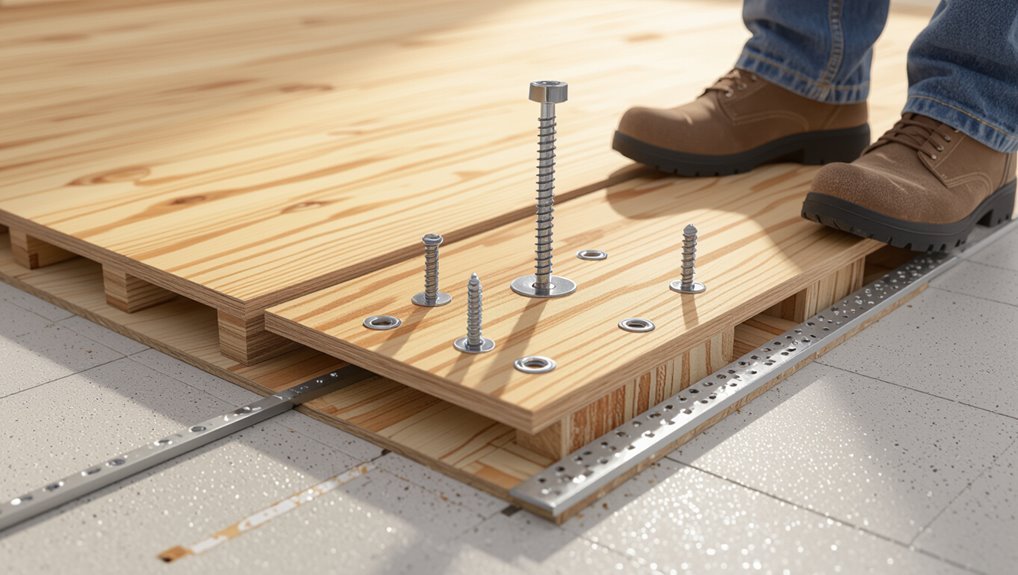
Step 6 Fastening methods to avoid extra thickness (counter-sunk screws, adhesive options)
Step 6 covers fastening techniques that keep your new subfloor flush and thin — use countersunk screws set just below the wood surface and low-profile adhesives to bond panels without adding bulk.
Space screws per manufacturer specs, stagger fasteners, and drive screws until heads sit slightly recessed.
Use construction adhesive sparingly in beads to eliminate squeaks and gaps, avoiding thick underlayment compounds that raise height.
Step 7 Sealing seams, taping, and moisture protection
With your panels fastened flush, you’ll want to focus on sealing seams, taping joints, and adding moisture protection to keep the subfloor stable and dry.
Run construction tape over seams, fill gaps with flexible polyurethane or acrylic caulk, and apply a thin breathable membrane or moisture barrier where needed.
Seal perimeter gaps and any fastener penetrations to prevent moisture migration.
Step 8 Transition solutions at doorways and between rooms
1 key area you can’t overlook is the shift between rooms and at doorways, where different floor heights, materials, or expansion needs meet; you’ll install the right trim, threshold, or reducer to create a smooth, safe, and attractive junction while allowing movement and moisture control.
Measure gaps, pick compatible profiles, fasten per manufacturer guidelines, and leave expansion clearance. Seal and test for trip hazards.
Step 9 Installing finished flooring over the new subfloor
Now that you’ve handled doorways and room junctions, you’re ready to lay the finished flooring over the new subfloor.
Inspect and clean the surface, allow any adhesives or leveling compounds to cure, then acclimate your flooring per manufacturer instructions.
Start along the longest straight wall, stagger end joints, maintain expansion gaps, and secure or float the flooring as recommended for the material.
Finish with trim.
Tools and materials checklist
Gathering the right tools and materials before you start will save time and prevent costly trips mid-project.
You’ll need quality plywood or OSB sheets sized to fit, construction adhesive, screws, and a circular saw. Have safety gear, a tape measure, chalk line, and a drill ready.
Prepare a layout and fastener plan before cutting.
- Cutting and fastening tools
- Adhesives and fasteners
- Safety and layout gear
Estimated time and cost considerations
Plan on the installation taking longer than you might expect: a typical 12×12 room with existing flooring usually requires 4–8 hours for a single person and 2–4 hours with two.
Larger or irregular rooms, extensive subfloor prep, or joist repairs can push the job into multiple days.
Estimate materials at $2–$6/sq ft for plywood and fasteners; labor adds $30–$60/hr if hired.
Technical Tips to Preserve Ceiling Height
To keep ceiling height while installing a subfloor, you’ll pick the thinnest materials that still meet structural needs and use self-leveling compounds only where necessary instead of pouring full layers.
You can strengthen joists from below as an alternative to raising the finished floor and use optimized fastening patterns to minimize overlap and build-up.
These tactics let you lower added thickness without sacrificing stability or performance.
Choosing minimal-thickness but structurally adequate materials
When you need to add rigidity without shaving ceiling height, pick the thinnest subfloor materials that still meet span and load requirements—typically 3/8″ to 1/2″ plywood or 3/8″ tongue-and-groove underlayment over a rigid substrate—and verify species, grade, and fastening patterns so you don’t sacrifice structural integrity for clearance.
Measure joist spans, consult span tables, stagger seams, and use adhesive plus screws for firm bonding.
Using self-leveling compounds selectively instead of full-thickness layers
If you’ve chosen thin subfloor panels to save headroom, you can still get a flat, stable surface by using self-leveling compound only where low spots or localized deflections occur instead of pouring a full-thickness layer across the whole floor.
Patch small depressions, feather edges to meet panel height, and use primer per manufacturer instructions.
Spot application saves height and material while delivering a level finish for your flooring.
Reinforcing joists from below as an alternative to raising the floor
Consider sistering new lumber or steel plates to the underside of existing joists to strengthen a floor without eating into ceiling height.
You’ll fasten continuous members along weakened spans, using structural screws and construction adhesive, and pack bearing points.
Check for level, clearances, and utilities before work.
Steel plates require corrosion protection and expert fastening; heavier options may need temporary support and professional review.
Optimizing fastening techniques to reduce required overlap
Because overlap eats into ceiling clearance, tightening your fastening strategy lets you keep sistered members slimmer and shorter without sacrificing strength.
Use staggered, countersunk screws with structural adhesive to eliminate long laps. Choose screw length to penetrate both members and joist by at least 1½”, and space fasteners closer near ends and load points.
Pre-drill to prevent splitting and guarantee consistent clamping.
Common Mistakes and How to Avoid Them
Don’t assume you can add any thickness without checking thresholds and clearances for doors and trim.
Check for moisture and voids under the existing floor and fasten the new subfloor correctly to prevent squeaks and movement.
Also account for HVAC registers, doors, and trim so you won’t need last‑minute adjustments.
Mistake: Adding too much thickness without measuring thresholds
If you add too much thickness to a new subfloor without measuring doorways and thresholds first, you’ll create alignment problems that can stop doors from closing or make changes trip hazards.
Measure clearances at all doors and passages, factor in flooring and underlayment heights, and trim or plane doors as needed.
Use reducers or threshold kits where needed to guarantee safe, smooth passages.
Mistake: Ignoring moisture and voids under the existing floor
When you skip checking for moisture and hidden voids beneath the existing floor, you’re inviting rot, mold, and squeaky, unstable new subflooring.
Inspect thoroughly: lift access panels, probe suspect areas, and use a moisture meter.
Dry or remediate damp spots, fill or pack voids with appropriate material, and guarantee a level, dry base before installing subfloor to protect structure and finish.
Mistake: Improper fastening leading to squeaks or movement
Skip proper fastening and your new subfloor will scream every step: loose screws, wrong fasteners, or missed joists let panels shift and rub, creating squeaks and structural movement.
You should use correct-length screws or ring-shank nails, fasten into every joist at proper spacing, stagger seams, and countersink fasteners.
Pre-drill near edges and re-check tightness after acclimation to prevent future noise and movement.
Mistake: Overlooking HVAC, doors, and trim adjustments
Because adding a subfloor changes floor height, you’ll need to check HVAC registers, door clearances, and trim before you install—otherwise vents can get blocked, doors may stick or not close, and baseboards can look awkwardly high.
Measure register collars and raise or extend them, trim or plane doors, and prepare to adjust or reinstall baseboards and thresholds so everything fits and functions.
When to Consider Alternatives to Overlaying (Problem-Solution)
If overlaying raises your finished floor too much, you’ll want to weigh other solutions like removing the old floor to install a low-profile subfloor, reinforcing the joists/ceiling below to allow lowering the floor, or switching to thinner finish materials such as engineered hardwood or LVP.
Consider a simple decision checklist: target finished height, structural limits, budget, and disruption to occupants.
That’ll help you pick the approach that solves the clearance problem with the least trade-offs.
Option: Remove existing floor and reinstall a low-profile subfloor
When your existing floor is badly damaged, uneven beyond reasonable repair, or already adds too much height for an overlay, removing it and installing a low-profile subfloor can be the smarter fix; you’ll get a flatter, more stable base without raising finished floor height considerably.
You’ll strip down to joists, install thin tongue-and-groove or plywood panels with screws and adhesive, improving alignment and long-term performance.
Option: Reinforce ceiling/joists from below to allow lowering floor
Removing the existing floor to fit a low-profile subfloor works in many cases, but sometimes the real problem is below the joists — sagging, undersized, or damaged framing that forces you to keep the finished floor higher.
If joists are compromised, reinforce from below: sister new lumber, add blocking, plate and beam repairs, or install a suspended beam. That lets you lower the floor safely.
Option: Use thinner finish materials (engineered hardwood, LVP)
Because lowering the floor isn’t always practical, choose thinner finish materials like engineered hardwood or luxury vinyl plank (LVP) to keep the overall thickness down while still getting a durable, attractive surface.
You’ll preserve ceiling height, simplify connections to adjacent rooms, and reduce door trimming.
Pick stable, thin-stock options and proper underlayment to prevent squeaks and moisture issues without adding bulk.
Decision checklist to choose the best approach
If you’re weighing overlaying your existing floor versus an alternative, run through a quick checklist that flags deal-breakers—floor height limits, door clearances, structural concerns, moisture risk, and subfloor condition—and use those answers to steer you toward repair, replacement, or a thinner finish instead.
- Measure clearance and ceiling impact.
- Inspect joists, squeaks, and rot.
- Test moisture and plan vapor control.
Best Practices and Maintenance After Installation
After the subfloor is down, check the whole surface for gaps, loose spots, and any squeaks so you can fasten or shim them right away.
Keep moisture in check with proper ventilation, a vapor barrier where needed, and prompt spills cleanup to prevent warping or mold.
Schedule periodic inspections and tighten fasteners, monitor humidity, and address problems early to extend the floor’s life.
Post-installation inspection and addressing squeaks
Once the subfloor’s fasteners are set and the adhesive has cured, do a thorough inspection to catch any gaps, loose boards, or squeaks before you finish the surface.
Walk the room, mark squeak locations, and test edges.
Tighten or add screws into joists through the subfloor, inject construction adhesive where needed, and shim gaps.
Recheck; repeat until the floor is solid and quiet.
Moisture control and ventilation recommendations
Having resolved squeaks and secured the subfloor, you’ll want to control moisture and keep airflow steady to protect the new assembly and any finished flooring you install.
Install a vapor barrier where recommended, seal perimeter gaps, and guarantee crawlspace or attic vents are unobstructed.
Use dehumidifiers in damp climates and monitor humidity; maintain steady ventilation to prevent mold and warping.
Periodic checks and long-term maintenance tips
Because regular checks catch small problems before they become costly, set a simple inspection routine for your new subfloor and finished flooring: look for gaps, soft spots, loose fasteners, or signs of moisture every 6–12 months, and check high-risk areas (near exterior doors, plumbing, and vents) more often.
Tighten fasteners, replace damaged panels, maintain HVAC humidity, and address leaks promptly to prevent rot and squeaks.
Visual Aids and Measurement Guides
You’ll want clear diagrams that show how different overlay thicknesses affect ceiling height so you can plan door clearances and trim.
Include simple illustrations of fastening methods and connection details to make installation steps unambiguous.
Keep measurements and labels precise so you can avoid costly mistakes.
Diagrams showing overlay thickness impacts on ceiling height
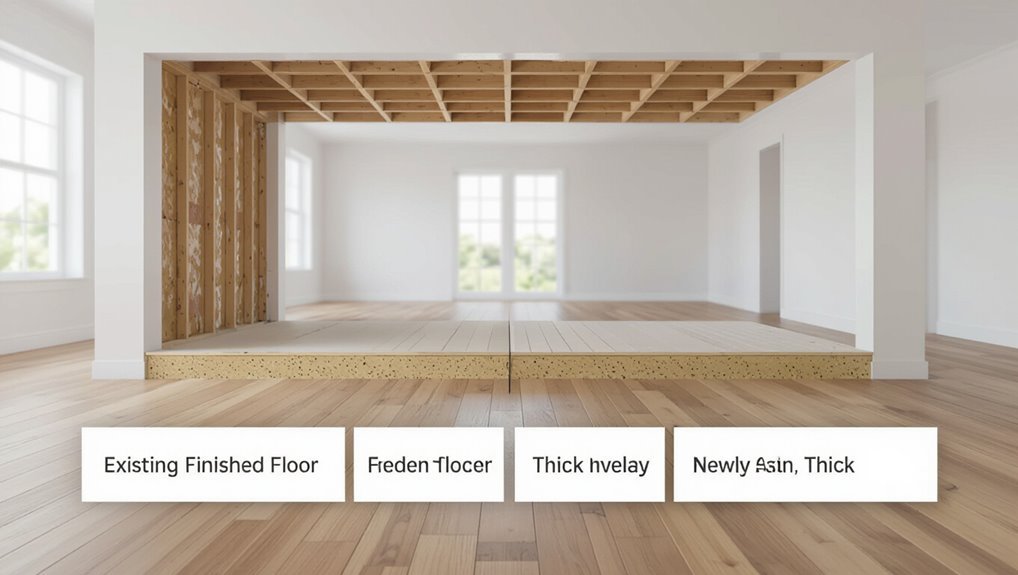
A clear diagram lets you quickly see how different overlay thicknesses change the finished ceiling height and room proportions, so you can pick materials that keep clearances and door swings acceptable.
Use scale drawings showing existing floor, added layers (plywood, underlayment, adhesive), and resulting soffit drop. Label measurements, thresholds, and minimum headroom.
Compare common thicknesses to help you choose confidently.
Illustrations of fastening methods and transition details
When you’re ready to fasten the new subfloor and tie in thresholds or connections, clear illustrations make the methods and spacing unambiguous.
Show nail or screw types, pattern and spacing, and how fasteners sit relative to seams and joists.
Include zoomed junction details for doorways, appliance openings, and stair edges, plus a keyed legend for fastener lengths, countersink depth, and spacing intervals.
Frequently Asked Questions
You probably have quick questions about warranties, code compliance, and how much floor-to-ceiling height a new subfloor will eat up.
You’ll also want to know whether radiant heat fits without big height loss, if overlays can go over tile or concrete, and when to call a structural engineer or pro.
Below are clear answers to those common concerns.
Will adding a subfloor over existing flooring void my warranty or code compliance?
Wondering if tacking a new subfloor over your existing floor will knock out warranties or violate building codes?
It can, depending on material warranties and local codes. Check manufacturer terms—many require specific substrates or installation methods.
Contact your local building department and get inspections or permits if required.
When in doubt, document choices and ask professionals to avoid voiding warranties or failing compliance.
How much height will I typically lose with a subfloor overlay?
How much height you’ll lose depends mostly on the materials and how they’re fastened: typical overlays add 3/8″ to 1‑1/4″ for common options (plywood or OSB underlayment plus adhesive or screws), while thicker solutions like 3/4″ plywood or sleepers with new subflooring can take 1″–1‑1/2″ or more.
Expect door trimming, threshold adjustments, and potential trim work with any increase.
Can I install radiant floor heating without major height loss?
If losing a half‑inch to an inch for a subfloor overlay feels like too much, you can still add radiant heat with low‑profile systems that keep total build‑up minimal.
Use electric mats or thin hydronic tubing designed for retrofit floors, install directly over the existing surface or the new thin subfloor, and insulate beneath.
Check floor covering compatibility and local code for clearances and load.
Is it acceptable to lay subfloor over tile or concrete?
Though you can lay a new subfloor over existing tile or concrete, you’ll need to prep the surface properly to guarantee a sound, long‑lasting installation.
Remove loose tile, clean thoroughly, and level high or low spots.
On concrete, install a moisture barrier and use adhesives or mechanical fasteners suited to masonry.
On tile, consider thin backer board or use self-leveling compound for a flat, bonded surface.
When should I hire a structural engineer or pro contractor?
When should you call in a structural engineer or a pro contractor?
Call them if joists are damaged, sagging, or spaced unusually, if you plan to add heavy loads (tiled floors, built‑ins), or if walls might be altered.
Also hire help when subfloor height affects doors, stairs, or permits are required.
A pro guarantees safety, code compliance, and long‑term performance.