How to Install Backsplash Tile Sheets: Clean Lines, Minimal Mess
You can install backsplash tile sheets yourself quickly and with minimal mess by prepping a flat, clean wall, snapping level reference lines, and starting from a centered point. Measure and dry-fit sheets, score-and-snap for cuts, trim mesh backing, and use the recommended adhesive or peel-and-stick backing. Press firmly, wipe excess grout, seal edges, and touch up caulk for a finished look. Follow these steps and you’ll get clean, uniform lines—keep going to learn tips and timing.
Can You Install Backsplash Tile Sheets for Clean Lines and Minimal Mess?
You can get clean lines and minimal mess with tile sheets, especially for straight runs, backsplashes behind stoves, and rental-friendly updates.
Expect a quick install—often a few hours to a day—low material cost, and a beginner-friendly skill level if you follow the instructions.
If you have complex cuts or uneven walls you’ll need more time, basic tools, and some patience to keep results neat.
Short summary of results and ideal use cases
Though they won’t replace every custom job, backsplash tile sheets give you fast, clean results with minimal mess and precise grout lines.
You’ll learn how to install backsplash tile sheets for straightforward coverage, uniform alignment, and easy cuts around outlets. They’re ideal for rental updates, DIY kitchen refreshes, and backsplashes with simple layouts where consistent pattern and quick installation matter most.
Time, cost, and skill level estimate
If you’ve got basic DIY skills and a few hours free, installing backsplash tile sheets is a realistic weekend project that delivers clean lines with minimal mess.
You’ll spend a few hours to a day, $30–$200 depending on materials, and only basic tools. You’ll need patience more than expertise.
- measuring tape and pencil
- level across tiles
- adhesive spreader close-up
- peeled backing sheet
- clean grout lines
What Are Backsplash Tile Sheets and Why Choose Them?
Backsplash tile sheets are pre-mounted tiles—often mesh-backed, peel-and-stick, or vinyl—that let you cover walls faster than setting individual pieces.
You’ll like them for speed, consistent spacing, less grout work, and easy DIY installation.
They’re not ideal for uneven surfaces, high-heat areas, or when you need custom layouts, so consider limitations before you start.
Definition and common materials (mesh-backed, peel-and-stick, vinyl)
Tile sheets are pre-assembled panels of small tiles bonded to a backing that make covering walls faster and easier than setting individual tiles.
You’ll find mesh-backed sheets for grout-ready installs, peel-and-stick for quick adhesion, and flexible vinyl for low-cost, temporary updates.
Choose by surface, durability, and finish.
- glossy ceramic mosaic
- natural stone squares
- metallic accent strips
- weathered subway tiles
- textured vinyl panels
Benefits: speed, consistency, reduced grout work, DIY-friendly
Having looked at mesh-backed, peel-and-stick, and vinyl options, you’ll see why many homeowners pick tile sheets: they let you finish a backsplash far faster than laying individual tiles.
You’ll get uniform spacing and pattern alignment, cut down grout lines or skip grout entirely, and enjoy predictable results. Installation’s simpler, so you can tackle it yourself with basic tools and confidence.
Limitations and situations to avoid
While tile sheets speed up installation and simplify layout, they’re not ideal for every job—so you should know their limits before committing.
Avoid uneven or heavily textured walls, tight corners, curved surfaces, and areas needing custom cuts or frequent access behind tiles.
Don’t use sheets where grout lines must match existing tile or where pattern alignment is critical; choose individual tiles instead.
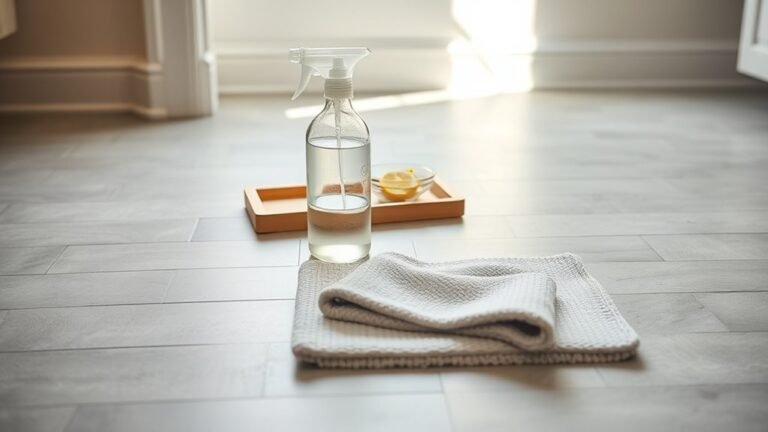
Tools, Materials, and Preparation Checklist
Before you start, gather your essential tools and any optional upgrades—trowel, notched float, level, tile sheets, and a wet saw or snips if needed.
Choose the right tile sheet type and adhesive for your wall (peel-and-stick, mesh-mounted, or groutable) and have surface prep supplies on hand.
Don’t forget safety gear—gloves, eye protection, and cleaners to guarantee a clean, stable substrate.
Essential tools and optional upgrades
You’ll need a concise kit of reliable tools and a few optional upgrades to make installing backsplash tile sheets faster and cleaner. The essentials cover measuring, cutting, adhesive application, and finishing, while optional items like a wet saw or laser level can improve speed and precision.
You’ll grab basics, add upgrades if you want cleaner cuts and faster alignment.
- Tape measure and pencil
- Notched trowel
- Utility knife and scoring tool
- Rubber float and grout sponge
- Wet saw or laser level
Tile sheet types and adhesive options
Tile sheet choices and the right adhesive set the project’s success, so pick materials that match your surface and skill level. Choose mesh-backed ceramic for beginners, glass for a sleek look, or metal for durability. Match adhesive to substrate: premixed for painted drywall, thinset for cement board, or mastic for non-wet areas.
| Tile Type | Look | Best Adhesive |
|---|---|---|
| Ceramic | Classic | Premixed |
| Glass | Sleek | White thinset |
| Metal | Industrial | Modified thinset |
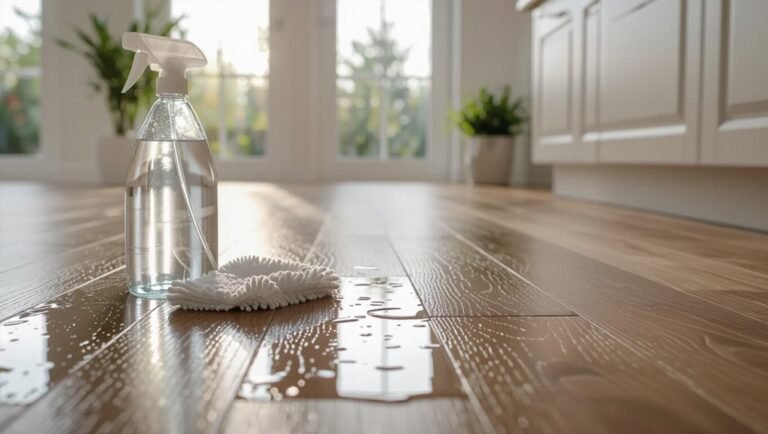
Surface prep supplies and safety gear
When you’re prepping for backsplash installation, gather the right tools, materials, and safety gear so the job runs smoothly and safely.
You’ll want durable supplies and protective equipment to prep surfaces, remove old grout, and guarantee a level, clean substrate before applying tile sheets.
- Rubber gloves and safety goggles
- Dust mask or respirator
- Sandpaper and sanding block
- Putty knife and scraper
- Cleaning rags and degreaser
How to Plan Your Backsplash Layout (Quick Design & Measurement)
Start by measuring the wall area and marking the locations of outlets and fixtures so you know how many sheets and cuts you’ll need.
Lay out full sheets on the floor or tape them to the wall to test for clean lines and minimize seams before you glue anything.
Pick a grout color, edge trim, and junction details now so your final look is cohesive and any visible joints are intentional.
Measuring wall area and accounting for outlets/fixtures
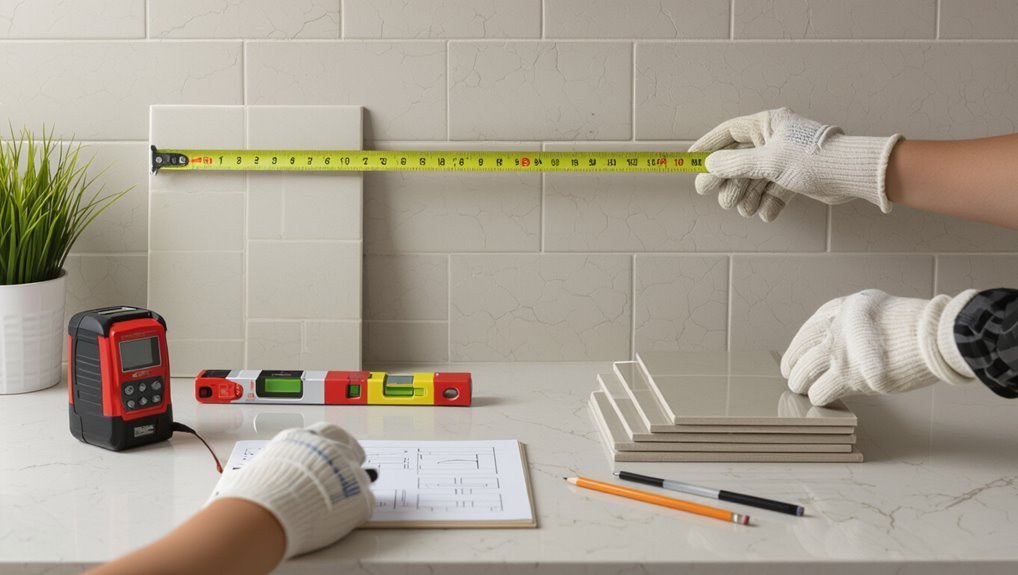
Measure the total wall area you plan to cover and subtract openings for outlets, switches, windows, and fixtures so you know how many tile sheets and cuts you’ll need.
Then map each opening’s dimensions on your layout, mark centerlines, and note cover plates or recessed boxes.
Add 5–10% extra for waste and awkward cuts, and list precise cut sizes before ordering.
Laying out sheets for clean lines and minimal seams
With your cuts and openings listed, plan sheet placement to keep seams in inconspicuous areas and align pattern lines across joints.
Dry-fit full sheets, trim edge pieces for symmetry, and stagger seams where unavoidable.
Mark reference lines and note each sheet’s orientation so pattern matches.
- full sheet centered under window
- partial sheet at cabinet edge
- seam tucked behind faucet
- staggered vertical joint
- trimmed corner piece
Choosing grout color, edge trim, and transition details
When you pick grout, edge trim, and junction details, think about how each choice affects the look and maintenance of the finished backsplash: grout color can unify or contrast tile, trim defines the perimeter and protects edges, and junctions bridge between backsplash and countertop or adjoining walls.
Choose stain-resistant grout, coordinate trim finish with fixtures, and use flexible caulk at connections for a clean, durable result.
Step-by-Step Installation Process
Start by preparing and cleaning the wall, then mark a level starting line so your first sheet sits straight.
Cut and dry-fit the sheets with the right tools, then apply adhesive or remove the backing and press each sheet into place.
Finish by checking seams and alignment as you go to keep tight, clean lines.
Step 1 Prepare and clean the wall surface
1. You’ll clear, clean, and smooth the wall so tiles stick and look professional. Remove outlets, scrape loose paint, and wipe grease.
Sanding glossy spots, patching holes with spackle, and guaranteeing a flat, dry surface before adhesive is crucial.
- peeling paint curling away
- greasy splatter near the stove
- drilled holes filled and sanded
- chalky residue wiped clean
- matte, even drywall ready
Step 2 Mark level lines and starting point
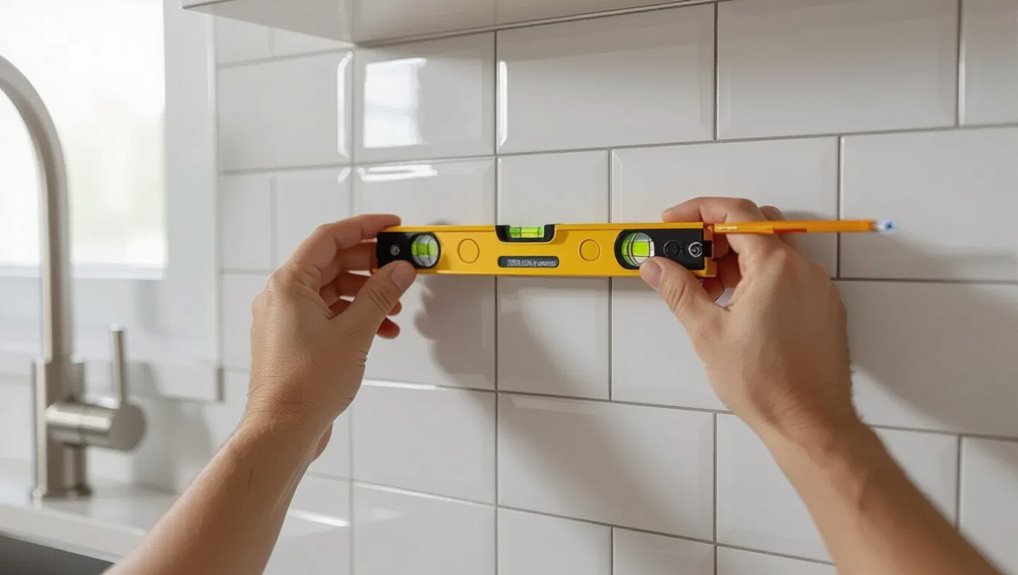
Before you put any sheets up, snap a level reference line so every row sits straight and your pattern stays aligned; next, locate a starting point—usually centered over a focal area or at a cabinet edge—and mark plumb vertical lines for alignment.
Measure from corners to avoid awkward slivers, note outlet centers, and pencil-lightly mark tiles’ edges to guide consistent placement.
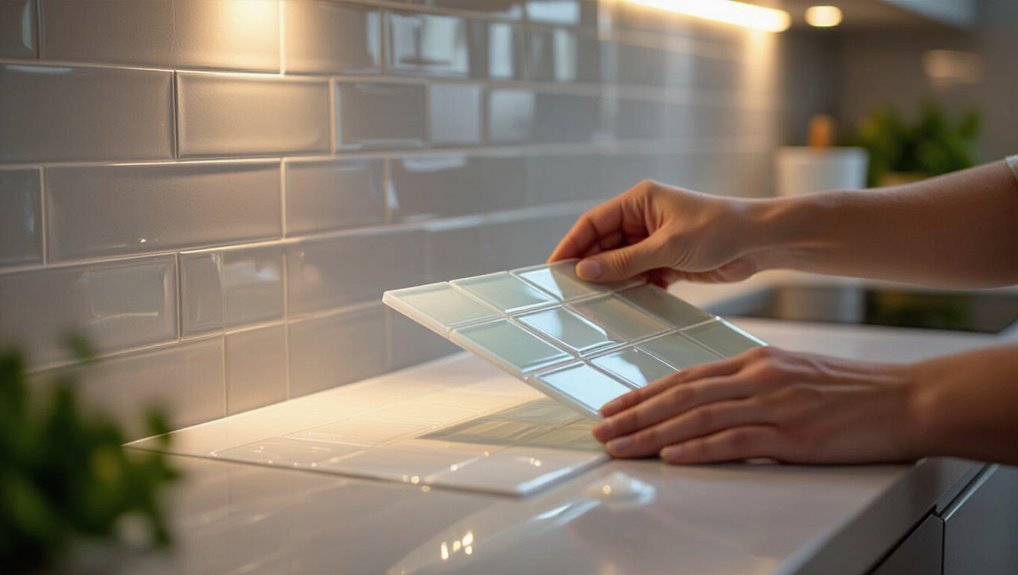
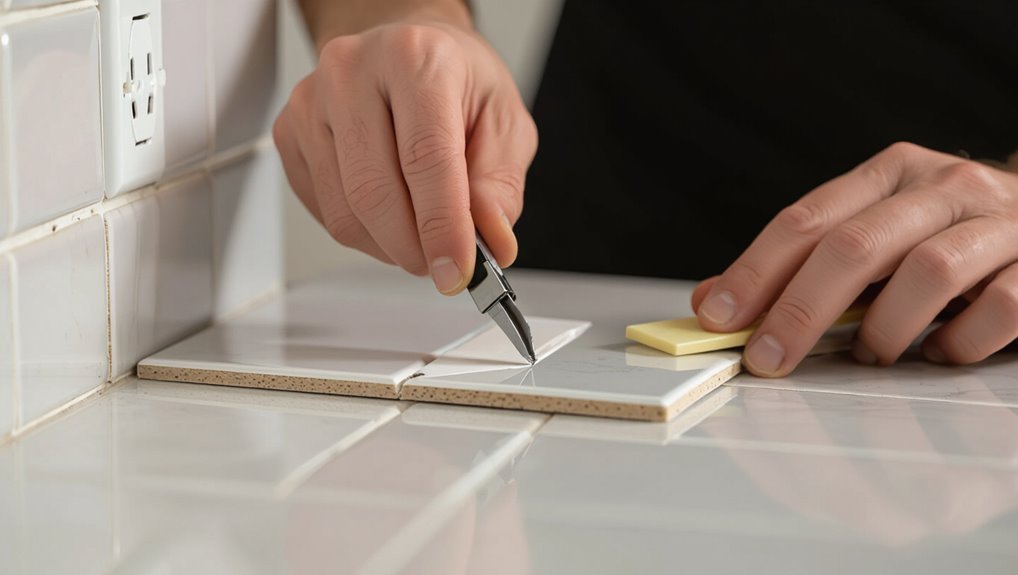
Step 3 Cut and dry-fit tile sheets (tools and techniques)
Now you’ll cut and dry-fit the backsplash sheets so they sit cleanly around outlets, corners, and edges; gather a score-and-snap cutter, utility knife, straightedge, tile nippers, and a wet saw for tougher cuts.
Then lay each sheet in place without adhesive to check alignment, seam spacing, and fit against your level and plumb lines.
- snap clean straight cuts
- trim mesh backing
- notch for outlets
- shave corners tight
- test corner miters
Step 4 Apply adhesive or remove backing and position sheets
Apply the adhesive or peel the sheet backing and set each tile sheet in place, working from the center outward so you keep seams straight and avoid trapped air.
Press firmly, smoothing with a plastic float or firm cloth. Trim any excess adhesive immediately.
Check pattern orientation as you go, and support edges near countertops until adhesive tack develops to prevent slipping.
Step 5 Ensure tight seams and alignment for clean lines
While the adhesive is still tacky, press sheets together and snug their edges so seams meet without gaps or stair-stepping; use a straightedge to check alignment across rows and a rubber tile spacer or shim to keep spacing consistent while you adjust.
You’ll tap lightly, re-seat misaligned tiles, and wipe squeezed adhesive before it skins.
- Fingers smoothing seams
- Straightedge gliding across tiles
- Rubber spacer between edges
- Light mallet taps
- Damp cloth catching squeeze-out
Step 6 Grouting (if applicable) and sealing edges
Mix the grout to a creamy, lump-free consistency and work it into the seams with a rubber float, pressing diagonally across the tiles so the joints fill completely; wipe excess grout from the tile faces with a damp sponge before it dries, then let the grout cure per the manufacturer’s directions.
Then seal edges where tile meets countertop or outlets to prevent moisture.
- Smooth grout lines
- Damp sponge strokes
- Clean tile faces
- Neat sealed edge
- Cured, durable finish
Step 7 Finishing touches: trim, caulk, and cleanup
Finish strong by adding trim, caulking seams, and cleaning up so your backsplash looks polished and stays watertight; press trim firmly, tool caulk smooth, and wipe haze before it cures.
Inspect joints, touch tiny gaps, and remove debris. Maintain straight lines and even pressure for a professional finish.
- crisp metal trim along edges
- smooth bead of white caulk
- wiped grout haze
- clean work surface
- polished tile face
Common Problems and How to Fix Them
You’ll run into a few common issues—misaligned sheets, visible seams, or cuts that don’t fit around outlets and corners—and I’ll show how to correct them.
If tiles lift or bubble it’s usually an adhesion problem you can fix by re-cleaning the substrate and reapplying adhesive or using a stronger contact cement.
For grout stains or uneven joints, I’ll cover cleaning, regrouting, and sealing techniques to get a consistent finish.
Misalignment and visible seams fixes
When sheets don’t line up or seams show, it’s usually due to shifting during installation or uneven substrate edges. You can fix most issues without ripping everything out.
Reposition loose sheets by carefully cutting and lifting edges, shim low spots with thinset, and realign seams with a straightedge.
Fill gaps with matching caulk or grout, trim excess, and press firmly to reseat sheets for a seamless look.
Adhesion failures and bubbling causes and remedies
If tiles start to lift or bubble, it’s usually because the adhesive bond failed—often from inadequate surface prep, excess moisture, trapped air, or using the wrong adhesive for your substrate.
You can usually fix it without gutting the whole backsplash. Peel lifted sections, clean and dry substrate, remove old adhesive, apply appropriate thinset or mastic, press sheets with a roller, and seal edges.
Cutting errors around outlets and corners fixes
Because outlets and outside corners are tight spots, cutting tile sheets to fit takes patience and the right technique.
Measure twice, mark precisely, and score multiple light passes before snapping. For outlets, cut larger then trim for a snug fit; use a rotary tool for curves.
For outside corners, back-cut and miter edges or use trim pieces. Test-fit before adhesive.
Grout staining or inconsistent joints solutions
Although grout problems can seem minor, stained grout and uneven joints quickly make a new backsplash look unfinished. You’ll want to address them before sealing.
Use a grout saw to remove discolored or bulging grout, clean with a grout cleaner, then regrout with matching color.
Tool joints evenly with a damp finger or grout float, wipe residue promptly, and let cure fully.
Best Practices for Minimal Mess and Professional Results
Plan your work sequence to limit cleanup and keep dust off counters by working top-to-bottom and using drop cloths and a HEPA vacuum.
Protect surfaces and control dust with plastic sheeting, painter’s tape, and a quick brush-on cleaner for grout haze, and use drywall saws or hole cutters for neat cuts around sockets, windows, and corners.
Finish with simple maintenance—regular wiping and resealing grout where needed—to keep lines crisp and professional.
Work sequencing to limit cleanup
When you sequence your work logically—dry-fitting sheets, cutting and labeling pieces, then applying adhesive and setting tiles—you’ll cut cleanup time and prevent mistakes that create extra mess.
Plan tasks so messy steps come last, batch similar cuts, and clear debris between stages. Fastidious staging saves time and keeps surfaces pristine.
- folded drop cloths
- labeled tile stacks
- a single grout bucket
- staged cutting board
- swept work path
Dust control and protecting counters
If you want clean counters and minimal dust while installing backsplash tile sheets, start by sealing off the work area and covering surfaces with protective layers—zip the cabinets with plastic sheeting, lay folded drop cloths over appliances, and tape heavy-duty cardboard where knives or grout might nick edges.
- Vacuum with a HEPA shop vac as you go
- Use a damp sponge to catch dust
- Run a quiet air scrubber
- Keep a small trash bin nearby
- Wipe countertops after each session
Tips for working around sockets, windows, and corners
With counters protected and dust under control, focus next on clean, accurate work around sockets, windows, and corners to keep the installation looking professional.
Turn power off, remove covers, and mark precise cutouts on the tile sheet. Score and snap or use a rotary tool for outlets.
For windows and corners, dry-fit, trim edges, and use minimal caulk or grout for neat changes and flexible joints.
Maintenance tips to keep lines crisp
Because clean lines start at the edges, keep a steady hand and sharp tools to prevent smeared grout or ragged cuts.
Clean grout joints promptly with a damp sponge, change water often, and wipe edges before drying.
Seal grout to resist stains, inspect caulk lines yearly, and touch up chips immediately.
Store spare tiles and trim for future repairs to match finishes.
Comparison: Tile Sheets vs Traditional Tile Installation
You’ll compare tile sheets and traditional tile on time, cost, durability, and looks to see which fits your project.
Tile sheets usually install faster and cheaper but may trade off some long-term durability and custom aesthetics.
Choose sheets for quick updates or tight budgets, and go full tile when longevity and custom layouts matter.
Time, cost, durability, and aesthetics comparison
Although both options give you a finished backsplash, tile sheets usually save time and money while standard tile offers greater durability and customization; weighing these trade-offs helps you choose the right approach for your schedule, budget, and long-term needs. You’ll finish faster with sheets, spend less upfront, but expect longer life and repair options from full tile.
| Factor | Tile Sheets | Traditional Tile |
|---|---|---|
| Time | Quick | Longer |
| Cost | Lower | Higher |
| Durability/Aesthetics | Moderate | High |
When to choose tile sheets vs full tile and why
When should you pick tile sheets over full tile?
You’ll choose sheets when speed, minimal grout lines, and easier DIY installation matter.
Go with full tile if you need complex patterns, higher heat or water resistance, or a more custom look—professionals handle cuts and grout.
Balance budget, skill, and durability: sheets save time and cost; full tile offers longevity and design flexibility.
Cost Breakdown and Time Estimates
You’ll compare materials versus labor costs for both DIY and hiring a pro so you can see where money’s actually going.
Expect shorter timelines for small kitchens and longer ones for full remodels, and I’ll give typical hour or day estimates for each size.
That way you can weigh whether to tackle the job yourself or budget for professional help.
Materials vs labor for DIY and pro installation
Because materials and labor make up very different parts of the total cost, it helps to separate what you’ll buy from what you’ll pay someone to do. You’ll save on labor by DIYing simple prep and cutting, but professionals speed installation and guarantee warranty. Compare costs:
| Item | Typical cost |
|---|---|
| Materials | $50–$300 |
| Labor | $100–$600 |
Typical project timelines by kitchen size
Materials and labor numbers give you the cost picture; now let’s look at how long projects typically take based on kitchen size.
You’ll plan time for prep, adhesive setting, and grout. Small jobs are quick; larger ones need more drying and touch-ups.
Typical timelines:
- Galley kitchen: 4–6 hours
- Small L-shape: 1 day
- Medium kitchen: 1–2 days
- Large kitchen: 2–3 days
- Full remodel: 3–5 days
Frequently Asked Questions
You’ll likely have specific questions as you plan your backsplash—like whether you can install over existing tile, how sheets hold up near stoves and sinks, and how to align grout lines between sheets.
You might also wonder about repainting or replacing sheets later and what warranties peel-and-stick options include. Below are clear answers to help you decide and avoid common mistakes.
Can I install tile sheets over existing tile?
Wondering if you can install tile sheets over existing tile? Yes—if the old tile is sound, clean, and level.
Scuff glazed surfaces, fill cracks and loose grout, and guarantee strong adhesion with a suitable primer or thinset.
Avoid applying over uneven, water-damaged, or delaminating tiles; in those cases remove the old tile first to secure a durable, flat substrate.
Are tile sheets heat- and water-resistant behind a stove or sink?
Curious whether tile sheets can handle the heat and splashes behind a stove or sink? Yes—most ceramic, porcelain, and glass tile sheets resist heat and water when properly installed on a suitable substrate with waterproofing and heat-resistant adhesive.
Keep grout sealed, avoid direct flame contact, and follow manufacturer limits for temperature and moisture.
For heavy steam or grease, choose nonporous tiles and durable sealants.
How do I match grout lines between sheets?
How do you get grout lines on tile sheets to line up so the finished backsplash looks seamless? Measure and dry-fit sheets, aligning patterns and cutting edges where needed.
Use a straight edge and spacer clips to maintain consistent gaps between sheets. Trim adhesive backing slightly to shift sheets.
Verify level across runs before pressing; small adjustments now prevent visible misalignment later.
Can I paint or replace a sheet later?
Can you paint or swap out a backsplash tile sheet later?
You can paint many peel-and-stick sheets with a bonding primer and appropriate paint, but test a scrap first.
Replacement is possible: heat adhesive gently and peel, clean residue, and apply a new sheet.
Expect occasional surface damage on delicate substrates and plan for careful removal to avoid wall repair.
What warranties or guarantees exist for peel-and-stick sheets?
Wondering what protection you get with peel-and-stick backsplash sheets? You’ll usually find limited warranties covering adhesive failure, colorfastness, and manufacturing defects for a set period.
Always register products and keep receipts.
- Warranty card folded on the counter
- Sticker label stating “limited lifetime”
- Receipt tucked in a drawer
- Discolored corner warning
- Adhesive failure photo for claim