
How to Clean Epoxy Floors: Keep That Glossy Finish Looking New
Keep your epoxy floor glossy by sweeping daily to remove grit, spot-cleaning spills immediately, and damp-mopping weekly with a pH‑neutral cleaner, then rinsing with clean water. Use soft tools—microfiber mops, soft-bristle brooms—and wear gloves and goggles for strong cleaners. Monthly machine scrubbing or annual deep cleaning helps restore sheen; buff or recoat worn areas every few years. Follow stain-specific steps for oil, rust or paint, and keep reading for detailed tips and troubleshooting.
How to Clean Epoxy Floors and What to Expect
You’ll get a quick, practical routine for everyday cleaning that keeps dirt and grime from building up.
I’ll also set realistic expectations for how long the gloss will last and how often you’ll need touch-ups.
Finally, you’ll learn the basic safety steps and the tools you should have on hand.
Quick Answer: Best Everyday Cleaning Routine
One simple routine keeps epoxy floors looking great: sweep or dust-mop daily to remove grit, damp-mop with a mild, pH-neutral cleaner weekly, and spot-clean spills right away to prevent stains or slipperiness.
For quick care, rinse with clean water, use a soft mop, and avoid harsh chemicals.
If you’re wondering how do you clean epoxy floors, follow this simple regimen.
Gloss Retention Expectations and Frequency
How long will your epoxy shine? Expect several years of gloss with proper care; heavy traffic, UV exposure, and chemicals speed dulling.
Wipe spills quickly, mop weekly, and use nonabrasive cleaners to preserve finish.
Recoat or professional buffing every 3–7 years restores gloss depending on wear.
Monitor high-use zones and spot-treat dull areas promptly to extend overall retention.
Safety and Equipment Overview
Because epoxy is durable but sensitive to abrasives, chemicals, and UV, you should approach cleaning with the right safety gear and tools to protect both the floor and yourself.
Use gentle cleaners, soft mops, and avoid harsh scrubbing.
Essential items include:
- Nitrile gloves and safety goggles
- Soft-bristle broom or microfiber mop
- pH-neutral cleaner
- Wet/dry vacuum or mop and bucket
Understanding Epoxy Floors: What They Are and Why Careful Cleaning Matters
You’re working with a resin-and-hardener surface that cures into a glossy, durable finish, and the exact materials and topcoat you have will change how it wears and how you should clean it.
Different epoxy systems—solid, water-based, or polyaspartic topcoats—respond differently to cleaners and abrasion, so knowing your type helps avoid damage.
Scratches, chemical spills, UV exposure, and dirt build-up are the usual causes of dullness, stains, and weakening of the finish.
What Is an Epoxy Floor? Materials and Finish
An epoxy floor is a multi-layer coating made from epoxy resin and a hardener that chemically bond to create a dense, glossy surface.
You’ll find pigments, fillers, and optional topcoats added for color, texture, UV protection, and abrasion resistance.
The cured finish is nonporous, easy to wipe, and resists chemicals and stains, but it can scratch or yellow without proper care.
Types of Epoxy Coatings and How They Affect Cleaning
While epoxy floors share the same basic chemistry, different formulations—solvent-based, water-based, 100% solids, and flake or quartz systems—change how you should clean and maintain them.
You’ll use milder detergents on decorative flakes, avoid abrasive scrubbing on thin water-based coats, and choose tougher cleaners for durable 100% solids.
Match cleaner pH and technique to the epoxy type.
Common Causes of Dullness, Stains, and Damage
Because epoxy’s hard finish looks tough, it’s easy to forget that everyday mistakes and environmental factors can quickly dull, stain, or damage it.
You’ll cause dullness with abrasive scrubbing, grit, and chemical spills. UV exposure yellows or fades some coatings. Oil, grease, and acidic cleaners leave stains or etchings.
Heavy impacts, dragging sharp objects, and improper maintenance accelerate wear and reduce gloss.
Tools, Cleaners, and Materials You Need
To keep epoxy floors looking great, you’ll want a few basic tools like a broom, dust mop, and microfiber pads for daily and weekly care.
Use pH-neutral cleaners, mild detergents, or manufacturer-recommended commercial solutions for regular cleaning, and reserve a floor scrubber, buffer, or wet vacuum for periodic deep cleaning.
Avoid harsh chemicals, abrasive pads, and solvents that can damage the epoxy finish.
Daily and Weekly Tools (broom, dust mop, microfiber)
Although epoxy is durable, you’ll keep it looking its best by using a few simple daily and weekly tools:
- Broom with soft bristles for loose dirt
- Microfiber dust mop to trap fine particles
- Damp microfiber mop for quick touch-ups
- Rubber squeegee to remove spills and prevent streaks
Use these regularly to prevent scratches and maintain that glossy finish.
Recommended Cleaners: pH-neutral, mild detergents, and commercial solutions
Along with the right tools, choosing the proper cleaners makes a big difference in preserving your epoxy floor’s shine and durability.
You’ll want gentle, effective options that won’t etch or dull the surface.
- pH-neutral floor cleaner for regular mopping
- Mild dish soap diluted for spot cleaning
- Enzyme-based degreaser for oil and grime
- Commercial epoxy-safe cleaners for tougher stains
Equipment for Deep Cleaning: floor scrubber, buffer, wet vacuum
Machines make deep cleaning epoxy floors faster and more consistent, and you’ll want the right ones: a floor scrubber for large areas, a buffer for polished finishes, and a wet vacuum to pick up slurry and water.
Choose machines sized to the job, use appropriate pads or brushes, keep cords tidy, and follow manufacturer maintenance.
Mobility and good suction cut downtime and improve results.
What to Avoid: harsh chemicals, abrasive pads, and solvents
When you’re cleaning epoxy floors, don’t reach for harsh acids, abrasive pads, or solvent-based cleaners—these will dull the finish, etch the surface, and can break down the resin binder over time.
Protect your floor by avoiding:
- muriatic or strong acid cleaners
- scouring pads or steel wool
- solvent degreasers (acetone, lacquer thinner)
- bleach at full strength; use diluted, mild alternatives
Step-by-Step Cleaning Routine
Start by prepping the area: clear the floor, sweep debris, and protect nearby surfaces.
For regular care you’ll dust-mop and spot-wipe daily, mop weekly with a pH-neutral cleaner using the right mix and technique, and run a machine scrub plus rinse each month.
Save deep stain removal—oil, grease, rust, and paint—for targeted procedures suited to each stain type.
Step 1 Prepare the Area: clear, sweep, and protect nearby surfaces
Clear the room and sweep the floor to remove loose dirt, dust, and debris before you do anything else; this prevents scratches and keeps your cleaning solution from getting dirty.
Next, protect nearby surfaces and items so they don’t get splashed.
Gather tools and barriers:
- dustpan and broom
- drop cloths or plastic sheeting
- painter’s tape for edges
- a small handheld vacuum
Step 2 Daily Cleaning: dust-mopping and spot wiping
Daily care keeps epoxy floors looking their best, so dust-mop high-traffic areas every day and spot-wipe spills as soon as you see them to prevent stains and grit buildup.
Use a microfiber dust mop to lift dust and debris without scratching. For spots, blot with a soft cloth and mild water rinse; avoid abrasive pads or harsh chemicals that can dull the finish.
Step 3 Weekly Cleaning: mopping with pH-neutral cleaner (mix ratios, technique)
After you’ve kept up with dust-mopping and spot wiping, plan a weekly wet-clean to remove grime that dry methods miss.
Mix a pH-neutral cleaner per label — usually 1–2 ounces per gallon. Use a microfiber mop, wring well to avoid pooling, and work in overlapping passes.
Rinse with clear water if residue forms, then let the floor air-dry.
Step 4 Monthly Maintenance: machine scrubbing and rinse procedures
When grime builds beyond what weekly mopping removes, schedule a monthly machine-scrub to deep-clean the epoxy: you’ll use a low-speed orbital or automatic scrubber with a soft-bristle pad, a pH-neutral detergent, and a clear-rinse cycle to lift embedded dirt without damaging the finish.
Work in overlapping passes, avoid excessive pressure, change dirty solution frequently, and finish with a thorough rinse and squeegee-dry.
Step 5 Deep Stain Removal: oil, grease, rust, paint (procedures per stain type)
Although epoxy resists most spills, stubborn stains like oil, grease, rust, and paint will need targeted treatments.
You’ll tackle each type with the right cleaner and method to avoid harming the finish. Use these steps:
- Oil/grease: apply citrus degreaser, agitate, rinse.
- Rust: use oxalic acid solution, neutralize, rinse.
- Paint: soften with appropriate stripper, scrape gently.
- Heavy buildup: repeat or consult pros.
Step 6 Restoring Gloss: polishing, buffing, and recoat guidelines
Start by evaluating the finish and deciding whether you need polishing, buffing, or a recoat; light scuffs and dulled areas usually respond to a polish or buff, while deep scratches or large worn sections often require a thin recoat of epoxy.
Choose technique, prepare surface, and work methodically:
- Polish with fine pads and a low-speed polisher
- Buff to blend minor haze
- Clean before recoating
- Apply thin, even epoxy coats
Step 7 Drying and Ventilation Best Practices
After polishing or recoating, let the floor dry fully and ventilate the space to speed curing and keep fumes from building up.
Open windows and doors, run fans or exhaust systems, and use dehumidifiers if humidity’s high.
Keep traffic off for the manufacturer’s recommended time, post signs, and monitor odor.
Proper airflow and patience guarantee a hard, glossy, long-lasting finish.
Specialized Scenarios and Surface Variations
Depending on where your epoxy floor lives—garage, commercial space, or basement—you’ll need different cleaning schedules and products to match traffic and contaminants.
For heavy traffic, industrial soiling, or chemical spills, you should use stronger detergents, targeted degreasers, and immediate spot treatment to prevent staining or damage.
If your epoxy is outdoors or UV‑exposed, factor in fading and choose UV‑stable cleaners and protective maintenance to preserve appearance.
Cleaning Epoxy in Garages vs. Commercial Spaces vs. Basements
Though epoxy flooring shares basic care principles, cleaning a garage, a busy commercial space, and a damp basement calls for different routines and products because traffic, contaminants, and moisture vary so much; you’ll tweak tools, cleaners, and frequency to match each environment.
In garages, focus on degreasers and scrubbing; commercial spaces need microfiber mops and scheduled maintenance; basements require mildew-safe cleaners and moisture control.
Dealing with Heavy Traffic, Industrial Soiling, and Chemical Spills
When routine mopping and spot-cleaning aren’t enough, you’ll need a tougher plan for heavy traffic, industrial grime, and chemical spills that can damage epoxy or create safety hazards.
Use heavy-duty degreasers, scrub with a rotary machine and nonabrasive pads, and rinse thoroughly.
Neutralize acids or bases per manufacturer guidelines, ventilate, and dry quickly.
Inspect for abrasion, reseal or recoat high-wear zones promptly.
Outdoor or UV-Exposed Epoxy: fading and cleaning considerations
If your epoxy sits outdoors or gets a lot of sun, UV exposure can dull the gloss and slowly yellow the resin.
So you’ll need cleaning and maintenance practices that protect both appearance and performance. You should rinse grit, use mild detergent, inspect for chalking, and apply UV-stable topcoats periodically.
- Rinse loose debris weekly
- Use pH-neutral cleaner
- Recoat with UV inhibitor
- Shade when possible
Mistakes to Avoid When Cleaning Epoxy Floors
Don’t make common DIY mistakes that scratch or dull your epoxy finish—abrasive pads, acidic cleaners, and ammonia can all strip or etch the surface.
You should also avoid over-wetting the floor, improper buffing techniques, and using cleaners at the wrong dilution.
I’ll explain why each of these errors causes damage and how to prevent them.
Common DIY Errors That Damage Finish
A few common DIY mistakes can dull or scratch your epoxy finish quickly, so knowing what to avoid will save time and money.
Don’t drag heavy furniture without protective pads, mop with overly wet cloths that leave residue, or use dirty tools that grind grit across the surface.
Test any new cleaner on an inconspicuous spot before full use.
Why Abrasives, Acidic Cleaners, and Ammonia Are Harmful
When you use abrasive pads, acidic cleaners, or ammonia on epoxy floors, you strip the protective layer and speed up wear, sometimes permanently dulling or etching the surface.
You’ll remove gloss, expose softer layers, and encourage staining or discoloration.
Stick to pH-neutral cleaners and soft microfiber tools to preserve shine and avoid costly repairs or early recoating.
Over-wetting, Improper Buffing, and Incorrect Product Dilution
If you over-wet epoxy floors, buff them improperly, or dilute cleaners wrong, you’ll create problems that simple mopping won’t fix.
You can lift edges, stain seams, or cause bubbling with excess water. Heavy-handed buffing wears the clear coat and creates swirls.
Follow manufacturer dilution ratios, use microfiber mops, low-speed buffers, and minimal moisture to protect finish and extend epoxy life.
Prevention, Care Strategies, and Best Practices
To keep your epoxy floor looking its best, follow a clear routine—daily sweeping, weekly damp-mopping, monthly deeper cleans, and an annual inspection.
Use mats at entrances, pads under furniture, and zone high-traffic areas to prevent wear, and plan topcoats or recoats based on gloss loss and traffic (typically every 3–7 years).
When cleaning, choose eco-friendly, low-VOC products to protect the finish and indoor air quality.
Routine Maintenance Schedule (daily, weekly, monthly, annual)
A simple, consistent schedule keeps epoxy floors looking their best and prevents costly repairs. You’ll sweep daily, mop weekly with pH-neutral cleaner, inspect monthly for chips or dull spots, and deep-clean or recoat annually as needed. Track tasks to stay proactive.
| Frequency | Task |
|---|---|
| Daily | Sweep |
| Weekly | Mop |
| Monthly | Inspect |
| Annual | Deep-clean/recoat |
Protective Measures: mats, furniture pads, and zoned cleaning
When you combine simple barriers like entrance mats and furniture pads with a zoned cleaning plan, you’ll prevent most wear and keep epoxy floors looking new longer.
Place heavy-traffic mats at entries, use soft pads under legs, and rotate rugs seasonally.
Divide your space into cleaning zones, tackle one area at a time, and address spills immediately to minimize abrasion and staining.
When to Apply a Topcoat or Recoat and How Often
If your epoxy floor starts showing dull spots, scratches, or areas where dirt clings despite regular cleaning, it’s time to contemplate a topcoat or recoat—typically every 3–7 years depending on traffic and exposure.
Lighter-use residential floors often wait toward the longer end, while garages and commercial spaces need attention sooner.
Inspect annually, spot-treat damage, and recoat sooner where finish wears; follow manufacturer cure times.
Eco-friendly and Low-VOC Cleaning Options
Because you’re keeping indoor air quality and surface longevity in mind, choose gentle, low-VOC cleaners and routine methods that remove dirt without breaking down the epoxy finish.
Use pH-neutral, biodegradable cleaners, diluted per label instructions, and microfiber mops to trap grit.
Spot-clean with vinegar-water (diluted) for stubborn marks, rinse thoroughly, and air-dry.
Avoid ammonia, bleach, and harsh solvents.
Cost, Time, and When to Hire a Professional
Deciding between DIY and professional cleaning comes down to cost, time, and how severe the damage is—DIY saves money but pros handle big repairs and stubborn stains.
Expect simple maintenance to take an hour or two for small rooms and professionals to charge anywhere from a few hundred to several thousand dollars depending on size and needed restoration.
If you see deep scratches, peeling, discoloration, or persistent odors, it’s time to call a pro.
DIY vs. Professional Cleaning: pros and cons
When weighing DIY against hiring a pro for epoxy floor cleaning, consider the trade-offs in cost, time, and the skill needed to get reliable results. You can save money DIY but spend more time and risk mistakes; pros work faster with better equipment and warranties. Hire professionals for large or heavily stained areas.
| Option | Pros | Cons |
|---|---|---|
| DIY | Lower cost | Time, skill |
| Pro | Fast, guaranteed | Higher price |
| Hybrid | Split tasks | Coordination needed |
Typical Costs and Time Estimates by Space Size
Estimate costs and time based on space size:
A single-car garage typically takes 1–3 hours and costs $50–$150 in materials and your time for a DIY clean, while hiring a pro runs $100–$300.
A two-car garage doubles time and materials.
Basements, workshops, and commercial bays scale up—expect longer labor, higher materials, and $300+ for pros on larger or heavily soiled areas.
Signs You Need Professional Restoration
After you’ve weighed costs and time for basic cleaning, watch for signs that the job is beyond DIY and needs professional restoration.
Call a pro when deep scratches, delamination, large stains, or extensive yellowing appear.
If repairs take more than a day, require sanding or recoating, or your floor’s warranty could be voided, hiring experts saves time and prevents costly mistakes.
Troubleshooting Guide: Problems, Causes, and Fixes
If your epoxy looks dull or cloudy, you’ll learn the common causes and step-by-step fixes to restore the shine.
For stubborn stains, I’ll show you how to identify their type and apply the right targeted treatments.
If you spot bubbling, peeling, or delamination, you’ll get clear guidance on immediate actions and when to refinish or call a pro.
Dull or Cloudy Finish causes and stepwise fixes
A dull or cloudy epoxy finish usually means the surface lost its original shine from abrasion, improper curing, or surface contamination. You can often restore it by identifying the cause and following targeted steps.
Inspect for scratches, haze, or residue. Clean with a pH-neutral cleaner, rinse, and dry.
Lightly buff scuffed areas with a fine pad; reseal or recoat if curing failure or deep abrasion persists.
Persistent Stains identification and targeted treatments
You’ve restored shine in many areas, but some stains can resist cleaning and need a different approach.
Identify oil, rust, paint, or chemical stains by color, texture, and smell.
Use targeted cleaners: degreasers for oil, oxalic acid for rust, solvent-based removers for paint, and neutralizers for chemicals.
Test a small area, rinse thoroughly, and recoat damaged spots if necessary.
Bubbling, Peeling, or Delamination what to do next
Spotting bubbles, peeling edges, or sections lifting from the substrate means the epoxy system has lost adhesion or cured improperly, and you’ll want to diagnose the cause before attempting repairs.
Check for moisture, improper mixing, or contaminants.
Remove affected epoxy, grind to sound substrate, test moisture vapor, then reapply compatible primer and epoxy under correct conditions.
Consider professional help for large delamination.
FAQ Common Questions About Cleaning Epoxy Floors
You’ve probably got specific questions like how often to deep-clean and polish, whether bleach or vinegar are safe, and how to lift oil stains from a garage epoxy floor.
You might also wonder if scrubbing machines will harm the surface or whether you can refinish or recoat the epoxy yourself.
Below are clear, practical answers to each common concern.
How often should I deep-clean and polish my epoxy floor?
How often should you deep-clean and polish an epoxy floor? Aim for a light cleaning weekly, a deeper scrub monthly, and polish or recoat every 1–3 years depending on traffic. High-traffic garages or commercial spaces need more frequent attention; low-traffic residential floors can wait toward the longer end. Inspect regularly for wear and address dull spots promptly to prolong the finish.
Can I use bleach or vinegar on epoxy floors?
If you keep up with regular cleaning and address dull spots promptly, you’ll also want to know which cleaners are safe to use.
Don’t use undiluted bleach or acidic vinegar regularly—they can dull or etch epoxy over time.
Mild, pH-neutral cleaners or diluted bleach for occasional disinfecting (rinsed thoroughly) are safer.
Always test any solution in a hidden spot first.
How do I remove oil stains from a garage epoxy floor?
Wondering how to lift oil stains from your garage epoxy floor? Act quickly: blot fresh oil with paper towels, avoiding rubbing.
Apply a poultice of baking soda or cat litter to absorb older spots, let sit several hours, then sweep.
For stubborn stains, use a mild degreaser or dish soap with warm water and a soft brush, rinse thoroughly, and dry to restore shine.
Will scrubbing machines damage the epoxy?
While most commercial scrubbing machines won’t harm a properly cured epoxy floor, you should match the pad, brush, and cleaning solution to the finish—use soft or medium non-abrasive pads and avoid metal brushes or overly aggressive grits that can abrade the surface.
Also keep machine speed and downforce moderate to prevent heat buildup or gouging. Test in an inconspicuous spot, rinse thoroughly, and inspect regularly for wear.
Can I refinish or recoat my epoxy floor myself?
After confirming your scrubbing machine and pads haven’t worn the surface, you might ask whether you can recoat or refinish the epoxy yourself.
Yes—minor recoats and clear topcoats are DIY-friendly if you thoroughly clean, etch or scuff, and follow product instructions for temperature and cure times.
For deep damage, heavy peeling, or substrate issues, hire a pro to guarantee adhesion and longevity.
Visual Guide and Quick Reference Resources
You’ll find a step-by-step photo sequence that shows spot-cleaning moves and results so you can copy them exactly.
There’s also a printable quick-clean checklist you can keep by the mop bucket for regular maintenance.
A compact comparison chart lists common cleaners and when each is best, so you’ll pick the right product fast.
Step-by-step photo sequence for spot cleaning
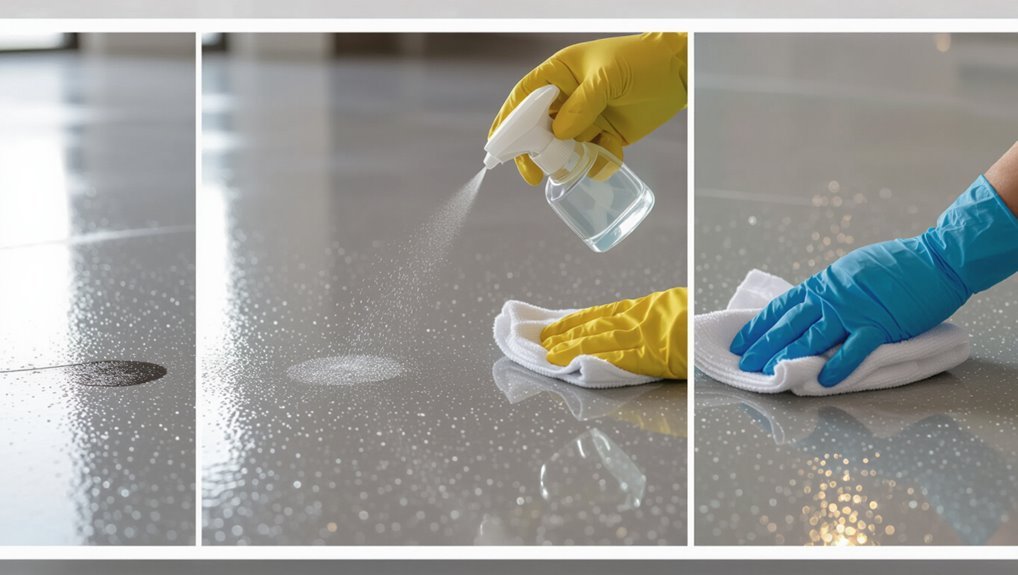
Start by photographing the stain and the surrounding area so you’ve got a clear before image and can track progress; this visual record helps you compare results, choose the right cleaning method, and avoid overworking the epoxy.
Next, photograph after each step: dry sweep, apply cleaner, agitate gently, rinse, and dry.
Label images, note time and product used for reliable comparisons.
Quick-cleaning checklist to print and follow
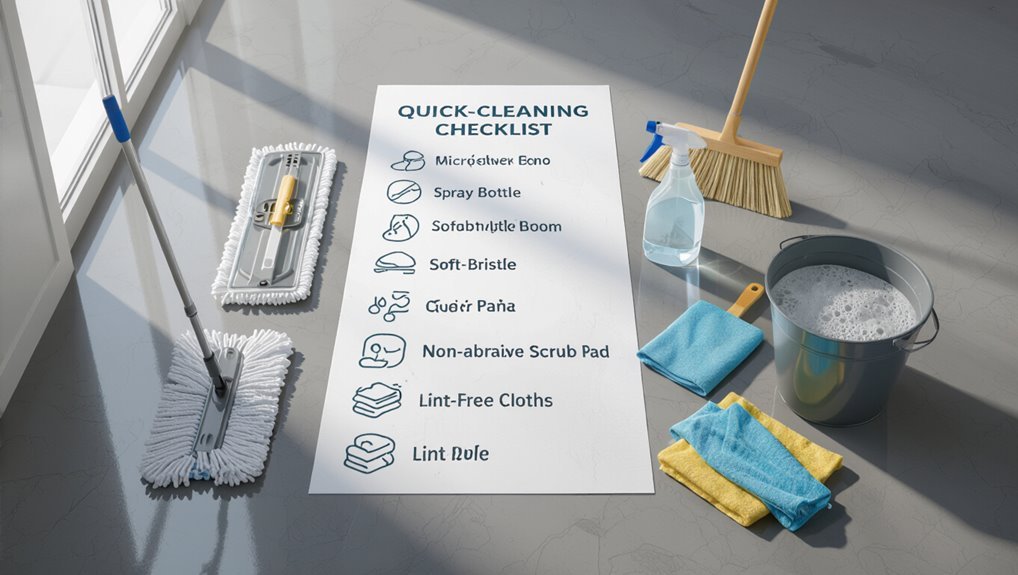
Keep a single-page checklist handy so you can tackle spills fast and keep your epoxy floor looking its best.
Print a laminated sheet with steps: clear debris, blot liquids, apply mild cleaner, scrub gently with soft brush, rinse, dry with microfiber, inspect for residue, and note problem spots.
Keep emergency supplies nearby and update the checklist as needed for seasonal care.
Comparison chart of cleaners and when to use them
Although some cleaners are marketed as “all-purpose,” choosing the right product for epoxy depends on the soil type and finish. Use the chart below to pick safely: mild detergent for routine dirt, pH-neutral for shine, degreaser for oil.
| Soil Type | Recommended Cleaner | When to Use |
|---|---|---|
| Light dirt | Mild detergent | Weekly |
| Grease/oil | Solvent-free degreaser | Spot clean |
| Stains | pH-neutral cleaner | As needed |
