How to Epoxy a Concrete Floor for a Durable, Showroom-Worthy Finish
You can get a showroom-quality epoxy floor by prepping, priming, and applying a two-part epoxy system with care. Start by evaluating and repairing the concrete, degrease and mechanically profile the slab, then apply a penetrating primer. Mix resin and hardener precisely, squeegee on a base coat, broadcast flakes or add metallic effects if desired, and finish with a clear topcoat. Control temperature, avoid trapped air, and use thin even coats for best results—keep going to learn full steps and pro tips.
How to Epoxy a Concrete Floor for a Durable, Showroom-Worthy Finish
Yes—you can get a showroom-quality finish with proper prep and the right epoxy system, typically over a few days to a week depending on curing times.
This guide is for DIYers and pros who want a durable, glossy floor that resists stains and wear.
Expect a high-gloss, long-lasting surface if you follow each prep, application, and curing step closely.
Quick answer can you get a showroom-quality finish and how long it takes
Wondering if epoxy can give you a showroom-quality floor? Yes—you can achieve that look by following proper steps for how to epoxy concrete floor: prep, repair, grind, prime, apply epoxy, and finish.
Expect 1–3 days of labor plus 24–72 hours curing before light use, and up to 7 days for full chemical and abrasion resistance.
Proper prep is the key.
Who this guide is for and expected results
If you want a durable, showroom-worthy concrete floor without hiring a pro, this guide walks you through the steps, tools, and realistic expectations so you can get it right.
It’s for handy homeowners, DIY renters with permission, and small business owners ready to invest time.
Expect a high-gloss, durable surface when you prepare properly, follow instructions, and allow full cure time.
Basic Understanding What epoxy is and why use it on concrete
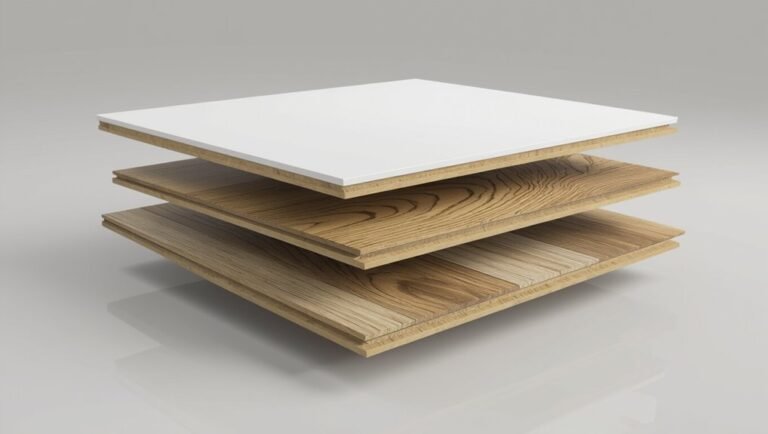
Epoxy flooring is a multi-part system you mix on-site—resin and hardener—often applied over primers and finished with topcoats for extra protection.
You’ll pick epoxies for their toughness, improved appearance, chemical and stain resistance, and low maintenance.
Options range from solvent or water-based formulas to 100% solids systems, plus decorative flake and metallic finishes to match your needs.
What epoxy floor coating is (resin, hardener, primers, topcoats)
Think of epoxy as a two‑part liquid system—resin and hardener—that chemically bond to form a tough, seamless coating. Primers promote adhesion to concrete, while topcoats add gloss, UV resistance, and extra durability.
You’ll mix specified ratios, apply primer to sealed or prepared concrete, roll or squeegee epoxy, then finish with a clear topcoat for protection and desired sheen.
Benefits: durability, appearance, chemical resistance, maintenance
Durability is one of the biggest reasons people choose epoxy for concrete: it forms a hard, impact‑resistant surface that stands up to heavy foot and vehicle traffic, abrasion, and long-term wear.
You’ll also get improved appearance, chemical resistance, and easier maintenance.
Benefits include:
- Tough, long‑lasting protection
- Enhanced glossy or tailored look
- Resistance to oils and spills
- Simple cleaning
- Reduced dust and cracking
Common epoxy types and finishes (solvent vs. water-based, 100% solids, flake, metallic)
Now that you know why epoxy’s benefits matter, it helps to understand the different types and finishes so you can pick the right product for your concrete.
Solvent and water-based epoxies are easier to apply but thinner.
100% solids give maximum durability and chemical resistance.
Flake systems hide flaws and add texture; metallic epoxies create high-gloss, swirled showroom looks.
Assessing Your Concrete Is your floor ready for epoxy?
Before you epoxy, check the surface condition: look for cracks, spalling, settling, old coatings, and signs of moisture.
You can run a plastic sheet test or use a moisture meter to measure vapor emission, and inspect structural issues to decide which repairs need to be done first.
If you find active moisture, large cracks, or compromised slab sections, fix those before applying epoxy.
Checklist: surface condition, cracks, moisture, previous coatings
If you want a lasting epoxy finish, start by checking four things: the surface condition (texture and cleanliness), any cracks or spalls, moisture levels, and whether the slab has previous coatings.
Then confirm readiness with this quick checklist:
- Surface is clean, profiled, and free of oil.
- Cracks are identified and scored.
- Spalls are repaired.
- Moisture signs are absent.
- No incompatible coatings remain.
How to test for moisture vapor emission (plastic sheet test, moisture meter)
You’ve checked surface texture, cracks, spalls, and coatings—next confirm the slab’s moisture status, because hidden vapor can ruin an epoxy job.
Tape a 2–3 foot plastic sheet to concrete edges, wait 24–48 hours; condensation or darkening means moisture.
Use a quantitative moisture meter or calcium chloride kit for accuracy. If readings exceed manufacturer limits, address vapor before coating.
Structural concerns: cracks, spalling, settling when to repair first
Assess the slab for structural issues—cracks, spalling, and uneven settling—that can compromise an epoxy coating’s adhesion and longevity.
You should repair wide or moving cracks, delaminated areas, and pronounced settlement before coating. Use epoxy or polyurethane injections for structural cracks, patch spalled zones with concrete repair mortar, and level low spots.
Skipping repairs risks failure, bubbling, and peeling.
Materials, Tools, and Safety Gear You’ll Need
Before you start, gather the right materials—primer, an epoxy kit and topcoat, fillers, and any flakes or metallic pigments you want to add.
You’ll also need the proper tools: grinders with a diamond cup wheel or shot blaster for surface prep, plus squeegees, rollers, and mixing paddles for application.
Don’t forget safety and cleanup: guarantee good ventilation, wear a respirator, gloves, and eye protection, and have spill containment ready.
Materials: primer, epoxy kit, topcoat, fillers, epoxy flakes/metallic pigments
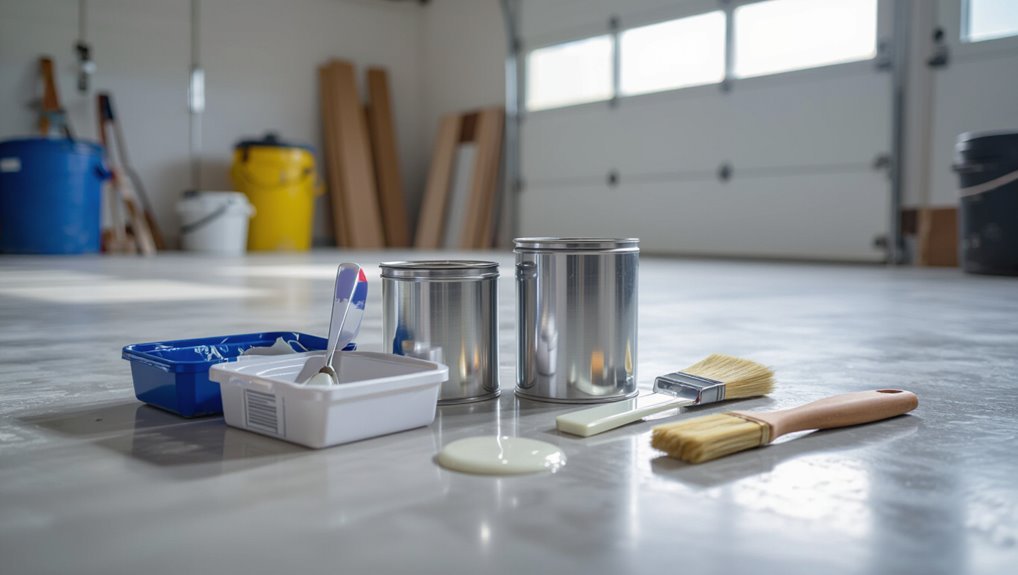
1 set of quality supplies will make the job easier and the finish last: you’ll need a concrete primer, a compatible epoxy kit (resin and hardener), a durable topcoat, any fillers for cracks or pits, and optional decorative additives like epoxy flakes or metallic pigments.
- Primer (penetrating, breathable)
- Epoxy kit (correct mix ratio)
- Topcoat (urethane or polyaspartic)
- Fillers (patching compound)
- Decorative flakes/pigments
Tools: grinders, diamond cup wheel, shot blaster, squeegees, rollers, mixing paddles
Once you’ve got the right materials lined up, the proper tools will let you prepare the concrete and apply the epoxy correctly.
You’ll need equipment for profiling, cleaning, mixing, and spreading so coatings bond and finish evenly.
- Grinder with diamond cup wheel
- Shot blaster or scarifier
- Squeegees for even coats
- 18″ rollers with nap covers
- Heavy-duty mixing paddle and drill
Safety: ventilation, respirators, gloves, eye protection, spill containment
Because epoxy and its solvents give off fumes and can irritate skin and eyes, you’ll need proper ventilation, a respirator, chemical-resistant gloves, and eye protection before you start.
Wear a half- or full-face respirator with organic vapor cartridges, nitrile or neoprene gloves, splash goggles, and coveralls.
Contain spills with absorbent pads and a tray.
- Ventilation
- Respirator
- Gloves
- Eye protection
- Spill containment
Step-by-Step Preparation (Step 1 to 4)
Before you mix any epoxy, you’ll need to prep the slab: clear away debris, degrease stains, and create a mechanical profile with grinding or shot blasting so the coating sticks.
Patch cracks and spalls using the appropriate repair method—epoxy for bonded, thin repairs or cementitious products for larger voids.
Finish with a thorough cleaning and a moisture check to guarantee conditions are right for coating.
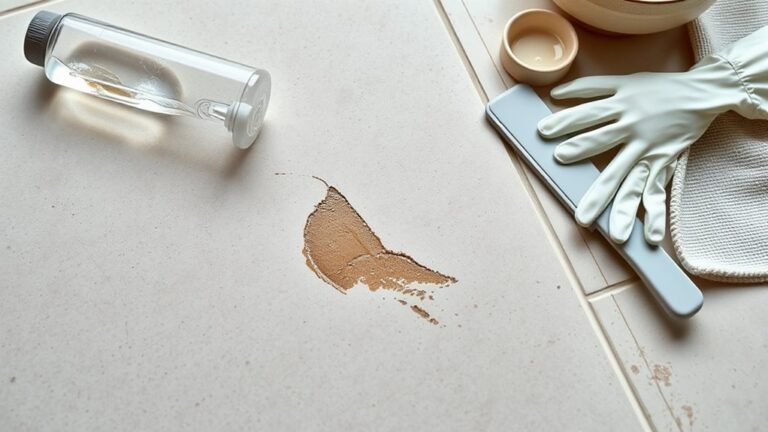
Step 1 Clear, clean, and degrease the floor
Clear the area and remove all loose debris so you can see the floor’s condition clearly.
You’ll clean, degrease, and prepare concrete for epoxy; remove oil, grease, and contaminants thoroughly.
Follow these steps:
- Sweep and vacuum all dust
- Apply concrete cleaner or degreaser
- Scrub stains with stiff brush
- Rinse and squeegee thoroughly
- Dry completely before next step
Step 2 Mechanical surface profile: grinding or shot blasting for proper adhesion
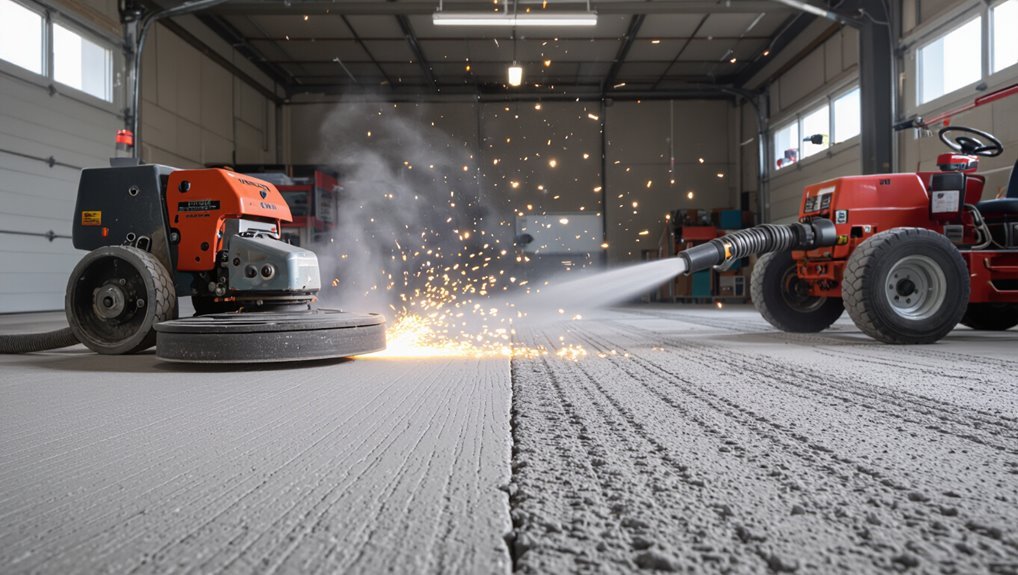
Once the floor is swept, cleaned, and fully dry, you’ll need to create a mechanical profile so the epoxy can bond properly.
Use a concrete grinder for small areas or shot blasting for larger surfaces to remove laitance, coatings, and smoothness.
Aim for a uniform 40–60 grit profile, keep dust controlled with vacuums, and inspect for consistent texture before priming.
Step 3 Repairing cracks and spalls (epoxy patch vs. cementitious repair)
After creating the proper surface profile, you’ll need to address cracks and spalls so the epoxy system can perform as designed.
Choose repair method based on size, movement, and moisture.
- Use epoxy patch for hairline to 1/4″ cracks, bonding and sealing.
- Use cementitious repair for large spalls or voids.
- Clean and remove loose material.
- Follow manufacturer cure times.
Step 4 Final cleaning and moisture re-check before coating
Before you apply any epoxy, give the floor a final thorough cleaning and verify moisture levels so the coating bonds properly and won’t delaminate later.
Sweep, vacuum, and mop with a degreasing solution, then rinse and let dry.
Use a moisture meter or plastic sheet test in multiple spots.
Only proceed when readings are within the epoxy manufacturer’s specified limits.
Applying Epoxy Coating (Step 5 to 9)
Now you’ll move on to applying the epoxy coating, starting with a primer to promote adhesion and following precise mixing ratios and temperature guidelines for proper pot life.
Apply the base coat using a squeegee and roller with a wet-edge strategy, then broadcast flakes or add metallic effects while the base is still wet.
Finish with a clear topcoat or sealer for gloss, UV protection, and long-term durability.
Step 5 Choosing and applying a primer: purpose and method
When you’re preparing to lay down epoxy, choosing the right primer matters because it locks in adhesion, seals porous concrete, and prevents blistering or peeling later on; pick a primer formulated for epoxy systems and compatible with your concrete’s condition.
Then apply it evenly with a roller or brush following the manufacturer’s pot life and recoat window. Work methodically, cover thinly, and allow full cure before topcoating.
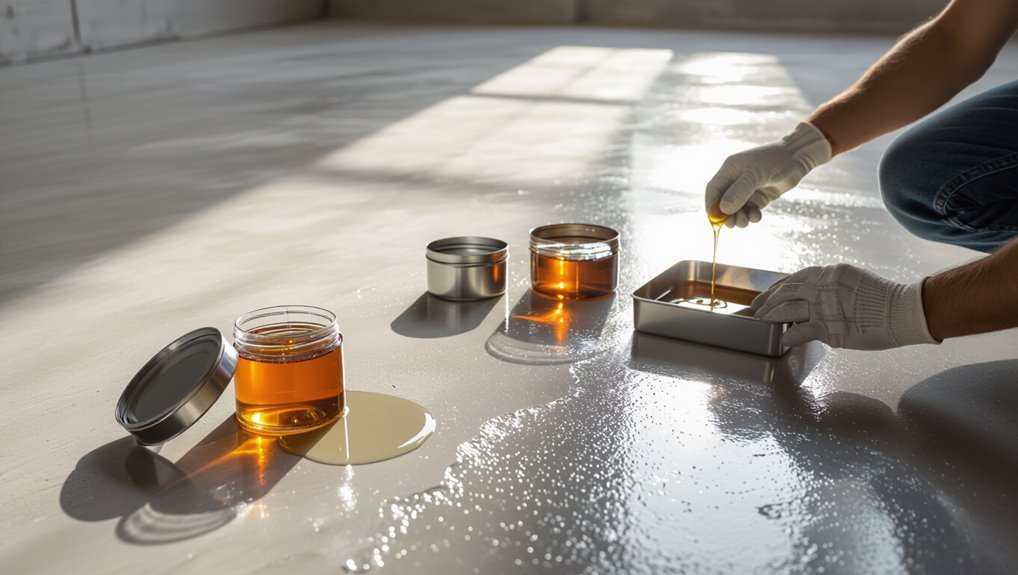
Step 6 Mixing epoxy correctly: ratios, pot life, temperature tips
If you want a durable, properly cured epoxy coat, mix the resin and hardener exactly to the manufacturer’s ratio—usually a 1:1 or 2:1 volume or weight—and follow the specified pot life; incorrect ratios or overlong pot life can leave the floor soft, tacky, or improperly bonded.
- Measure by volume or weight precisely
- Mix thoroughly, scrape sides/bottom
- Stay within pot life at job temperature
- Warm components for cold conditions
- Use slow, steady stirring to avoid air
Step 7 Applying base coat: technique, wet-edge strategy, roller/squeegee methods
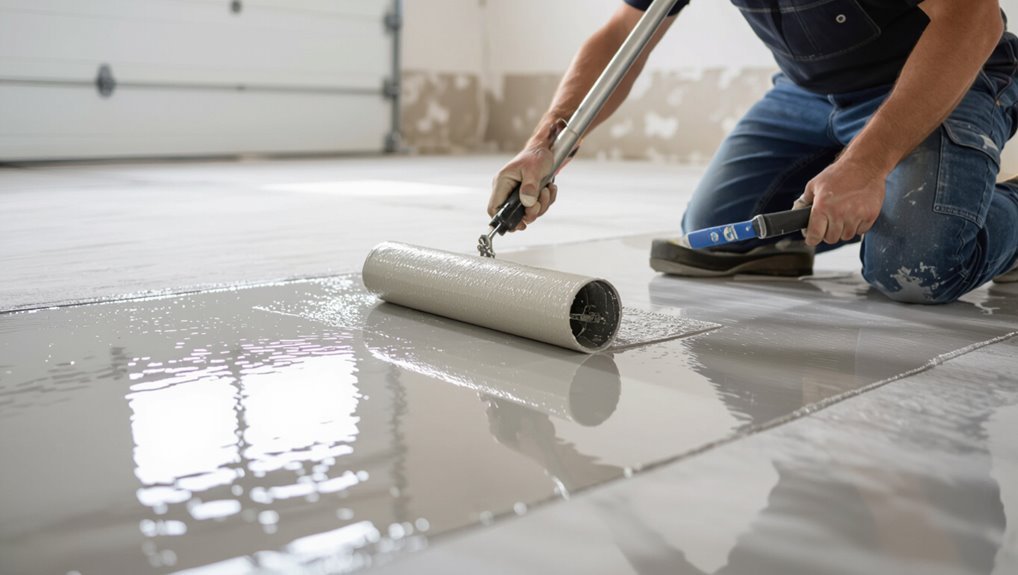
Although you’ve mixed the epoxy correctly, applying the base coat demands speed and a steady hand to keep a continuous wet edge so the finish is smooth and seamless.
Work in 3–4 foot-wide workable sections, squeegee epoxy out evenly, then back-roll with a 3/8″–1/2″ nap roller to remove lines and bubbles.
Maintain overlap, watch pot life, and finish before edges set.
Step 8 Broadcast flakes or add metallic effects while base is wet
Step 8 is where you can personalize the look: while the base coat is still wet, sprinkle decorative flakes evenly or pour and manipulate metallic pigments to create swirls, knowing each technique sets the floor’s final texture and appearance.
You should:
- Work in small sections for control
- Toss flakes uniformly or blend pigments with a brush
- Monitor blending speed
- Wear gloves and respirator
- Let broadcast settle before next step
Step 9 Applying topcoat/sealer for gloss, UV protection, and durability
Seal the floor with a clear topcoat to lock in flakes or metallic effects, add a durable glossy finish, and provide UV resistance that prevents yellowing and wear.
Mix the polyurethane or epoxy sealer per instructions, work in thin, even coats with a roller, maintain wet edges, allow full cure between coats, and guarantee ventilation.
Inspect and touch up for consistent sheen.
Curing, Post-Application Care, and Timeframes
After you finish the epoxy, you’ll need to wait: most floors are light-foot traffic ready in 24–48 hours and vehicle-ready in 72 hours to seven days depending on the product.
Temperature and humidity will speed up or slow down curing and can affect gloss and adhesion, so you should follow the manufacturer’s recommended range and avoid extremes.
For maintenance, start with gentle cleaning after the initial cure and follow a regular schedule of sweeping, mild detergent washes, and occasional recoat or spot repairs to keep the finish durable.
Typical cure times and walk-on vs. vehicle-ready timelines
Curing epoxy takes time, and knowing the difference between “walk-on” and “vehicle-ready” is key to avoiding damage: you can usually walk on a properly applied epoxy within 12–24 hours, but full chemical cure for vehicle traffic typically requires 3–7 days depending on temperature, humidity, and product formulation. Plan access, avoid heavy loads until fully cured, and monitor for tackiness.
| Stage | Typical Time | Recommendation |
|---|---|---|
| Walk-on | 12–24 hours | Light foot traffic |
| Vehicle-ready | 3–7 days | Full vehicle use |
How temperature and humidity affect cure and appearance
Although epoxy sets faster in warm, dry conditions, you’ll get the best cure and finish when temperature and humidity stay within the product’s recommended range because both factors change reaction speed, gloss, and potential defects.
Work within specified temperature and relative humidity to prevent ambering, blushing, bubbles, or soft spots.
Monitor conditions during curing and adjust ventilation or heating to maintain consistent, recommended levels.
Initial maintenance and long-term care tips
When you finish the final coat, give the epoxy time and gentle conditions to reach full hardness—most garage-grade systems need 24–72 hours for light use and 7 days for full chemical and impact resistance.
After curing, sweep and mop with pH-neutral cleaners, avoid harsh solvents, and use soft pads for scrubbing.
Use protective mats under heavy equipment, reseal chips promptly, and schedule yearly inspections.
Common Problems and How to Fix Them
You’ll run into a few common issues like adhesion failures or blistering, bubbling and orange‑peel textures, and color or gloss inconsistencies.
For each problem you’ll want to identify the cause—moisture, improper mixing or temperature, surface contamination or uneven application—and follow specific remediation steps.
Below are clear fixes and prevention tips so you can correct flaws and avoid them next time.
Adhesion failures and blistering causes and remediation
Adhesion failures and blistering are some of the most common issues you’ll face when epoxy doesn’t properly bond to concrete. They usually stem from surface contamination, moisture, or improper preparation.
To fix them, remove loose epoxy, grind to sound concrete, test for moisture, clean and etch, then apply a suitable primer and recoat under recommended conditions to guarantee proper bonding and cure.
Bubbling, fish-eyes, or orange peel texture prevention and repair
Once you’ve addressed adhesion and blistering issues, watch for surface imperfections that can ruin a smooth finish: bubbling, fish-eyes, and an orange peel texture.
To prevent them, keep surfaces clean, mix epoxy slowly to avoid entrained air, apply thin, even coats, and control temperature and humidity.
For repairs, sand affected areas, degrease, recoat with low-viscosity epoxy, and use a heat gun to pop remaining bubbles.
Color inconsistencies, streaks, and uneven gloss troubleshooting steps
When color looks blotchy, streaked, or gloss levels vary across the floor, start by diagnosing causes like uneven mixing, inconsistent application thickness, contamination, or incompatible topcoats.
Recoat thin or bare areas after proper sanding and cleaning. Blend edges with feathered rolls.
Strip incompatible sealers, guarantee correct mix ratios and pot life, and use consistent roller technique and temperature to restore uniform color and sheen.
Best Practices and Professional Tips for a Showroom Finish
To get a showroom finish you’ll focus on proper surface profiling, controlling temperature and humidity, and running strict quality checks before and after each coat.
Pay close attention to edges, shifts, and maintaining uniform gloss with consistent roller technique and cutting tools.
Finally, weigh a simple cost-benefit checklist to decide when you can DIY and when hiring a pro will save time and guarantee flawless results.
Surface profiling targets, ideal environmental conditions, and quality checks
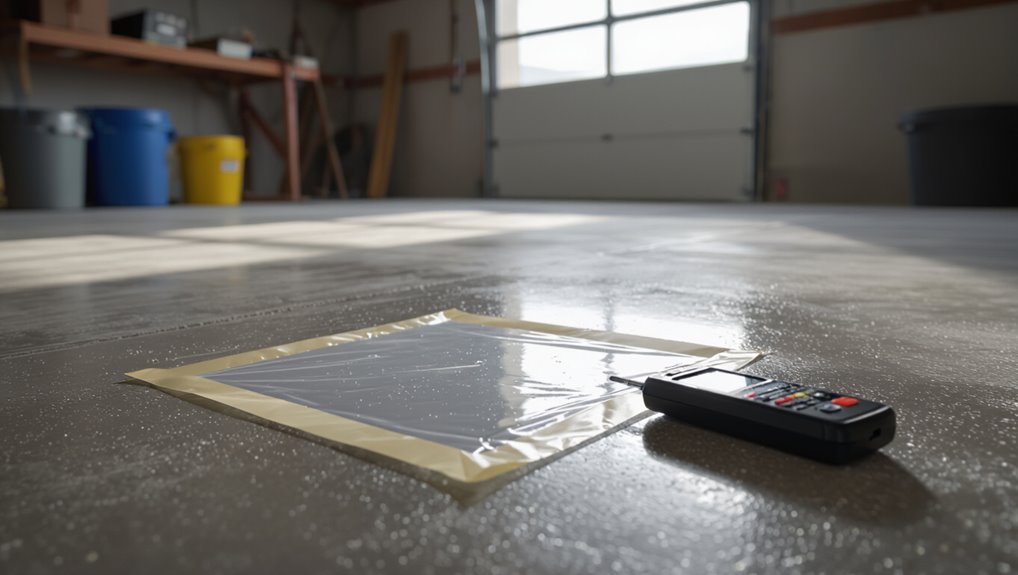
1 clear profile depth matters: you should create a consistent anchor pattern on the concrete—typically a CSP (Concrete Surface Profile) of 2–3 for epoxy—so the coating bonds mechanically without trapping contaminants.
Monitor temperature/humidity, dew point, and surface moisture. Perform adhesion and moisture tests.
Use these checks:
- target CSP 2–3
- ambient 60–75°F, RH <60%
- no rising moisture
- adhesion pull tests
- visual uniformity inspection
Tips for achieving perfect edges, transitions, and uniform gloss
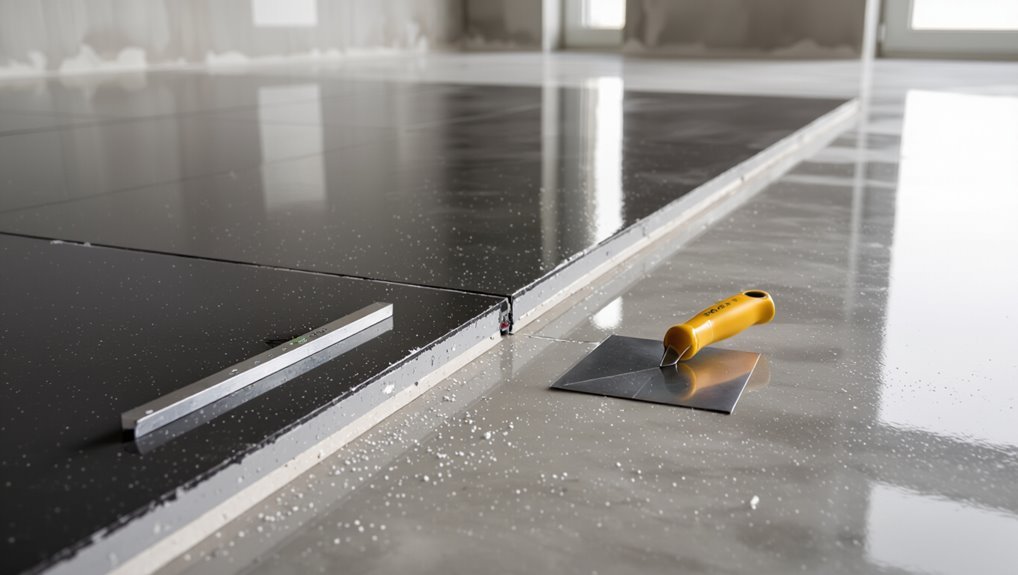
Although edges and changes demand extra patience, you can get razor-sharp lines and consistent gloss by planning your sequence, using the right tools, and keeping a wet edge.
Tape cleanly, use an angled brush for perimeter work, and feather shifts with a short nap roller. Match roller direction, monitor pot life, and lightly back-roll to eliminate lap marks for a uniform, showroom finish.
When to DIY vs. when to hire a pro (cost-benefit checklist)
Deciding whether you should tackle an epoxy floor yourself or hire a pro comes down to evaluating your skills, time, and the real costs involved.
Weigh these factors quickly:
- Skill: confident with surface prep and mixing?
- Time: can you wait through cure windows?
- Tools: do you have grinders, vacuums, rollers?
- Budget: compare DIY material vs. labor costs
- Risk: consider warranty and finish quality
Cost Estimates, Materials Comparison, and ROI
You’ll want a clear budget that breaks costs into materials, tools, and any labor so you know where your money goes.
Compare epoxy to alternatives like polyaspartic and polyurethane for durability, cure time, and price per square foot.
That comparison will help you estimate ROI based on lifespan and maintenance needs.
Typical cost breakdown: materials, tools, and labor
Budgeting for an epoxy floor starts with breaking costs into three clear buckets: materials, tools, and labor. You’ll weigh epoxy kits, repair compounds, rollers, grinders, and pro installation. Expect DIY savings but more time; pros cost more but guarantee. Use the table below for quick estimates.
| Item | Typical Cost | Notes |
|---|---|---|
| Materials | $100–$600 | Kit size varies |
| Tools | $50–$800 | Rent vs buy |
| Labor | $2–$6/sq ft | Depends on prep |
Comparing epoxy with alternative floor coatings (polyaspartic, polyurethane)
How do epoxy, polyaspartic, and polyurethane coatings stack up for cost, materials, and long-term return? You’ll weigh upfront price, cure time, abrasion resistance, and maintenance. Epoxy is affordable; polyaspartic costs more but cures fast; polyurethane resists UV. Choose based on budget, downtime, and desired lifespan for best ROI.
| Coating | Cost | Lifespan |
|---|---|---|
| Epoxy | Low | 5–10 yrs |
| Polyaspartic | High | 10–15 yrs |
| Polyurethane | Medium | 7–12 yrs |
FAQs
You’ll want clear answers to common concerns like lifespan, compatibility with old paint or coatings, and what to do about damp concrete or high moisture vapor.
We’ll also cover how flakes or metallic systems change durability and maintenance, and whether epoxy holds up to garage vehicle traffic and oil spills.
Read on for concise, practical guidance and troubleshooting.
How long does an epoxy floor last?
Wondering how long an epoxy floor will last?
With proper surface prep, quality epoxy, and routine care, you can expect 10–20 years in garages and 20+ years in lighter-use spaces.
High-traffic commercial areas may need refreshes sooner.
Regular cleaning, prompt spill cleanup, and avoiding harsh chemicals extend lifespan.
Inspect periodically for chips or wear and recoat when gloss declines.
Can I epoxy over old paint or coatings?
Can you epoxy over old paint or coatings? You can, but only if the existing finish is well-bonded, clean, and free of peeling, oil, or contaminants.
Test adhesion by scraping and perform a spot bond test. Scuff or sand glossy finishes and thoroughly degrease.
If coatings are failing or soft, fully remove them to guarantee the epoxy bonds to solid substrate and lasts.
What if my concrete is damp or has a high moisture vapor emission?
If your concrete is damp or showing a high moisture vapor emission, don’t epoxy it until you test and address the problem—moisture trapped under epoxy will cause blisters, adhesion failure, and peeling.
Use a calcium chloride or relative humidity test to measure vapor emission. If results exceed product limits, fix with moisture mitigation (sealers, vapor barriers, or concrete repair) before coating to guarantee adhesion and longevity.
How do flakes or metallic epoxies affect durability and maintenance?
When you choose flake or metallic epoxy, expect a durable, attractive finish that’s a bit different to maintain than plain solid-color epoxy.
Flakes hide wear and minor imperfections, reducing visible scratches. Metallics mask imperfections but can show swirl marks.
Both require regular sweeping, occasional damp-mopping with neutral cleaner, and periodic topcoat reapplication in high-traffic zones to preserve gloss and protection.
Can I use epoxy in a garage with vehicle traffic and oil spills?
Want a garage floor that stands up to cars and the occasional oil spill? Yes—you can use epoxy. Choose a high-solids, chemical-resistant epoxy and prep concrete thoroughly.
Regular maintenance and a durable topcoat handle traffic and stains.
Benefits include:
- Strong impact resistance
- Chemical/oil resistance
- Easy cleanup
- Long lifespan
- Repairable surface