How to Remove Vinyl Tile Flooring Without Damaging the Subfloor
You can remove vinyl tile without wrecking the subfloor by prepping, testing, and working patiently. Start by testing for asbestos, clearing the room, wearing PPE, and sealing the area. Identify the tile type, heat or score edges, and lift with a putty knife or scraper, using solvents or an oscillating tool for stubborn adhesive. Clean gently, repair gaps with filler or shims, and check moisture on concrete. Keep at it and you’ll find detailed tips and troubleshooting next.
How to Remove Vinyl Tile Flooring Without Damaging the Subfloor
You can often remove vinyl tile yourself if you take your time and use the right tools to avoid gouging the subfloor.
If the tiles are glued, old or cover a delicate substrate, you may want to hire a pro to prevent costly damage.
We’ll compare DIY steps and signs that it’s smarter to call an expert.
Can you remove vinyl tile safely?
Wondering whether you can remove vinyl tile without wrecking the subfloor? Yes—you can, if you work methodically and use proper tools.
Learn how to remove vinyl tile flooring by scoring, heating stubborn areas, and prying tiles gently with a floor scraper.
Protect the subfloor by removing adhesive residue carefully, wearing PPE, and testing a small area first to avoid gouges or damage.
When to hire a pro vs. DIY
If the job’s a small room with intact tiles and you’re comfortable with basic tools, tackle it yourself; hire a pro when the floor’s glued down heavily, the subfloor’s compromised, or the space contains asbestos or other hazards that require testing and abatement.
You should also consider:
- Limited time or patience
- Lack of proper tools
- Structural concerns
- Asbestos suspicion
- Complex patterns or multiple layers
Basic Understanding What You’re Dealing With
Before you start, you’ll want to identify the vinyl type—individual vinyl tiles, sheet vinyl, or heavier VCT—as each peels up differently.
Check the subfloor beneath (plywood, concrete, OSB, or cement backerboard) so you know what tools and repairs might be needed.
Also note the adhesive: cutback adhesives can be hazardous and harder to remove than pressure-sensitive glues, so plan accordingly.
Types of vinyl flooring (vinyl tile, sheet vinyl, VCT)
Vinyl flooring comes in three common forms—peel-and-stick tiles, sheet vinyl, and vinyl composition tile (VCT)—and each behaves differently when you remove it, so knowing which you have will save you time and effort. You’ll find:
| Type | Adhesive | Removal tip |
|---|---|---|
| Peel-and-stick | Pressure-sensitive | Heat and lift corners |
| Sheet vinyl | Full-spread | Score and peel |
| VCT | Heavy adhesive | Scrape and grind |
Common subfloor materials (plywood, concrete, OSB, cement backerboard)
Because what’s under the tile determines how you’ll remove it, you’ll want to identify the subfloor type right away: plywood is common, sturdy, and can dent; concrete is durable but may need patching; OSB swells with moisture and can crumble at edges; cement backerboard is rigid and water-resistant but brittle.
Knowing which you have guides tool choice and removal care to avoid damage.
Adhesives and their impact on removal (cutback adhesive, pressure-sensitive)
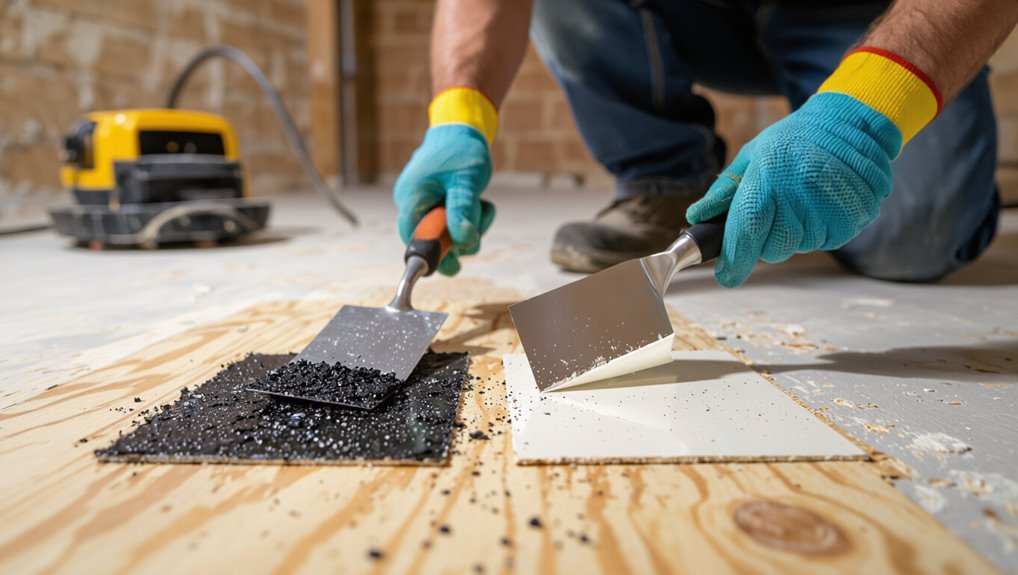
When you lift a tile, the adhesive you find will largely determine your approach and how messy the job gets: cutback adhesive — a hardened, often tar‑like glue used with older tiles — can cling stubbornly to subfloors and may require chemical strippers or grinders.
In contrast, modern pressure‑sensitive (PSA) adhesives peel away more cleanly but can still leave a gummy residue that needs scraping.
Know which type you’re facing, test removal methods, use proper PPE, and choose solvents or mechanical tools accordingly to avoid subfloor damage.
Preparation Before You Start
Before you start, gather the right tools and materials and put on proper safety gear so you won’t be scrambling mid-job.
Check for asbestos risk, guarantee good ventilation, and know how to test tiles or adhesives before you disturb them.
If a test shows asbestos or you’re unsure, stop work and contact a certified abatement professional.
Tools and materials you’ll need
Gathering the right tools and materials will make removing vinyl tile faster and safer; you’ll need a utility knife, floor scraper or putty knife, pry bar, heat gun or hair dryer, heavy-duty gloves, knee pads, safety glasses, a dust mask, trash bags, and a roll of painter’s tape.
Prepare these items and:
- Utility knife and replacement blades
- Floor scraper or rigid putty knife
- Heat gun or hair dryer
- Pry bar and hammer
- Trash bags and painter’s tape
Safety gear and environmental precautions (asbestos risk, ventilation)
You’ve got the tools ready, now focus on safety gear and environmental precautions to protect yourself and your home.
Wear N95 or P100 respirator, disposable coveralls, gloves, and eye protection.
Seal off the work area with plastic sheeting, use a fan for cross-ventilation exhausting outside, and dampen surfaces to limit dust.
Dispose of debris in sealed bags per local rules.
How to test for asbestos and when to stop
1 simple test can save you from a dangerous mistake: confirm whether your vinyl tiles or the adhesive underneath contain asbestos before you start removal.
Stop immediately if tests indicate asbestos or if you suspect it. Hire a licensed abatement professional to sample and, if positive, remove materials safely.
Don’t sand, dry-scrape, or disturb suspect tiles yourself—containment and PPE are essential.
Step-by-Step Removal Process
Now that the room’s prepped, you’ll follow a clear sequence to remove the vinyl tiles safely and efficiently.
Start by clearing the space and protecting adjacent areas.
Then score and loosen tiles by hand before using heat or chemical softeners as needed.
Finish with mechanical scraping or power tools and remove adhesive residue carefully to avoid damaging the subfloor.
Step 1 Clear the room and protect adjacent areas
Before you start prying up tiles, clear the room and protect anything nearby that could get damaged.
Remove furniture, curtains, and rugs; seal vents and doorways; turn off HVAC to avoid dust spread; cover thresholds and baseboards with tape and cardboard; lay drop cloths to protect flooring you’ll keep.
Follow safety: gloves, goggles, and a dust mask.
Step 2 Score and loosen tiles (manual methods)
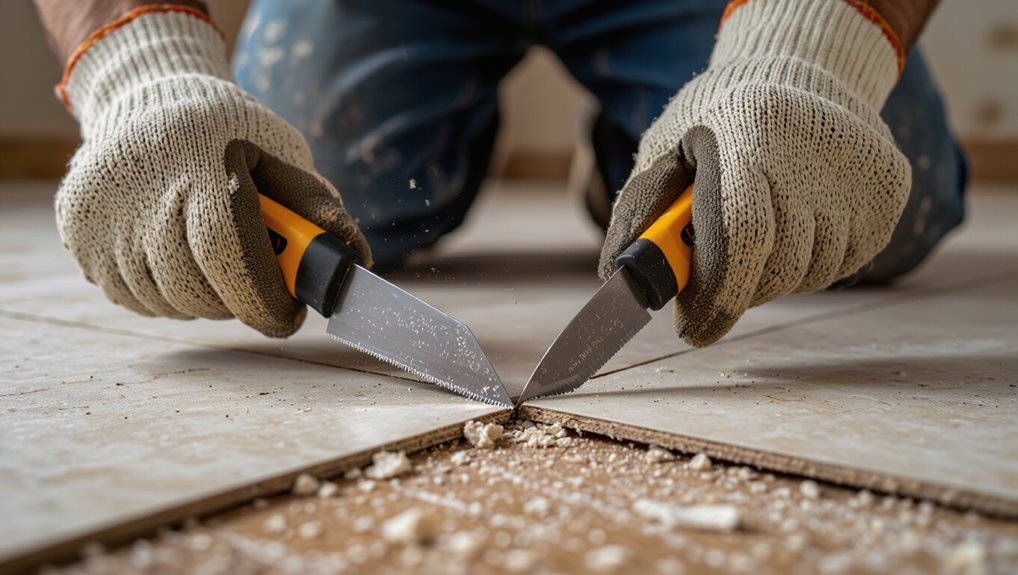
With the room prepped and nearby surfaces protected, you can start loosening the tiles themselves.
Score grout lines or tile edges with a utility knife, then pry using a floor scraper, chisel, or putty knife at a low angle. Work slowly to avoid gouging the subfloor.
Remove adhesive lumps with a scraper and collect debris as you go to keep the area safe.
Step 3 Using heat and chemical softeners safely
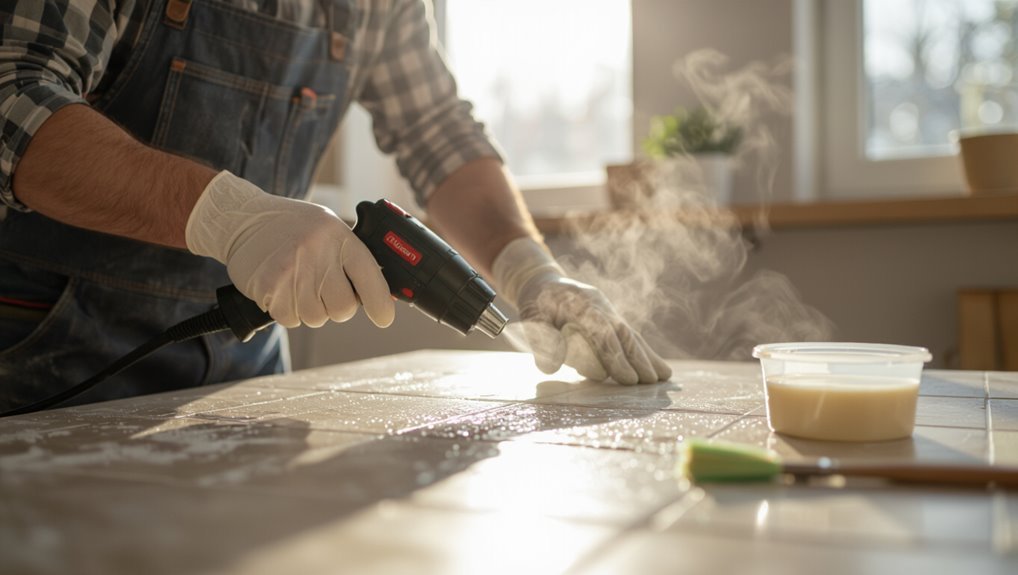
Heating or applying a chemical softener will loosen stubborn adhesive and make prying tiles easier, but you should handle both methods cautiously to protect yourself and the subfloor.
Wear gloves, eye protection, and a respirator for solvents. Test a small area first and follow manufacturer instructions.
Use moderate heat—never scorch—keeping the tool moving. Ventilate the room and dispose of wastes properly.
Step 4 Mechanical removal with scrapers and power tools
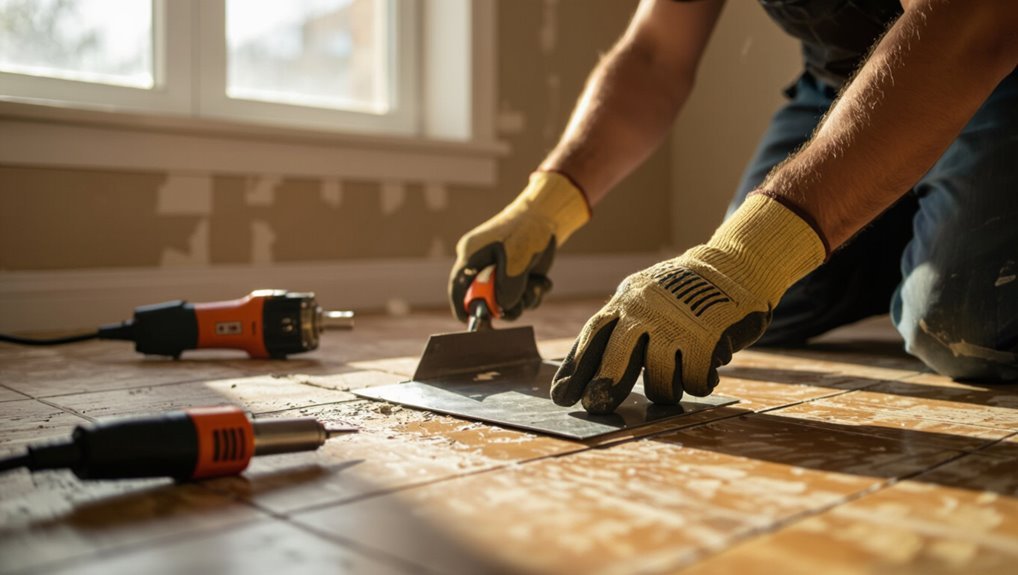
Start prying and scraping the loosened tiles using the right tools so you can remove adhesive and tile fragments efficiently without damaging the subfloor.
Use a flat pry bar, floor scraper, and putty knife; work at a shallow angle.
For stubborn areas, switch to a powered scraper or oscillating tool with a rigid blade, wearing eye and respiratory protection and keeping steady, controlled strokes.
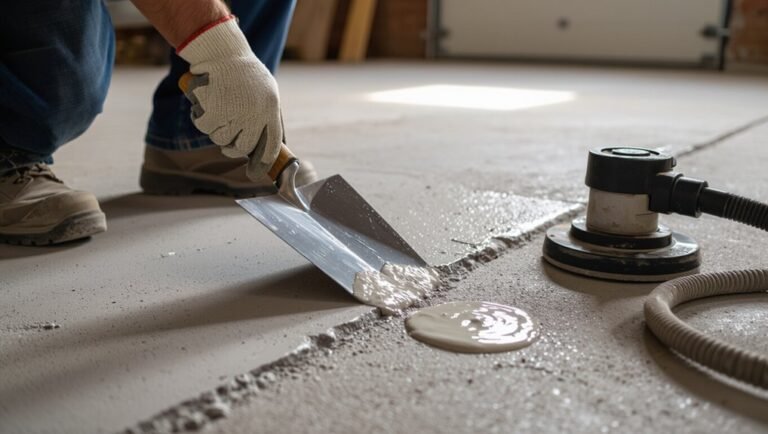
Step 5 Removing adhesive residues without harming subfloor
Tackle adhesive removal methodically so you don’t damage the subfloor:
begin by identifying the adhesive type (water-based, solvent-based, or asphaltic) and testing a small inconspicuous area to see how it responds to your chosen solvent or mechanical method.
Use appropriate solvent, gel adhesive remover, or heat; work gently with a plastic scraper and low-speed buffer.
Protect vents, ventilate, and wear PPE.
Step 6 Cleaning and inspecting the exposed subfloor
Once you’ve removed the adhesive, clean the exposed subfloor thoroughly so you can spot damage and plan repairs.
You’ll sweep, vacuum, and mop, then inspect for rot, loose boards, or gouges. Note problem areas and measure for repairs before installing new flooring.
- Sweep debris
- Vacuum seams
- Mop residue
- Inspect for rot
- Mark repair spots
Subfloor Repair and Preparation After Removal
Now that the tiles are out, inspect the subfloor for common damage like delamination, gouges, and rot so you know what needs fixing.
You’ll learn how to repair plywood and OSB seams and gouges, when to replace damaged sections, and how to level and moisture-test concrete slabs.
Finally, we’ll cover when to install underlayment or cement backerboard to guarantee a stable, dry surface for your new floor.
Identifying common subfloor damage (delamination, gouges, rot)
Before you repair or replace subflooring, inspect it carefully for three common types of damage: delamination (layers separating), gouges and punctures, and rot from moisture.
Check for soft or spongy areas, visible layer separation at edges or screw holes, and dark staining or musty odor.
Mark damaged spots, note their extent, and determine if sections need replacement or localized attention.
How to repair plywood and OSB seams and gouges
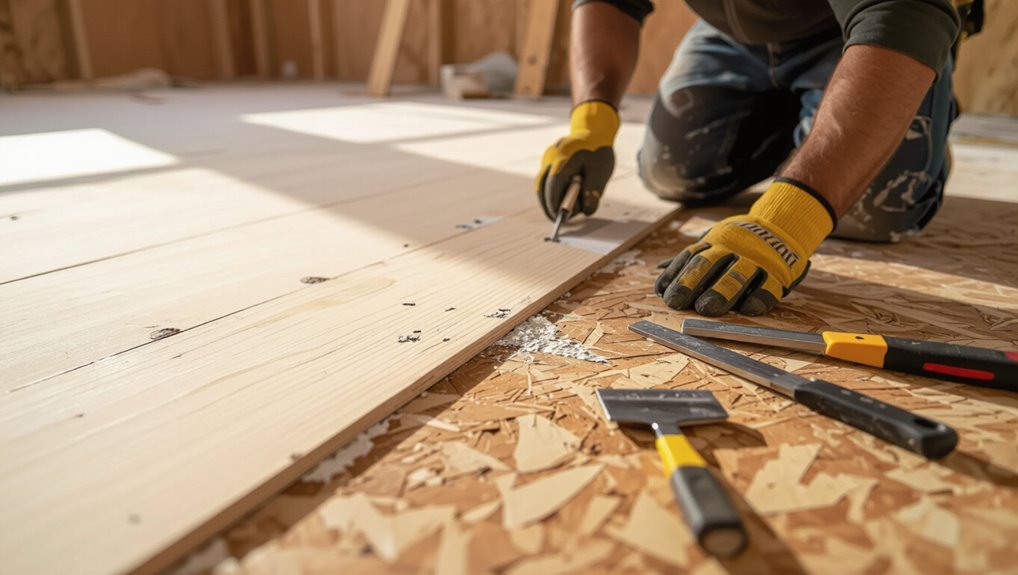
Prep the subfloor surface by cleaning away debris. Then assess seams and gouges to determine whether you’ll patch, fill, or sister new material over the existing plywood or OSB.
For gaps under 1/4″, use exterior-grade wood filler or epoxy. For wider seams, glue and screw shims or insert tapered plywood strips.
Replace delaminated panels. Fasten new sheets to joists for a solid, flush surface.
Moisture testing and leveling concrete subfloors
After you’ve removed the vinyl and cleaned the slab, test the concrete for moisture so you know whether it needs mitigation before you level it.
Use these steps to proceed efficiently:
- perform calcium chloride or RH tests per ASTM
- mark high-moisture zones
- dry with ventilation or dehumidifiers
- apply vapor barrier if required
- feather or pump self-leveler to specified tolerance
When to install underlayment or backerboard
When you’ve confirmed the slab is dry and level within tolerance, decide whether to install an underlayment or cement backerboard based on your finished floor choice, subfloor condition, and height constraints.
Choose cement backerboard for tile or damaged concrete, and thin underlayment for resilient or engineered floors.
Fasten per manufacturer instructions, check connections, and guarantee a stable, flat surface before laying the new flooring.
Tools and Methods Compared
You’ll choose between manual tools and power tools based on job size, control, and how much dust or muscle you want to deal with.
For stubborn tile and glue, compare heat guns, flooring strippers, and chemical adhesive removers for speed, safety, and cleanup requirements.
We’ll weigh the pros and cons of each so you can pick the most efficient, least risky method for your floor.
Manual tools vs. power tools pros and cons
Although you can remove vinyl tile with just a few hand tools, power tools speed the job up and cut down on the elbow grease — but they also add cost, noise, and safety considerations. You’ll choose hand tools for control and low cost, or power tools for speed. Consider trade-offs below.
| Manual tools | Power tools |
|---|---|
| Low cost | Fast |
| Precise | Tiring |
| Quiet | Noisy |
| Safer | Riskier |
Heat gun vs. floor stripper vs. chemical adhesive removers
After weighing hand versus power tools, you’ll need to pick a method for loosening stubborn vinyl and adhesive: a heat gun, a floor stripper (mechanical scraper), or chemical adhesive removers. You’ll choose by speed, control, and mess. Use a heat gun for precision, a stripper for large areas, chemicals for stubborn glue—mind ventilation and protective gear.
| Method | Best for | Drawbacks |
|---|---|---|
| Heat gun | Precision | Burns risk |
| Stripper | Large jobs | Heavy |
| Chemicals | Stubborn adhesive | Fumes |
Common Mistakes and How to Avoid Them
Don’t use pry bars or too much force, or you’ll gouge the subfloor—pick the right tools and work gradually.
Check for asbestos or hazardous adhesives before you start and stop and get testing or professional help if there’s any doubt.
Take your time removing adhesive; rushing here is what usually leads to damage and extra work.
Damaging the subfloor by using wrong tools or excessive force
When you pry up vinyl tile with the wrong tools or yank too hard, you can easily gouge or warp the subfloor beneath, creating bigger repairs than the job you started.
You should use proper tools and steady technique to avoid damage:
- Use a floor scraper or putty knife
- Heat stubborn adhesive gently
- Work in small sections
- Keep angle shallow
- Inspect as you go
Ignoring asbestos or hazardous-adhesive risks
While protecting the subfloor, you also need to watch for older adhesive or tiles that may contain asbestos or other hazardous chemicals—disturbing them can release dangerous fibers and vapors.
Don’t guess: test materials before you scrape. If tests show hazards, stop work, ventilate, and hire certified abatement pros.
Use proper PPE and sealed disposal to prevent contamination of the home and yourself.
Rushing the adhesive removal step
If you rush the adhesive removal, you’ll end up with an uneven subfloor, stubborn residue that ruins new flooring adhesion, or extra work down the line.
Take time to soften old glue with heat or an approved solvent, scrape carefully with a floor scraper, and finish with a mechanical buffer if needed.
Test patches and proper ventilation prevent damage and speed final installation.
Best Practices and Preventive Tips
As you remove vinyl tiles, keep dust contained with plastic sheeting, a shop vacuum, and wet-scraping where possible.
Cover cabinets, vents, and trim to prevent scratches and adhesive transfer.
Plan and level the subfloor now so the next floor goes down smoothly.
Minimizing dust and debris during removal
Kick up as little dust as possible from the start by sealing off the work area, wetting stubborn adhesive, and using tools that capture debris—these steps protect your lungs, furniture, and HVAC system.
- Run a HEPA vacuum while you work
- Mist adhesive before scraping
- Use a floor scraper with dust port
- Lay down plastic sheeting to catch fragments
- Change PPE and filter frequently
Protecting surrounding fixtures and finishes
Before you pull up a single tile, protect nearby cabinets, trim, appliances, and fixtures so dust, tools, and adhesive won’t damage finishes or create extra cleanup.
Cover surfaces with drop cloths or plastic sheeting, tape seams, and remove hardware where practical.
Use foam padding on edges, protect plumbing and electrical outlets, and keep a clean work perimeter to prevent accidental dings or adhesive smears.
Preparing for the next floor installation
Once the old vinyl’s up and the subfloor’s clean, plan the next floor system so you won’t have to redo work later: choose underlayment, moisture barrier, and adhesion method compatible with your subfloor and new flooring.
Measure, acclimate materials, and address leveling or repairs now. Protect thresholds, allow for expansion gaps, and keep a clear timeline so installers can work efficiently.
Estimated Time, Cost, and When to Hire a Pro
Plan on a few hours for a small room and a day or more for larger spaces, depending on adhesive and subfloor work.
Your total cost will vary with labor, disposal, any asbestos/lead testing, and needed repairs.
If you hit stubborn glue, suspect hazardous materials, or lack time and tools, call a pro.
Typical timeframes for rooms of different sizes
A small bathroom will usually take you a few hours to strip, while a medium kitchen or hallway can stretch into a full day, and larger open-plan rooms often require a day or two depending on adhesive difficulty and subfloor repairs; factor in extra time for cleanup and disposal when estimating cost or deciding whether to call a pro.
| Room Size | Time | Notes |
|---|---|---|
| Small (bath) | 2–4 hrs | minimal adhesive |
| Medium (kitchen) | 6–10 hrs | may need patching |
| Large (open) | 1–2 days | likely repairs |
| Hallway | 6–8 hrs | narrow, faster prep |
Cost factors: labor, disposal, testing, repairs
Several factors will drive the total cost of removing vinyl tile: labor rates and the time crew members spend, disposal fees for old flooring and adhesive waste, any required asbestos or lead testing, and the extent of repairs to the subfloor or underlayment.
You should budget for:
- Labor hours and hourly rates
- Disposal and landfill or hauling fees
- Hazardous-material testing
- Adhesive removal costs
- Subfloor repairs and materials
Signs you should hire a professional
If you’re facing extensive damage, suspect hazardous materials, or don’t have the time and tools, hire a pro—removal can take a few hours for a small room but several days for large, adhesive-heavy jobs, and costs rise quickly if specialists, testing, or subfloor repairs are needed.
Hire pros when asbestos or mold is possible, when subfloor repairs exceed your skills, or when project scope, permit needs, or tight timelines demand expertise.
FAQ
You probably have a few questions about safety, prep, and what comes next.
We’ll cover how to check for asbestos, safer ways to remove adhesive without a heat gun, whether you can floor over old vinyl, proper disposal of tiles and mastic, and whether removal will raise your finished floor height.
If something’s unclear, ask and I’ll clarify the answers for your situation.
How do I know if my vinyl tile contains asbestos?
Wondering whether your vinyl tile contains asbestos? You can’t tell by look or age alone.
If tiles date before the 1980s, treat them as suspect. Have a certified lab test a small sample taken by a professional—don’t DIY sampling.
Local health departments or licensed asbestos contractors can arrange testing and advise safe removal if results are positive.
What’s the safest way to remove adhesive without a heat gun?
After you’ve handled any asbestos concerns and removed suspect tiles safely, you’ll still need to deal with the old adhesive underlayment.
For a heat-gun-free approach, soften adhesive with a commercial adhesive remover or diluted citrus solvent, apply per directions, let it penetrate, then scrape gently with a floor scraper or putty knife.
Finish with a solvent wipe and mild detergent rinse to remove residue.
Can I install new flooring directly over old vinyl?
Can you lay new flooring right over old vinyl? You can in some cases—if the vinyl is firmly adhered, flat, dry, and free of soft spots or major seams.
Engineered wood, laminate, and some luxury vinyl can go over stable vinyl, but check manufacturer warranties and height changes.
Always test for moisture and repair any subfloor issues before proceeding.
How do I dispose of removed vinyl tiles and adhesive waste?
How should you handle old vinyl tiles and the sticky adhesive they leave behind?
Bag tiles in heavy-duty contractor bags and label for local disposal rules; many areas accept them as construction waste.
Scrape adhesive into containers, avoid washing it down drains, and collect residue with absorbent pads.
Check local hazardous-waste guidelines—old adhesive may contain asbestos or PCBs—and use a licensed disposal service if required.
Will removing vinyl tiles raise the floor level noticeably?
If you’ve removed tiles and scraped up adhesive, you’re probably wondering whether taking out that layer will leave your finished floor sitting higher than before.
Removing vinyl and adhesive usually lowers the finished floor by about 1/16″ to 1/8″ per layer removed. You won’t raise the floor; you’ll reduce thickness, so plan thresholds, passages, and new flooring underlayment accordingly.