Can You Install Carpet Over Tile? What You Need to Know Before You Try
Yes — you can install carpet over tile if the tile is level, secure, and dry, but you’ll need to inspect and prep the floor first. Check for loose or cracked tiles, high grout lines, and moisture with a level and moisture meter. Use a suitable moisture-resistant padding, low-profile tack strips, and a floor-leveling compound where needed. Watch for height changes and trapped moisture. Keep going to learn the steps, materials, and common pitfalls.
Can You Install Carpet Over Tile? Quick Answer
Yes — you can install carpet over tile when the tile is level, secure, and dry.
The upside is quicker installation and added warmth, while the downside is potential height issues, trapped moisture, and less longevity than removing the tile.
You’ll want to check subfloor conditions and trim thresholds before you start.
Direct yes/no summary and when it’s appropriate
You can install carpet over tile in many cases, but only when the tile is level, firmly adhered, and free of moisture or damage.
Yes—you can install carpet over tile if conditions are right. It’s appropriate for soundproofing, comfort, or temporary updates.
Don’t proceed over loose, cracked, or damp tile; fix substrate issues first, then choose proper padding and installation methods.
One-sentence pros and cons
Since installing carpet over tile is feasible when the substrate is sound, here are bite-sized pros and cons to help you decide:
Pro: You’ll gain warmth, comfort, and quicker installation without demoing tile.
Pro: It can lower noise and hide minor imperfections.
Con: Moisture and uneven grout can cause mold or rippling.
Con: It may reduce resale appeal and complicate future flooring changes.
Basic Understanding What It Means to Install Carpet Over Tile
When you install carpet over tile, you’ll need to evaluate the tile type—ceramic, porcelain, vinyl, or stone—as each has different hardness and surface textures.
You’ll also pick a carpet and underlayment suited to the subfloor and traffic, since padding affects comfort and height.
Finally, check tile flatness, grout lines, and moisture levels because unevenness or damp can change installation methods and longevity.
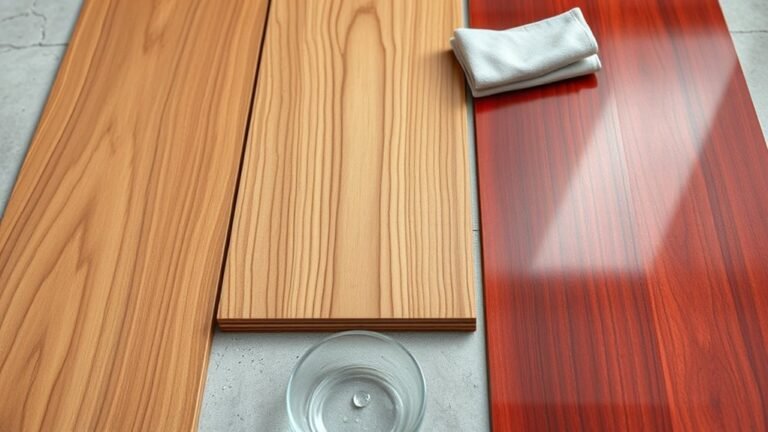
Types of tile surfaces (ceramic, porcelain, vinyl, stone)
Tiles come in several common types—ceramic, porcelain, vinyl, and natural stone—and each behaves differently when you lay carpet over it.
You’ll consider durability, flatness, and moisture. Check grout and sealants first.
- Ceramic: rigid, often uneven grout lines
- Porcelain: dense, less absorbent
- Vinyl: flexible, smoother
- Stone: porous, may need sealing
- Subfloor: impacts outcome
Types of carpet and underlayment relevant to tile
After you’ve checked grout, sealants, and subfloor conditions, pick carpets and underlayments that match the tile’s firmness and flatness.
You’ll choose fibers and padding to balance comfort, durability, and friction on tile.
- Low-pile nylon for high-traffic rooms
- Polyester for stain resistance
- Wool for longevity and warmth
- Dense foam pad for smoothness
- Rubber or felt for grip and sound control
How tile characteristics affect carpet installation (flatness, grout, moisture)
Because tile can vary widely in flatness, grout depth, and moisture levels, you’ll need to address those conditions before laying carpet to guarantee a smooth, durable finish.
Check for uneven tiles and level or replace them. Fill or grind deep grout lines.
Test for moisture; remediate dampness with sealers or a vapor barrier.
Proper prep prevents ripples, odors, and premature wear.
When Should You Consider Installing Carpet Over Tile?
You might choose to lay carpet over tile to cut costs, save time, freshen a rental, or change the room’s look without major renovation.
It makes sense when the tile is level, firmly attached, and the subfloor has no moisture issues.
Don’t do it if the tile is loose, the floor has active water problems, or you need a long-term, high-durability solution.
Common scenarios and motivations (cost, time, rental, aesthetics)
When you’re weighing whether to lay carpet over existing tile, practical motivations usually drive the decision: lower cost and faster installation, improved comfort and warmth, or simply making a rental or dated space more appealing.
You’ll consider scenarios like:
- Quick cosmetic refresh for tenants
- Budget-friendly temporary update
- Sound dampening in basements
- Warmer feet in bedrooms
- Hiding minor tile damage
Situations when you should NOT install carpet over tile
If the tile’s cracked, loose, or has uneven grout lines, don’t cover it with carpet—you’ll trap moisture and create an unstable, short-lived floor.
Also avoid carpet over tile in moisture-prone areas (bathroom, laundry), on floors with radiant heating unless compatible, or when tile conceals mold or structural issues.
If you need longevity, repair or remove the tile first.
Preparation Assessing the Existing Tile and Room Conditions
Before you install carpet over tile, check the floor for levelness, cracked or loose tiles, and signs of moisture with a simple inspection checklist.
Gather tools like a level, tapping tool, moisture meter, and flashlight so you can test spots and document any issues.
Use a moisture meter or calcium chloride test—aim for moisture readings within manufacturer-recommended thresholds (typically below 3–5% for wood-based underlayment or per carpet system specs).
Inspection checklist (level, cracks, loose tiles, moisture)
Although the tile might look fine at a glance, you need a thorough inspection checklist to confirm the floor is level, free of cracks and loose tiles, and dry enough for carpet installation.
Use this quick checklist to spot problems and plan repairs before you proceed:
- Check levelness across room with a straightedge.
- Scan for visible cracks and grout gaps.
- Press tiles to find loose ones.
- Smell and test for moisture.
- Note uneven changes and thresholds.
Tools and materials needed for inspection
Gather a compact kit of tools and materials so you can quickly assess the tile and room conditions before carpet installation.
You’ll need basic items to spot issues, measure, and document findings before any repairs.
- Level or straightedge
- Hammer and chisel
- Grout scraper
- Measuring tape and marker
- Camera or smartphone for photos
Moisture testing methods and acceptable thresholds
When evaluating tile before carpet installation, you’ll want to test moisture with both quick spot checks and more reliable quantitative methods:
use a surface moisture meter for immediate readings, a calcium chloride or anhydrous calcium chloride test for 72-hour vapor emission rates, and a relative humidity (RH) probe test for in-situ slab conditions;
compare results to the carpet and adhesive manufacturers’ maximum allowable moisture limits to decide if mitigation’s required.
- surface moisture meter
- calcium chloride (72 hr)
- anhydrous calcium chloride
- in-situ RH probe
- manufacturer limits
Step-by-Step How to Install Carpet Over Tile
Now you’ll walk through the concrete steps to go from bare tile to a finished carpeted floor.
Start by cleaning and repairing the tile, then level grout lines or uneven tiles before choosing and installing the right underlayment or padding.
Finally, decide on tackless strip placement and install, then lay, stretch, and secure the carpet for a smooth result.
Step 1 Clean and repair the tile surface
Start by thoroughly cleaning the tile so the carpet and underlayment can adhere properly; sweep and vacuum to remove loose debris, then mop with a degreasing cleaner and rinse well.
Inspect for cracked or loose tiles and replace or reattach them. Fill chips and small gaps with a suitable epoxy or grout repair, let cures fully, then dry the surface before proceeding.
Step 2 Leveling and addressing grout lines or uneven tiles
Although tile can seem flat, grout lines and slight height differences will telegraph through carpet if you don’t level them.
So you’ll want to address these issues before laying underlayment. Inspect for high or loose tiles, grind down raised edges, and fill low spots or deep grout with a floor-leveling compound.
Sand smooth, let cure fully, and recheck for evenness before continuing.
Step 3 Choosing and installing appropriate underlayment or padding
1 key decision before laying carpet is choosing the right underlayment or padding, since it affects comfort, insulation, and how well the carpet hides any remaining imperfections in the tile.
Pick a dense, moisture-resistant pad to prevent indentations and mold. Cut it to fit, tape seams, and use adhesive where needed so the padding stays flat and supports the carpet evenly.
Step 4 Tackless strip options and installation over tile
Tackless strips are the foundation for a secure carpet installation over tile, so you’ll need to choose the right type and install them carefully to verify the carpet grips and lays flat.
Pick low-profile, moisture-resistant strips or adhesive-backed variants for tile.
Use construction adhesive or concrete screws through the tile grout lines, align edges ¼–½ inch from wall, and confirm pins face inward.
Step 5 Laying, stretching, and securing the carpet
Start by laying the carpet roll across the room with the pile facing the direction you want, leaving a few extra inches at each wall for trimming.
Cut seams slightly long, align pattern, and seam tape underneath.
Use a knee kicker to seat carpet onto the tackless strip, then a power stretcher to remove wrinkles.
Trim excess and press edges firmly for a secure fit.
Step 6 Finishing edges and transitions to other flooring
Now you’ll finish the edges and make clean changes to other flooring so the installation looks professional and wears well; trim the carpet flush to walls and doorways, install junction strips or reducers where carpet meets tile, hardwood, or vinyl, and tuck or glue edges into seams and thresholds to prevent fraying and tripping.
Use carpet tape at thresholds, secure vinyl or hardwood with appropriate fasteners, and test junctions.
Alternatives to Installing Carpet Directly Over Tile
You can choose to remove the tile and install a proper subfloor for the cleanest result, or save time by installing a floating underlayment or plywood subfloor over the existing tile.
If you want a less permanent option, consider area rugs or modular carpet tiles that give soft underfoot feel without major work.
We’ll compare pros, cons, costs, and installation effort for each choice so you can pick what fits your space.
Removing tile vs. installing a subfloor
When deciding between removing existing tile or installing a raised subfloor, weigh the trade-offs in cost, time, and disruption to your home—removal gives you a true flush base but takes more labor and can create dust and repair needs, while a subfloor installs faster with less mess and can improve insulation and soundproofing but raises floor height and may require trim adjustments.
| Option | Key impact |
|---|---|
| Remove tile | Lowers floor, needs repairs |
| Add subfloor | Raises height, adds insulation |
Floating underlayment or plywood subfloor options
Two common alternatives to laying carpet directly over tile are floating underlayment systems and installing a plywood subfloor, and each approaches height, stiffness, and moisture differently.
You can float engineered panels or cork-based underlayment for slight height and cushioning, or screw down exterior-grade plywood for a solid, stable base.
Always level, seal grout lines, and address moisture before adding padding and carpet.
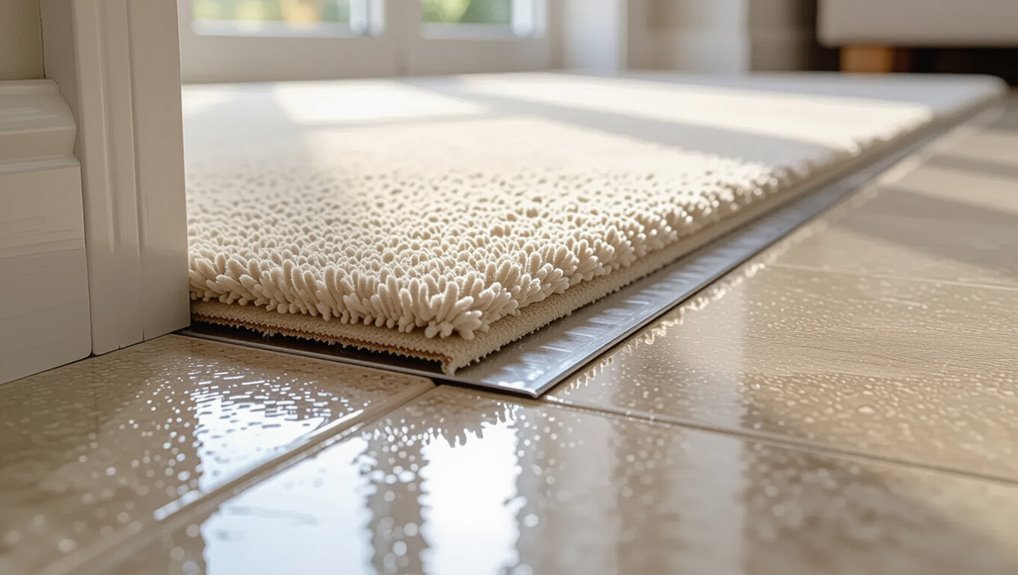
Using area rugs or modular carpet tiles as a non-permanent solution
Area rugs and modular carpet tiles give you a quick, non-permanent way to soften tile floors, add warmth, and define zones without committing to full carpet installation.
You can mix sizes, textures, and patterns to suit rooms, protect tiles, and reduce noise. Choose non-slip pads for safety, replace stained pieces easily, and change layouts seasonally—no major tools or permanent alterations required.
Comparison Cost, Time, and Performance
You’ll want to weigh upfront costs of laying carpet over existing tile against the higher expense of ripping out tile and installing new flooring.
Consider time and labor too — carpet-over-tile is usually quicker and less disruptive, while full removal takes longer and needs skilled work.
Finally, think about longevity and maintenance: carpet may need more frequent replacement and care, whereas new tile is more durable but costlier to install.
Cost comparison: carpet over tile vs. tile removal and new installation
Although upfront costs often make carpeting over tile tempting, comparing the true price, time, and long-term performance of that shortcut versus removing tile and installing new flooring will help you decide which route gives the best value. You’ll often pay less now for carpet over tile, but removal plus new flooring usually yields better longevity and resale value.
| Option | Initial Cost | Long-term Value |
|---|---|---|
| Carpet over tile | Lower | Lower |
| Remove & replace | Higher | Higher |
Time and labor differences
Beyond upfront cost and long-term value, time and labor can sway your choice between carpeting over tile and removing it for new flooring.
Installing carpet over tile is faster—you skip demolition, dust, and disposal—so you’ll finish in days instead of weeks.
Removing tile demands heavy labor, potential subfloor repairs and longer downtime.
Choose based on your schedule, tolerance for mess, and budget.
Longevity and maintenance trade-offs
While carpeting over tile saves time and upfront cost, it also changes how long your floor performs and what upkeep looks like.
Carpet hides existing tile wear but wears faster in high-traffic areas and traps moisture or spills that tile would shed.
You’ll spend more on periodic replacement, cleaning, and potential mold remediation, though you’ll gain warmth and noise reduction—trade cost and maintenance for comfort.
Common Problems and Mistakes to Avoid
Before you lay carpet over tile, watch for moisture issues and trapped water that can ruin the carpet and promote mold.
Make sure the tile surface is even and you use proper padding—uneven substrate or the wrong pad will cause premature wear and lumps.
Don’t skip correct tack strip placement, changes, and door clearances, because mistakes there will make the installation look and function poorly.
Problems caused by moisture and trapped water
If you install carpet over tile without addressing moisture, you’ll likely trap water between the two layers and invite mold, mildew, and rot that damage the carpet, pad, and subfloor.
You’ll also get stains, odors, and accelerated fiber breakdown.
Hidden dampness can warp door thresholds, weaken adhesives, and create unhealthy air; inspect, seal, and dry thoroughly before carpeting.
Issues from uneven substrate and inadequate padding
When you lay carpet over tile without addressing unevenness or skimping on padding, you’ll quickly notice ripples, premature wear, and poor comfort underfoot.
Low spots in the tile telegraph through the carpet while thin or wrong-density padding fails to cushion and support the fibers.
Inspect and level high or low tiles, use appropriate foam density and thickness, and replace crushed or old padding before installation.
Mistakes with tack strips, transitions, and door clearances
Because tack strips, connection pieces, and door clearances control how your new carpet meets existing surfaces, getting them wrong will undo even a perfect stretch job.
You need correct placement, secure strips, and proper trim so seams sit tight and doors swing freely.
- Tack strips set too close or loose
- Wrong threshold height
- Missing reducer strips
- Poor seam alignment
- Insufficient door clearance
Best Practices and Maintenance Tips After Installation
Once your carpet’s over tile, you’ll want a regular vacuuming and occasional deep-clean schedule to keep fibers and grout dust from building up.
Check for moisture under seams and around edges after spills or humidity changes so you can stop mold before it starts.
If you spot rips, loose edges, or persistent damp, repair seams or replace affected sections promptly to protect the rest of the floor.
Cleaning and vacuuming recommendations for carpet over tile
Start by removing loose debris and dust with a thorough vacuum using a brush-roll or adjustable-head attachment to loosen dirt trapped between carpet fibers and grout lines beneath.
Then follow regular care to keep the carpet over tile clean and lasting:
- Vacuum high-traffic areas daily
- Use low-suction for delicate fibers
- Spot-clean spills immediately
- Deep-clean quarterly with steam or dry methods
- Rotate furniture to prevent matting
Monitoring for moisture and mold prevention
Keeping your carpet clean helps, but you also need to watch for moisture that can hide beneath fibers and around grout lines—left unchecked it leads to mold and odors.
Check for damp spots weekly, use a moisture meter if uncertain, keep humidity under 50%, ventilate after spills, dry promptly, and treat any musty smell immediately with appropriate cleaners and professional help if growth appears.
Repair and replacement guidance
After installation, you’ll want a clear plan for repairing and replacing carpet to protect your investment and keep the floor safe.
Inspect seams, tack strips, and padding regularly. Address stains and odors promptly; replace saturated padding to prevent mold.
Patch small damaged areas or replace carpet tiles for localized issues.
For widespread wear or recurring moisture, remove carpet and assess tile and substrate before reinstalling.
Cost & Materials Checklist
Before you start, you’ll want a clear budget: DIY installs typically run much lower than hiring a pro, but factor in your time and potential mistakes.
Make a checklist of every material and tool—carpet, padding, tack strips, seam tape, adhesives, knee kicker, stretcher, utility knife, and safety gear—so you don’t get stuck mid-project.
Compare your total estimated costs against professional quotes to decide the best route.
Estimated budget ranges for DIY vs. professional installation
Deciding between DIY and professional carpet installation largely comes down to budget and skill: DIY usually runs $1–$4 per square foot for materials and basic tools, while hiring pros typically costs $3–$8 per square foot including labor, with higher-end services and complex jobs reaching $10+ per square foot.
| DIY | Pro |
|---|---|
| Low cost | Faster |
| Learning curve | Guaranteed finish |
| Flexible pace | Warranty included |
Complete materials and tool list
Whether you tackle the job yourself or hire pros, you’ll need a clear list of every material and tool to keep costs accurate and the work efficient.
You’ll gather the right supplies, verify quantities, and plan rentals. Check local prices and factor waste.
- Carpet and padding
- Tack strips and threshold molding
- Adhesive or double-sided tape
- Knee kicker and power stretcher
- Utility knife, hammer, pry bar
FAQ
You’ll want clear answers to whether carpet will adhere to tile, whether trapping moisture can cause mold or mildew, and how long the carpet might last over a hard surface.
Also consider whether removing or reinstalling carpet later will harm the tile and if commercial-grade padding makes a measurable difference.
I’ll walk you through those FAQs so you can make the right choice for your space.
Will carpet stick to tile without removing the tile?
Although carpet can be installed over existing tile, it won’t simply “stick” to the surface — you’ll need a proper underlayment, adhesives or tack strips, and surface prep to guarantee a secure, long-lasting installation.
You’ll clean, level, and possibly fill grout lines, install a padding or plywood layer, and use appropriate adhesive or tack strips so the carpet stays flat, safe, and durable.
Can carpet over tile cause mold or mildew?
Can carpet over tile cause mold or mildew? Yes—if moisture gets trapped beneath carpet, you can get mold or mildew growth.
You should guarantee tile is dry, fix leaks, and use a vapor barrier and breathable padding.
Regularly check for dampness, maintain humidity under 60%, and address spills promptly to prevent hidden mold that can damage flooring and harm indoor air quality.
How long will carpet last when installed over tile?
If you’ve kept moisture out and prevented mold, the next question is how long carpet will last when laid over tile.
Lifespan depends on carpet quality, pad, foot traffic, and installation. High-quality carpet with proper padding can last 10–15 years; budget options wear faster, around 5–7 years.
Regular cleaning and prompt moisture control extend life; heavy use shortens it.
Can I reinstall or remove the carpet later without damaging the tile?
Yes — you can usually remove and reinstall carpet over tile without damaging the tile, but careful removal and proper tools are key.
Use a knee kicker and tackstrip puller to lift edges, trim underlayment, and roll the carpet gently.
Avoid metal scrapers that scratch grout.
Patch any tackstrip holes and clean adhesive residue so the tile stays intact for future use or reinstallations.
Is it better to use commercial-grade padding over tile?
While you can use standard residential padding, commercial-grade padding often performs better over tile because it’s denser, more durable, and resists compression and moisture — so it keeps the carpet flatter and lasts longer in high-traffic areas.
You’ll get better support, less shifting, and improved wear resistance. Choose closed-cell or rubber-based commercial pads to prevent moisture trapping and tile damage.