How to Lift Ceramic Floor Tiles Without Cracking Them or the Subfloor
You can lift ceramic floor tiles intact by working slowly and using the right tools: score grout lines, pry gently with a thin putty knife or floor scraper, and support tile edges with shims or scrap wood as you ease them up. Stop at any resistance, check for rigid adhesive or subfloor movement, and shore up rotten joists before continuing. Wear gloves and eye protection, plan debris disposal, and follow careful technique — keep going to learn the step-by-step process and tips.
Can You Lift Ceramic Floor Tiles Without Cracking Them or the Subfloor?
You can often lift ceramic floor tiles without cracking them or the subfloor, but it takes the right tools and steady technique.
Start by softening the adhesive and using a flat pry bar or chisel at a low angle to ease tiles up, working slowly to avoid snap points.
Protect the subfloor with thin shims or scrap wood and stop at the first sign of resistance to reassess.
Short summary of feasibility and key precautions
Although lifting ceramic floor tiles without cracking them or the subfloor can be tricky, it’s often feasible with the right tools, technique, and patience.
You’ll learn how to lift ceramic floor tiles safely by following simple precautions and visual cues:
- Use thin, even prying pressure.
- Score grout and heat adhesive gently.
- Support tile edges to avoid flexing.
Basic Understanding Why Tiles and Subfloors Crack
When you lift ceramic tiles, you’re working against whatever bonded them to the subfloor—thin-set, mastic, mortar, or a floating system each holds and releases differently.
Cracks usually happen from mechanical force, improper adhesive removal, or movement in the subfloor itself. Knowing the bond type and common causes of damage helps you choose the right tools and technique to minimize breakage.
How ceramic tiles bond to the subfloor
Because ceramic tiles rely on a thin, rigid layer of mortar or adhesive to transfer loads to the subfloor, any mismatch in movement or support quickly shows up as cracks or loose tiles.
You should know the adhesive bonds by mechanical keying and chemical adhesion to tile backs and subfloor. Proper trowel coverage, curing, and flat, stable substrate keep the bond intact.
Common causes of tile and subfloor damage during removal
Knowing how tiles bond to the subfloor helps you see why removal often causes damage: that thin, rigid adhesive layer doesn’t tolerate movement, so prying or impact can crack tiles, fracture the mortar, or pull pieces of the substrate loose.
You also risk damage from inadequate support beneath tiles, sudden force, using wrong tools, or failing to score grout first, which concentrates stress.
Types of tile installations and how they affect removal (thin-set, mastic, mortar, floating)
If you’re tackling tile removal, start by identifying how the tiles were installed—thin-set, mastic, mortar, or a floating system—as each method bonds and fails differently and changes how much force and what tools you’ll need.
Thin-set and mortar are rigid and require chisels or grinders; mastic peels with heat and scrapers; floating floors pry apart at joints.
Match technique to adhesive to avoid cracking.
When to Remove Tiles vs. Repair or Overlay
Check the pattern and extent of damage to decide if you need full removal—loose, crumbling tiles or widespread subfloor rot typically means you should pull everything up.
If damage is localized, you can often repair a few tiles or overlay with a thin-set and new flooring.
Call a professional when structural issues, moisture damage, or large areas are involved and you’re unsure how the subfloor will respond.
Signs removal is necessary
When should you pull up ceramic floor tiles instead of patching or overlaying them?
You should remove tiles when widespread cracking, loose or hollow-sounding areas, severe subfloor rot, persistent moisture damage, or unevenness beyond shimming exist.
Also pull up tiles if adhesive fails across large sections or if layout changes require new substrate heights.
Removal prevents recurring problems and guarantees a stable base.
When to choose overlay or repair instead
Although complete removal is sometimes necessary, you’ll often save time and money by repairing or overlaying tiles when damage is localized, the subfloor is sound, and the existing tile is well bonded and level.
Choose repair for isolated cracks, loose grout, or chipped edges.
Overlay when tiles are flat, stable, and adhesive-compatible.
Both options minimize dust, disruption, and cost versus full removal.
When to call a professional
If the damage looks extensive, the subfloor feels soft, or the tile field shows widespread bonding failures, call a professional—removal can be tricky and you don’t want to create bigger problems by guessing.
A pro will assess structural issues, hidden water damage, and adhesive removal. If repairs are simple, you can patch or overlay; otherwise let the specialist handle full removal and subfloor restoration.
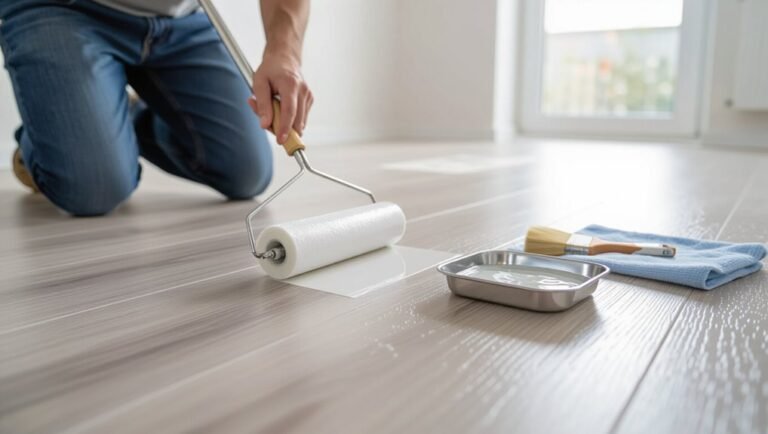
Tools and Materials You’ll Need
You’ll need a mix of hand and power tools for gentle tile removal—crowbar, putty knife, floor scraper, plus an oscillating tool or small demo hammer if tiles are stubborn.
Don’t forget protective gear and support materials like gloves, safety glasses, knee pads, floor protection, shims, and wedges.
For tricky spots bring optional items such as a heat gun and suction cups to soften adhesive and lift intact tiles.
Essential tools for gentle tile removal (manual and power options)
Removing ceramic floor tiles gently takes the right mix of manual and power tools to pry, cut, and lift without damaging the subfloor; you’ll want a few basics on hand plus optional power tools for tougher spots.
- Putty knife, floor scraper, grout saw — for careful prying and grout removal.
- Flat pry bar, chisel — to lift tiles with controlled leverage.
- Oscillating multi-tool or rotary tool — for stubborn adhesive and clean cuts.
Protective gear and support materials (floor protection, shims, wedges)
While you’re working, wear sturdy gloves, eye protection, and a dust mask to keep fragments and dust from cutting or irritating you.
Use knee pads to protect your joints during extended work. Protect surrounding floors with rosin paper or cardboard, and keep shims and wedges handy to support lifted tiles and prevent sagging.
- Cardboard sheets
- Plastic shims
- Wooden wedges
Optional tools for challenging situations (heat gun, oscillating tool, suction cups)
If the basic kit doesn’t loosen stubborn tiles, a few specialty tools can make tough jobs manageable.
Use a heat gun to soften adhesive, an oscillating tool with a grout blade to free edges, and suction cups for clean, controlled lifts.
Picture:
- Warmed adhesive easing.
- Blade slicing grout lines.
- Suction handles lifting whole tiles without chipping.
Step-by-Step Safe Tile Removal Process
Before you start, get the area clear, lay down protection, and gather your grout tools, pry bars, wedges, suction cups, and safety gear.
Inspect and loosen grout first so you don’t stress surrounding tiles. Then choose starting points and a lifting pattern that reduces tension.
Use controlled prying with wedges and finish by lifting intact tiles with suction cups or hooks.
Step 1 Preparation and workspace setup
Start by clearing the room and creating a safe, well-lit work area: move furniture and rugs out, cover vents and doorways with plastic sheeting to contain dust, and open windows or set up fans for ventilation.
Put on safety gear — gloves, goggles, dust mask — and lay down protective floor coverings.
Gather tools, a trash bin, and a bright inspection light before you begin.
Step 2 Inspecting grout lines and loosening grout
Now you’ll closely inspect the grout lines to find loose or cracked areas and plan where to begin loosening grout for safe tile removal.
Use a utility knife, grout saw, or oscillating tool with a grout blade to remove grout 1/8–1/4 inch deep around target tiles.
Work slowly, wear eye protection, and vacuum dust frequently to keep joints clear.
Step 3 Starting points and pattern for lifting tiles to reduce stress
When you lift tiles, choose a starting point and sequence that lets you work outward and avoid concentrating stress on a single area; begin at an edge, loose tile, or near a removed fixture.
Work in a staggered, checkerboard pattern so adjacent tiles remain supported. That reduces localized stress, prevents cracking, and keeps the subfloor stable as you progress across the surface.
Step 4 Using prying tools, wedges, and controlled force
Grab the right prying tools and wedges and work deliberately: insert a flat pry bar or chisel under a tile edge, tap the tool with a mallet to seat it, then rock and lever gently while placing thin wooden or plastic shims to spread the load and protect the subfloor.
Keep force gradual, reposition wedges as needed, avoid twisting, and stop if resistance spikes to prevent tile or substrate damage.
Step 5 Lifting whole tiles with suction cups or lifting hooks
After you’ve loosened and pried up edges with wedges and a pry bar, use suction cups or lifting hooks to remove whole tiles without shattering them.
Center the cup, pump or lock it, and lift steadily, keeping the tile level. For hooks, engage grout gaps or drilled holes, lift gently, and set tiles on a padded surface.
Wear gloves and eye protection.
Step 6 Dealing with stubborn tiles and adhesive remnants
If a tile won’t budge or stubborn adhesive keeps chunks stuck to the subfloor, work methodically to avoid damage and reduce cleanup time.
Score around the tile with a utility knife, use a chisel at a low angle and gentle taps, and pry slowly.
Heat breakers or penetrating adhesive remover can help loosen bonds—apply sparingly and let products sit per instructions.
Step 7 Cleaning adhesive from subfloor without damaging it
Start by evaluating the adhesive—identify its type (mastic, thinset, or mortar) so you can choose the right removal method and avoid harming the subfloor.
For mastic use a solvent or adhesive remover, applied sparingly and wiped up.
For thinset or mortar, scrape gently with a floor scraper or use a chisel at low angle.
Vacuum debris and rinse; let dry.
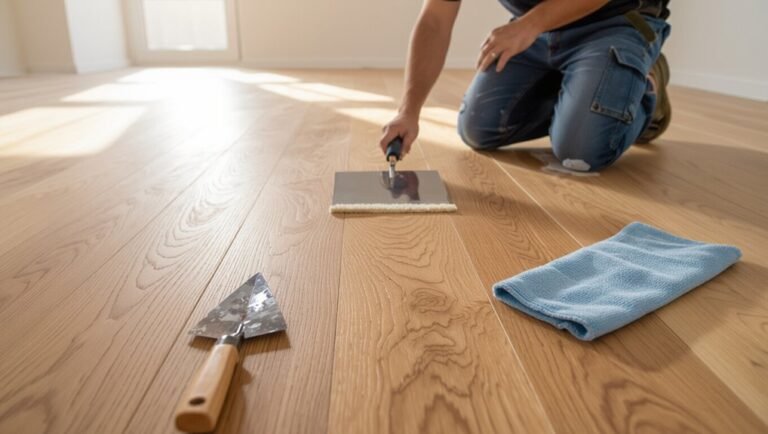
Techniques for Specific Tile and Subfloor Types
When you tackle tile removal, you’ll need different approaches for cement or concrete versus plywood subfloors to protect the substrate.
You’ll also adjust your tools and technique depending on whether the tiles are adhered with mastic or thin-set, and take extra care with large-format or heavy tiles to prevent cracking or injury.
Next, we’ll cover specific methods and safety tips for each situation.
Removing tiles from cement backer board or concrete subfloors
Tackling tiles set on cement backer board or concrete means working with very durable materials, so you’ll need sturdier tools and a careful approach to avoid damaging the subfloor.
Score grout, use a masonry chisel or oscillating tool, and start at broken or edge tiles. Pry gently, chip mortar progressively, and remove adhesive shards.
Wear eye and dust protection; clean debris to inspect for substrate damage.
Removing tiles from plywood or wood subfloors (risk mitigation)
Because plywood flexes and wood joists can hide fasteners and wiring, you’ll need a gentler, more deliberate approach to strip tiles without wrecking the subfloor.
Start by prying at grout lines with a grout saw, then tap a thin putty knife or floor scraper under tiles to lift slowly.
Support surrounding boards, work in small sections, and clamp or brace any loose framing as you go.
Removing tiles glued with mastic vs. thin-set mortar
Although both mastic and thin-set hold tiles firmly, they come off in very different ways, so you’ll want to match your tools and technique to the adhesive.
Mastic softens with heat and solvents, so heat guns and adhesive removers let you pry tiles gently.
Thin-set is cementitious—chip with a masonry bit, use a rotary hammer sparingly, and protect the subfloor from aggressive pounding.
Handling large-format or heavy tiles
If you’re working with large-format or very heavy ceramic tiles, plan for extra hands, sturdier tools, and careful subfloor protection from the start; their size changes how you lift, support, and transport each piece compared with standard tiles.
Use suction cups, lift with partners at opposite ends, score adhesive seams, pry gently at corners, cradle tiles on padded boards, and avoid twisting to prevent breakage.
Common Problems and How to Fix Them
You’ll sometimes crack tiles while prying them up, but you can often rescue pieces or replace them without redoing the whole floor.
If the subfloor gets nicked or weakened, you can patch small areas and add reinforcement to restore stability.
For stubborn adhesive residue, try the least aggressive chemical or mechanical method that removes it without harming the substrate.
Cracked tiles during removal rescue techniques
When tiles crack during removal, don’t panic—there are practical ways to salvage pieces and protect the substrate beneath.
Carefully lift loose fragments with a flat chisel and gloved hand, keeping adhesive intact where possible. Score remaining tile to control breaks, remove sharp shards, and collect reusable sections for patching or removal.
Clean debris and inspect the substrate for immediate concerns.
Minor subfloor damage patching and reinforcement methods
Though small gouges and soft spots can seem alarming, you can usually repair and reinforce a subfloor without replacing the whole panel.
Clean debris, dry the area, and remove loose fibers. Fill shallow gouges with a rapid-setting wood filler or epoxy patch.
Sister nearby joists or fasten a plywood shim under soft spots for reinforcement.
Sand, seal, and reinstall tiles once cured.
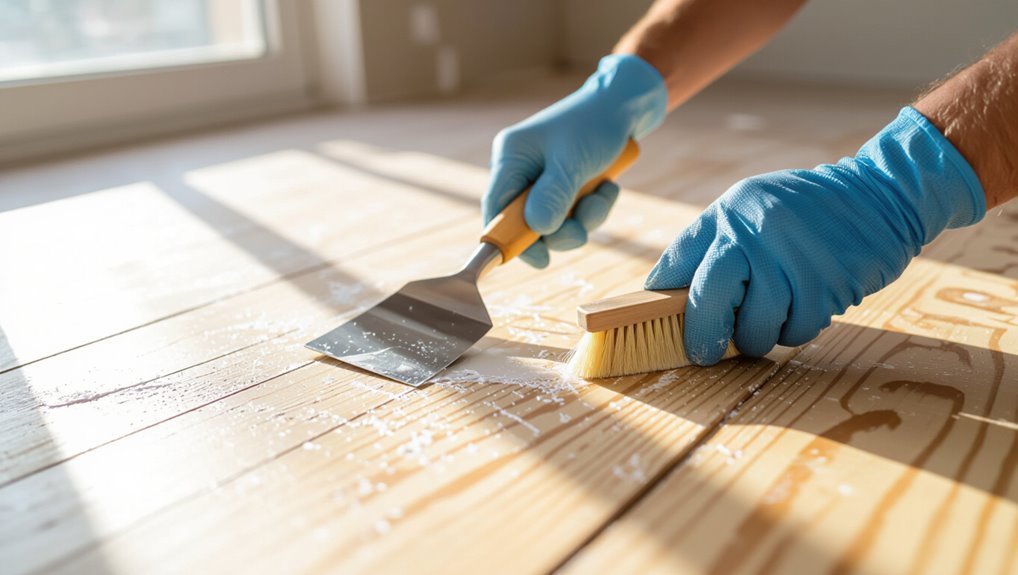
Adhesive residues that won’t come off chemical and mechanical options
Repairing the subfloor often uncovers stubborn adhesive residues that won’t budge with a broom and water, so you’ll need to tackle them before relaying tiles.
Use solvent, heat, or grinders carefully to protect the subfloor.
Visualize steps:
- Scrape softened glue with a putty knife.
- Apply solvent, wait, then wipe.
- Sand or grind low spots, vacuum thoroughly before priming.
Prevention, Best Practices, and Safety Tips
To prevent cracking and damage, you should minimize vibration and point loads by using padded supports and steady pressure.
Keep consistent spacing and follow a clear removal sequence with the right tools to avoid stressing adjacent tiles.
Wear a dust mask, eye protection, and check for structural issues before you start to control dust, debris, and safety risks.
How to minimize vibration and point loads
If you want your ceramic tiles to last and avoid cracking, minimize vibration and point loads by planning how weight and movement will be distributed across the floor.
Walk gently, avoid dragging heavy tools, and use wide load-bearing boards when standing or placing equipment.
Cushion impact areas with rubber pads, balance loads across joists, and work slowly to prevent sudden shocks that crack tile or subfloor.
Proper spacing, sequencing, and tool selection to prevent damage
While you’re removing tiles, think ahead about spacing, sequencing, and the right tools so you don’t introduce cracks or damage the substrate; work from an edge or a spare tile area toward the center, keep consistent gaps for access and leverage, and choose hand tools over power tools when precision matters.
Sequence removals to reduce load on remaining tiles. Use thin pry bars and wide chisels, and test tools before forcing.
Safety precautions for dust, debris, and structural concerns
Because dust and debris can harm your lungs and hide structural problems, you should treat tile removal as a safety operation from the first strike.
Wear an N95, eye protection, and gloves. Control dust with a vacuum and wet scoring.
Check joists and subfloor for rot or loose areas; shore up before proceeding.
- Masked, gloved, goggles
- Vacuum + dampen
- Inspect and brace
Time, Cost, and When to Hire a Pro
You’ll want to know how long DIY removal takes—expect a few hours for a small room and a full day or more for larger rooms or glued-down tiles.
Compare typical costs for renting tools and disposal to contractor quotes, because pros can be more economical for difficult or high‑value floors.
If you hire a contractor, ask about their timeline, cleanup, and whether their estimate includes substrate repair and disposal.
Estimated time and labor for DIY removal (by room size and tile type)
A small 100-square-foot room with ceramic tiles can take a single DIYer 6–10 hours to remove, but larger rooms or harder tile types will lengthen that.
Thin-set or mortar-backed tiles and porcelain-grade ceramics usually require more time and effort than peel-and-stick or loose-laid tiles.
Expect 1–2 days for a 200–300 sq ft area, and 2+ days for stubborn adhesive or thick mortar.
Typical costs and when professional removal is more economical
Given the time estimates above, cost quickly becomes the deciding factor in whether you tackle tile removal yourself or hire a pro.
You’ll weigh tool rental, disposal fees, and your time against contractor rates—often $3–$10 per sq ft.
Hire pros when labor-intensive tile, damaged substrate, or tight timelines raise DIY costs; otherwise, DIY saves money if you’re confident and patient.
What to expect when hiring a contractor
Wondering what hiring a contractor will actually involve?
You’ll get a clear timeline, usually one to three days for removal and subfloor prep, depending on area and damage.
Expect labor rates plus disposal fees; a quote should break materials, labor, and cleanup.
Hire a pro when structural issues, large areas, or tight schedules demand speed, warranty, and guaranteed subfloor protection.
Checklist Before, During, and After Removal
Before you start, make a short pre-removal checklist so you’ve got the right tools, safety gear, and a plan for debris.
While you’re working, follow a during-removal checklist to control dust, protect nearby surfaces, and pace the work.
After the tiles are up, run through a post-removal checklist and inspect the subfloor for damage, moisture, or uneven spots that need repair.
Pre-removal checklist
1 clear checklist will save you time and prevent surprises: confirm utilities are off, clear and protect the work area, gather tools and safety gear, and plan debris disposal.
Before you start, verify permits, inspect tile condition, and note substrate type.
Visualize the sequence:
- protective sheeting and pathways
- labeled waste containers
- tool layout and spare blades
During-removal checklist
Now that your work area’s prepped and tools are staged, start the removal by following a compact during-removal checklist to keep the job controlled and safe.
- Pry gently at grout lines, lift tiles evenly, watch for cracks.
- Support tile edges with a flat bar, peel adhesive slowly to protect the subfloor.
- Clear debris frequently, keep vacuum ready, and pause for repositioning as needed.
Post-removal checklist and subfloor inspection
After the tiles are up, inspect the subfloor and surrounding area systematically to catch damage, adhesive residue, or moisture issues that could compromise your next installation.
Check and document findings, then repair, clean, and dry as needed. Prioritize safety and flatness before proceeding.
- Scrape adhesive; probe for soft spots.
- Measure level; mark high/low areas.
- Test moisture; ventilate and dry.
Frequently Asked Questions (FAQ)
You probably have questions like whether you can lift tiles whole, if the subfloor will be ruined, or which tools cause the least damage.
You’ll also want to know how to remove thin-set from plywood without harm and whether damaged tiles can be reused.
Read on for clear, practical answers to those common concerns.
Can I lift tiles whole without breaking them?
Want to lift ceramic floor tiles whole without breaking them? You can, with patience, the right tools, and proper technique.
Score grout lines, use a thin pry bar or flat chisel under warmed adhesive, lift slowly from multiple edges, and support the tile as you go.
Work small areas, keep adhesive damp if needed, and expect some failures—success depends on adhesive type and installation quality.
Will removing tiles ruin the subfloor?
Will removing tiles ruin the subfloor? You won’t necessarily ruin it if you work carefully.
Adhesive, thinset, or mortar can stay bonded and require effort, but gentle prying and patience preserve plywood, cement board, or concrete.
Expect some surface scarring or leftover mortar that needs scraping and sanding.
Inspect as you go and stop if you see delamination or rot.
What tools cause the least damage?
A few handheld tools minimize damage when you lift ceramic floor tiles: pry bars with thin, tapered blades, flat chisels, and a good floor scraper let you work close to the substrate and control leverage to avoid gouging.
Use padded handles, thin putty knives for seams, and a rubber mallet for gentle persuasion. Keep blades sharp and work slowly to prevent cracking.
How do I remove thin-set without damaging plywood?
How can you strip stubborn thin-set from plywood without gouging the subfloor?
Use a wide putty knife or floor scraper at a shallow angle, working slowly to lift softened thin-set. Soften residue with warm water and a dilute adhesive remover or white vinegar; avoid harsh chemicals.
Finish with fine-grit sanding, apply even pressure, and vacuum dust to inspect for any remaining spots before reinstalling.
Can damaged tiles be reused or reinstalled?
Can damaged tiles be reused or reinstalled? You can salvage tiles with minor chips or intact backs; clean off thin-set and inspect for hairline cracks.
Don’t reuse tiles with breaks, delamination, or compromised glazing. Match replacement tiles for color and thickness.
When reinstalling, use proper thin-set and back-buttering to guarantee full contact and prevent future failure.