
Can You Sand Ceramic Tile to Remove Glaze or Rough Up the Surface?
Yes — you can sand ceramic tile to dull or remove glaze in small areas, but you’ll need to be cautious. Glaze is glassy and varies in hardness, so aggressive sanding can expose body color, alter patterns, or crack tiles. Use fine-to-medium abrasives, test a hidden spot, wear PPE, and control dust; consider manual sanding or diamond pads for precision. For full guidance on techniques, tools, risks, and safer alternatives, keep going to learn more.
Can You Sand Ceramic Tile to Remove Glaze or Rough Up the Surface?
You can sand ceramic tile in limited cases, but it’s not a universal fix.
It’s appropriate if you need to scuff a small area to improve adhesion for paint or thin-set, but you shouldn’t sand through the glaze on patterned or thin tiles or try it on porcelain.
Always test a hidden spot and use proper tools and PPE before proceeding.
Direct, concise verdict
Although ceramic tile is very hard, you can sand it to remove glaze or roughen the surface, but only with the right tools and care.
If you’re asking “can you sand ceramic tile,” the short answer is yes, selectively.
Use diamond abrasives, light pressure, and eye/respiratory protection.
Expect slow progress, potential surface damage, and limited results compared with replacement or professional refinishing.
When sanding is appropriate and when it’s not
When you want to change a tile’s surface—either to remove a worn glaze, eliminate minor stains, or roughen it for better adhesion—you can sand, but only in specific situations.
You should sand unglazed or matte tiles and small damaged spots; avoid sanding glossy, printed, or glazed tiles that’ll look worse or expose porous bodies.
Use proper grit and gentle technique.
Basic Understanding What Is Ceramic Tile Glaze and Why Surface Texture Matters
Glaze is a glassy coating—made from silica, fluxes, and colorants—that’s fused to tile to protect it and give it color and sheen.
You’ll find that glaze changes how adhesives bond, affects slip resistance, and largely determines the tile’s finished look.
Glazed, unglazed, and porcelain tiles differ in whether they’ve that coating, how dense they are, and how they respond to sanding or prepping.
What glaze is (composition and purpose)
Think of ceramic tile glaze as a thin, glassy skin fused to the clay body: it’s made from silica (glass former), fluxes that lower the melting point, and stabilizers like alumina, plus colorants and opacifiers that create finish and pattern.
You’ll encounter glossy, matte, and textured glazes formulated to protect the tile, color it, and control surface hardness and chemical resistance during use.
How glaze affects adhesion, slip resistance, and appearance
Because the glaze forms the tile’s outer skin, it directly controls how adhesives bond, how slippery the surface gets, and how the tile looks over time.
If glaze is smooth and glossy, adhesives may struggle and you’ll get higher slip; textured or matte glaze improves mechanical grip and reduces slipperiness.
Surface damage or wear changes appearance and can weaken adhesive performance, so prep matters.
Types of ceramic tile (glazed, unglazed, porcelain) and how they differ
Tiles come in a few common varieties—glazed, unglazed, and porcelain—and each behaves differently because of how they’re made and finished. You’ll notice: glazed tiles have a glassy surface; unglazed are porous and grippy; porcelain is dense and tough. Choose based on durability and adhesion needs.
| Type | Characteristic |
|---|---|
| Glazed | Smooth, decorative |
| Unglazed | Textured, porous |
| Porcelain | Dense, hard |
How Sanding Works on Ceramic Tile Science and Practical Limits
When you sand ceramic tile you’re using abrasives to wear away glaze molecules, which is different from the cutting action of grinding or the chemical removal of etching.
The glaze’s hardness determines whether sanding will abrade the surface or just scuff it, and very hard or glazed tiles may fundamentally be unsandable without aggressive grinding.
Be aware that removing glaze can expose body color, alter patterns, and create micro-cracks that weaken the tile.
Abrasive mechanisms: sanding vs grinding vs etching
Abrasive action removes material from ceramic surfaces by mechanical or chemical means, and knowing which process you’re using—sanding, grinding, or etching—matters for results and risk.
Sanding abrades lightly with grit, suitable for surface texture changes. Grinding removes more quickly with power tools and risks chipping.
Etching uses acids to chemically roughen glaze but needs strict safety and controlled application.
How glaze hardness influences sandability
Because glaze hardness directly controls how much material your sanding will remove, you’ll find that hard, glassy glazes resist abrasive grit while softer or worn glazes abrade more readily.
You’ll need progressively coarser abrasives, higher pressure, or longer passes to alter hard glazes. Test small areas first; measure progress often, since hardness dictates achievable texture and realistic effort.
Risks to tile integrity, color, and pattern
If you sand ceramic tile, you risk more than just scuffed glaze—you can thin or crack the glaze, expose the porous body, and permanently alter color and pattern.
You’ll remove protective layers, making tiles absorbent and prone to stains.
Abrasion can reveal underbody hues or body clay, creating mismatched patches.
Structural microcracks lower durability and can propagate into visible fractures over time.
When and Why You Might Want to Roughen or Remove Glaze
If you’re prepping existing tile for new work, you might roughen or strip the glaze to get a better bond for thin-set, paint, or anti-slip coatings.
You may also do it to change the finish appearance or to expose and repair chips and surface damage.
In each case you’ll choose methods that balance how much glaze you remove with protecting the tile beneath.
Common scenarios (re-tiling, bonding thin-set, repainting, anti-slip treatments)
When might you want to roughen or remove a tile’s glaze? You’ll encounter this when re-tiling to guarantee old tiles bond to new mortar, when thin-set won’t adhere to glossy surfaces, when repainting ceramic with specialty coatings, or when adding anti-slip textures in wet areas.
Each scenario demands proper surface prep and appropriate abrasive or chemical methods to avoid damage.
Alternative goals (increase adhesion, change finish, repair damage)
Although ceramic glaze protects tile, you might want to roughen or remove it to boost adhesion, alter the finish, or repair surface damage.
You’ll do this when adhesives won’t stick, when you prefer a matte or satin look, or to smooth chips and scratches before refinishing.
Choose gentle mechanical abrasion or chemical etchants based on tile type and desired outcome, testing first on a scrap.
Step-by-Step: Safe Methods to Roughen or Remove Glaze (Do’s and Don’ts)
Before you start, suit up with eye, lung, and skin protection, mask off surrounding areas, and clean and test a small inconspicuous patch to gauge results.
You’ll learn safe manual sanding techniques and grit choices, proper power-tool attachments and settings, and when to use chemical etchants or blasting instead.
Finish each method by thoroughly cleaning, neutralizing any chemicals, and inspecting the surface for uniform texture and damage.
Preparation steps (protective gear, masking, test area, cleaning)
If you’re going to sand or roughen ceramic tile, start by protecting yourself and the surrounding area: wear a NIOSH-approved respirator, safety goggles, and gloves; lay down drop cloths and mask off adjacent surfaces and grout lines with painter’s tape.
Then clean and test:
- Clean tile with degreaser, rinse, dry.
- Test a hidden area to confirm results.
- Keep vacuum and wet wipes handy to control dust.
Manual methods: sanding by hand tools, grits, technique, pros/cons
When you’re ready to roughen or remove a glaze by hand, choose the right abrasive and work deliberately: use a fine-to-medium grit sandpaper (180–220) or a sanding sponge for light abrasion.
Step up to 120–150 grit only for tougher spots, and reserve diamond hand pads for very hard, glazed surfaces.
Sand gently in circular strokes, check progress often, avoid excessive pressure, and clean dust frequently.
Power tools: angle grinder, rotary tool, orbital sander correct attachments and settings
Power tools can speed up roughening or removing glaze, but you need the right attachments and settings to stay safe and avoid damaging the tile.
Use low RPMs, light pressure, and dust control. Match tool to task:
- Angle grinder: diamond cup for heavy glaze removal, slow passes.
- Rotary tool: diamond bits for edges, low speed.
- Orbital sander: fine diamond pads, very light touch.
Chemical and mechanical alternatives: etching solutions, acid etching, blasting
Although mechanical tools work well, chemical and non-abrasive mechanical methods give you gentler alternatives for roughening or removing glaze.
You can etch or blast carefully, but follow product instructions and test a scrap. Consider:
- Acid etching for light glaze removal—use proper PPE and ventilation.
- Commercial etching solutions for controlled roughening.
- Micro-abrasive blasting for precise, low-damage surface texture.
Finishing steps: cleaning, neutralizing chemicals, inspecting surface
After roughening or stripping the glaze, you’ll need to clean and neutralize the surface before inspection to prevent residue from interfering with adhesion or appearance.
Rinse thoroughly, scrub with a mild detergent, then neutralize any acid with a baking soda solution.
Dry completely, examine under good light for uniform dullness, chips, or remaining glaze, and rework spots as needed before proceeding.
Comparison of Methods Effectiveness, Safety, Cost, and Finish
Now you’ll compare manual sanding, power tools, and chemical etching side-by-side for effectiveness, safety, cost, and finish.
I’ll point out which method works best for different tile types and project goals so you can choose confidently.
Keep in mind some tiles and jobs call for gentler approaches while others tolerate more aggressive methods.
Side-by-side comparison of manual sanding, power tools, and chemical etching
When you’re deciding how to alter ceramic tile surfaces, weighing manual sanding, power tools, and chemical etching side-by-side helps you match results to the job; each method differs sharply in effectiveness, safety, cost, and final appearance.
| Method | Notes |
|---|---|
| Manual | Low cost, low dust, slow, subtle finish |
| Power tools | Fast, high dust, risk of damage, aggressive finish |
| Chemical etching | Even etch, toxic fumes, requires PPE, variable cost |
Recommended method by tile type and project goal
Choose the method that matches both your tile type and goal: porcelain and glazed ceramic usually need aggressive approaches like power tools or chemical etching for reliable adhesion, while unglazed or matte tiles respond well to manual abrasion; consider effectiveness, safety, cost, and final look before you start.
For repairs, use manual sanding for small spots; for bonding or coating, favor etching or grinders with PPE; test first.
Common Mistakes and Problems When Sanding or Roughening Tile
Be careful—if you sand too aggressively you can weaken or crack the tile and strip the glaze, which will alter the color and pattern permanently.
You can also create uneven spots or gouges that show up once sealers or grout are applied.
Always use proper dust control, respirators rated for silica, and the right tools to avoid health risks and tool-related damage.
Over-sanding and structural damage
If you sand ceramic tile too aggressively, you can remove more than the glaze and end up weakening the body of the tile itself.
You’ll create thin spots, hairline cracks, or fractures that reduce load-bearing strength and increase breakage risk.
Once weakened, tiles can chip, crack under weight, or fail during installation.
Stop at light abrasion and test an inconspicuous area first.
Glaze removal causing color/pattern loss
When you sand ceramic tile too far, you won’t just dull the surface—you can strip away the glaze that carries the tile’s color and pattern, leaving a bland, mismatched look that you can’t restore.
Once glaze’s decorative layer is gone, the underlying body shows raw, muted tones.
You shouldn’t expect to repaint or reseal to recreate the original design.
Creating uneven surface or gouges
Though you might aim to roughen tile for better adhesion, aggressive or inconsistent sanding will leave visible high and low spots or deep gouges that compromise both appearance and function.
You’ll create uneven edges that collect dirt, weaken grout joints, and make thinset bonding unreliable. Use light, even passes and test a scrap tile first to avoid irreversible surface damage.
Safety hazards: dust, silica exposure, tool misuse
Because ceramic tile releases fine dust and crystalline silica when abraded, you’ll face real health risks and safety concerns unless you control the process.
Wear an N95 or P100 respirator, use a HEPA vacuum and wet methods to suppress dust, and ventilate the area.
Secure tools, keep bystanders away, and follow manufacturer safety guidelines to avoid injury and long-term respiratory harm.
Best Practices, Prevention, and Alternatives
Before you grab sandpaper, consider whether a bonding primer or tile-specific adhesive will give you a better, less risky result than sanding.
When sanding is necessary, use proper PPE, dust control, and gentle, progressive abrasives to avoid glazing, chipping, or inhaling silica.
And if the job is large, historic, or you’re unsure about substrate or VOC concerns, hire a pro who can assess alternatives and guarantee a safe, durable finish.
When to choose adhesives or primers instead of sanding
When you’re planning a project on ceramic tile, choose adhesives or primers instead of sanding whenever the surface is intact but too smooth or glazed for a reliable mechanical bond.
Use a high-quality primer or epoxy adhesive designed for nonporous surfaces to guarantee adhesion. This avoids unnecessary abrasion, preserves tile integrity, and speeds work.
Test a small area to confirm compatibility before full application.
Best practices to minimize damage and health risks
If you opt for sanding despite viable primer or adhesive alternatives, take steps to protect the tile, your lungs, and the surrounding space.
Wear an N95 or P100 respirator, seal the room with plastic sheeting, and use a vacuum sander or HEPA vacuum to capture dust.
Follow safer grit progression and test a small area first.
- N95/P100 respirator
- Plastic containment
- HEPA dust capture
Professional services: when to hire a pro
Because sanding ceramic tile can damage glaze, release silica dust, and require specialized tools, you should consider hiring a pro for jobs that exceed your comfort, experience, or equipment.
A professional will assess tile type, remove glaze safely, control dust with HEPA vacuums, and finish evenly.
Hire pros for large areas, historic tile, complex cuts, or when warranties and resale value matter.
Tools, Materials, and Safety Checklist
Before you start sanding ceramic tile, gather the right abrasives and pads and plan a grit progression to avoid damaging the surface.
You’ll also need PPE—respirator, eye protection, gloves—and dust control like a shop vac and plastic sheeting.
Finally, stock consumables and cleanup supplies such as replacement pads, buckets, rags, and a HEPA vacuum to finish the job safely.
Recommended abrasives, pads, and grit progression
Choose abrasives and pads that match your tile’s glaze and the finish you want: diamond pads for heavy material removal, silicon carbide or zirconia for light honing, and non-woven scuff pads for polishing and cleaning between grits.
You’ll progress from coarse to fine to avoid damage:
- Start 60–80 grit for glaze removal
- Move to 120–240 grit for smoothing
- Finish 400–800+ grit for sheen
Personal protective equipment and dust control measures
Once you’ve picked the right abrasives and grit progression, you’ll need proper personal protective equipment and dust control to keep the job safe and clean.
Wear fitted respirators, eye protection, and gloves; use a vacuum with a HEPA filter and a wet sanding option when possible.
Keep bystanders away and ventilate the area.
- N95 or P100 respirator
- Safety goggles
- HEPA vacuum
Consumables and cleanup supplies
Gather the consumables and cleanup supplies you’ll need so the sanding session stays efficient and safe: disposable tack cloths, microfiber rags, and a bucket with clean water.
Have replacement sanding discs (various grits), tape to mask edges, a shop vacuum bag, trash bags, and a spray bottle.
Keep a damp sponge and mild detergent handy to remove glaze dust and residues promptly.
Project Examples and Case Scenarios
You’ll see step-by-step sequences for a small patch repair on a glazed tile step, and for preparing a tile floor before applying a non-slip coating.
You’ll also get guidance on when restoration is the smarter choice instead of stripping glaze.
Use these examples to decide which approach fits your situation and skill level.
Small patch repair on a glazed tile step sequence
A small patch repair on a glazed ceramic tile step lets you fix chips or hairline cracks without replacing the whole step. It usually involves cleaning the area, mixing a color-matched epoxy or filler, and carefully feathering it to blend with the glaze.
You sand lightly, cure per instructions, sand again for smoothness, then polish and seal to match sheen and protect the repair.
Preparing a tile floor for non-slip coating step sequence
After you finish a small patch repair and get the glaze matched, you’ll often want to make the whole step safer—especially if it’s in a high-traffic area.
Clean thoroughly, degrease, and etch or scuff the glaze with fine-grit abrasive. Vacuum and tack-wipe, mask adjacent surfaces, apply primer if required, then roll on the non-slip coating in even coats, allowing full cure between layers.
When restoration is better than glaze removal
When tiles show only surface wear, hairline chips, or localized glaze mismatch, restoring them usually costs less and keeps the original character than stripping and reglazing the whole area.
You can patch chips, touch up glaze, and blend colors to match surrounding tiles.
Restoration preserves grout lines, minimizes disruption, and often yields better visual continuity—choose it for targeted, cost-effective repairs.
FAQ Frequently Asked Questions
You’ll find quick answers here to common concerns like whether porcelain sands like ceramic and if sanding will strip printed patterns or glaze.
You’ll also get practical tips on preventing silica dust, using sanded grout instead of sanding tile, and testing a tile’s sandability.
If you have a specific tile type or finish, mention it so you get a precise recommendation.
Can you sand porcelain tile the same way as ceramic?
Wondering if you can sand porcelain tile the same way you do ceramic? You can, but porcelain’s density and hardness make sanding tougher and slower.
Use diamond or silicon carbide abrasives, low-speed tools, and plenty of water to prevent heat and dust.
Test a small, inconspicuous area first. Expect more effort and quicker abrasive wear compared with softer ceramic tile.
Will sanding remove printed patterns or color from glazed tiles?
Porcelain’s hardness affects how abrasives perform, but the bigger concern with sanding glazed tile is the surface finish itself: sanding will often abrade or remove printed patterns and surface color because those designs sit in or on the glaze layer rather than in the body of the tile.
If you sand, expect fading, scratching, or complete removal of surface decoration; test an inconspicuous tile first.
How do I prevent silica dust exposure when sanding tile?
How can you avoid dangerous silica dust when sanding tile?
Wear an N95 or P100 respirator, sealed goggles, and disposable coveralls.
Use wet sanding or a wet vacuum attachment to suppress dust.
Work outdoors or in a well-ventilated area, seal off adjacent rooms, and clean up with a HEPA vacuum.
Never dry-sweep; dispose of debris in sealed bags.
Can I use sanded grout to improve adhesion instead of sanding tile?
Can using sanded grout boost adhesion enough that you can skip sanding the tile?
You can often improve bond by using sanded grout or a bonding grout, but it’s not a universal fix.
Rough or glazed tiles may still need mechanical abrasion or a primer.
Test adhesion on a small area and follow manufacturer recommendations to avoid failures.
How do I test whether a tile can be safely sanded?
Wondering if a tile can handle sanding without cracking or chipping?
Start by inspecting glaze and body: unglazed or matte tiles sand easier.
Test a hidden corner with light sanding using 120–220 grit for 10–20 seconds.
Check for surface scratches, color change, or edge damage.
If it flakes, chips, or shows deep scratches, stop—don’t sand that tile.
Visual Aids and Reference Resources
You’ll find it helpful to see images of tool choices, before-and-after surfaces, and proper safety setups so you know what to expect and how to protect yourself.
Use photos to compare grinding versus sanding results and to recognize safe dust-control measures.
Also follow links to standards and safety guidance (OSHA/NIOSH) for detailed protocols.
Images: tool choices, before/after surfaces, safety setup
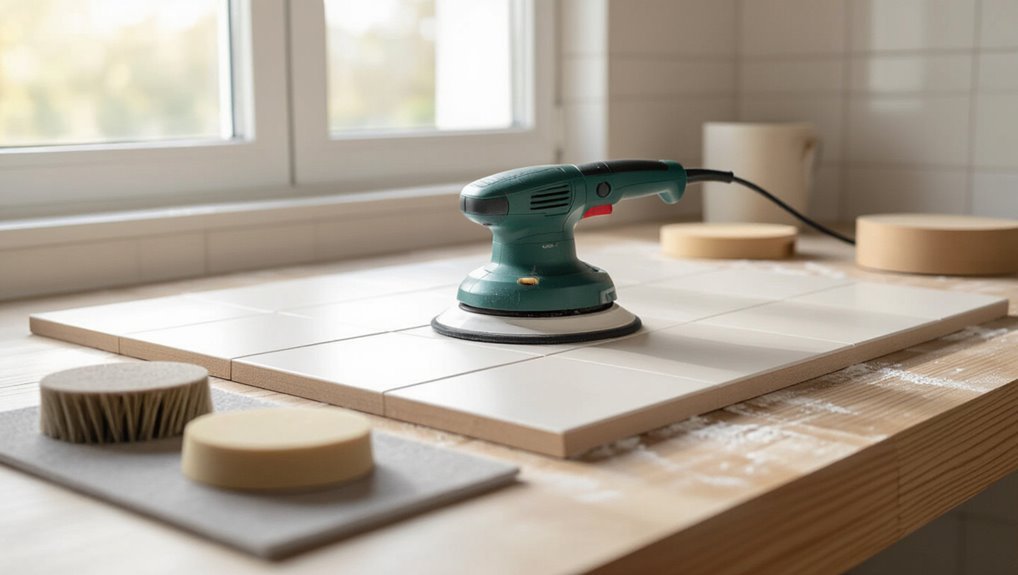
When you’re deciding whether to sand ceramic tile, clear, well-lit images of the tools, the tiles before and after work, and a proper safety setup make it easier to judge techniques and expected results.
Photograph grit progression, sanding pads, and tool grips. Show close-ups of glaze removal stages and edge conditions.
Include PPE placement, dust containment, and ventilation shots so you can replicate a safe, effective process.
Links to standards and safety guidance (OSHA/NIOSH)
Good photos of tools, grit progression, and PPE help you judge technique, but they don’t replace authoritative safety guidance—so pair your visuals with standards from OSHA and NIOSH.
You should consult those agencies for respiratory protection, silica exposure, and ventilation requirements.
Useful links and quick references:
- OSHA silica rule and respirator guidance
- NIOSH respirator selection and certification
- OSHA general PPE and hazard communication