How to Install Tile: A Beginner’s Complete Step-by-Step Guide
You can install tile yourself if you’re prepared and patient; start by choosing the right tile and adhesive for the room, inspect and repair the substrate, and snap chalk lines from the visual center. Mix thinset to a spreadable consistency, trowel evenly, set tiles with spacers, and cut as needed. Let thinset cure, grout and wipe haze, then seal grout or stone. Follow safety and layout tips, and keep going to learn advanced techniques and troubleshooting.
Can You Install Tile Yourself and What to Expect
You can handle most small tiling projects yourself if you’re handy, patient, and ready to follow proper prep and layout steps, but hire a pro for complex patterns, large areas, or wet-room work.
Expect a DIY bathroom floor or backsplash to take a weekend to a few days, cost a few hundred dollars for materials and tools (or more for pricey tile), and require moderate skill.
If you value speed, flawless grout lines, or have tricky surfaces, a contractor can save time and headaches.
Short summary of who can DIY vs when to hire a pro
If you’re handy with basic tools, patient, and willing to learn, installing tile yourself can save money and be very satisfying; but more complex jobs—irregular layouts, large-format or natural stone tiles, wet-area waterproofing, or uneven subfloors—are best left to professionals.
If you’ve asked how do you install tile, try small, straightforward projects. Hire a pro for waterproofing, tricky cuts, heavy lifting, or warranty-backed finishes.
Typical time, cost range, and difficulty overview
Many DIY tile jobs take a weekend for a small room but can stretch to several days or even weeks for larger or more complex projects; plan time for demolition, subfloor prep, layout, setting, grouting, and cure times. You’ll spend $3–$20/ft² materials, $5–$15/ft² labor if hired, and face moderate skill demands.
| Size | Cost | Difficulty |
|---|---|---|
| Small | Low | Easy |
| Medium | Medium | Moderate |
| Large | High | Challenging |
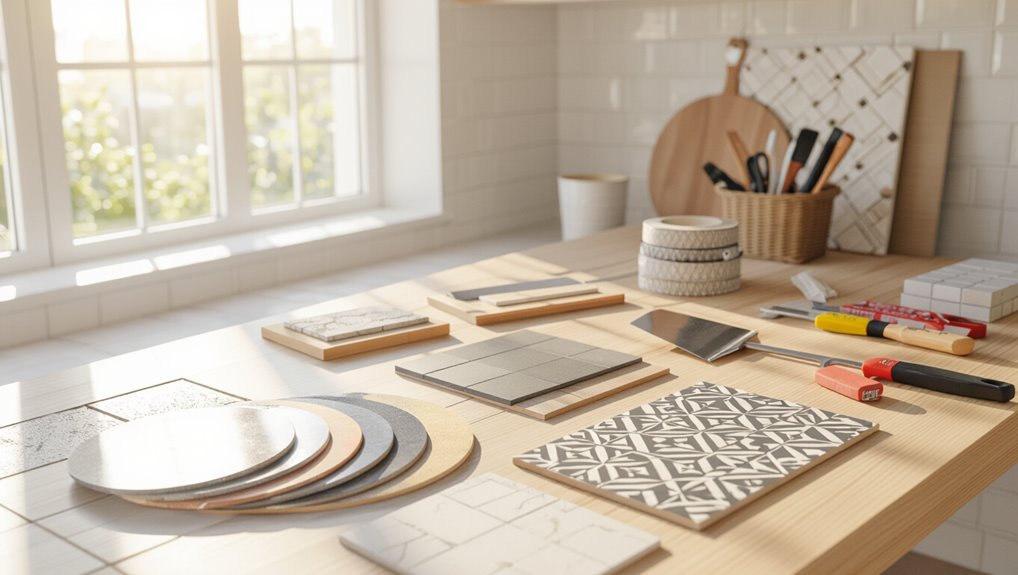
Understanding Tile Types and Where to Use Them
Before you pick tiles, you’ll want to know the pros and cons of common materials like ceramic, porcelain, natural stone, glass, and vinyl.
Consider how sizes, shapes, and finishes change cutting and grout lines, then match tile types to rooms—bathroom, kitchen, floors, or backsplashes—for durability and slip resistance.
Finally, get a tools-and-materials checklist ready so you’ve got everything from spacers and trowels to the right thin-set for your chosen tile.
Common tile materials (ceramic, porcelain, natural stone, glass, vinyl)
Choosing the right tile material shapes both the look and performance of your space, so you’ll want to match properties like durability, water resistance, maintenance, and cost to the room’s demands. You’ll choose ceramic for affordability, porcelain for toughness, stone for luxury, glass for accents, and vinyl for easy upkeep.
| Material | Best Use |
|---|---|
| Ceramic | Low-traffic rooms |
| Porcelain | Wet, high-traffic areas |
| Stone/Glass/Vinyl | Accent, luxury, easy-care respectively |
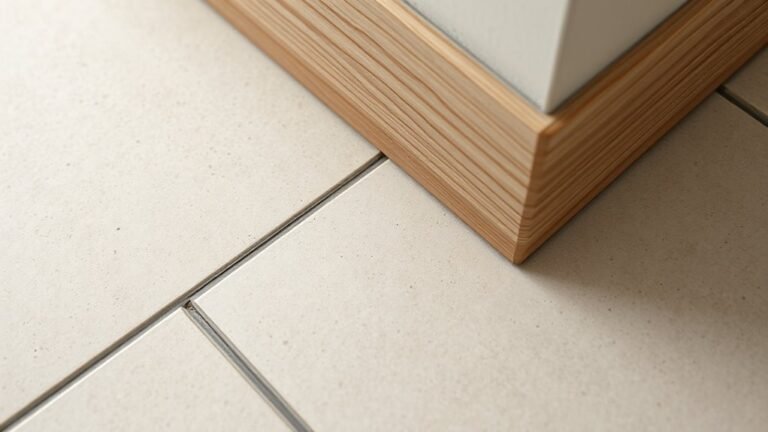
Tile sizes, shapes, and finishes and how they affect installation
Now that you’ve matched material to room needs, think about how tile size, shape, and finish will change both the look and the work involved.
Large-format tiles speed installation but require flatter substrates and fewer grout lines.
Small mosaics need more cutting and grout.
Textured or matte finishes add slip resistance but complicate cleaning; polished tiles highlight imperfections and need careful layout.
Recommended tile types by room (bathroom, kitchen, floor, backsplash)
For each room you’ll want tiles that match its wear, moisture, and cleaning demands:
- Bathroom: porcelain or ceramic glazed tiles for water resistance and easy cleaning.
- Kitchen floor: durable porcelain or natural stone sealed properly for spills and traffic.
- Backsplash: glazed ceramic, glass, or metal mosaic for stain resistance and visual impact.
- Living/floor: slip-resistant porcelain or sealed stone for longevity and style.
Tools and materials checklist before you start
Having picked tiles that suit each room’s moisture and traffic, you’ll want to gather the right tools and materials so the job goes smoothly.
You’ll need essentials for prep, cutting, laying, and finishing. Check off these basics:
- Tile cutter or wet saw
- Notched trowel and spacers
- Thinset mortar and grout
- Level, tape measure, and safety gear
Preparatory Work Assessing the Surface and Planning
Before you lay any tile, inspect the subfloor or wall substrate—concrete, plywood, or drywall—to check for damage, flatness, and suitability.
Measure the area carefully and calculate tile quantity including a waste factor, then plan a layout by finding the center, doing a dry layout, and deciding tile orientation.
Finally, prepare the surface with necessary repairs, leveling, waterproofing, or by installing backer board so the substrate is stable and ready.
Inspecting subfloor or wall substrate (concrete, plywood, drywall)
When you inspect the subfloor or wall substrate—whether concrete, plywood, or drywall—look for levelness, structural soundness, and signs of moisture or damage that could undermine tile adhesion.
Check for cracks, soft spots, mold, or delamination. Verify joist stability and deflection limits on floors.
On walls, confirm backing is secure and non-sagging.
Note repairs needed and whether a moisture barrier or primer is required.
Measuring the area and calculating tile quantity + waste factor
With the substrate inspected and any repairs noted, move on to measuring the room so you know exactly how much tile to buy. Measure length and width, calculate area, then add a waste factor (5–15%) for cuts and breakage. Round up to whole boxes. Use this quick planner:
| Item | Measurement | Notes |
|---|---|---|
| Length | ||
| Width | ||
| Area | ||
| Waste % | ||
| Boxes |
Layout planning: finding center, dry layout, and tile orientation
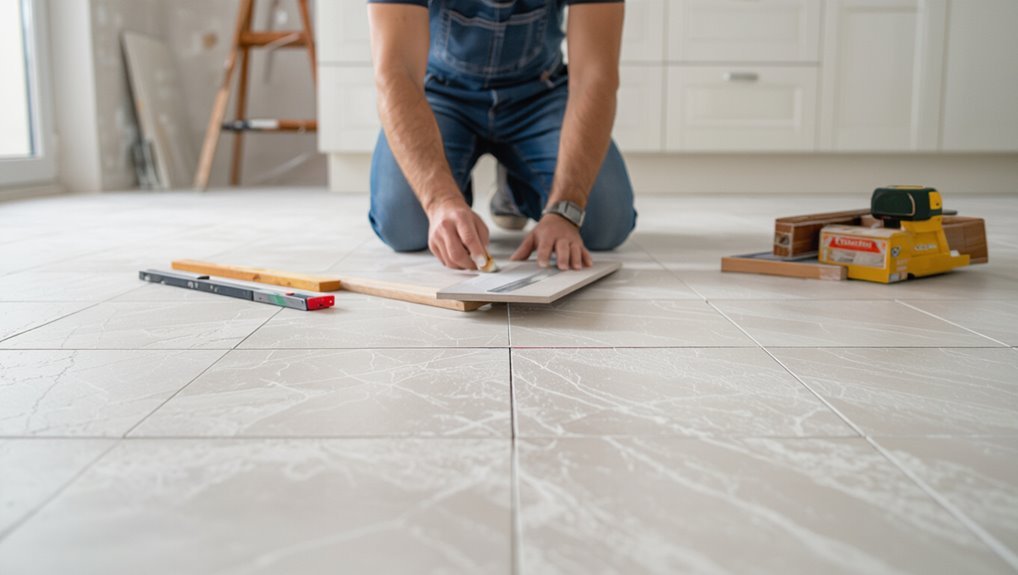
Start by finding the room’s visual center and snap chalk lines to guide your layout so your tiles fall symmetrically and any narrow edge cuts end up against walls or in less visible areas.
Dry-lay tiles along those lines, spacing with wedges or spacers, check pattern repeats and orientation, adjust to minimize thin border pieces, and mark reference lines for consistent alignment during installation.
Preparing the surface: repairs, leveling, waterproofing, backer boards
After you’ve settled on a layout and marked your reference lines, inspect the substrate thoroughly to decide what repairs and preparations it needs before tiling.
Patch cracks, remove loose material, and level dips with a self-leveling compound.
Install cement backer board on floors or walls, seal seams with tape and thinset, and apply waterproof membranes where moisture is expected before you bed tiles.
Step-by-Step Installation Process (Floor and Wall)
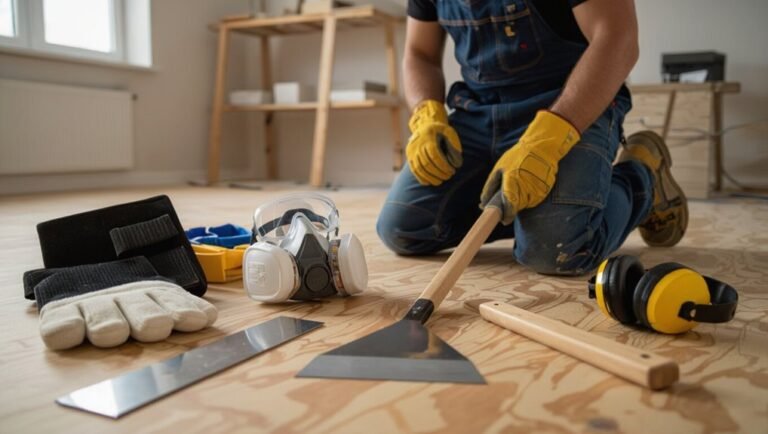
Start by setting up safely—wear PPE, snap chalk lines for straight guides, and mix thinset to the manufacturer’s specs.
You’ll spread the thinset or mortar evenly, press the first row in place and check alignment as you go.
Use spacers, cut tiles to fit edges, and carefully work around toilets, cabinets, and other fixtures.
Step 1 Setting up: safety, chalk lines, and mixing thinset
Before you lay a single tile, take time to set up for safety, mark your layout with chalk lines, and mix thinset to the right consistency.
Put on goggles, gloves, knee pads, and a dust mask. Clear and level the substrate.
Snap perpendicular chalk lines from room center for alignment.
Mix thinset per manufacturer instructions to a smooth, peanut-butter consistency, avoiding lumps.
Step 2 Applying thinset or mortar correctly
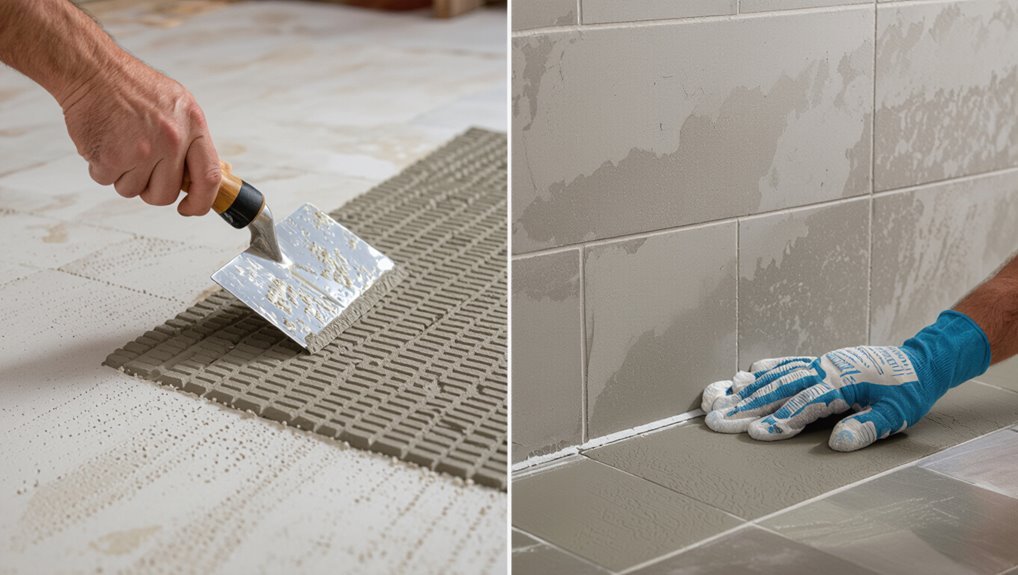
Spread thinset evenly and confidently so each tile gets a consistent bond.
Use a notched trowel held at the correct angle to create uniform ridges.
Work small areas to prevent skinning. Butter back large tiles if needed for full coverage.
Keep mortar at recommended thickness, remove excess, and check for voids to guarantee a strong, flat setting bed before placing tiles.
Step 3 Laying the first row and maintaining straight lines
With your thinset troweled and checked for voids, you’re ready to lay the first row and lock in straight reference lines.
Begin at your primary guideline, press each tile firmly with a slight twist, and tap with a rubber mallet for full contact.
Continuously check alignment with a long level or straight edge, adjusting before the mortar skins over.
Step 4 Using spacers, cutting tiles, and fitting edges

Now you’ll set consistent grout joints with tile spacers, cut tiles to fit perimeter and obstacles, and snugly fit edge pieces so the installation looks professional and lasts.
Place spacers at every corner, check alignment, and snap cuts with a wet saw or score-and-snap tool.
Measure twice, cut once, then dry-fit trim and bullnose pieces before setting to guarantee clean shifts and straight edges.
Step 5 Working around obstacles (toilets, cabinets, fixtures)
You’ll run into pipes, cabinets, and fixtures that don’t fit a grid, so plan cuts and clearances before you set the tile.
Mark outlines on tiles, use a hole saw or nibbler for pipes, and make relief cuts for cabinets.
Dry-fit pieces, trim edges for tight seams, and leave recommended expansion gaps.
Label complex cuts to keep placement accurate.
Step 6 Waiting time and proper curing before grouting
After fitting tiles around obstacles and checking dry fits, let the setting bed cure fully before you grout; rushing this step can loosen tiles or trap moisture.
Follow manufacturer cure times—often 24–72 hours for thinset, longer for mortar or heated floors.
Keep traffic off, maintain ambient temperature and humidity, and protect from drafts or water so tiles achieve full bond before proceeding.
Step 7 Grouting: choosing grout type, application, cleaning
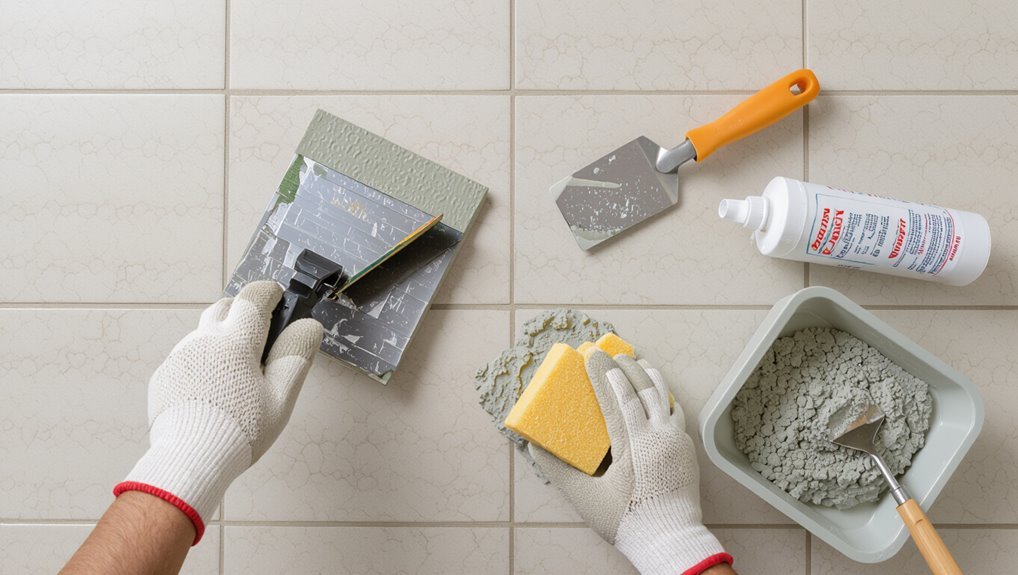
Mix and match grout types to match your tile, joint width, and exposure, then apply and clean carefully to get a durable, attractive finish.
Choose sanded for wide joints, unsanded for narrow, or epoxy for high-moisture areas.
Mix to manufacturer specs, push grout diagonally into joints, remove excess with a damp sponge, let haze dry slightly, then buff tiles for a crisp, even look.
Step 8 Sealing (when and how for grout and natural stone)
While grout and natural stone can look great right away, you should seal them to protect against stains, moisture, and wear—especially in high-traffic or wet areas.
Choose a penetrating sealer for natural stone and a grout sealer for joints. Apply per manufacturer instructions, usually after grout cures (72 hours), wipe excess, allow full cure, and reapply periodically per use and traffic.
Step 9 Final cleanup, caulking joints, and finishing touches
Finish strong by cleaning, caulking, and adding final touches that protect your work and make the installation look professional.
Remove haze, vacuum gaps, and wipe tiles with a damp sponge.
Apply silicone or matching caulk at joints and connections, tooling smooth.
Reinstall trim, outlet covers, and fixtures.
Inspect grout lines, touch up chips, and let everything cure before light use to guarantee longevity.
Special Cases and Advanced Techniques
Now you’ll tackle special cases and a few advanced techniques that change how you plan and install tile.
You’ll learn tips for mosaic and small-format tiles, what to take into account when installing over radiant-heated floors, and how to repair or replace a single tile without redoing the whole surface.
You’ll also find when it’s appropriate to install new tile over existing tile and the prep required to do it right.
Installing mosaic or small-format tiles
Tackle mosaic and small-format tile work with a steady hand and a few specialized techniques—these tiles demand tighter joints, thinner mortar, and careful backing to prevent lippage and grout voids.
Use a fine-notched trowel, apply thin-set evenly, and press sheets firmly with a rubber float.
Keep spacers minimal, check alignment constantly, and grout with a narrow-profile mix for uniform seams and durability.
Heated floor systems and tile installation considerations
When you add a heated floor system under tile, you’ll need to plan for thin-set compatibility, height changes, and appropriate insulation so the system performs reliably and the tile stays bonded.
You should choose uncoupling membranes or cement backer boards rated for heat, use polymer-modified thin-set specified by the heater manufacturer, keep wiring accessible per code, and test the system before grouting.
Repairing or replacing single tiles without redoing entire floor
A chipped or loose tile doesn’t mean you have to rip up the whole floor—you can often remove and replace individual tiles with minimal disruption.
Score grout, loosen tile with a chisel, and remove debris.
Check substrate for damage; repair with thin-set if needed.
Set new tile level, grout, and seal.
Match grout color for a seamless fix.
Installing tile over existing tile when it’s appropriate
If your existing tile is sound, level, and well-bonded, you can often lay new tile directly over it to save time, labor, and disposal costs.
Inspect for cracks, loose tiles, and moisture; remove contaminants and grout haze.
Scuff or prime the surface, use a suitable thinset, and make certain the added height won’t interfere with doors, changes, or fixtures before tiling.
Common Mistakes and How to Avoid Them
Don’t skip thorough surface prep—uneven or dirty substrates ruin tile adhesion and longevity, but you can prevent that with proper cleaning, leveling, and patching.
Choose the correct adhesive and grout for your tile type and environment to avoid bond failures and staining, and plan your layout to prevent awkward narrow cuts at edges.
For wet areas, you’ll need proper waterproofing membranes and seals so moisture doesn’t cause hidden damage.
Mistake: Poor surface prep prevention and fixes
When you skip proper surface prep, tiles won’t bond correctly and you’ll quickly see cracks, uneven grout lines, or loose pieces; take the time to clean, level, and repair the substrate before you lay anything down.
Remove dust, grease, and old adhesive. Patch holes, grind high spots, and use a leveling compound on dips.
Verify flatness with a straightedge before setting tile.
Mistake: Wrong adhesive or grout choice prevention and fixes
After you’ve prepped the surface, pick the right adhesive and grout to match your tiles and the room’s conditions—wrong choices will undo all that prep work.
Check tile porosity, substrate type, and moisture exposure. Use modified thinset for porcelain and wet areas; unmodified for natural stone when specified.
Match grout joint width and color; test a small area first and follow manufacturers’ pot-life and curing times.
Mistake: Improper layout leading to narrow cuts prevention and fixes
If you rush into setting tiles without a dry layout, you’ll often end up with skinny, awkward cuts along walls and doorways that look unprofessional and waste material.
Prevent this by dry-fitting rows, centering focal tiles, and adjusting grout lines for symmetry. Shift your starting point if needed, plan changes, and trim tiles evenly.
Recheck measurements before applying adhesive to avoid costly rework.
Mistake: Inadequate waterproofing in wet areas prevention and fixes
Because water finds the smallest gaps, inadequate waterproofing in showers, tub surrounds, and other wet areas quickly leads to mold, rot, and costly repairs.
So you need to seal beyond just the visible surface. Use a bonded waterproof membrane, seal seams and penetrations, slope substrates to drains, and protect backer boards.
Test for leaks before tiling and follow manufacturer instructions to guarantee lasting protection.
Best Practices, Tips, and Time-Saving Tricks
You’ll get straight, even lines by using spacers, a chalk line, and a reliable square for consistent grout joints and clean cuts.
Keep tools sharp, clean, and tuned—small maintenance hacks save time and prevent mistakes.
Plan your budget: splurge on a good wet saw and quality thinset, but save on spacers and basic hand tools.
Pro tips for straight lines, consistent grout joints, and clean cuts
Straight lines, even grout joints, and clean cuts come down to three things: good layout, the right tools, and steady pacing.
Snap chalk lines, dry-lay tiles to confirm pattern, and use spacers for uniform joints.
Score porcelain before cutting, backerboard seams aligned, and trim slowly to avoid chips.
Check alignment frequently and adjust before adhesive sets.
Tool hacks and maintenance tips for long-lasting installation
When you keep your tools sharp, clean, and tuned, installations go faster and mistakes shrink; simple hacks—like marking blades for depth, using duct-tape guards on wet saw fences, and storing spacers in labeled bins—save time and frustration.
Inspect blades, replace worn parts, and lubricate moving joints.
Calibrate tile cutters, wrap handles for grip, and keep a portable kit for quick on-site fixes.
Budgeting tips and when to splurge vs save
A few well-considered choices can keep your tiling project on budget without sacrificing quality.
Prioritize splurging on durable backer board, quality adhesive, and waterproofing where needed.
Save on decorative or high-cost accent tiles by mixing pricier pieces with affordable field tiles.
Borrow or rent specialty tools, shop sales, and measure carefully to avoid costly waste—plan materials, timeline, and contingencies.
Cost, Time, and When to Hire a Professional
You’ll want a clear cost breakdown—materials, tools, and possible labor—before you start so you don’t get surprised.
Expect time estimates to vary by project size and tile type, from a weekend for a small backsplash to several days for a large floor.
If the layout is complex, the substrate needs repair, or you don’t have the right tools, hire a pro and look for a licensed contractor with good references and clear estimates.
Detailed cost breakdown (materials, tools, labor)
Breaking down tile installation costs into materials, tools, and labor helps you budget realistically and spot where savings matter most. You’ll estimate materials (tiles, mortar, grout), tools (buy vs. rent), and labor (DIY hours or pro rates). Compare costs to decide when to hire help.
| Item | Typical Cost | Notes |
|---|---|---|
| Tiles | $2–$15/sq ft | |
| Mortar/grout | $0.50–$2/sq ft | |
| Labor | $4–$12/sq ft |
Time estimates by project size and tile type
Costs tell you what you’ll pay; time estimates show how long projects take and when hiring pros makes sense.
A small backsplash can take a day; a bathroom floor, two to three days; a large open-plan floor, several days to a week.
Porcelain and large-format tiles need more cutting and leveling, adding time.
Allow extra for surface prep and grout curing.
Signs you should hire a pro and how to choose a contractor
If the project risks structural issues, requires complex layouts, or you don’t have time to manage drying and leveling, hire a pro—these jobs demand precision, specialized tools, and experience that reduce mistakes and costly rework.
- Check licenses, insurance, and references.
- Compare written quotes and timelines.
- Confirm materials, warranty, and cleanup.
- Trust clear communication and realistic schedules.
FAQs About Installing Tile
You’ll have common questions like how long tile needs to cure before you can use the room and whether you can install tile over a wood subfloor.
You’ll also want to know the best grout for showers, how to cut tiles without a wet saw, and how often grout and tile need resealing.
I’ll answer each so you can finish the job right and avoid costly mistakes.
How long does tile installation take to fully cure before use?
How long should you wait before walking on new tile? You can usually walk on tiles after 24 hours, but grout and thinset need longer.
Wait 48–72 hours for light use and 7 days for full cure before heavy traffic or placing rugs and furniture.
Porcelain or large-format tiles and cooler conditions may extend curing time—check manufacturer instructions.
Can I install tile over wood subfloors?
After waiting the proper cure time for your tile and grout, you might wonder whether your existing wood subfloor can support a new tile installation. You can, but only with proper preparation:
Guarantee joists deflect less than L/360, add a cement backer board or uncoupling membrane, screw and tape joints, and use a suitable thinset.
Avoid nailing directly to plywood without reinforcement.
What grout should I use in showers and high-moisture areas?
Which grout you pick matters a lot in showers and other wet areas, so choose one rated for high moisture and frequent cleaning.
Use epoxy or high-performance urethane grout for joints exposed to water and soap; they resist staining, mildew, and cracking.
Sanitize regularly and seal cementitious grout if chosen.
Match grout flexibility to tile movement and gap width for lasting results.
How do I cut tiles without a wet saw?
Picking the right grout for wet areas helps prevent leaks and stains, but you’ll also need to shape tiles to fit corners, fixtures, and drains — even if you don’t own a wet saw.
Use a manual tile cutter for straight cuts, a tile nipper for small curves, a carbide-grit or diamond hole saw for pipes, and a scoring-and-snapping method for porcelain.
Take safety precautions.
How often should grout and tile be resealed?
How often you should reseal grout and tile depends on the material and the room’s moisture level: seal porous stone and unglazed tile every 6–12 months, grout in showers and high-moisture areas every 6 months, and grout in low-traffic, dry rooms every 1–2 years.
Check sealant wear annually, test with water beading, and reapply sooner if stains, darkening, or absorption appear to protect grout and tile.