Can You Glue Laminate Flooring Down Instead of Floating It?
Yes — you can glue laminate down instead of floating it when the product and subfloor allow, and it often gives firmer, quieter floors with better edge stability and moisture resistance. You’ll need a stable, flat subfloor (concrete or smooth plywood), a laminate rated for glue-down installation, the correct adhesive and proper subfloor prep to avoid gapping or buckling. Gluing takes more time and is harder to repair than floating. Keep going to learn when gluing makes sense and how to do it right.
Can You Glue Laminate Flooring Down Instead of Floating It? Quick Answer
Yes — you can glue laminate down in some situations, like over concrete or uneven subfloors that won’t suit a floating install.
You’ll trade easier replacement and natural expansion room for a more permanent bond and potential moisture issues if not done correctly.
Consider manufacturer guidance and moisture barriers before deciding.
Short direct answer summarizing when gluing is possible and common trade-offs
While laminate is usually installed as a floating floor, you can glue it down in certain situations—like over concrete, in high-traffic commercial spaces, or when you need extra stability—though you’ll trade easier repairs and expansion room for a firmer, more permanent installation.
If you’re asking can you glue laminate flooring, do it when substrate and moisture allow, knowing removal and board movement become harder.
Basic Understanding of Laminate Flooring
Laminate flooring is a layered product with a decorative surface, a core (like HDF or MDF), and a backing. You’ll usually install it over an underlayment.
You can fit laminate as a floating floor, glue it down, or in some cases nail it, depending on the product and subfloor. Knowing the core type, backing, and required underlayment helps you decide which installation method will work best.
What is laminate flooring?
Flooring made from compressed wood fibers and a photographic decorative layer, laminate gives you the look of hardwood or tile without the cost or maintenance.
You’ll find it durable, moisture-resistant in limited contexts, and available in many finishes.
Consider these key features:
- Core: high-density fiberboard or HDF
- Wear layer: protective transparent coating
- Patterned layer: printed design
- Backing: stabilizes and resists moisture
Typical installation methods: floating vs glued vs nailed
Now that you know what laminate is made of, you’ll want to pick an installation method that matches your room, subfloor, and DIY skill level. You can float planks for easy expansion, glue for stability over concrete, or nail/staple into wood subfloors for permanence. Consider moisture, movement, and removal ease when choosing.
| Method | Best for |
|---|---|
| Floating | DIY, uneven |
| Glued | Concrete |
| Nailed | Plywood |
Materials involved: core types, backing, underlayment
Think of laminate as a layered system where each component plays a specific role: a dense core gives strength, a printed decorative layer provides the look, and a backing stabilizes the board while underlayment cushions and controls moisture.
You’ll choose HDF or MDF cores, rigid vinyl or stone polymer alternatives, moisture-resistant backings, and foam, cork, or rubber underlayments to match subfloor, sound control, and moisture needs.
When Gluing Laminate Is Appropriate
You’ll want to glue only laminate designed for glue-down installation, typically engineered planks without click-lock edges.
Glue works best over stable, flat subfloors like properly prepared concrete or smooth plywood.
Choose glue-down when moisture, heavy foot traffic, or strict sound-control requirements make a floating floor less suitable.
Types of laminate suitable for glue-down installation
Because not all laminate is made the same, you’ll want to choose products specifically designed for glue-down installation—typically engineered planks labeled “glue-down” or “direct glue” that have a stable core (HDF or plywood) and a smooth, porous backing for adhesive bonding.
Also pick wear-layer ratings suitable for your traffic, match plank thickness to adhesive recommendations, and avoid click-lock floating-only boards.
Subfloor conditions that permit gluing (concrete, plywood)
When gluing laminate, you need a clean, level, and compatible subfloor—typically concrete or exterior-grade plywood—that’s dry, structurally sound, and free of contaminants like paint, oil, or adhesive residue.
You’ll check for flatness, moisture, and stability, then choose proper adhesive and underlayment.
Consider these prep steps:
- Verify level within manufacturer tolerances
- Test and remediate moisture
- Remove old adhesives/contaminants
- Repair delamination or loose panels
Environmental and usage factors favoring glue-down (moisture, traffic)
Once your subfloor checks out—flat, dry, and sound, you’ll weigh environmental and usage factors that make glue-down installation the better choice.
If moisture risks exist—basement or slab—you’ll benefit from adhesive sealing and stability.
In high-traffic zones or commercial rooms, gluing prevents plank movement, reduces noise, and extends wear life.
Choose glue when permanence and moisture control matter most.
How to Glue Laminate Flooring: Step-by-Step Guide
Before you start, inspect and prepare the subfloor—check for level, clean thoroughly, and test for moisture.
Pick the correct adhesive and tools, plan your layout while the planks acclimate, then apply adhesive and place each plank with proper spacing.
Finish by rolling the floor, allowing full cure time, and handling immediate touch-ups.
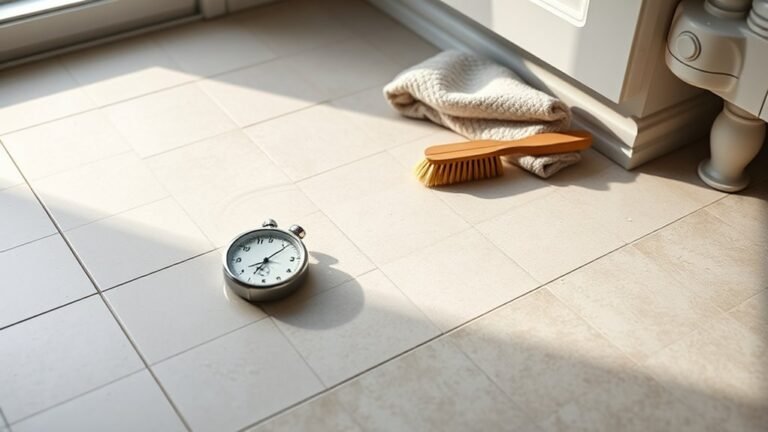
Step 1 Inspect and prepare the subfloor (leveling, cleaning, moisture testing)
Because a solid subfloor determines how long your glued laminate will last, you’ll need to inspect and prepare it carefully.
Remove debris, nails, and old adhesives. Check for levelness with a straightedge; shim or self-leveling compound any dips or high spots beyond manufacturer tolerance.
Clean thoroughly and test moisture with a meter; address dampness or leaks before proceeding to adhesive work.
Step 2 Choose the right adhesive and tools
With the subfloor prepped and moisture under control, pick adhesives and tools that match your laminate type and job conditions.
You’ll need products rated for laminate and compatible with any underlayment. Choose practical tools and safety gear.
- Polymer or construction adhesive specified for laminate
- Notched trowel size per adhesive
- Caulking gun and adhesive remover
- Knee pads and gloves
Step 3 Layout planning and acclimation of planks
Start by laying out several rows of planks along the longest wall to determine your starting line, staggering joints and checking that the final row won’t be narrower than 2 inches.
This dry-run lets you adjust layout, trim end pieces, and rotate boards for color variation before you glue.
Then let planks acclimate flat in the installation room for 48–72 hours to equalize moisture and temperature.
Step 4 Applying adhesive and placing planks (technique, spacing)
Grab your trowel and adhesive and work methodically: spread a consistent bead of manufacturer-recommended glue with the proper notched trowel, lay each plank into the adhesive while it’s still tacky, and leave the specified spacing at walls and between rows to allow for expansion.
Stagger end joints, press planks firmly into the glue, tap seams for tight fit, and clean excess immediately with recommended solvent.
Step 5 Rolling, curing time, and immediate finishing touches
Roll over the newly laid planks immediately to press them into the adhesive and eliminate air pockets—use a floor roller (50–100 lb) or a weighted roller and make several passes across each row.
Check for squeeze-out, wiping excess with a damp cloth before it skins.
Allow manufacturer-recommended curing time, keep traffic minimal, and place protective pads on furniture you move in right away.
Step 6 Long-term settling and final trim installation
Once the adhesive’s cured and traffic’s been kept light for the recommended period, let the floor settle for a few days while you monitor for any movement or gaps. This lets planks acclimate fully and reveals any spots that need attention before final trim goes on.
After settling, install baseboards and connecting strips, caulk edges where needed, verify expansion gaps, and inspect for loose or lifted planks.
Comparison: Glued vs Floating Laminate
When you compare glued and floating laminate, consider durability and how the floor will perform day to day.
Think about sound and feel underfoot, moisture resistance and ease of repairs, plus how long installation will take, the skill required, and the cost.
These factors will help you choose the right method for your space.
Durability and performance
Although both glued and floating laminate aim to look and feel similar, their long-term durability and performance differ in key ways you should know. You’ll find glued installs resist edge lifting and moisture at seams better, while floating floors tolerate subfloor movement and are easier to replace.
| Aspect | Glued | Floating |
|---|---|---|
| Edge stability | High | Moderate |
| Repairability | Harder | Easier |
Sound and feel underfoot
Because the installation method changes how the boards interact with the subfloor, glued and floating laminate feel and sound noticeably different underfoot.
Glued laminate transmits firmer, quieter footsteps and less hollow echo since it’s bonded to the subfloor.
Floating floors have a slightly springy, more resonant feel and can amplify click or creak sounds at seams.
Your choice affects comfort and noise.
Moisture resistance and repairability
If you’re weighing glued versus floating laminate, moisture resistance and repairability are key trade-offs to contemplate:
Glued panels resist minor surface moisture better since adhesive blocks seepage, but trapped moisture can warp boards and ruin the bond.
Floating floors let you replace damaged planks easily and allow moisture to vent underneath, though seams are more vulnerable to spills.
Choose based on exposure and maintenance preferences.
Installation time, skill level, and cost
When you’re weighing glued versus floating laminate, the floating option usually gets you across the finish line faster and with less skill: its click-lock planks snap together and don’t require adhesive curing time, so a typical DIYer can install a room in a day or two.
Gluing demands more prep, precise placement, clamps, and longer cure times, raising labor difficulty and cost for materials and installers.
Common Problems and Mistakes When Gluing Laminate
When you glue laminate, choosing the wrong adhesive or using too much can cause joints to fail or leave visible residue.
Skipping proper subfloor prep or ignoring moisture levels leads to gapping, buckling, or telegraphing of imperfections.
Also be ready for harder, costlier repairs and replacements compared with floating installations.
Adhesive-related issues (wrong adhesive, overuse)
Choosing and using the wrong adhesive—or using too much of the right one—can ruin a laminate installation by preventing proper board movement, causing visible seepage, or creating weak bonds that fail over time.
You should match adhesive type to manufacturer recommendations, apply the correct bead size, and avoid squeezing glue into joints.
Clean excess immediately and test a small area before full application to guarantee compatibility.
Subfloor and moisture mistakes
If your subfloor isn’t flat, clean, and dry, even the best adhesive won’t save the installation—gaps, squeaks, and delamination follow.
You must test moisture with a reliable meter, fix high readings, and use appropriate vapor barriers.
Remove debris, level low spots, and repair rot or soft spots.
Skipping these steps lets moisture break bonds and ruins glued laminate quickly.
Gapping, buckling, and telegraphing imperfections
Because glued laminate doesn’t forgive small mistakes, you’ll quickly notice gapping, buckling, or telegraphing if panels aren’t installed precisely.
If seams aren’t tight, gaps appear; if boards aren’t aligned or subfloor isn’t flat, they buckle.
Uneven adhesive or debris telegraphs through the surface, showing bumps and ridges.
You must prep the subfloor, follow layout tolerances, and use consistent adhesive to avoid these issues.
Difficulty with replacement and repairs
One major drawback of gluing laminate is that you’ll make future repairs a lot harder: glued planks are bonded to the subfloor and to each other, so removing a damaged board often means cutting out sections, prying up adjoining pieces, and sometimes replacing large areas rather than a single plank.
You’ll spend more time, tools, and money; matching seams and finish gets tricky, too.
Best Practices and Expert Tips for Glue-Down Laminate
When you glue laminate, pick an adhesive matched to both your substrate and the specific laminate to guarantee proper bond and flexibility.
Prepare the subfloor to industry standards, work in manageable sections while controlling humidity and temperature, and follow the manufacturer’s open time and cure instructions.
After installation, keep humidity stable, use protective pads, and clean spills promptly to protect the glued floor.
Selecting adhesive based on substrate and laminate type
Although it might seem tempting to grab any adhesive off the shelf, choosing the right glue for your substrate and laminate type determines long-term performance and prevents costly failures.
Match adhesive chemistry to substrate—urethane for concrete or moisture-prone surfaces, pressure-sensitive for engineered plywood, and water-based adhesives for compatible laminates.
Check manufacturer specs, VOC limits, and cure times to guarantee bond strength and warranty compliance.
Preparing the subfloor to industry standards
Because a proper glue-down installation starts beneath your feet, you should prepare the subfloor to precise industry standards before laying any boards.
Remove old adhesives, nails, and debris; repair cracks and level to manufacturer tolerances (typically ≤3/16″ over 10′).
Ascertain dryness with a moisture test, confirm flatness, vacuum thoroughly, and apply primer or patch compounds as specified so the adhesive bonds consistently and lasts.
Working in sections and controlling humidity/temperature
If you break the room into manageable sections and keep temperature and humidity steady, you’ll avoid adhesive failures and uneven seams.
Work one small area at a time, apply glue per manufacturer window, press and roll before it skins over.
Monitor HVAC or use dehumidifiers to maintain recommended conditions.
Move methodically to let adhesive cure uniformly and prevent gaps or bond loss.
Maintenance tips to protect glued installations
When you stick with a simple routine—regular sweeping, quick spot-cleaning, and keeping spills off the surface—you’ll prolong the life and appearance of a glue-down laminate floor.
Wipe moisture quickly, use pH-neutral cleaners, and avoid waxes or steam mops.
Place felt pads under furniture, use mats at entrances, and trim pet nails.
Inspect seams periodically and reseal edges if adhesive shows wear.
Cost and Time Considerations
You’ll want to weigh materials and labor costs when choosing glued versus floating laminate, since glue and adhesive tools add upfront expense while pros may charge more for glue-down work.
For a typical room, expect a DIY glued install to take longer than snapping a floating floor, especially because of adhesive open times and curing.
Hiring a professional speeds the job and may cost more, but can save time and reduce mistakes.
Materials and labor cost comparison (glued vs floating)
Because glued laminate needs adhesive, more prep, and often a skilled installer, it usually costs you more in both materials and labor than a floating floor; floating installations use less glue (or none), fewer specialty tools, and can be faster to lay, which cuts labor hours and total price. Compare:
| Item | Glued | Floating |
|---|---|---|
| Adhesive | High | Low/None |
| Tools | Specialty | Basic |
| Labor cost | Higher | Lower |
Time estimates for DIY vs professional installation
If you tackle a glued laminate install yourself, expect it to take considerably longer than a floating floor—mostly because adhesive application, curing time, and precise edge work slow the process and leave less room for shortcuts.
A DIY job on a medium room can take two to three days with curing; a pro crew can finish prep and bonding in one long day, reducing downtime and risk.
When to Hire a Professional
If your subfloor is uneven, the room is large or oddly shaped, or you’re short on time, you should hire a pro.
Ask potential installers about experience with glued laminate, request references and a written estimate, and confirm they’re licensed and insured.
Before work starts, get clear warranties on labor and material and written guarantees for the installation method they’ll use.
Signs you should hire an installer
When your laminate project involves tricky cuts, uneven subfloors, or complicated changes, call a pro—these issues can turn a weekend job into costly mistakes if you tackle them alone.
Hire an installer if you’re replacing large areas, working around stairs or built-ins, dealing with moisture or radiant heat, or lack tools and experience.
Professionals save time, guarantee warranty compliance, and prevent costly errors.
What to ask a flooring contractor
Before you hire someone, know the right questions to ask so you can compare bids and avoid surprises.
Ask about experience with glued laminate, timeline, and prep needed. Confirm licensing and insurance, and get a written scope. Also discuss cleanup and change orders.
- Experience with glue installations
- Project timeline and prep
- Licensing and insurance
- Written scope and payment terms
Warranties and guarantees to request
Why settle for vague promises? You should insist on a written warranty covering adhesive failure, seam lifting, and moisture-related issues for a specified period.
Ask for labor and materials coverage, clear claim procedures, and transferability if you sell the home.
Get timelines for repairs, exclusions in writing, and a contractor’s license and insurance proof before signing any agreement.
Alternatives to Gluing Laminate
If you want to avoid glue, you can install laminate as a floating floor to enjoy easier repairs and faster installation.
Floating systems work well over imperfect subfloors and in rental or DIY situations where you might need to remove the floor later.
You can also consider engineered hardwood or luxury vinyl for a glued-down look with better moisture resistance and longevity.
Floating installation advantages and suitable situations
When you want a quick, reversible, and less mess-prone option, floating laminate floors are a great alternative to gluing—planks click together over an underlayment and rest on the subfloor rather than being permanently bonded.
You’ll enjoy faster installation, easier repairs, and improved sound and moisture control with proper underlayment.
Choose floating for rental units, DIY projects, or areas needing future access to subfloor systems.
Using engineered hardwood or luxury vinyl as alternatives
Although laminate can be glued down, you might prefer engineered hardwood or luxury vinyl as alternatives that give you superior durability and a more authentic look without the drawbacks of permanent installation.
You’ll find engineered hardwood offers real wood texture and refinishing options, while luxury vinyl resists moisture and heavy wear.
Choose based on budget, subfloor conditions, and whether you want long-term repairability or simple replacement.
Frequently Asked Questions
You probably have a few quick questions about glued laminate, like whether every type can be glued or if glue stops moisture problems.
You’ll also want to know how removal and replacement work, whether glue-down is a smart choice for basements, and how long glued laminate lasts versus a floating floor.
I’ll answer each point clearly so you can pick the best installation for your space.
Can all laminate be glued down?
Can all laminate be glued down? You can glue some types, but not all.
Check the manufacturer’s guidelines—many laminates are designed for floating installation and have warranties voided if glued.
Engineered or click-lock boards sometimes accept adhesive; direct-stick laminates exist for glue-down.
Also consider substrate compatibility and product-specific adhesives.
When in doubt, follow manufacturer instructions to avoid damage or warranty loss.
Will gluing laminate prevent moisture issues?
If you glue laminate down properly, it can reduce surface water seepage and edge movement, but it won’t stop moisture coming up from a damp subfloor or protect against standing water.
You should install a proper vapor barrier and fix subfloor moisture first.
Gluing helps seam stability but won’t prevent mold or warping if underlying humidity or leaks aren’t addressed.
Can glued laminate be removed and replaced later?
Wondering whether glued laminate can be removed later? You can remove glued laminate, but expect more effort, potential damage, and higher costs than a floating floor.
Panels bonded to subfloor may split, and adhesive residue will need scraping and sanding.
Plan for replacement time, repair of the substrate, and possibly installing new underlayment.
Hire pros if you want cleaner results.
Is gluing laminate better for basements?
Why glue laminate in a basement? You’ll get a firmer, more stable floor that resists movement from humidity and slight moisture.
Gluing reduces gaps, improves sound transmission, and can prevent cupping. You should still use a proper moisture barrier and compatible adhesive, and avoid gluing over damp concrete.
Consider long-term moisture risk before choosing glue-down installation.
How long does glue-down laminate last compared to floating?
Gluing laminate down in a basement can improve stability and moisture resistance, and it also affects lifespan compared with floating installs.
You’ll usually get longer wear when adhesive prevents movement, but longevity still depends on quality and conditions.
- Glue-down often lasts 10–25 years
- Floating usually lasts 8–20 years
- Subfloor moisture shortens life
- High-traffic areas wear faster