How Much Does Shower Tile Installation Really Cost?
You’ll typically pay between $800 and $6,000 to install shower tile, with most homeowners spending about $2,500 depending on tile choice, shower size, and any hidden repairs. Small showers run $800–$1,500, standard remodels $1,500–$3,500, and high‑end jobs $3,500–$6,000+. Costs cover tile, waterproofing, labor, and possible demo or plumbing fixes. Budget an extra 10–30% for surprises, and keep reading to see how choices and quotes affect your final price.
Quick Answer How Much Does Shower Tile Installation Really Cost?
You can expect shower tile installation to run roughly $800 to $6,000 nationwide, with an average around $2,500 depending on materials and labor.
For a small shower you might pay $800–$1,500, a standard remodel $1,500–$3,500, and a large or high-end job $3,500–$6,000+.
Budget at least the average plus a contingency for surprises.
Typical national cost range and average price
Nationally, shower tile installation typically runs between $800 and $4,500, with the average homeowner spending about $2,000 for a standard-sized shower using mid-range tile and professional labor.
When you ask how much for shower tile installation, expect variation from tile quality, labor rates, region, and complexity.
Budget around the average but get multiple quotes to lock your actual cost.
Cost examples by project size (small, standard, large)
While exact figures vary by region and materials, a quick rule of thumb breaks shower tile jobs into three sizes: small (niche repairs or walk-in pan under 25 sq ft) often runs $400–$1,200; standard (typical 3′ x 5′ shower, mid-range tile) is about $1,200–$3,000; and large or high-end projects (custom layouts, full tub surrounds, premium tile) usually fall between $3,000–$6,000 or more — so use these ranges to gauge which bracket your job fits.
For small jobs expect minimal labor and quicker timelines.
Standard projects involve modest demolition, waterproofing, and grout work.
Large or high-end jobs add design time, specialty materials, and longer labor, pushing costs higher.
One-line summary for homeowners considering budgeting
If you’re budgeting for shower tile installation, plan on roughly $400–$6,000 depending on size and finish: small repairs or compact pans run about $400–$1,200, typical showers around $1,200–$3,000, and large or high-end jobs usually hit $3,000–$6,000+.
Expect tile, labor, waterproofing, and fixtures to drive costs; pick materials and scope first, then get multiple local quotes to lock a realistic budget.
Understanding Shower Tile Installation Costs (What and Why)
To understand what drives your shower tile bill, look at the main components: labor, materials, permits, and contractor overhead.
You’ll see labor, materials, and overhead each play distinct roles—labor covers time and skill, materials include tile and waterproofing, and overhead adds insurance, tools, and shop costs.
Expect prices to vary by region and contractor based on local labor rates, material availability, and business size.
Components that make up the total cost
A handful of distinct components combine to form your shower tile installation bill, and knowing each one helps you spot where costs can rise or fall.
You’ll evaluate choices, site conditions, and finishing details.
Consider these elements:
- Tile type and quantity
- Substrate prep and waterproofing
- Drain, fixtures, and trim choices
Differences between labor, materials, and overhead
Knowing the parts that add up to your invoice makes it easier to separate what you’re paying for—labor, materials, and overhead each play a distinct role in the final price.
You’ll pay labor for skilled work and time, materials for tile, grout, and waterproofing, and overhead for tools, insurance, permits, and business expenses that keep the crew operating and compliant.
Why prices vary by region and contractor
Because local wages, supply costs, and demand all differ, you’ll see wide price swings for the same shower tile job from one region or contractor to another.
You should compare bids, check references, and confirm licenses. Higher-cost areas often include license fees, insurance, and stronger unions.
Low bids can skip permits or use cheaper materials, so weigh reputation and warranties alongside price.
Cost Breakdown Materials
Now let’s look at what materials will drive your costs, from common tile types—ceramic, porcelain, natural stone, and glass—with very different price ranges.
You’ll also need grout, backer board, waterproofing membrane, sealants, and accessories like niches, benches, thresholds, and trim pieces.
Below are estimated material-cost examples for typical tile choices so you can compare realistic budgets.
Tile types and their price ranges (ceramic, porcelain, natural stone, glass)
1. You’ll pick tiles based on style, durability, and budget. Ceramic is cheapest, porcelain stronger, natural stone pricier, and glass premium. Expect wide price ranges depending on finish and size.
| Tile type | Typical price/ft² |
|---|---|
| Ceramic | $1–$5 |
| Porcelain | $3–$10 |
| Natural stone | $5–$20 |
| Glass | $7–$30 |
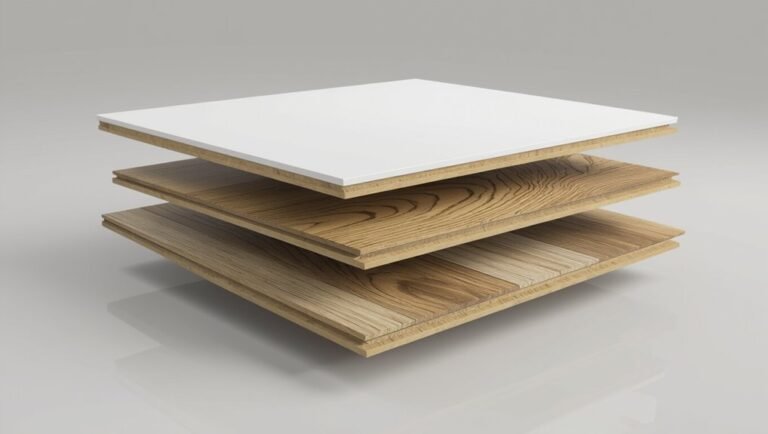
Grout, backer board, waterproofing membrane, sealants
Several key materials beyond the tiles themselves drive shower costs: grout, backer board, waterproofing membrane, and sealants each add both material and labor expenses.
You’ll pay for cement board or backer board per sheet, waterproofing membranes by roll or liquid gallon, grout type and color, and sealants for joints.
Installation labor and proper waterproofing greatly affect overall price.
Accessories: niches, benches, thresholds, trim pieces
Accessories like niches, benches, thresholds, and trim pieces add both function and cost to a shower—expect to pay per unit or linear foot depending on the item.
You’ll budget for labor and materials, varying by size and finish.
Consider common options:
- Recessed niche for shampoo and soap
- Built-in bench or folding seat
- Threshold or metal trim for clean edges
Estimated material cost examples for common tile choices
Those extra features affect your material totals, so let’s look at typical tile choices and what they cost per square foot. You’ll pay more for porcelain or natural stone than ceramic. Consider grout, waterproofing, and trim when budgeting; they add $1–$5/sq ft. Use this quick reference:
| Tile Type | Low | High |
|---|---|---|
| Ceramic | $1 | $5 |
| Porcelain | $3 | $10 |
Cost Breakdown Labor and Installation
Expect labor to be quoted by the hour or as a flat job rate, with tile setters often charging more than general contractors due to specialized skill and waterproofing work.
Plan for a simple re-tile to take a day or two, a full shower rebuild several days, and custom patterns several more hours or days depending on layout complexity.
Remember extras like demo, plumbing adjustments, and substrate repair will add time and higher hourly or project charges.
Typical labor rates and how they’re calculated
While labor usually makes up the largest share of a shower tile project’s price, understanding how installers calculate their rates—hourly wages, travel and setup time, skill level, and job complexity—lets you spot where costs come from and where you can save.
You’ll see rates set per hour or per day, markups for materials or subcontractors, and premiums for certifications, insurance, and warranty coverage.
Time estimates by project complexity (simple re-tile, full shower rebuild, custom patterns)
Because project scope drives most of the clock time, you’ll see big differences in labor hours between a simple re-tile, a full shower rebuild, and a custom-pattern install.
You’ll typically expect a simple re-tile in 1–2 days, a full rebuild in 3–7 days, and complex patterns in 4–10 days depending on layout, tile size, curing times, and grout work.
Specialized labor: waterproofing, tile setter vs general contractor
When your shower project moves beyond basic tiling, you’ll pay more for specialists like waterproofing pros and experienced tile setters than for a general contractor’s hourly rate.
This is because those skills reduce long-term problems and warranty risk. You should hire a licensed waterproofing installer for membranes and a certified tile setter for layout, substrate prep, and grout work.
Experience minimizes callbacks and protects your investment.
Extra services that increase labor cost (demo, plumbing adjustments, substrate repair)
If your shower retrofit uncovers hidden damage or needs layout changes, expect labor costs to rise for extra services like demo, plumbing adjustments, and substrate repair.
You’ll pay more when workers remove old tile, rebuild rotted substrate, reroute or replace valves and drains, or update rough plumbing to meet code.
Get written estimates and contingency allowances to avoid surprises.
Project Types and Cost Scenarios (Primary Framework: Explanation + How-To)
You’ll want to match the scope of your project to your budget, whether you’re tiling over an existing surround, replacing the pan and plumbing, or opting for luxury finishes like mosaic, marble, or heated floors.
I’ll outline the typical steps and cost ranges for each scenario and compare DIY versus hiring pros so you can weigh savings against risk.
That way you’ll know what’s reasonable to attempt yourself and when to bring in a contractor.
Simple tile over existing shower steps and cost
Tiling over existing shower steps can be a quick, budget-friendly way to refresh the look and repair minor damage without a full demo—here’s how it works and what it typically costs.
You’ll clean, sand, and prime surfaces, apply thinset, and set tile or overlays.
Expect $200–$800 for materials and labor per step depending on tile quality, prep needs, and contractor rates.
Full shower remodel with new pan and plumbing steps and cost
When you replace the shower pan and relocate plumbing, you’re committing to a full remodel that changes the room’s layout, waterproofing, and cost profile.
This process typically involves demo, new drain and supply runs, pan installation, waterproofing, and tile or wall finishes.
You’ll plan permits, coordinate plumbers and installers, expect 3–10 days of work, and budget $2,000–$8,000+ depending on materials and complexity.
Custom or luxury installations (mosaic, marble, heated floors) steps and cost
Custom or luxury shower installations—think intricate mosaics, natural stone like marble, and radiant heated floors—bring striking aesthetics and higher performance but demand more planning, skill, and budget than standard jobs.
You’ll need design layout, substrate prep, waterproofing, precision tile setting, grout sealing, and electrical work for heating.
Expect higher material costs, longer labor time, and specialty trades; budgets often double compared to basic installs.
DIY vs professional installation: cost comparison and risk assessment
Deciding whether to DIY or hire a pro for your shower tile comes down to budget, skill, and tolerance for risk—doing it yourself can save labor costs but raises the stakes for waterproofing mistakes, uneven tile, and code noncompliance; hiring a professional costs more up front but reduces failures, warranty gaps, and long-term repair bills.
| Choice | Cost | Emotion |
|---|---|---|
| DIY | Low | Nervous |
| Pro | High | Relieved |
| Hybrid | Mid | Hopeful |
Step-by-Step Cost Estimating Guide for Homeowners
Start by measuring your shower and listing exactly what’s included so you can scope materials and labor.
Pick tile and supplies from a budget checklist, get multiple quotes to compare line items, and set aside funds for permits and contingencies.
Finally, factor in scheduling and timeline choices—short notice or phased work can raise costs.
Step 1: Measure and scope the project (what to include)
Before you order materials or hire help, measure the shower and define the full scope so your estimate reflects real needs. Measure floor, walls, ceiling height, niches, benches, thresholds, and curb.
Note existing fixtures, waterproofing condition, and any demolition or substrate repairs. Include labor hours for prep, waterproofing, tile layout complexity, grout, sealant, and waste allowance.
Step 2: Choose tile and materials (budgeting checklist)
With your measurements and scope in hand, you can now pick the tile and materials that will drive most of the budget. Choose wisely: price tiers, durability, and labor impact matter.
Consider these essentials:
- Tile type and square footage (porcelain, ceramic, natural stone)
- Waterproofing and backer board
- Grout, sealant, trim, and waste/overage allowance
Step 3: Get multiple quotes and compare line items
1 smart move is to collect at least three written quotes so you can compare prices, timelines, and exactly what’s included—labor, materials, waterproofing, disposal, permits, and cleanup—line by line.
Review unit costs, scope clarity, warranty terms, and payment schedule. Ask contractors to explain discrepancies and provide references.
Use the comparisons to pick the best value, not just the lowest bid.
Step 4: Budget for contingencies and permits
Because unexpected issues and local rules can add cost, you should set aside a contingency and include permit fees when finalizing your tile budget.
Plan 10–20% extra for surprises like water damage, substrate repair, or tile backorders.
Check local permit costs and inspection schedules upfront.
Factor permit processing and potential rework into your final estimate so bids reflect realistic total expenses.
Step 5: Schedule and timeline considerations that affect cost
When you set the project schedule, remember time directly affects cost: longer timelines can raise labor and storage fees, while compressed schedules may mean overtime and rush charges.
You should plan for lead times on materials, coordinate contractor availability, and pick realistic start dates to avoid delays.
Weekend or holiday work typically adds premiums, so balance urgency against added expenses.
Comparison Cost Drivers and Tradeoffs
You’ll weigh upfront costs against long-term durability and maintenance when choosing tile and grout—cheaper materials save now but can cost more later.
Decide where aesthetics matter and where you can save, splurging on focal areas while using budget-friendly options elsewhere.
Also consider energy and water-saving upgrades like low-flow fixtures or heated floors, which raise installation costs but can cut utility bills over time.
Cheap materials vs long-term durability and maintenance
If you pick cheaper tile and grout to save up front, expect higher maintenance and earlier replacement down the road; these savings can evaporate once you factor in repairs, resealing, and potential water damage.
You’ll deal with more frequent grout staining, cracked tiles, and moisture issues that raise lifetime cost.
Investing modestly in quality materials often reduces service calls, downtime, and cumulative expenses.
Cost vs aesthetics: when to splurge and when to save
Cheaper tile can cost you more over time, but that doesn’t mean every high-end option is worth the splurge—deciding what to invest in comes down to where it’ll show and how you’ll use the shower. Prioritize durability in wet zones and style on focal walls; save on secondary areas.
| Splash zone | Durable porcelain |
|---|---|
| Focal wall | Designer ceramic |
| Floor | Slip-resistant tile |
| Niche | Accent mosaic |
Energy and water-saving upgrades that affect cost (e.g., low-flow fixtures, heated floors)
When you choose water- and energy-saving upgrades for your shower, expect upfront costs to rise but long-term bills and environmental impact to fall.
Low-flow fixtures, thermostatic valves, and radiant heated floors each shift the cost-benefit equation in different ways.
You’ll pay more for efficient valves and electric or hydronic floor systems, but save on water, heater runtime, and comfort—often recouping costs over years.
Common Problems, Hidden Costs, and Mistakes to Avoid
When you tear out old tile you can uncover hidden costs like mold, rotten framing, or unexpected plumbing repairs that push the budget up fast.
Skipping proper waterproofing or installing tile over the wrong substrate are common mistakes that create costly rework.
And watch contractors for vague quotes, frequent change orders, or missing licenses—those red flags usually mean higher final bills.
Hidden costs during demo (mold, rot, plumbing issues)
If you strip tile and shower pan without anticipating surprises, you could uncover mold, rot, or hidden plumbing problems that quickly drive up costs.
Plan for contingencies and budget an extra 10–30% for repairs so you won’t be blindsided when demolition reveals issues that need immediate attention.
Expect mold remediation, rotten framing replacement, and unforeseen pipe fixes—each adds labor, materials, permits, and time to the project.
Mistakes that increase cost (improper waterproofing, wrong substrate)
Because improper waterproofing or the wrong substrate can turn a simple tile job into a costly redo, you should get those details right from the start.
If water breaches liner or membrane, you’ll face mold, rot, and full teardown.
Using unstable backer board or applying thinset incorrectly leads to cracked tile and leaks.
Insist on proper materials, installation methods, and inspections to avoid expensive repairs.
Contractor pitfalls: vague quotes, change orders, lack of licensing
Getting the materials and methods right won’t stop costly headaches if you hire the wrong contractor.
You’ll face vague quotes that hide scope, surprise change orders that inflate your budget, and unlicensed workers who risk shoddy work and no recourse.
Demand detailed written estimates, fixed-price terms for defined scopes, proof of licensing and insurance, and clear change-order procedures before work starts.
Prevention, Best Practices, and Money-Saving Strategies
You can protect your investment by verifying contractor licenses, insurance, and warranty details before you sign anything.
Choose cost-saving options that keep quality—like mixing premium accent tiles with budget field tile or using a prefab pan—and schedule work during slower seasons or weeknights to lower labor rates.
Regular maintenance (grout sealing, prompt caulk replacement, and proper cleaning) will extend the life of your shower and save repair costs.
How to verify contractor qualifications and warranties
How can you be sure a tile contractor will do the job right and stand behind their work?
Verify licenses, ask for references, and insist on written warranties.
Check insurance and BBB/online reviews.
Get a clear contract with scope, timelines, and warranty terms.
- Request proof of licensure and insurance
- Call recent clients about workmanship
- Require a written warranty detailing coverage and duration
Cost-saving tips that don’t sacrifice quality (mixed tile strategies, prefab pans)
While savings matter, you don’t have to compromise durability or style—smart choices like mixing high-traffic durable tiles with more decorative accent pieces and opting for prefab shower pans can cut costs without sacrificing quality.
You can prioritize ceramic or porcelain on walls and floor, use natural stone sparingly as accents, choose a molded pan to reduce labor, and still get a polished, long-lasting result.
Timing and planning strategies to lower labor costs
Mixing tile types and choosing a prefab pan sets you up to save on materials, and smart timing and planning will do the same for labor.
Schedule during slow seasons, bundle tasks to minimize crew mobilization, finalize selections and measurements beforehand, and secure permits early.
You’ll reduce idle time, avoid costly change orders, and let installers work efficiently so labor bills stay lower.
Maintenance practices that protect your investment
If you keep up with simple, regular care and catch small issues early, your shower tile will look better and last far longer without expensive repairs.
Wipe tiles and grout after showers, use a squeegee, clean weekly with pH-neutral cleaner, re-seal grout annually, fix cracked grout or loose tiles immediately, maintain ventilation to prevent mold, and schedule professional inspections every few years.
Regional and Market Variations
Where you live can change your shower tile bill considerably because local labor rates and how easy it’s to get specific tiles affect pricing.
You’ll often get better rates in the off-season, so schedule work in slower months if you can.
In major metros expect wide ranges—e.g., $800–$2,500 in smaller cities versus $2,000–$6,000+ in high-cost areas—so check local quotes.
How local labor markets and material availability affect price
Because contractors and suppliers vary widely from place to place, the same shower job can cost a lot more or less depending on local labor rates and how easy it’s to get materials.
You’ll pay more where skilled tile setters are scarce or unions set wages.
Remote areas or places with limited supply chains often add markups and lead times, raising your overall project cost.
Seasonal pricing and when to schedule for better rates
When you schedule your shower tile project during slower seasons, you can often get better rates and more flexible timelines from contractors and suppliers.
Plan for late fall or winter when demand dips; contractors may offer discounts, quicker start dates, and easier material sourcing.
Ask for off-peak quotes, confirm warranty timing, and lock a firm contract to guarantee savings and reliable scheduling.
Example cost ranges for major metro areas
Across major metro areas, shower tile installation typically runs from about $900 to $6,000 depending on city labor rates, material choices, and local permit costs; expect lower-end projects (basic tile, small shower) in midwestern or southern markets and higher-end jobs (stone, custom work) in coastal cities like San Francisco or New York.
| City | Typical Range |
|---|---|
| Chicago | $1,000–$3,000 |
| Dallas | $900–$2,500 |
| Seattle | $1,500–$4,500 |
| Miami | $1,200–$4,000 |
Typical Warranty, Lifespan, and Return on Investment
You’ll want to contemplate how material and workmanship affect lifespan—porcelain and natural stone can last decades with proper installation, while cheaper tiles and poor grouting wear faster.
Check typical warranties (materials, labor, and waterproofing) to know what’s covered and for how long.
Finally, think about resale: quality tile work can boost curb appeal and recover a significant portion of your investment, especially in midrange to high-end homes.
Expected lifespan by material and installation quality
Because material choice and installation quality directly affect performance, you’ll want to weigh typical warranties against realistic lifespans to judge value.
Porcelain and natural stone can last 30–50 years with proper waterproofing; ceramic often lasts 20–40 years.
Poor installation—insufficient waterproofing, improper grout—can cut lifespan dramatically.
Investing in skilled labor and quality materials improves longevity and ROI, reducing long-term repair costs.
Common warranty types and what they cover
Having settled how material and workmanship shape lifespan, you’ll want to compare the warranties that manufacturers and installers offer so you can judge real value.
Manufacturers typically cover tile defects and glazing; installers guarantee workmanship, waterproofing, and grout/adhesive failure for a set period.
Check lengths, transferability, exclusions (like improper maintenance), and claim processes to estimate true lifespan protection and return on investment.
How shower tile upgrades affect home value and resale considerations
When you upgrade shower tile, you’re not just changing finishes—you’re investing in a feature buyers notice and appraisers value.
Durable, well-installed tile with a clear warranty can boost perceived home quality and improve resale appeal. You’ll recoup more on midrange-to-upscale tile, especially with modern neutral styles and documented warranties.
Factor lifespan, maintenance, and local market expectations into ROI projections before choosing materials.
How to Get Accurate Quotes Checklist for Comparing Estimates
To compare estimates effectively, you’ll want a checklist that points out specific line items in a detailed quote like materials, labor hours, and cleanup.
Ask contractors clear questions about timelines, warranties, permits, and who’s responsible for unexpected issues.
Watch for red flags in bids and contracts such as vague scopes, unusually low prices, or missing insurance and licensing details.
Line items to look for in a detailed quote
Because estimates can hide important differences, you’ll want a checklist of specific line items to compare side-by-side.
Include materials, labor, and scope details so you can spot omissions or upgrades.
Look for:
- Tile type, quantity, and waste allowance
- Waterproofing, backer board, and substrate prep
- Labor hours, rates, and cleanup/permit fees
Questions to ask contractors before hiring
Now that you’ve lined up the specific line items to compare, you’ll want a concise list of questions to ask each contractor so you can verify those details and uncover any hidden costs.
Ask about timeline, warranties, and change-order procedures. Also confirm licensing, insurance, and references.
- What’s the project timeline and milestones?
- What’s included in the warranty?
- How do you handle change orders and extra costs?
Red flags in bids and contracts
What should make you hesitate when comparing bids and contracts?
Watch for vague scopes, missing timelines, no materials list, or open-ended change orders.
Beware unusually low prices, lack of license or insurance details, and payment demands upfront.
Make certain warranties, cleanup responsibilities, and permit duties are written.
If a contractor dodges specifics, cross them off your shortlist and get another written estimate.
FAQ
You’ve probably got a few key questions: what’s the per-square-foot cost, is it cheaper to retile over existing tile, and how much should you budget for waterproofing and substrate repairs?
You’ll also want to know whether you can save money by doing the work yourself and what ongoing maintenance costs to expect.
Below we answer each question clearly so you can compare options and plan your budget.
How much does it cost per square foot to install shower tile?
Curious how much you’ll pay per square foot to tile a shower? Expect national averages roughly $8–$25 per sq ft installed: basic ceramic near $8–$12, midrange porcelain or glass $12–$20, and high-end stone or intricate patterns $20–$40.
Labor, grout, waterproofing, and complexity drive costs. Get written estimates and measure square footage precisely to compare bids.
Is it cheaper to retile over existing tile?
Can you save money by tiling over existing shower tile? You might, but only if the old tile, substrate, and waterproofing are sound, flat, and well-bonded.
Skipping demolition cuts labor and disposal costs, yet adds risk of adhesion failure, hidden damage, and limited tile options.
Have a pro inspect conditions; short-term savings can turn costly if problems surface later.
How much should I budget for waterproofing and substrate repairs?
If the existing tile or substrate looks questionable, factor waterproofing and repair costs into your budget before deciding to tile over it.
Expect $200–$1,200 for simple membrane replacement or local patching; full substrate replacement and waterproofing can run $1,000–$3,500 depending on shower size and access.
Always prioritize proper waterproofing—cheap fixes often lead to costly future damage.
Can I install tile myself to save money?
Although DIY tiling can cut labor costs, it requires steady hands, proper tools, and careful prep to get right.
You can save money if you’re comfortable measuring, cutting tile, and setting mortar, but mistakes waste materials and cost more to fix.
Evaluate your skill, tool access, and time; hire a pro for complex layouts, waterproofing, or uneven surfaces to avoid costly errors.
What maintenance costs should I expect after installation?
Because routine care prevents bigger repairs, you should budget for a few predictable maintenance costs after tile installation: regular cleaning supplies, occasional grout sealing, and the rare grout or tile repairs.
Expect yearly grout sealing ($20–$100 DIY, $100–$300 pro), basic cleaners ($10–$30/year), and occasional repair labor or replacement parts ($50–$500) depending on damage severity.
Visuals and Resources
You’ll find typical project cost examples paired with photos so you can compare real results and pricing.
I’ve included materials comparison charts to help you weigh options quickly.
Download the budgeting template to plug in your measurements and get an instant cost estimate.
Typical project cost examples with photos

Below are real-world project examples that show typical shower tile costs, so you can compare sizes, materials, and labor needed for jobs like yours; each entry includes a photo, a brief scope (square footage, tile type, demolition or waterproofing required), and the final price to help you set realistic expectations.
You’ll see small budget tiling, mid-range remodels with waterproofing, and high-end stone installs—each notes timeline, key challenges, and final cost.
Materials comparison charts and downloadable budgeting template
Seeing those real project examples gives you a clearer idea of what affects price; now let’s look at the specific materials and numbers that drive those totals. Use the chart below to compare tile, labor, and waterproofing costs, then download the budgeting template to input your measurements and get a ready estimate.
| Item | Low | High |
|---|---|---|
| Tile/sq ft | $2 | $25 |
| Labor/hr | $40 | $120 |
| Waterproofing | $50 | $300 |