How to Clean a Kitchen Floor Based on Your Floor Type
Clean your kitchen floor based on its material to avoid damage and get the best results: sweep loose dirt, then use appropriate cleaners—pH‑neutral or mild detergent for tile and stone, a wood‑safe cleaner and quick drying for hardwood, barely‑wet microfiber for laminate, and gentle vinyl cleaner then rinse for vinyl/linoleum. Wring mops well, blot spills immediately, and avoid harsh acids or excess water. Keep tools matched to the floor type and follow manufacturer care, and you’ll find detailed tips next.
Quick Answer Best Way to Clean Your Kitchen Floor by Type
Whether you have tile, hardwood, vinyl, laminate, or stone, you’ll want a simple, specific cleaning step for each type.
Below are one-sentence recommendations that’ll get your floor clean without guessing.
Read the line for your floor and follow that single, clear instruction.
One-sentence cleaning recommendation per floor type
Pick the type of floor you have, and use the single one-line recommendation below to get the best results quickly.
| Floor Type | One-line Recommendation |
|---|---|
| Tile | Sweep, mop with warm water and mild detergent, dry to prevent grout stains. |
| Hardwood | Sweep, damp-mop with a wood cleaner, dry immediately to avoid warping. |
| Vinyl/Linoleum | Sweep, mop with a gentle cleaner, rinse, and dry for a streak-free finish. |
Basic Understanding Why Floor Type Matters
Different floor materials react very differently to water, cleaners, and scrubbing, so you need to pick products and methods that match your surface.
Use gentler cleaners and less water on wood or laminate to avoid warping, while tile and vinyl tolerate more aggressive cleaning.
If a stain, damage, or installation issue is beyond routine care, call a professional instead of risking costly mistakes.
How different materials react to water, cleaners, and abrasion
Because each flooring material responds differently to moisture, cleaners, and wear, you should match your cleaning methods to the floor type to avoid damage.
Porcelain tolerates water and stronger cleaners; grout needs sealed protection.
Hardwood swells with excessive moisture and dulls with harsh abrasives.
Laminate and vinyl resist water but scrape easily.
Natural stone needs pH-neutral cleaners to prevent etching.
When to call a professional vs. DIY
When should you tackle floor care yourself and when should you call a pro?
You can handle routine cleaning, minor stains, and using recommended cleaners for your specific floor type.
Call a professional for deep damage, large water intrusion, stubborn grout issues, warped boards, or if you’re unsure about stripping, refinishing, or chemical compatibility.
A pro prevents costly mistakes and preserves warranties.
Wood and Engineered Hardwood Floors
Wood and engineered hardwood need gentler care than tile or vinyl, so you’ll want to know how moisture and cleaners affect their finish.
Start with daily dry cleaning and spot-treat spills. Use a step-by-step deep-clean routine when needed, and stick to products labeled safe for hardwood while avoiding harsh solvents.
Also take simple prevention steps—like mats and quick spill cleanup—to minimize damage and warping.
What you need to know about wood flooring
If you’ve chosen hardwood or engineered hardwood for your kitchen, know that both look great but need different care: solid hardwood reacts to moisture and temperature changes, while engineered boards handle humidity better thanks to their layered construction.
You’ll want to avoid standing water, use pH-neutral cleaners made for wood, protect floors from scratches with pads, and maintain consistent indoor humidity.
Daily and weekly maintenance (Step 1: Dry cleaning, Step 2: Spot cleaning)
1 simple routine will keep your hardwood or engineered floors looking their best: dry clean daily to remove grit and dust, then tackle spills and smudges with quick spot cleaning as they happen.
- Sweep or vacuum with a soft-brush attachment each day.
- Use a microfiber mop for weekly dust control.
- Blot spills immediately with a damp cloth and dry promptly to prevent damage.
Deep-cleaning process (Step-by-step)
Deep-cleaning your hardwood or engineered floors takes just a few focused steps and the right products, and you’ll want to do it only when regular dry cleaning and spot care won’t suffice.
Start by removing furniture and sweeping thoroughly.
Damp-mop with a manufacturer-approved solution, working in small sections.
Rinse with clean water, dry immediately with microfiber cloths, and replace furniture using pads to prevent scratches.
Safe cleaners and those to avoid
Once the floor’s clean and dry, you’ll want to pick cleaners that protect the finish rather than strip it.
Use pH-neutral wood or hardwood-specific cleaners, diluted per label, and microfiber mops.
Avoid vinegar, ammonia, oil soaps, and abrasive scrubs—they dull or damage finishes.
Test any new product in an inconspicuous spot first, and never flood the floor with water.
Preventing damage and moisture issues
Because wood and engineered hardwood react to moisture and wear, you should control humidity, prevent spills from sitting, and shield high-traffic areas with rugs or felt pads.
Wipe spills promptly, use a damp — not wet — mop, and avoid steam cleaners. Trim pet nails, keep entry mats to reduce grit, and lift furniture when moving to prevent scratches and long-term moisture damage.
Common mistakes with wood floors and how to fix them
1 key to keeping wood and engineered hardwood floors looking great is knowing the mistakes people make and how to fix them quickly; you’ll prevent small problems from becoming costly repairs.
Don’t use excessive water—dry spills fast and mop with a damp, wrung-out cloth. Avoid harsh cleaners; use pH-neutral products.
Repair scratches with matching wax or touch-up pens and replace warped boards promptly.
Laminate Floors
Laminate floors look like wood but are more water-sensitive, so you’ll want to treat spills fast and avoid soaking them.
For daily care, you’ll sweep or vacuum and use a barely damp mop, while deeper cleaning uses a manufacturer-safe cleaner and gentle scrubbing for stains.
I’ll also cover stain-specific tricks and common mistakes to avoid—like excess water that warps boards or harsh cleaners that leave streaks.
Laminate floor basics and susceptibility
Though it looks like hardwood, your laminate floor is a layered synthetic product with a wear-resistant top and a fiberboard core. That construction makes it durable yet more vulnerable to moisture and scratches than solid wood.
You should avoid excessive water, steam cleaners, and abrasive tools; spills need quick blotting. Felt pads prevent gouges, and high heels or grit can cause permanent damage.
Quick daily cleaning routine (Step-by-step)
Start with a quick sweep to remove grit and loose debris.
Then follow this simple routine to keep laminate tidy and dry:
- Damp-mop with a barely-wet microfiber mop, going with the grain.
- Wipe spills immediately with a soft cloth to prevent swelling.
- Air-dry or buff with a dry microfiber to remove streaks and excess moisture.
Deep-cleaning method and recommended products
When you need a deeper clean, tackle the floor in sections and use products made for laminate so you don’t damage the finish; avoid abrasive cleaners or soaking the boards.
Mix a manufacturer-approved laminate cleaner with water per instructions, mop with a damp (not wet) microfiber pad, rinse the pad often, and dry each section immediately.
Finish with a gentle laminate polish if recommended.
Stain removal tips specific to laminate
If a spill leaves a mark, act quickly to prevent it from setting into the laminate’s wear layer; blot up liquids with a soft cloth, then treat stains with mild, nonabrasive solutions recommended by the manufacturer.
For sticky residues, gently rub with a damp microfiber and a few drops of dish soap.
For stubborn spots, use a manufacturer-approved cleaner and soft nylon scrub; rinse and dry.
Mistakes to avoid (warping, streaking)
Because laminate’s core and wear layer are sensitive to moisture and harsh cleaners, you should avoid common mistakes that cause warping or streaking.
Don’t flood the floor or leave standing water; use a damp, well-wrung mop. Skip abrasive pads and ammonia-based or bleach cleaners.
Wipe spills promptly, use pH-neutral products, and dry surfaces quickly to preserve finish and prevent cupping.
Vinyl and Luxury Vinyl Plank (LVP/LVT) Floors
Vinyl and LVP/LVT floors are durable, water-resistant options that handle kitchen traffic well but still need the right care to stay looking new.
You’ll want a simple routine of sweeping or dry mopping daily, damp-mopping weekly with a pH-neutral cleaner, and occasional deeper cleans for seams or grout-like joints.
Use nonabrasive tools and vinyl-safe cleaners to address scratches, dullness, or stains, and try spot repairs or manufacturer-recommended products for common issues.
Characteristics and durability
While they feel softer underfoot than tile or wood, vinyl and luxury vinyl plank (LVP/LVT) are surprisingly tough, resisting scratches, stains, and moisture better than many other floorings.
You’ll find options with wear layers designed for high-traffic kitchens and waterproof cores that stand up to spills and frequent mopping.
You’ll also note dimensional stability, fade resistance, and easy replacement of damaged planks, extending overall lifespan.
Routine cleaning steps (daily/weekly)
1. Sweep or vacuum daily to remove grit that can scratch vinyl.
Weekly, damp-mop with a pH-neutral cleaner diluted per label instructions; avoid soaking the floor.
Wring the mop well to prevent water damage at seams.
Tackle spills immediately with a soft cloth.
Use felt pads under furniture and replace abrasive mats to keep the surface looking new.
Deep-cleaning and grout care (if applicable)
Because deep-cleaning removes ground-in dirt and restores finish, you should plan a more thorough process every few months: mop with a mild, pH-neutral solution and rinse well, using minimal water to avoid seeping.
For seams and textured edges, scrub gently with a soft brush. If grout-like seams exist, clean with a diluted cleaner and soft brush, then dry thoroughly to prevent moisture damage.
Best cleaners and tools for vinyl
A soft microfiber mop and a gentle, pH-neutral cleaner will keep vinyl and LVP/LVT floors looking their best without stripping the wear layer.
Use a spray bottle for light cleaning and a damp (not wet) mop for larger areas. Avoid abrasive brushes and steam cleaners.
Soft bristle broom, non-scratching pads, and felt furniture pads prevent damage and make routine care easy.
Common problems and solutions (scratches, dullness)
Keeping vinyl looking great means handling common wear issues quickly.
For light scratches, buff gently with a soft cloth and apply a manufacturer-approved vinyl polish.
Deeper gouges need a vinyl repair kit or professional patching.
If floors look dull, mop with a pH-neutral cleaner, rinse, and consider a restorative, finish-safe polish.
Avoid abrasive tools and harsh chemicals to prevent further damage.
Tile Floors (Ceramic, Porcelain)
Tile floors are tough, but grout needs gentler, more targeted care — you’ll treat the two differently.
Stick to a simple daily sweep and weekly mop, then use a step-by-step deep-clean for stained grout when needed.
I’ll compare homemade and commercial grout cleaners and show how to prevent discoloration and mold.
Tile vs. grout: what needs different care
Because grout sits lower and soaks up dirt while ceramic or porcelain surfaces stay sealed, you’ll need different cleaning approaches for each.
Treat tiles with a pH-neutral cleaner and a soft mop to avoid dulling the glaze.
Scrub grout lines with a stiff brush and a baking soda paste or diluted bleach for stains.
Rinse thoroughly and seal grout periodically to prevent future buildup.
Daily and weekly cleaning routine
While you don’t need heavy-duty products every day, a simple routine will keep ceramic and porcelain floors looking their best:
Sweep or vacuum daily to remove grit, then spot-mop spills immediately.
Once or twice weekly, damp-mop with a pH-neutral cleaner or mild dish soap, rinse with clean water, and dry to avoid streaks.
Use felt pads under furniture to prevent scratches.
Deep-cleaning grout and tile (step-by-step)
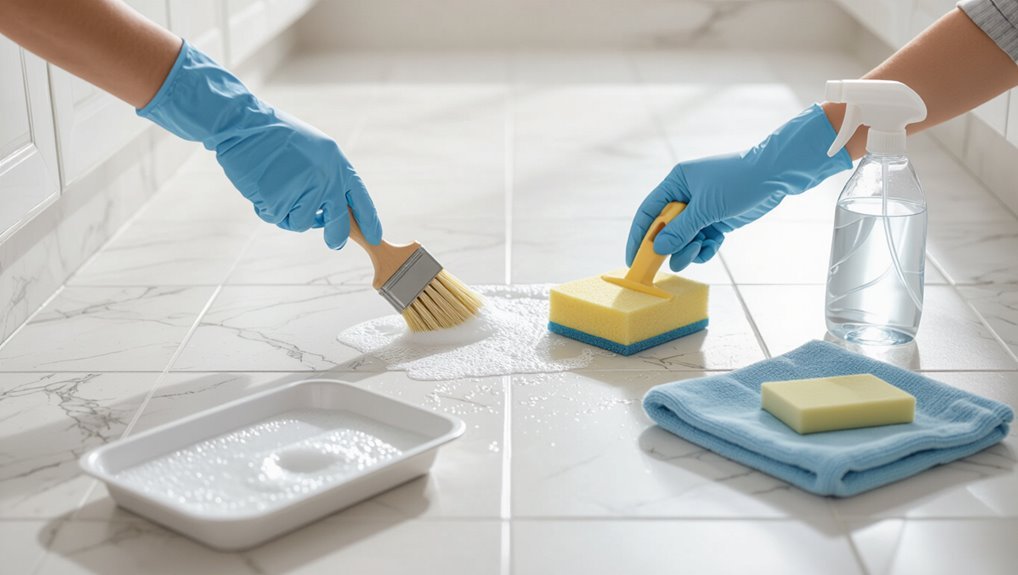
1 simple deep-clean session every few months will keep grout and ceramic or porcelain tiles looking fresh and prevent stains from setting.
Sweep, vacuum, then mop with warm water.
Apply grout cleaner, let sit per instructions, scrub with a stiff brush along grout lines.
Rinse thoroughly, dry with microfiber towels, and seal grout if recommended to protect against future staining.
Homemade vs. commercial grout cleaners
When deciding between homemade and commercial grout cleaners, think about how tough the stains are, the grout material, and how much effort you want to put in.
You can use baking soda and vinegar for mild grime and safer, inexpensive upkeep.
For stubborn stains, sealed grout, or heavy buildup, choose a commercial cleaner labeled for tile and grout—follow instructions and ventilate the area.
Preventing grout discoloration and mold
Because grout soaks up moisture and grime, you should act proactively to keep it from discoloring and growing mold: wipe up spills promptly, dry the floor after mopping, and run a bathroom fan or open a window to reduce humidity.
Seal grout yearly, use pH-neutral cleaners, scrub with a soft brush, and address stains immediately.
Inspect grout lines regularly and repair cracks to prevent moisture intrusion.
Natural Stone Floors (Marble, Slate, Travertine)
Natural stone needs pH-neutral care because acidic or alkaline cleaners can etch and dull the surface.
So you’ll use mild solutions for daily cleaning. Follow a gentle routine—sweeping and damp-mopping—and schedule a thorough deep clean and reseal every 1–3 years with step-by-step prep and drying.
Learn targeted stain removal and etch repair methods, and avoid common mistakes like acidic cleaners, abrasive pads, and excessive water that can permanently damage stone.
Why stone needs pH-neutral care
Although stone looks tough, it’s chemically sensitive, and alkaline or acidic cleaners can etch, dull, or stain surfaces like marble, slate, and travertine.
You should use pH-neutral products because they clean without breaking down stone’s mineral structure or sealers.
Neutral cleaners reduce risk of discoloration, surface roughening, and long-term damage, helping preserve appearance and value while minimizing costly repairs or resurfacing.
Gentle daily cleaning routine
1 simple routine will keep your stone floors looking their best day to day: sweep or vacuum daily to remove grit, then damp-mop with a pH-neutral stone cleaner and warm water.
Wring the mop well to avoid excess moisture, change dirty water often, and dry with a soft microfiber cloth.
Address spills immediately to prevent staining.
Deep-cleaning and sealing schedule (step-by-step)
Every six months (or more often in high-traffic areas), deep-clean and reseal stone floors to protect them from wear and stains.
Start by sweeping, then mop with pH-neutral stone cleaner. Rinse thoroughly and let dry 24–48 hours.
Apply a penetrating stone sealer per label, usually two thin coats with a lint-free applicator. Buff gently after curing for even protection.
Stain removal and etch repair strategies
Once the sealer’s done and your floor’s cured, tackle stains and etches promptly to prevent permanent damage.
Blot spills, then use pH-neutral cleaner for surface stains. For oil, apply poultice; for organic stains, use hydrogen peroxide paste.
Light etches can be buffed with a damp cloth and fine abrasive pad; deeper etches need professional honing and resealing to restore finish.
Mistakes that permanently damage stone
If you use the wrong cleaners, tools, or techniques, you can cause irreversible harm to marble, slate, and travertine that no routine maintenance will undo.
Don’t use acidic cleaners, bleach, or abrasive pads; avoid steam cleaners and harsh scrubbing.
Don’t seal over stains or ignore grout failure.
Test products first, wipe spills promptly, and call a pro for deep etch or structural cracks.
Cork and Bamboo Floors
Cork and bamboo require gentler, material-specific care—use pH-neutral cleaners and avoid excess water to protect the finish.
You’ll want a weekly sweep or vacuum, prompt spill cleanup, and controlled humidity to prevent warping or swelling.
For deeper grime or worn surfaces, follow manufacturer-approved deep-cleaning steps, consider re-sealing or refinishing, and use felt pads and rugs to prevent common damage.
Material-specific care principles
Both cork and bamboo demand gentle, moisture-conscious cleaning and occasional protective measures to keep their surfaces durable and attractive.
For cork, avoid abrasives, seal scratches promptly, and use pH-neutral cleaners to preserve finish and resilience.
For bamboo, protect from standing water, use soft mops, and apply manufacturer-recommended sealers to prevent swelling, fading, and wear while maintaining natural grain and sheen.
Routine cleaning and moisture control
Now that you’ve covered material-specific care, focus on a simple routine that keeps cork and bamboo looking their best while minimizing moisture-related damage.
Sweep or vacuum daily, mop with a barely damp microfibre pad using a pH-neutral cleaner, and dry immediately.
Wipe spills right away, use mats at entries, and monitor humidity—keep it between 35–55% to prevent swelling or cracking.
Deep-cleaning tips and refinishing options
When deeper cleaning’s due or the finish shows wear, you’ll want targeted methods that lift grime without over‑wetting the wood fibers; use a pH‑neutral wood cleaner, a damp microfiber mop, and quick drying.
For refinishing cork, sand lightly and apply manufacturer‑approved sealant.
For bamboo, sand only if strand‑woven and refinish with compatible polyurethane.
Test small areas first to confirm adhesion and color match.
Preventative care and common pitfalls
If you want cork or bamboo floors to last, keep them dry, clean, and protected from everyday wear: wipe up spills immediately, use pH‑neutral cleaners with a barely damp microfiber mop, place mats at entries, and add felt pads to furniture legs to prevent scratches and dents.
Avoid harsh chemicals, steam cleaners, excessive water, and dragging heavy items; refinish or reseal when finish shows wear.
Concrete and Sealed Concrete Floors
If your kitchen has concrete, start by noting whether it’s sealed or not, because sealed concrete cleans like tile while unsealed soaks up spills and needs gentler care.
Sweep daily to remove grit, and wipe with a neutral cleaner for routine maintenance.
For deep cleaning or grease, use a degreaser, treat stains or efflorescence promptly, and reseal the surface as recommended to protect it.
Cleaning sealed vs. unsealed concrete
Although concrete looks simple, sealed and unsealed surfaces clean very differently, so you’ll want to treat them accordingly.
For sealed concrete, use a pH-neutral cleaner and avoid abrasives to preserve the finish; rinse and dry to prevent streaks.
For unsealed concrete, scrub with a mild detergent and soft brush, blot excess water, and address stains with poultices or a diluted degreaser.
Daily maintenance and sweeping
Now that you know how sealed and unsealed concrete require different cleaners, focus on everyday upkeep to keep sealed concrete looking its best.
Sweep daily with a soft-bristled broom or vacuum with a hard-floor setting to remove grit that can scratch the finish.
Wipe spills promptly with a damp microfiber mop and pH-neutral cleaner.
Dry high-traffic areas to prevent dulling and stains.
Deep-cleaning, degreasing, and resealing guidance
When grease, grout haze, or embedded dirt starts to dull your sealed concrete, tackle it with a targeted deep-cleaning routine that degreases without harming the finish.
Mix a pH-neutral concrete cleaner or diluted degreaser, scrub with a stiff brush, rinse thoroughly, and let dry.
Reapply an appropriate sealer every few years or after heavy wear to restore protection and sheen.
Handling stains and efflorescence
Stains and efflorescence on concrete tell you where moisture and contaminants have been working against the surface, and you can treat them without damaging sealed floors if you pick the right approach.
First, blot spills, then test a mild pH-neutral cleaner.
For efflorescence, dry the area, brush with a stiff nylon brush, and use a diluted vinegar rinse sparingly.
Reseal if staining recurs.
Step-by-Step Universal Cleaning Checklist
Before you start, gather tools, check safety gear, and clear the room so you’re ready to work efficiently.
First remove loose debris and dry-clean, then treat any stains with the right method.
Finish by mopping or machine-cleaning with a floor-specific solution and guarantee proper drying and ventilation.
Preparation: tools, safety, and room setup
Start by gathering a small set of reliable tools—broom or vacuum, mop or microfiber pad, bucket, pH-appropriate cleaner, scrub brush, and protective gloves—and clear the room so you can move freely and avoid tripping.
- Check cleaner compatibility with your floor.
- Remove fragile items and secure pets.
- Put on gloves, guarantee good lighting, and ventilate the space.
Step 1: Remove debris and dry clean
With the room set and your tools ready, begin by clearing loose dirt and crumbs so the wet cleaning step works better.
Sweep or vacuum thoroughly, getting edges, corners, and under appliances.
Use a dust mop or microfiber to pick up fine grit that can scratch.
Empty and shake out mats.
Check for larger debris by hand so the floor’s ready for mopping.
Step 2: Spot treat stains appropriately
Treat stains promptly so they don’t set—identify the stain type (grease, wine, coffee, pet mess, or tracked-in mud) and choose a targeted cleaner or DIY solution that’s safe for your floor material.
Test cleaner in an inconspicuous spot. Blot liquids, scrape solids gently, then apply cleaner per instructions.
Rinse residue and dry thoroughly to prevent damage or staining recurrence.
Step 3: Mop or machine-clean with floor-specific solution
After you’ve removed or neutralized stains, it’s time to clean the whole floor so it looks even and smells fresh.
Choose a cleaner made for your floor type—wood, tile, vinyl, or laminate—and dilute per label.
Use a mop or floor-cleaning machine, work in small sections, rinse if required, and change dirty water frequently to avoid streaks and residue.
Step 4: Drying and ventilation
Step 4 gets your floor ready for use: speed up drying and prevent moisture damage by removing excess water, promoting airflow, and keeping people off the surface until it’s fully dry.
Use a dry mop or towels to blot puddles, open windows, run fans or dehumidifiers, and keep traffic minimal.
Check under cabinets and grout lines for lingering dampness.
Step 5: Post-cleaning inspection and touch-ups
When you finish drying, do a careful walk-through to spot missed dirt, streaks, or damp areas that could attract grime or cause damage; check high-traffic zones, grout lines, and beneath cabinets, and note anything that needs a quick touch-up.
Return with a mop, soft brush, or microfiber cloth to target spots, buff streaks, and reapply a small amount of cleaner where necessary.
Best Tools and Cleaners by Floor Type
Next you’ll match tools and cleaners to your floor type so you get the best results without damage.
You’ll learn which mops, brushes, and vacuum settings work for tile, vinyl, hardwood, or laminate, plus when a DIY solution beats a store-bought product.
I’ll also cover eco-friendly and pet-safe options so you can clean safely and effectively.
Recommended mops, brushes, and vacuum settings
Choosing the right mop, brush, and vacuum lets you clean faster and protect your floor’s finish, so match tools to your surface: microfiber flat mops for sealed hardwood, spin or string mops for tile and vinyl, stiff nylon brushes for grout, and a canister or upright vacuum with a hard-floor setting (no beater bar) for loose dirt.
| Floor Type | Recommended Tool |
|---|---|
| Hardwood | Microfiber flat mop |
| Tile/Grout | Spin mop + nylon brush |
DIY cleaners vs. store-bought products
Wondering whether to mix up a homemade cleaner or grab a store-bought bottle?
You can tailor DIY mixes—vinegar for tile, mild soap for vinyl—to control strength and cost.
Store-bought formulas offer tested pH balance and protective additives for laminate or hardwood.
Match cleaner type to your floor, test a small area, and avoid harsh acids or waxy residues that can damage finishes.
Eco-friendly and pet-safe options
Because your pets spend so much time on the floor, pick cleaners and tools that are both effective and non-toxic:
Mild, fragrance-free castile soap or a vinegar solution (diluted appropriately) works well on tile and vinyl.
pH-balanced plant-based cleaners suit sealed hardwood and laminate, and microfiber mops capture dirt without chemicals.
Rinse thoroughly, air-dry, and store products safely out of pets’ reach.
Common Mistakes and How to Fix Them
Don’t soak floors or you’ll risk warping—use just a damp mop and wring it well.
Avoid abrasive cleaners or tools that scratch finishes, and don’t neglect grout and edges where dirt hides.
If damage shows up, focus on reconditioning or spot repairs and consider re-sealing when wear becomes obvious.
Over-wetting floors and causing warping
If you soak a wood or laminate floor, it won’t just take longer to dry—it can swell, warp, or delaminate, turning a routine clean into a costly repair.
Use a damp mop, wring it thoroughly, and clean small sections. Wipe spills immediately and ventilate to speed drying.
For sensitive floors, use manufacturer-approved cleaners and minimal water to prevent damage.
Using abrasive cleaners or tools
Scrub smart: using abrasive cleaners or rough tools can quickly strip finishes, scratch tiles, or dull grout, turning a quick clean into a visible problem.
Choose nonabrasive, pH-appropriate cleaners for your floor type. Test products in an inconspicuous spot first.
Swap steel wool and scouring pads for microfiber mops or soft brushes.
Repair minor scratches with recommended polish or manufacturer fixes.
Ignoring grout and edges
When you focus only on the center of the floor, grout lines and edges quickly collect dirt, mold, and grime that regular mopping misses; these areas need targeted care to keep your kitchen sanitary and your floors looking even.
Don’t skip baseboards, corners, or grout creases—scrub them with a brush and appropriate cleaner, rinse thoroughly, and dry to prevent staining and bacterial buildup.
Fixes: reconditioning, spot repairs, and when to re-seal
Although regular cleaning keeps dirt at bay, worn spots, grout wear, and dull finishes still need targeted fixes to keep your floor performing and looking its best.
Spot-repair scratches or chips promptly, recondition wood with oil or polish, and deep-clean grout before sealing.
Test sealers on a hidden area; reseal high-traffic zones every 1–3 years.
Follow manufacturer guidelines for materials and products.
Prevention and Best Practices
You can cut down on scrubbing by using entry mats, furniture pads, and simple traffic control to protect high‑use areas.
Set a routine maintenance schedule—daily spot checks, weekly mopping, and a monthly deeper clean—to keep dirt from building up.
Also adjust for seasons: watch humidity for wood floors and rinse winter salt promptly to prevent damage.
Entry mats, furniture pads, and traffic control
Because high-traffic zones bring grit and wear, start by placing sturdy entry mats and using furniture pads to protect your kitchen floor from scratches and moisture.
Position mats outside and inside entrances, shake or vacuum them regularly, and choose non-slip backing.
Use felt pads under chairs and appliances, replace worn pads, and reroute foot traffic when possible to minimize concentrated wear and spills.
Routine maintenance schedule template
A simple, regular schedule keeps your kitchen floor looking its best and prevents small problems from becoming big repairs.
Set clear, repeatable tasks so you don’t skip care. Follow this template:
- Daily: sweep/vacuum and wipe spills immediately.
- Weekly: mop with floor-appropriate cleaner and check grout/seals.
- Monthly: inspect for wear, tighten loose boards, and refresh protective pads.
Seasonal considerations (humidity, winter salt)
When seasons change, adjust your cleaning and prevention routine to protect floors from humidity swings and winter salt; you’ll cut down on warping, staining, and premature wear by acting proactively.
Use humidifiers or dehumidifiers to stabilize indoor moisture, mop up spills quickly, and place absorbent mats at entrances.
In winter, rinse salt off promptly and reseal porous floors before freeze-thaw cycles begin.
FAQ Kitchen Floor Cleaning
You’ll find answers to common questions like how often to deep-clean, whether vinegar or bleach suit your floor type, and how to safely remove sticky or oily stains.
We’ll also cover whether steam cleaning is safe for your flooring and simple ways to restore lost shine.
Read on and you’ll get clear, floor-specific guidance.
How often should I deep-clean my kitchen floor?
How often should you deep-clean your kitchen floor depends on how much traffic, spills, and pet activity you have; most households benefit from a monthly deep clean, while high-traffic or messy kitchens may need one every one to two weeks.
Adjust frequency for kids, cooking style, and visible grime. Spot-treat spills immediately, vacuum or sweep regularly, and schedule deep cleaning when dirt builds or finishes look dull.
Can I use vinegar or bleach on my floor type?
Curious whether vinegar or bleach will harm your specific floor?
Vinegar’s acidity can dull or etch stone, remove finish from hardwood, and strip sealers on laminate; it’s safe diluted for tile grout.
Bleach can discolor colored grout, damage wood finishes, and weaken some vinyl adhesives; use sparingly, well-diluted, spot-test first, ventilate, and follow manufacturer guidelines for your floor type.
How do I remove sticky residue or oil stains safely?
If vinegar or bleach aren’t right for your floor, you’ll still need safe methods to tackle sticky residue and oil stains without harming the surface.
Blot excess oil, sprinkle baking soda to absorb, then vacuum.
Use a mild dish soap solution and a soft cloth for sticky spots; rinse with clean water and dry.
Test any cleaner in an inconspicuous area first.
Is steam cleaning safe for my floor?
Wondering whether steam cleaning will damage your floor? It can be safe for ceramic, porcelain, and sealed vinyl—these handle moisture and heat well.
Avoid steam on hardwood, laminate, and unsealed stone; steam can warp, lift planks, or strip finishes.
Always check manufacturer guidance, test a hidden spot, use low settings, and dry promptly to prevent moisture damage and warping.
How can I restore shine to dull floors?
Since steam cleaning isn’t right for every surface, you’ll want other ways to bring back your floor’s shine without risking damage.
For tile or sealed wood, mop with a pH-neutral cleaner, rinse, then buff with a microfiber pad.
For vinyl, use a diluted vinegar solution and polish with a soft cloth.
Apply a manufacturer-approved floor polish for persistent dullness, following instructions.
Quick Reference Cheat Sheet
Keep a one-page cheat sheet handy that lists the dos and don’ts for each floor type so you can act correctly without guessing.
Tape a quick emergency stain-action guide on the fridge that tells you what to do in the first five minutes for spills.
These two tools save time and prevent permanent damage when messes happen.
One-page cleaning dos and don’ts by floor type
Whether you’ve just moved in or are doing weekly maintenance, this one-page cheat sheet gives clear dos and don’ts for each common kitchen floor type so you can choose the right tools and cleaners and avoid costly mistakes. Use appropriate cleaners, avoid harsh abrasives, dry promptly, and test first.
| Floor Type | Dos / Don’ts |
|---|---|
| Tile | Do mop; don’t use acidic cleaners |
| Wood | Do use pH-neutral cleaner; don’t soak floors |
Emergency stain-action guide (first 5 minutes)
In the first five minutes after a spill, act quickly: blot liquids with a clean cloth, scrape solids gently with a dull spatula, and avoid rubbing so you don’t spread the stain.
Follow this quick checklist to limit damage and prep for proper cleaning:
- Blot excess, then dab with mild detergent.
- Rinse with clean water.
- Dry thoroughly to prevent residue and staining.