How to Clean Mold From a Cement Floor Safely and Completely
You can remove mold from a cement floor safely and completely by isolating the area, wearing gloves, goggles and an N95, and fixing any leaks first. Sweep and vacuum loose debris, then scrub with detergent and water or a biocide like diluted bleach (1 cup per gallon) or hydrogen peroxide, keeping the surface wet for 10–15 minutes. Rinse and dry thoroughly, use a dehumidifier, and seal the concrete to prevent return — keep going to learn full step-by-step guidance.
How to Clean Mold from a Cement Floor Safely and Completely
You can usually remove mold from cement with a stiff brush and a solution of detergent, diluted bleach, or a commercial mold cleaner—these kill spores and lift stains when used with proper ventilation and PPE.
Test a small area first and repeat treatments until the surface is clean and dry to prevent regrowth.
Call a professional if the mold covers more than about 10 square feet, keeps returning, or you suspect hidden contamination in adjoining structures.
Quick Answer What Works Best and Is Safe
Three methods reliably remove mold from a cement floor: scrubbing with a detergent and water, applying a diluted bleach solution for porous concrete, or using a commercial mold remover or hydrogen peroxide for less harsh treatment.
For how to clean mold from cement floor, wear gloves, a mask, and goggles, ventilate well, test a small area, scrub firmly, rinse, and dry thoroughly to prevent regrowth.
When to Call a Professional
If the mold covers a large area, keeps returning after cleaning, or seems to be growing deep within the concrete, call a professional.
You should also contact one if you have health issues, suspect hidden structural damage, or lack proper protective gear.
Pros bring testing, containment, and remediation tools to remove mold safely and prevent recurrence, saving time and reducing health risks.
Understanding Mold on Cement Floors
You’ll learn what mold is and why it thrives on damp, porous cement surfaces.
I’ll cover the common mold types you might see, the health and structural risks they pose, and how to tell mold apart from simple stains or white efflorescence.
That way you’ll know what needs cleaning, what needs repair, and when to call a pro.
What Is Mold and Why It Grows on Cement
Mold is a type of fungus that thrives on damp, porous surfaces, and cement floors often give it the conditions it needs to grow.
You’ll find mold when moisture, organic debris, and poor ventilation combine. Spores land, settle into tiny pits, and use available nutrients.
Controlling humidity, fixing leaks, and cleaning residues reduces growth and limits recurrence on concrete surfaces.
Common Types of Mold Found on Concrete
Types of mold on concrete vary by moisture level, temperature, and available nutrients, and knowing the common ones helps you identify and treat them effectively.
You’ll most often see black mold (stachybotrys-like stains), green or blue molds (aspergillus, penicillium), white powdery molds (chalky mildew), and rust-colored or orange molds (sporadic bacterial/fungal growth).
Identification guides your cleaning approach.
Health Risks and Structural Concerns
Recognizing the common molds on your concrete helps you spot more than discoloration—it also points to potential health and structural problems you should address.
You should know mold can trigger allergies, worsen asthma, release mycotoxins, eat at porous concrete, and trap moisture that promotes rebar corrosion.
- Allergic reactions and respiratory irritation
- Asthma exacerbation risk
- Mycotoxin exposure concerns
- Concrete surface degradation
- Hidden moisture and metal corrosion
How to Identify Mold vs. Stains or Efflorescence
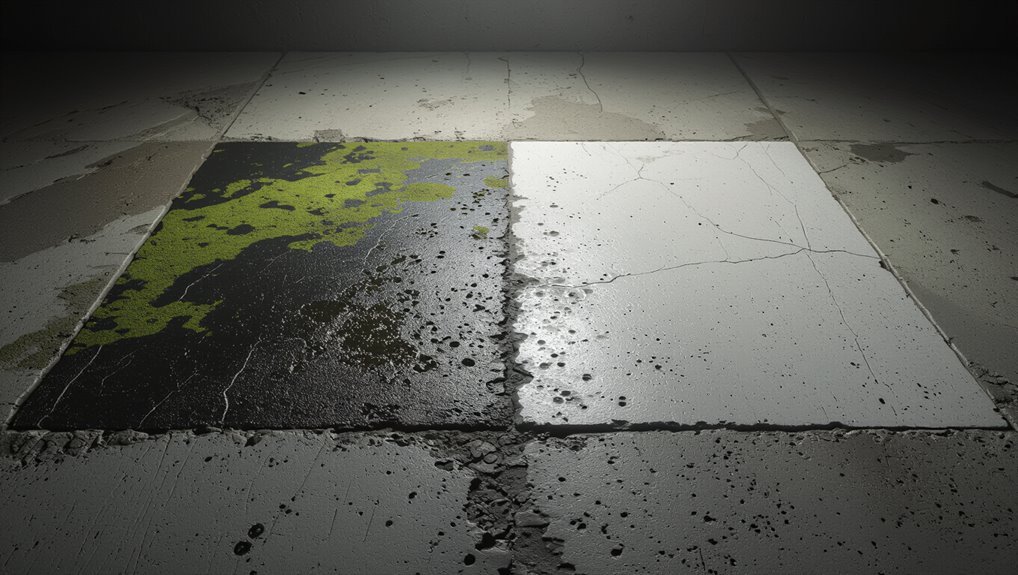
How can you tell whether that dark patch on your cement floor is mold, a stubborn stain, or white efflorescence?
Inspect color, texture and location: mold is fuzzy or slimy, often black/green, and grows where moisture and organic matter exist.
Stains soak in and won’t lift with gentle scrubbing.
Efflorescence appears powdery and white, and brushes off, revealing mineral residue from water.
Preparation Before Cleaning
Before you start cleaning, you’ll want to assess whether the mold is just on the surface or has penetrated the cement, since that affects your approach.
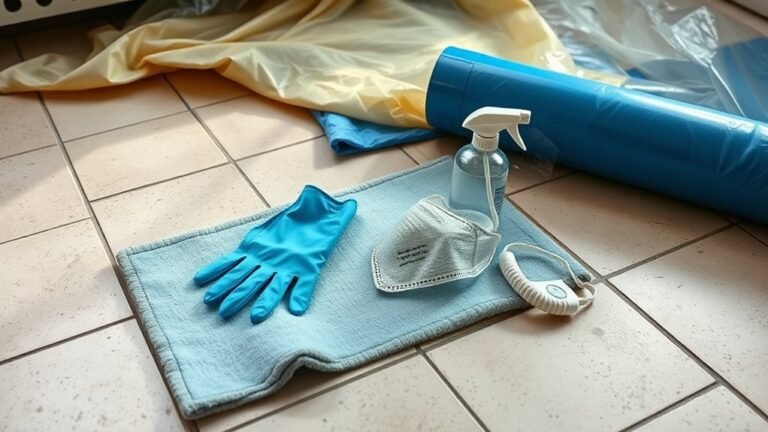
Put on proper PPE—gloves, goggles, and an N95 or better mask—and gather a scrub brush, stiff broom, bucket, detergent, and any recommended cleaners.
Guarantee good ventilation, set up containment to keep spores from spreading, and protect nearby surfaces and belongings.
Assessing the Extent of the Problem (surface vs. deep penetration)
When you first inspect the stained area, look for color, texture, and odor cues that tell you whether mold is only on the surface or has penetrated the concrete: puffier, fuzzy growth and strong musty smell often mean surface colonization; deep staining, powdery residue, or persistent odors after cleaning suggest penetration.
Tap and scrape gently to see if spores are embedded.
Required Personal Protective Equipment (PPE)
At minimum, you’ll need gloves, eye protection, and a respirator rated for particulates—because mold spores and cleaning chemicals can irritate skin, eyes, and lungs.
Wear disposable or washable coveralls and sturdy footwear. Seal hair and avoid breathing dust.
- N95 or higher respirator
- Chemical-resistant gloves
- Safety goggles (sealed)
- Disposable coveralls
- Rubber boots
Tools and Cleaning Supplies Checklist
Now that you’ve got your PPE on, gather the right tools and cleaners so the job goes smoothly and safely.
Keep items simple, effective, and mold-rated. Have replacements ready for worn gear.
- Stiff-bristle brush or push broom
- Bucket and mop or scrub pad
- Commercial mold cleaner or diluted bleach solution
- Plastic sheeting and disposable towels
- Heavy-duty trash bags
Safety Precautions (ventilation, containment, protecting nearby surfaces)
Because mold spores travel easily, you’ll want to set up proper ventilation and containment before you touch a cleaning solution. Open windows and run fans to exhaust air outward.
Seal off the work area with plastic sheeting and tape to prevent spread. Cover nearby surfaces and belongings with drop cloths.
Wear a respirator, gloves, and eye protection to shield yourself.
Quick Answer: Best Cleaning Solutions for Cement Mold
You’ll want to weigh the pros and cons of common cleaners like bleach, vinegar, and enzymatic products so you pick the safest, most effective option for your cement.
I’ll point out recommended non-toxic methods (vinegar, baking soda, hydrogen peroxide) and reliable commercial mold removers that work on porous concrete.
Use the gentlest effective solution first and step up only if mold persists.
Pros and Cons of Common Cleaners
When choosing a cleaner for mold on a cement floor, weigh effectiveness, safety, and cost so you get the best result for your situation. You’ll balance bleach (kills mold, fumes), vinegar (safer, less potent), hydrogen peroxide (effective, mild), and commercial fungicides (strong, costly). Use appropriate PPE and test a small area first.
| Cleaner | Quick Pros/Cons |
|---|---|
| Bleach | Strong/harsh fumes |
| Vinegar | Safer/less potent |
| H2O2 | Effective/mild |
| Fungicide | Powerful/costly |
Recommended Non-toxic and Commercial Options
Pick a cleaner that balances safety, cost, and mold-killing power for your situation: non-toxic options like white vinegar or hydrogen peroxide work well for light to moderate growth and are safe for regular use, while commercial mold removers and fungicides provide stronger, faster results for heavy or stubborn infestations but cost more and may need better ventilation and PPE.
You should test a small area, follow label directions, and rinse thoroughly.
Step-by-Step Cleaning Process
Start by clearing and drying the area so you can work safely and see all mold spots.
Remove loose debris and scrape surface mold, then apply the cleaner at the proper mixing ratio and let it sit for the recommended dwell time.
Finish by scrubbing with the right brush and pressure, then rinse thoroughly and remove any residue.
Step 1 Clear and Dry the Area
Clear out furniture, rugs, and any loose items from the affected area so you’ve got full access to the floor; this makes inspection and drying simpler and prevents mold spores from spreading onto belongings.
Open windows, run fans or a dehumidifier, and fix leaks.
Wear a mask and gloves while moving things, and leave the space until surfaces feel dry to the touch.
Step 2 Remove Loose Debris and Scrape Surface Mold
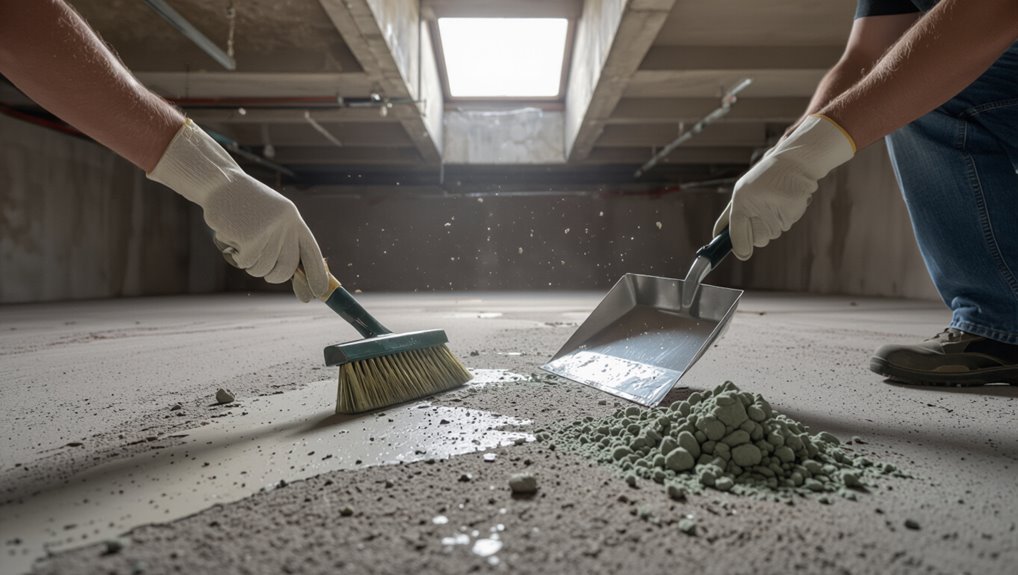
Sweep and vacuum the area to get rid of loose dirt, dust, and flaking mold so you can see the concrete’s surface clearly.
Wear gloves, eye protection, and an N95 mask.
Use a stiff-bristled brush or floor scraper to remove stubborn patches, working gently to avoid gouging the cement.
Collect debris in sealed bags and dispose of it promptly to prevent spread.
Step 3 Apply Cleaner (mixing ratios and dwell times)
Now you’re ready to apply a cleaner tailored to concrete—mix a solution of 1 cup household bleach to 1 gallon of water for light to moderate mold, or use a commercial concrete mold remover at the manufacturer’s dilution for heavy growth;
always label the mixture, wear gloves and eye protection, and test a small inconspicuous area first.
Apply evenly, keep the surface wet for 10–15 minutes, then rinse thoroughly.
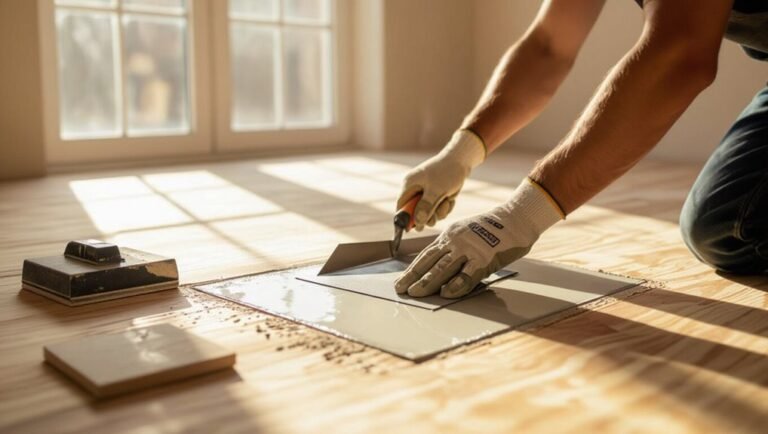
Step 4 Scrub Techniques (brush types, pressure, patterns)
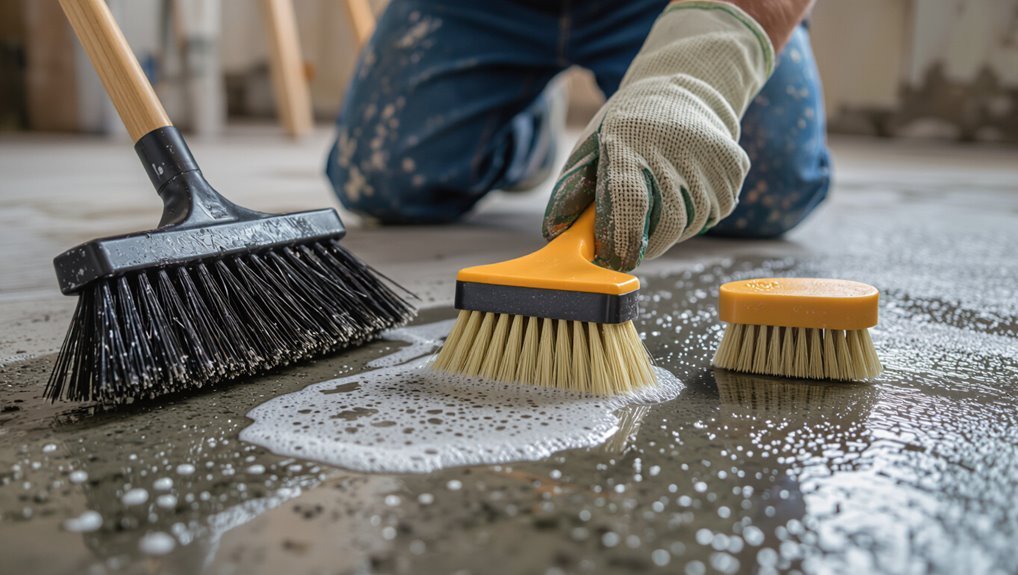
1 good scrub can make the difference between lingering mold and a clean, durable finish: choose a stiff nylon or polypropylene brush for most concrete, reserve wire brushes only for deeply pitted or heavily stained areas, apply firm even pressure without gouging the surface, and work in overlapping strokes across the grain of the concrete so you lift spores rather than smear them.
Move methodically, vary angle, and recheck texture.
Step 5 Rinse Thoroughly and Remove Residue
After scrubbing, you’ll want to rinse the area thoroughly to flush away loosened mold, cleaning solution, and particulates so they don’t settle back into pores or cracks.
Use a stiff broom and clean water or a garden hose with moderate pressure to push residue toward a drain or collection area.
Repeat rinsing until runoff looks clear, then remove pooled water and discarded debris promptly.
Step 6 Drying Methods to Prevent Recurrence
Once the rinse and debris removal are done, speed up drying to stop mold from coming back.
Open windows and use fans to circulate air; position them to push moist air out. Deploy a dehumidifier until concrete reaches equilibrium moisture below 10–12%.
For large or cool areas, add gentle heat.
Check for trapped water in cracks and drains, and keep ventilation continuous for 24–72 hours.
Step 7 Post-clean Inspection and Repeat Criteria
Step 7 checks whether your cleaning worked and tells you if you need to repeat any steps.
Inspect the entire area for visible spores, stains, or dampness.
Smell for mustiness and run a moisture meter if available.
If any mold remains, repeat targeted cleaning, scrubbing, and drying.
Confirm ventilation and fix sources of moisture before declaring the job complete.
Deep Mold Remediation for Penetrated or Widespread Mold
If mold keeps returning, has a musty odor, or shows deep staining and crumbling, it may have penetrated the concrete and need more than surface cleaning.
You can use pressure washing, soda blasting, or other abrasive methods and sometimes biocides or encapsulants are appropriate to kill and lock down colonies.
If the job is large or structural, you should hire a remediation specialist—ask about their experience with concrete, containment procedures, and a written plan and estimate.
Signs That Mold Has Penetrated Concrete
When mold goes beyond surface staining and soaks into concrete, you’ll notice more than discoloration—look for persistent musty odors, powdery or crumbly concrete, and dark rings that don’t scrub off; these signs mean the contamination is likely deep and requires specialized remediation rather than routine cleaning.
You’ll also see efflorescence, spalling, ongoing moisture, or allergies worsening despite surface treatments.
Methods for Deep Cleaning (pressure washing, soda blasting, abrasive methods)
There are three main heavy-duty approaches you can use to remove mold that’s soaked into concrete: high-pressure washing to blast out spores and grime, soda blasting to strip contaminant layers without excessive surface damage, and abrasive methods (like dry abrasive blasting or diamond grinding) for the most entrenched staining and structural cleanup.
Choose based on severity, surface integrity, and access; wear PPE, contain runoff, and vacuum residues thoroughly.
When to Use Biocides or Encapsulants
Because mold can penetrate deep into porous concrete and sometimes spread beyond what surface cleaning removes, you’ll need to contemplate biocides or encapsulants for true remediation.
Use biocides when testing shows live growth after deep cleaning or odors persist; follow label directions, ventilate, and wear PPE.
Use encapsulants to lock residual spores into the slab when removal isn’t feasible.
Hiring Remediation Specialists What to Expect and Questions to Ask
Thinking you can handle deep or widespread mold on your own? Hire a certified remediation specialist.
Ask about licenses, insurance, containment methods, air filtration (HEPA), testing, and remediation timeline.
Get a written scope, cost breakdown, and post‑remediation clearance testing.
Confirm worker safety protocols, disposal plans, and warranty terms.
Trust documented experience with similar cement‑floor projects.
Comparison: Cleaning Methods and When to Use Each
You’ll weigh options like bleach, hydrogen peroxide, vinegar, and commercial cleaners against mechanical methods such as scrubbing or pressure washing.
Consider cost, effectiveness, and safety trade-offs—chemicals can kill mold fast but need PPE and proper ventilation, while mechanical methods avoid harsh toxins but may miss roots in porous cement.
Choose based on how deep the mold is, the area affected, and your comfort with chemicals and equipment.
Bleach vs. Hydrogen Peroxide vs. Vinegar vs. Commercial Mold Cleaners
When choosing a mold cleaner for your cement floor, weigh effectiveness, safety, and the stain source:
| Cleaner | Strengths | When to Use |
|---|---|---|
| Bleach | Kills surface mold | Non-porous stains, limited use |
| H2O2 | Oxidizes, safer fumes | Porous cement, stain removal |
| Vinegar | Mild, non-toxic | Light growth, routine cleaning |
| Commercial | Broad-spectrum, formulated | Heavy infestations, professional jobs |
Mechanical Methods vs. Chemical Methods
Because mold roots and stains behave differently, you’ll pick mechanical or chemical methods based on how deep the growth is, how porous the cement is, and how much elbow grease you want to apply.
Use scrubbing, wire brushes, or pressure washing for surface stains and textured concrete.
Choose chemical treatments for penetrating roots or porous areas, and combine both when mold is stubborn.
Cost, Effectiveness, and Safety Trade-offs
While deciding which mold-removal method to use, weigh cost, effectiveness, and safety together so you get the best result for your situation; you’ll choose differently for small spots, widespread growth, or sensitive areas.
Consider pros and cons, PPE needs, disposal, and repeat treatments.
- Scrubbing: cheap, effective for small areas
- Pressure washing: fast, messy
- Bleach: strong, hazardous
- Vinegar: mild, safer
- Professional: costly, thorough
Common Mistakes and Problems to Avoid
Don’t use the wrong cleaner or too strong a concentration, since that can damage the concrete or leave residue.
Make sure you wear proper PPE and ventilate the area, because inadequate protection or airflow puts you at risk.
Also avoid over-wetting the floor and failing to fix the moisture source, or the mold will just come back.
Using the Wrong Cleaner or Concentration
If you grab the wrong cleaner or dilute it improperly, you’ll waste time and could damage the cement or fail to kill the mold.
Use products labeled for masonry and follow manufacturer mixing ratios. Don’t mix bleach with ammonia or acids.
Test a small area first. Overly strong solutions can etch concrete; weak ones leave spores alive.
Rinse thoroughly after treatment.
Inadequate PPE or Ventilation
Because mold treatment stirs up spores and often uses harsh chemicals, skimping on PPE or ventilation puts you at real risk.
Wear an N95 or respirator, eye protection, gloves, and long sleeves. Open windows, run fans to exhaust outdoors, and avoid confined spaces.
Proper gear and airflow protect your lungs and skin, reduce contamination, and guarantee cleanup is effective and safer.
Over-wetting Concrete Leading to More Mold
When you douse concrete with too much water while scrubbing or rinsing, you actually drive moisture deeper into pores and cracks where mold thrives and hides.
Don’t flood the area; use dampened scrubbers, wring out mops, and apply cleaning solutions sparingly. Excess water prolongs drying time, encourages regrowth, and forces you to repeat remediation.
Aim for controlled, minimal moisture and fast drying.
Failing to Address Underlying Moisture Sources
Even after you remove visible mold, neglecting the moisture source lets spores come back fast; you’ve got to find and fix leaks, poor drainage, or high humidity to make cleaning stick.
Inspect walls, joints, and grading, repair cracks, reroute downspouts, and install dehumidifiers or vapor barriers where needed.
Without fixing moisture, your efforts are temporary and mold will return.
Prevention and Long-Term Best Practices
To keep mold from coming back, you’ll want a plan that focuses on moisture control, regular cleaning/inspections, and protective coatings.
Use proper drainage, dehumidifiers, and a quality concrete sealant or epoxy to block water, and schedule quick spot-checks plus a deeper clean seasonally.
Also consider grading, gutters, and landscaping changes that steer water away from the slab.
Moisture Control Strategies (drainage, dehumidifiers, sealing)
Because moisture’s the root cause of most mold on cement, controlling water is the best long-term defense.
Grade exterior soil away from foundations, install gutters and proper drainage, and fix leaks promptly.
Use a dehumidifier to keep indoor relative humidity below 60%.
Apply a breathable concrete sealer to block moisture wicking while allowing vapor escape, and monitor wet spots after storms.
Routine Cleaning and Inspection Schedule
When you set a simple routine for cleaning and inspecting your cement floors, you’ll catch small mold issues before they grow and cut down long-term maintenance.
Inspect weekly, clean monthly, and address spills immediately. Keep records and adjust frequency for humidity. Use gentle cleaners and a stiff brush; wear PPE.
- Weekly visual inspection
- Monthly deep clean
- Immediate spill response
- Record findings
- Adjust for humidity
Best Sealants and Protective Coatings for Concrete Floors
Routine cleaning and inspections will catch mold early, but smart sealing keeps it from coming back.
Choose breathable silane/siloxane for moisture vapor control, epoxy for heavy-traffic durability, and acrylic or polyurethane for UV and chemical resistance.
Prep with patching and a concrete primer, follow manufacturer cure times, and recoat as recommended.
Proper sealants reduce porosity and make cleaning far easier.
Landscaping and Building Changes to Reduce Moisture
A few well-planned changes to your landscaping and building exterior can dramatically cut the moisture that feeds mold on concrete floors.
Grade soil to slope away from foundations, extend downspouts and gutters, and install French drains where water pools.
Trim vegetation away from walls, use gravel or hardscape near foundations, and repair roof or siding leaks promptly to keep surfaces dry.
Materials, Tools, and Product Recommendations
You’ll want the right brushes, scrapers, and a pressure washer rated for concrete to remove mold effectively without damaging the surface.
Use proven, labeled cleaning products and follow mixing guidelines closely to keep concentrations safe and effective.
Don’t forget PPE—gloves, goggles, a respirator—and proper disposal bags for contaminated debris.
Recommended Brushes, Pressure Washers, and Scrapers
When tackling mold on cement, pick tools that match the surface texture and severity: stiff nylon or natural-bristle brushes work well for general scrubbing, wire brushes suit stubborn stains on rough concrete, and flat-edged scrapers help lift thick growths.
- Stiff nylon push broom for large flats
- Handheld natural-bristle scrub brush
- Wire brush for textured concrete
- Flat metal or plastic scraper
- Pressure washer (1,500–2,500 PSI)
Safe Chemical Products and Mixing Guidelines
Before mixing anything, read product labels and safety data sheets so you know what each chemical does and what protective gear you’ll need.
Use EPA-registered mold cleaners, diluted bleach (if suitable), hydrogen peroxide, enzymatic cleaners, or commercial mildew removers.
Never mix bleach with ammonia or acids.
Follow manufacturer dilution ratios, ventilate, test a small area, and store chemicals sealed and labeled.
- EPA-registered mold cleaner
- Diluted bleach solution
- Hydrogen peroxide
- Enzymatic cleaner
- Commercial mildew remover
PPE and Disposal Supplies
Having the right personal protective equipment and disposal supplies keeps you safe while you tackle mold on cement floors.
Wear an N95 or P100 respirator, chemical-resistant gloves, goggles, and disposable coveralls or old clothes.
Use heavy-duty trash bags, labeled biohazard or sealed bags for contaminated rags, and a sturdy bucket for cleaning solution.
Dispose per local regulations; double-bag waste.
Cost and Time Estimates
You can usually remove surface mold from a small cement floor in a few hours using household cleaners and rented equipment, costing roughly $20–$100 in supplies.
Larger infestations or hidden mold will take longer and can push DIY costs into the low hundreds.
If you hire professionals, expect prices to vary widely based on scope, containment needs, and remediation methods.
Typical DIY Timeframe and Costs
A typical DIY mold-cleaning job on a cement floor takes between 2 and 8 hours, depending on the size of the area and how entrenched the mold is.
You’ll spend time prepping, scrubbing, rinsing, and drying.
Expect basic supplies (cleaner, scrub brush, protective gear) to cost $20–$80.
For larger jobs, add rental tools or specialty cleaners, raising costs modestly.
Professional Remediation Cost Factors
When mold is widespread or embedded in porous concrete, hiring a pro can save time and prevent costly mistakes, but you’ll pay more than for a DIY job.
Costs depend on acreage affected, contamination depth, remediation methods, containment needs, and disposal fees. Expect inspection fees, hourly labor, equipment rental, and possible repairs.
Turnaround ranges from a few days to weeks for severe cases.
FAQ Common Questions About Mold on Cement Floors
You probably have questions like whether bleach will kill mold on concrete or if sealing the floor stops it for good.
You’ll also want to know how soon you can walk on the floor after cleaning, whether mold testing is necessary, and what to do if mold comes back.
Below are clear, practical answers to those common concerns.
Can I use bleach to kill mold on concrete?
Wondering if bleach will do the job? You can use bleach on non-porous concrete to remove surface mold stains and sanitize, but it doesn’t penetrate deep pores.
For porous or heavily infested concrete, bleach may only bleach stains, not kill embedded spores.
Always ventilate, wear PPE, and follow diluted bleach instructions.
Consider scrubbing and a biocide designed for masonry for better results.
Will sealing the floor permanently prevent mold?
Can sealing your cement floor stop mold for good? No sealant guarantees permanent prevention.
Sealing reduces moisture intrusion and makes cleaning easier, but mold returns if humidity, leaks, or organic debris persist. You should fix water sources, control indoor humidity, and clean regularly.
Use an appropriate breathable or epoxy sealer based on location, and inspect periodically for cracks or wear.
How soon can I walk on the floor after cleaning?
After cleaning, wait until the surface is fully dry and any cleaning residues have been rinsed away before you walk on it.
Dry time depends on ventilation, temperature, and product used—typically 2–24 hours.
Check for damp spots and a neutral odor.
If you applied a sealant, follow manufacturer cure times before regular traffic.
Wear shoes to avoid recontamination until fully cured.
Is mold testing necessary for a concrete floor?
How do you know if mold testing is necessary for a concrete floor?
You usually don’t need testing for small, visible mold patches you can clean.
Consider testing if mold covers large areas, recurs after cleaning, or if occupants have unexplained health symptoms.
Testing helps identify hidden contamination, moisture sources, or toxic species, guiding remediation decisions and whether professionals are needed.
What to do if mold returns after cleaning?
If mold keeps coming back after you’ve cleaned it, it’s a sign the underlying moisture problem wasn’t fixed or the cleaning didn’t remove all contamination.
First, identify and stop moisture sources—fix leaks, improve drainage, raise ventilation.
Reclean with a stronger detergent or biocide, scrub and dry thoroughly.
If recurrence persists, consult a professional to assess hidden contamination or structural issues and get a remediation plan.