Can You Glue Down Click Lock Vinyl Flooring? When and Why It Works
Yes — you can glue down click-lock vinyl in certain cases, but you’ll want to be careful. Click-lock planks are made to float, yet bonding them is useful for uneven subfloors, high-traffic or commercial areas, narrow doorways, radiant heat systems, or when you need extra perimeter stability. Always confirm your plank type and manufacturer recommendations, use the proper vinyl adhesive, and prep the subfloor; keep in mind gluing can complicate future repairs and warranties if you ignore instructions — more guidance follows.
Quick Answer Can You Glue Down Click Lock Vinyl Flooring?
Short answer: you can glue down click-lock vinyl, but it’s usually meant to float and gluing it changes how it performs.
You’ll want to glue when installation over uneven subfloors, in large commercial spaces, or for added perimeter stability, but avoid gluing if the product’s manufacturer forbids it or if you want the easy removal and floor movement a floating install allows.
Check the manufacturer’s guidelines before deciding so you don’t void warranties or cause buckling.
Short direct answer
You can glue down click-lock vinyl, but it’s usually unnecessary and can make future removal harder.
Manufacturers design these floors to float, though adhesive may be appropriate over uneven subfloors or for extra stability in high-traffic or commercial areas.
Short answer: yes, you can glue down click-lock vinyl floor, but only do it when stability outweighs loss of mobility and warranty concerns.
When gluing is recommended vs when it’s not
If you’re weighing whether to glue click-lock vinyl, consider the subfloor condition and planned use: glue it when the subfloor is uneven, prone to moisture, or in high-traffic/commercial spaces to prevent movement and squeaks.
Don’t glue when you need a temporary installation, want easier repairs, or the manufacturer forbids adhesive—floating installs allow floatation, expansion, and simpler replacement.
What Is Click Lock Vinyl Flooring?
Click-lock vinyl flooring is a floating floor made in layers—wear layer, printed design, and core—which comes in common types like LVT, SPC, and WPC.
You’ll snap the planks together along tongue-and-groove edges so they lock without glue.
Installation usually lets the floor float over the subfloor with expansion gaps around the room.
Construction and common types (LVT, SPC, WPC)
Think of click lock vinyl as a layered floor system that snaps together without glue or nails.
You’ll find three main constructions: LVT (luxury vinyl tile) with flexible vinyl core and realistic visuals; SPC (stone plastic composite) offering rigid, dense stability; and WPC (wood plastic composite) adding thicker, cushioned core for comfort.
Each type balances durability, feel, and water resistance differently.
How click-lock installation normally works
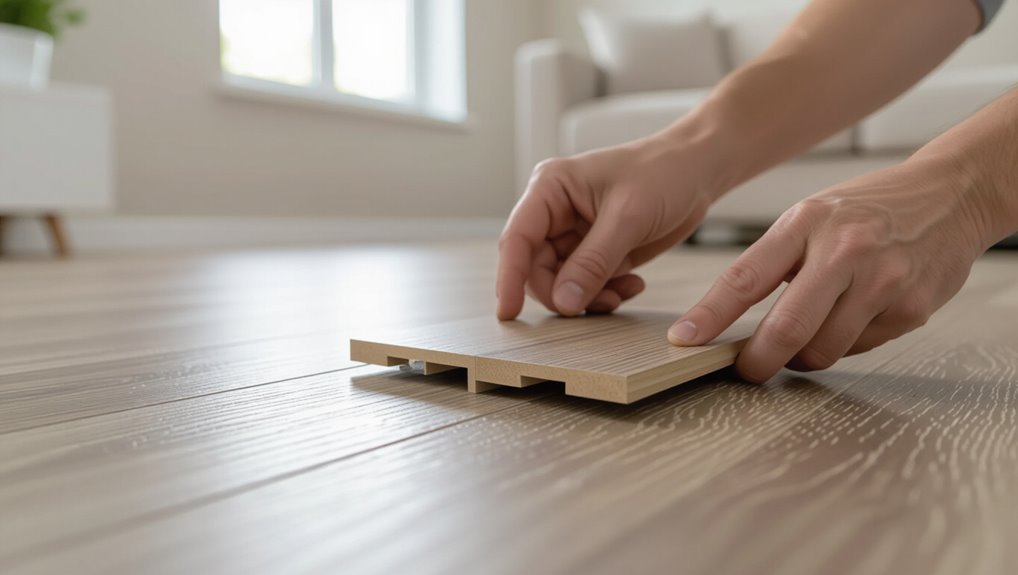
Installing click-lock vinyl usually takes just a few straightforward steps you can do yourself: you prep a flat, dry subfloor, lay underlayment if needed, then measure and stagger boards.
You angle each plank, engage the tongue into the groove, and press or tap to lock.
Trim edges, leave expansion gaps, and reinstall trim.
The system’s floating design lets the floor move.
Why Consider Gluing Click Lock Planks?
If you want extra stability, reduced noise, better moisture control, and a floor that stands up to commercial use, gluing click lock planks can be worth it.
You’ll especially consider it for high-traffic areas, uneven subfloors, doorways, or installations over radiant heat.
We’ll look at how these benefits and situations affect your choice.
Advantages of gluing (stability, sound, moisture control, commercial use)
Stability is the biggest reason to glue click-lock vinyl planks: bonding the seams and perimeter cuts movement, keeps the floor flat under heavy traffic, and prevents gaps from forming over time.
You’ll also reduce hollow sounds and footfall noise, improve moisture resistance by sealing edges, and create a more durable installation suitable for light commercial spaces where a firmer, longer-lasting floor surface matters.
Situations that motivate gluing (high traffic, uneven subfloors, doorways, radiant heat)
When your home or business sees heavy foot traffic, or your subfloor isn’t perfectly flat, gluing click-lock vinyl planks can keep the floor firmly in place and prevent gaps or movement over time.
You’ll also glue in narrow doorways, passage zones, or over radiant heat to reduce buckling, limit edge lifting, and guarantee long-term stability where floating installations might fail under stress.
When Gluing Click Lock Vinyl Works Compatibility Checklist
Before you glue click-lock planks, check whether your plank type (SPC, WPC, or LVT) is rated for glue-down installation.
Verify your subfloor—concrete, plywood, or existing flooring—meets flatness and moisture requirements for adhesive.
Also confirm the manufacturer’s warranty terms and use their recommended adhesive to avoid voiding coverage.
Floor and plank types compatible with glue-down (SPC vs WPC vs LVT)
Although click-lock vinyl is designed for float-installation, you can glue it down in many cases—but compatibility depends on the core type: SPC, WPC, or LVT.
SPC’s rigid stone core bonds well with adhesive and tolerates pressure.
WPC’s foam core is less dense; use manufacturer-approved glue only.
LVT (no click) is ideal for glue-down.
Always check manufacturer instructions and warranties.
Subfloor requirements (concrete, plywood, existing flooring)
You can often glue click-lock vinyl, but whether it’ll hold depends heavily on the subfloor you’re bonding to—concrete, plywood, or existing flooring each have different prep and compatibility needs.
Concrete must be clean, dry, level, and free of sealers or moisture.
Plywood needs stable, smooth, and properly fastened panels.
Existing floors require firm, non-cushioned, and compatible surfaces after thorough cleaning.
Manufacturer warranty and recommended adhesives
When you glue click-lock vinyl, check the manufacturer’s warranty and adhesive recommendations first — they often specify approved adhesives, surface conditions, and whether any bonding will void coverage.
You should follow their guidance to keep warranty protection and guarantee compatibility.
- Use only approved adhesive types.
- Prepare surfaces as specified.
- Note temperature and moisture limits.
- Document installation for claims.
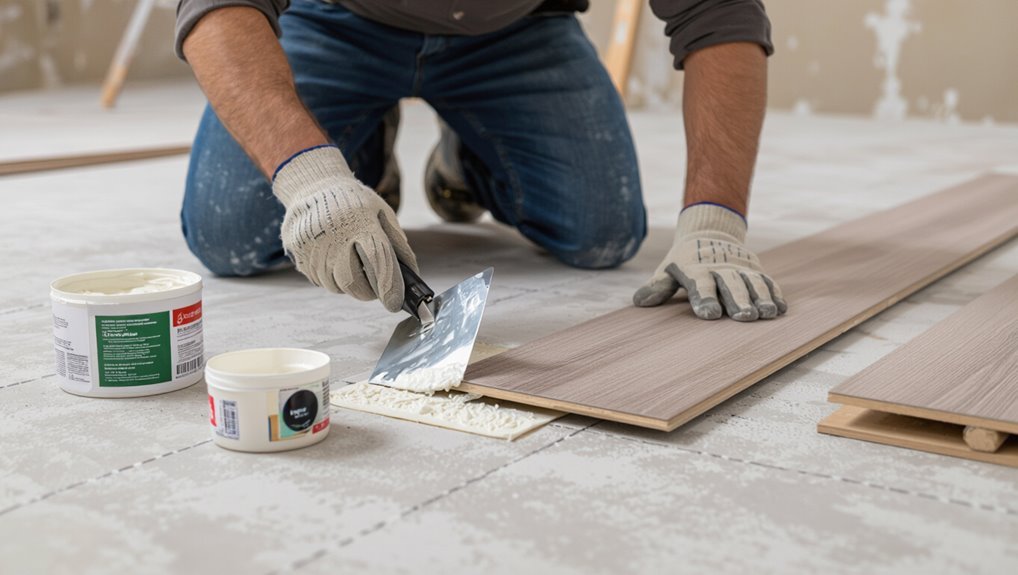
Step-by-Step: How to Properly Glue Down Click Lock Vinyl Flooring
Before you start, inspect the planks and subfloor for damage. Guarantee the flooring has acclimated to room conditions, and gather the right tools and adhesive.
Choose an adhesive rated for click-lock vinyl and plan your layout so you can spread adhesive and place planks efficiently.
Work methodically—apply adhesive per manufacturer instructions, set planks, and finish by rolling the floor to guarantee full contact.
Preparation assessing planks and subfloor
Although the click-lock planks snap together easily, you’ll still need to inspect each board and the subfloor carefully before gluing to confirm a stable, long-lasting installation.
Check planks for damage, color/lot consistency, and straight edges. Remove debris, nails, and old adhesive from the subfloor.
Verify flatness, repair dips or high spots, and ascertain that the surface is dry, clean, and structurally sound.
Acclimation and environmental conditions
If you want a durable glue-down result, let the click-lock planks acclimate in the installation room for at least 48 hours so they adjust to temperature and humidity.
Keep HVAC running at normal operating settings, maintain stable 60–80°F and 30–50% relative humidity, and avoid drafts or direct sunlight.
Check plank dimensions before gluing to confirm no significant expansion or contraction.
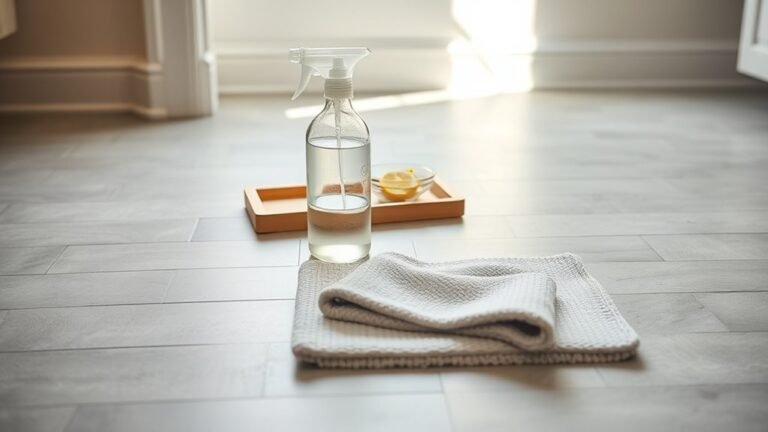
Tools and materials needed
Now that the planks have acclimated and the room conditions are stable, gather the right tools and materials to glue down your click-lock vinyl properly.
You’ll need basics and prep items to guarantee a clean, level installation:
- Measuring tape, chalk line, utility knife
- Roller, spacers, tapping block
- Moisture meter, level, broom
- Recommended adhesives, clean rags, safety gear
Adhesive selection and application techniques
Choose the right adhesive and apply it correctly to guarantee your click-lock vinyl bonds securely without gassing, lifting, or staining; select a low-VOC, vinyl-specific pressure-sensitive or acrylic adhesive rated for your subfloor and room (wet areas, radiant heat).
Follow manufacturer pot life and open time, trowel size, and temperature limits.
Test adhesion in an inconspicuous area before full application.
Installation steps: layout, spreading adhesive, placing planks, rolling
Start by laying out a clear plan for your glue-down click-lock installation so every plank fits tightly and the adhesive works as designed.
Measure, mark guidelines, and dry-fit rows.
Trowel adhesive per manufacturer, keeping an open time window.
Set planks into adhesive, engage joints, and tap gently.
Immediately roll each section with a floor roller to guarantee contact and remove air pockets.
Seaming, transitions, and trimming details
After you’ve rolled each bonded section and confirmed tight seams, focus on finishing the joins, edges, and thresholds so the floor looks and performs like a single, stable surface.
Trim perimeter planks for proper expansion gaps, install reducer and T-molding at junctions, and apply seam sealant where recommended.
Scribe around obstacles, fasten thresholds securely, and clean excess adhesive before it skins.
Drying time and initial care
When you’ve finished rolling and tucking seams, let the adhesive cure without disturbance so the plank joints set properly and the floor bonds fully to the substrate;
keep traffic off the surface and maintain the room at the manufacturer’s recommended temperature and humidity for the specified drying time.
After curing, remove weights and blocks, clean gently, and avoid heavy loads or furniture for at least 24–72 hours per adhesive guidelines.
Alternative Methods When Not to Glue
If you don’t want to glue, you can float click-lock vinyl to let the planks expand and make future repairs easier.
Consider loose-lay for quick installs where heavy furniture or minimal traffic keeps planks in place, and compare that to a full glue-down which anchors the floor for high-traffic or commercial spaces.
I’ll explain the specific benefits and when each method is best so you can pick the right approach.
Floating installation benefits and ideal use-cases
1 clear reason many pros and DIYers choose floating click-lock vinyl is speed: you’ll save time because the planks snap together over the subfloor without adhesive, letting you walk on the floor the same day and making repairs or replacements far easier.
You’ll also benefit from easier installation on imperfect subfloors, expansion flexibility, portable iterations for rentals, and minimal mess or odor.
Loose-lay and full glue-down differences
Although you’ll often hear click-lock called the fastest install, loose-lay and full glue-down methods give you clear alternatives when adhesive isn’t an option or you want different performance: loose-lay relies on weight and friction for stability and lets you lift and replace planks easily, while full glue-down bonds the vinyl permanently for maximum stability and sound reduction. You’ll choose based on mobility, longevity, and subfloor condition.
| Method | Best for |
|---|---|
| Loose-lay | Temporary, damaged subfloors |
| Full glue-down | High-traffic, sound control |
Common Problems When Gluing Click Lock Vinyl
When you glue click lock vinyl, you can run into problems like peaking, buckling, and telegraphing of subfloor imperfections that ruin the finish.
Adhesive issues — bond failure, yellowing, or bleed — can damage plank edges and the click profile.
You’ll also risk voiding warranties or creating conflicts with the manufacturer if the installation doesn’t follow their guidelines.
Peaking, buckling, telegraphing of subfloor imperfections
If you glue click-lock vinyl over an uneven or improperly prepared subfloor, you’ll soon see problems like peaking, buckling, and the floor telegraphing every bump and seam beneath it.
You’ll notice joints rise, planks cup, and surface irregularities show through the wear layer.
Prep properly: level, fill gaps, sand high spots, and guarantee a stable substrate so the glued floor stays flat and attractive.
Adhesive problems (bond failure, yellowing, adhesive bleed)
Because adhesive is the hidden link between your click-lock vinyl and the subfloor, failures show up fast and in obvious ways: bond failure leaves loose or shifting planks, yellowing stains the wear layer or seams, and adhesive bleed seeps through joints or edges.
You’ll spot delamination, stubborn stains, or sticky edges from wrong adhesive, moisture, or improper curing—address promptly to prevent bigger repairs.
Damage to click profile and plank edges
Problems with adhesive can quickly mask or worsen physical damage to the click profile and plank edges, so you’ll want to inspect joints and ends closely after any bonding issue.
If edges are chipped, crushed, or misaligned, glue can lock defects in place, preventing proper engagement and causing gaps or lifting.
Replace or repair damaged planks before gluing for reliable joins.
Warranty voiding and manufacturer conflicts
When you glue click-lock vinyl, you risk voiding the manufacturer’s warranty and creating disputes over responsibility for failures.
Manufacturers often specify floating installation; adhesive use can shift blame to you for cupping, edge lifting, or adhesive bleed.
Before bonding, check written warranty terms, get manufacturer approval in writing, and document installer agreements to avoid denied claims and costly arguments later.
Best Practices and Preventive Tips
To keep your warranty valid, follow manufacturer instructions exactly and document products and procedures you use.
Prepare and test the subfloor for flatness and moisture, choose and trial the appropriate adhesive with a mock-up, and address any telegraphing risks before installation.
After glue-down installation, stick to recommended cleaning and maintenance routines to prolong performance.
How to avoid voiding warranties
If you want your click-lock vinyl warranty to stay valid, follow the manufacturer’s instructions for installation, maintenance, and product use exactly—any deviations like improper underlayment, inadequate acclimation, or harsh cleaning chemicals can void coverage.
Keep receipts, register the product if required, use recommended adhesives or none, hire certified installers when specified, and document site conditions and maintenance to support any future claims.
Preparing subfloor to prevent telegraphing and moisture issues
Start by evaluating and fixing the subfloor so you won’t get telegraphing or moisture problems later: remove debris, level low spots, and sand high areas so shifts are smooth.
Patch cracks and seams with appropriate compound, guarantee flatness within manufacturer tolerance, and install a vapor barrier or moisture mitigation system if needed.
Check for plumbing leaks and allow the subfloor to fully dry before installing.
Proper adhesive selection and testing (mock-up)
Once your subfloor is sound and dry, pick an adhesive system that matches the vinyl type, subfloor material, and expected moisture levels—wrong glue will let planks lift or telegraph imperfections.
Test a small mock-up area with your chosen adhesive and plank, cure per manufacturer instructions, then inspect bond, edge adhesion, and appearance.
Adjust adhesive, trowel size, or primer based on results.
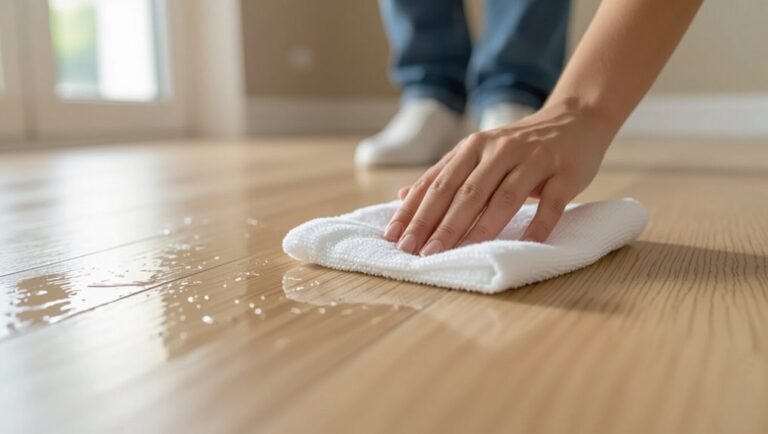
Maintenance tips after glue-down installation
Before routine dirt or spills have a chance to settle, establish a simple maintenance plan you can stick to:
sweep or vacuum daily,
mop weekly with manufacturer-approved cleaner,
and blot spills immediately.
Use felt pads under furniture, avoid steam cleaners and harsh chemicals, and rotate rugs in sunlit areas to prevent fading.
Inspect seams periodically and reapply adhesive where edges lift.
Cost, Time, and Labor Comparison
When weighing click lock options, you’ll want to compare costs between glue-down, floating click, and full glue-down LVT to see which fits your budget.
Also consider time and labor: floating planks are usually fastest and easiest DIY, while full glue-down can be pricier and more time-consuming.
If your subfloor is uneven, the room is large, or you want a guaranteed finish, hire a pro.
Cost comparison: glue-down vs floating vs full glue-down LVT
Because installation choices drive most of the upfront and long-term costs, comparing glue-down, floating (click-lock), and full adhesive LVT means weighing material price, labor rates, and time to install. You’ll find floating is often cheapest, glue-down midrange, full glue-down pricier. Use this quick comparison:
| Type | Material Cost | Typical Impact |
|---|---|---|
| Floating | Low | Faster, less prep |
| Glue-down | Medium | Stable, moderate prep |
| Full glue-down | High | Best durability |
Time and labor differences and when to hire a pro
Now that you’ve weighed material and upfront costs, time and labor become the next big factors in choosing between floating, glue-down, and full glue-down LVT.
A floating install’s fastest; you can DIY over a weekend. Glue-down takes longer and needs adhesive skills; full glue-down is most time-consuming and messy.
Hire a pro for large areas, uneven subfloors, or warranty-required installations to save headaches.
Real-World Scenarios and Recommendations
If you’re installing click lock vinyl in a living room or bedroom, you’ll want a comfortable underlayment and a plank with good dimensional stability.
For high-traffic commercial spaces, choose a thicker wear layer and a commercial-grade locking system to withstand constant use.
When laying over radiant heating or concrete with moisture, pick products rated for those conditions and use proper moisture barriers and installation methods.
Residential living room or bedroom
When you’re choosing click lock vinyl for a living room or bedroom, focus on comfort, appearance, and durability so the floor fits both daily life and style.
You’ll likely float it for easier installation and slightly softer feel, but glue can stabilize seams, reduce sound, and improve underfoot warmth.
Pick thicker wear layers and realistic textures for lasting, comfortable results.
High-traffic commercial spaces
For high-traffic commercial spaces—retail stores, restaurants, offices, and schools—you’ll want click lock vinyl that’s built to take heavy wear, frequent cleaning, and constant foot traffic without sacrificing appearance.
Choose commercial-grade planks with reinforced wear layers, install over a flat, stable substrate, and consider perimeter or full-surface adhesive in high-stress zones.
Maintain routine cleaning and periodic inspections to catch edge lifting early.
Over radiant heating or concrete with moisture
High-traffic areas and heated or moisture-prone substrates demand different installation strategies, so you’ll need to adjust your approach when installing click-lock vinyl over radiant heating or concrete with moisture.
Test moisture levels, follow manufacturer limits, and use appropriate underlayment or vapor barrier.
For radiant floors, confirm temperature caps and gradual heating.
When limits are exceeded, consider full glue-down or alternative flooring to avoid failure.
Mistakes to Avoid
Don’t use the wrong adhesive or slather on too much—click lock systems usually need little to no glue and the wrong product can ruin the lock.
You shouldn’t skip acclimating the planks or prepping the subfloor, because gaps, buckling, and uneven wear often follow.
Always read and follow the manufacturer’s instructions to avoid voiding warranties or making irreversible mistakes.
Using wrong adhesive or too much adhesive
If you grab the wrong adhesive or glob it on too thick, your click-lock vinyl won’t lock together properly and could buckle or stain over time.
Use only manufacturer-recommended adhesives and apply the thin, even amount they specify. Excess glue squeezes into joints, preventing proper engagement and causing visible residue.
Wrong glue can chemically react with the vinyl, discoloring or softening planks.
Skipping acclimation or subfloor prep
After you’ve picked the right adhesive and avoided globby application, don’t skip acclimating your click-lock vinyl or prepping the subfloor.
You’ll prevent buckling, gaps, and poor adhesion by letting planks equalize to room temperature and humidity.
Clean, level, and dry the substrate, remove debris, and repair imperfections so the glued sections bond evenly and the installation settles without movement or future failures.
Ignoring manufacturer instructions
Because manufacturers test their click-lock systems for specific subfloors, adhesives, and installation sequences, ignoring their instructions can void warranties and create problems you’ll have to fix later.
Don’t improvise with unapproved glue, underlayment, or moisture barriers. Follow recommended adhesives, expansion gaps, and fastening methods.
If you deviate, document reasons, accept responsibility, and expect possible repairs or denied claims.
FAQ
You’ll probably have questions about gluing, repairs, and installation specifics—like whether glue will prevent replacing damaged planks or if you can glue only the perimeter and float the rest.
You’ll also want to know if glued click-lock flooring works in basements, which adhesive suits waterproof click-lock materials, and whether you can glue over existing vinyl.
We’ll answer each of these clearly so you can choose the best approach for your project.
Will gluing affect the ability to replace damaged planks?
If you glue click-lock vinyl, you can still replace damaged planks, but the process becomes more involved and may require cutting or partial removal of surrounding boards.
You’ll need adhesive cleanup, careful prying, and maybe specialty tools to avoid damaging neighbors.
Plan for longer labor, possible seam repairs, and matching pressure-sensitive or recommended adhesive when installing replacements to guarantee stable seams and appearance.
Can I glue only the perimeter and float the rest?
Wondering whether you can glue only the perimeter and let the rest float? Yes—you can.
Perimeter gluing stabilizes edges, reduces cupping, and keeps junctions tight while preserving floating movement in the field for expansion.
Use manufacturer-approved adhesive, follow recommended gap and bead patterns, and avoid overgluing.
This hybrid method balances stability and serviceability but check warranties before proceeding.
Is click lock vinyl suitable for basements when glued?
Perimeter-gluing a click-lock floor can lead you to contemplate full adhesion in challenging spaces like basements.
You can glue click-lock vinyl in a basement if the subfloor is dry, level, and moisture-tested.
Gluing reduces movement and can help seal edges, but you’ll need to address potential hydrostatic pressure and drainage first.
If issues persist, consider alternative installations.
What adhesive is best for waterproof click-lock flooring?
Which adhesive works best depends on the substrate and the vinyl’s backing type, but for waterproof click-lock flooring you’ll usually want a high-quality urethane or pressure-sensitive (PSA) adhesive formulated for vinyl and compatible with your subfloor; these provide strong, flexible bonds that resist moisture and accommodate the plank movement.
Always check manufacturer recommendations, choose mold-resistant formulas, and use proper trowel/roller application for even coverage.
Can I glue click-lock flooring over existing vinyl?
Can you install glue-down click-lock planks over existing vinyl? You can, but only if the old vinyl is firmly bonded, level, dry, and free of wax, adhesive residue, or cushioning.
Roughen smooth vinyl for adhesion and use a compatible adhesive.
If seams, bubbles, or damage exist, remove the old floor first to guarantee stability and warranty compliance.