How Ceramic Tiles Are Made: The Process Behind the Product
You follow clay, silica, feldspar and additives as they’re mixed, shaped, dried, glazed and fired at high heat to become durable tiles. You’ll see methods like dry pressing and extrusion create precise or continuous profiles, while controlled drying and kiln schedules prevent warping and cracks. Surface treatments—glazing and digital printing—add color and wear resistance. Quality checks, sorting and careful packaging protect batches for installation, and the next sections explain each stage in detail.
How Ceramic Tiles Are Made Quick Answer
You’ll see ceramic tiles are made by mixing clay and other minerals, shaping, drying, firing, and glazing in a few clear steps.
The key materials are clay, feldspar, silica and sometimes pigments or additives, and the finished tiles go into floors, walls, countertops and outdoor surfaces.
Keep reading and you’ll learn how each material and stage affects strength, appearance and suitability for different uses.
One-sentence summary of the manufacturing process
When clay, minerals, and water are mixed, shaped, dried, glazed, and fired at high heat, they transform into durable ceramic tiles ready for installation.
To answer how do you make ceramic tiles, you’ll combine raw materials, form and finish the pieces, then fire them to harden and fix glazes; quality checks and packaging follow so the tiles perform reliably once installed.
Key materials and end uses
Ceramic tiles use a few core materials—clay, silica (sand), and feldspar—plus additives like fluxes, colorants, and sometimes recycled content to control strength, firing behavior, and appearance.
You select formulations for durability, porosity, and finish so tiles suit specific uses.
- Flooring
- Walls
- Countertops
- Outdoor paving
Basic Understanding What Ceramic Tiles Are and Why They Matter
You’ll learn that ceramic tiles are fired clay products—porcelain, earthenware, and stoneware—with glazed or unglazed finishes that change durability and appearance.
You’ll see how those types suit different uses, from high-traffic floors to decorative walls, based on hardness, water resistance, and maintenance needs.
You’ll also consider the environmental and economic impacts of tile production, including energy use, raw materials, and market value.
Definition and categories (porcelain, earthenware, stoneware, glazed vs unglazed)
Although they all start from clay, ceramic tiles cover a few distinct types you’ll want to know: porcelain, earthenware, and stoneware, each defined by its clay composition and firing temperature.
They are further classified as glazed or unglazed depending on whether a glassy surface layer has been applied.
You’ll choose porcelain for dense, high-fired bodies, earthenware for softer, low-fired pieces, and stoneware for mid-to-high fire durability.
Common applications and performance characteristics
Think of tiles as workhorses for floors, walls, countertops, and outdoor spaces — they handle foot traffic, moisture, stains, and temperature changes while setting the look of a room.
You choose tile based on hardness, porosity, slip resistance, and freeze-thaw durability. Glazed surfaces resist stains; porcelain offers low absorption and high strength; textured tiles improve traction.
Proper installation guarantees long-term performance.
Environmental and economic significance of tile manufacturing
Because tile production blends abundant natural materials with energy-intensive processes, it has clear environmental and economic impacts you’ll want to understand.
You can reduce footprints by choosing recycled-content tiles, supporting manufacturers using renewable energy, and preferring local suppliers to cut transport emissions.
Economically, tile factories create jobs and infrastructure but face energy cost volatility; efficiency and circular practices improve resilience and long-term savings.
Overview of the Full Manufacturing Process
You’ll get a high-level flowchart that maps the major stages of tile production from raw materials to finished product.
For each stage I’ll show the key inputs you feed in and the outputs you get out, so you can track material and energy flow.
That overview will make the detailed steps that follow easier to understand.
High-level flowchart of major stages
A clear high-level flowchart breaks the tile-making process into a few major stages—raw material preparation, forming, drying, glazing/decoration, firing, and quality control/packaging—so you can see how each step feeds the next and where key decisions or inspections occur.
You follow a linear progression with feedback loops for rejects and rework, checkpoints for measurements, and final packaging, enabling efficient throughput and traceability.
Inputs and outputs at each stage
Think of each manufacturing stage as a simple transformer: it takes specific raw inputs, applies processes or checks, and produces outputs that feed the next step or get diverted for rework. You’ll track inputs (clay, water, additives), process actions (mixing, pressing, firing, glazing), and outputs (green tiles, fired tiles, finished tiles, rejects) to optimize flow.
| Stage | Input/Output |
|---|---|
| Forming | Clay slurry → Green tile |
| Firing | Green tile → Fired tile |
Raw Materials and Preparation
Now you’ll look at the primary raw materials—clay, feldspar, silica and small additives—and why their characteristics matter for tile performance.
You’ll learn how manufacturers source, test and store these inputs to keep quality consistent.
Then you’ll see the blending and homogenization techniques used to create a uniform body before forming.
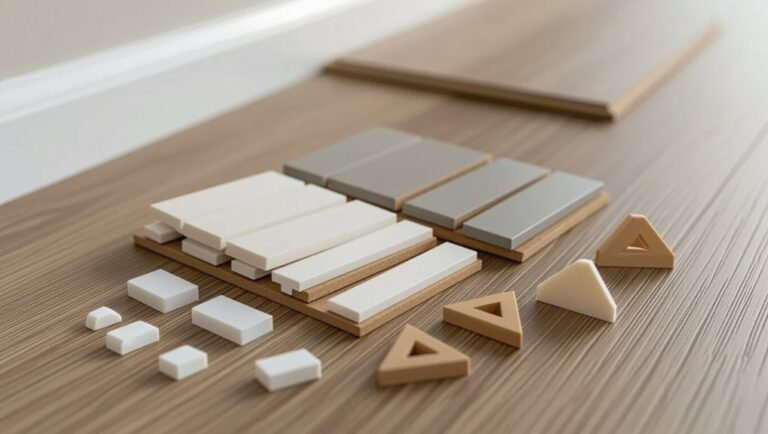
Primary raw materials (clay, feldspar, silica, additives)
Clay, feldspar, silica and a few performance-enhancing additives form the backbone of most ceramic tiles, and you’ll find each plays a distinct role during shaping and firing.
You mix and adjust proportions to control plasticity, vitrification, strength and surface finish.
- Clay: provides plasticity for forming
- Feldspar: fluxes to lower firing temperature
- Silica: adds rigidity, glassy phase control
- Additives: disperse, bind, color or enhance drying
Material sourcing, quality control, and storage
Having chosen the right mix of clay, feldspar, silica and additives, you then need reliable sources, consistent quality checks and proper storage to keep those ingredients performing as expected.
You verify incoming batches with moisture, particle size and impurity tests, track supplier certifications, quarantine off-spec material, rotate stock to prevent contamination or moisture uptake, and store powders in dry, temperature-controlled areas to preserve consistency.
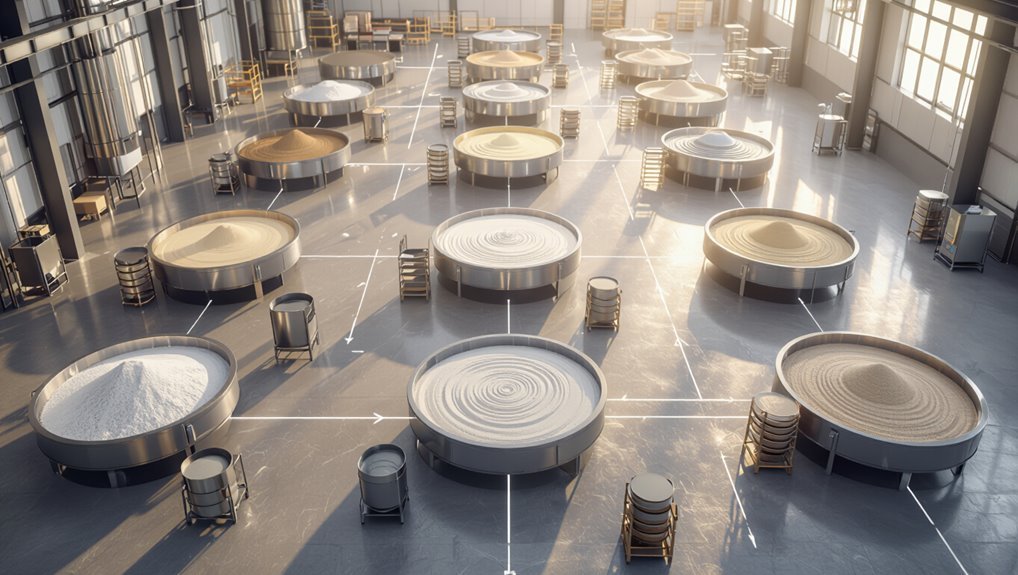
Raw material blending and homogenization techniques
When you move from selection to blending, precise homogenization guarantees every batch will fire predictably; you’ll measure, meter and mix powders to achieve a uniform particle distribution and moisture profile before any shaping or pressing.
You’ll use ball mills, high-shear mixers, and air-classifiers, monitor granulometry and moisture, and apply wet or dry blending strategies so green bodies form consistently and defects are minimized.
Shaping and Forming Methods
Now that the raw mix is ready, you’ll see how the body is formulated and converted into spray-dried granules as the first step.
Next you’ll compare pressing and extrusion—how dry pressing makes compact shapes while extrusion produces continuous profiles—and then follow cutting, sizing, and edge finishing to get accurate tile dimensions.
Finally you’ll look at drying methods and common defects to watch for so pieces reach the kiln in stable condition.
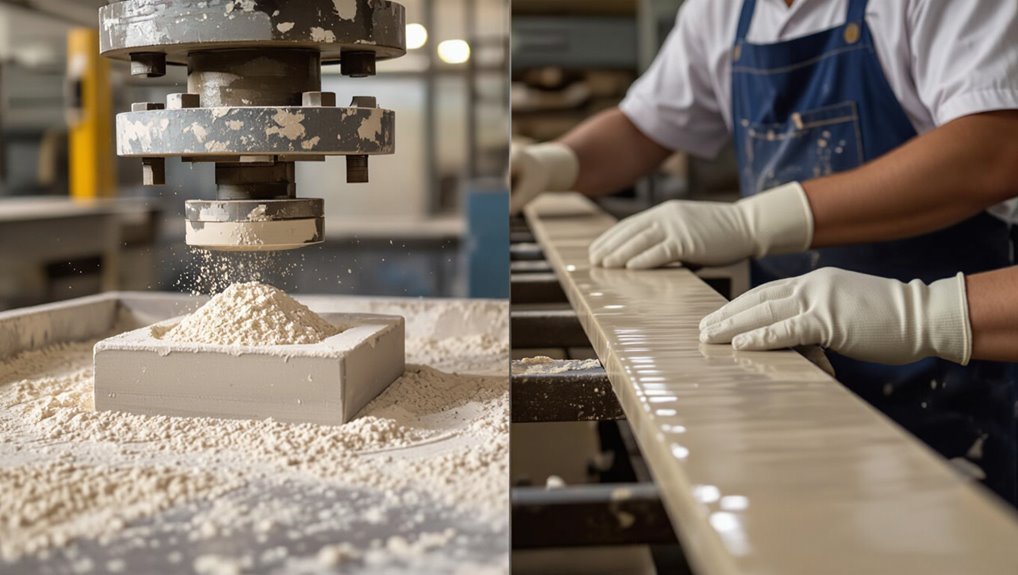
Step 1 Body formulation and spray drying
Start by blending raw materials into a balanced ceramic body: clay, feldspar, silica, and any needed additives are weighed and mixed to achieve the target plasticity, firing range, and color.
You then mill slurry, control solids and viscosity, and atomize into granules via spray drying.
The resulting powder’s particle size and moisture guarantee uniform pressing and consistent drying before glazing and firing.
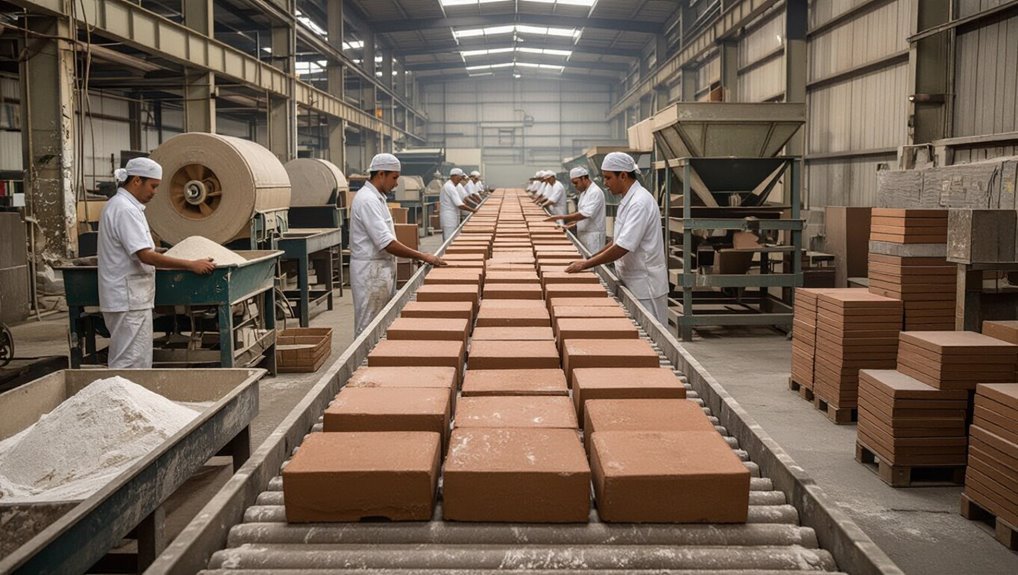
Step 2 Pressing and extrusion methods (dry pressing vs. extruded tiles)
After spray-dried granules are produced to the right moisture and particle size, shaping is where the tile takes its form: manufacturers use either dry pressing or extrusion depending on tile type and production scale.
You’ll see dry pressing force powders into rigid molds for precise, dense slabs; extrusion pushes a plasticized paste through a die for continuous profiles, ideal for sanitaryware and robust body tiles.
Step 3 Cutting, sizing, and edge finishing
Move on to cutting, sizing, and edge finishing, where the rough-formed tile is turned into a precise, ready-to-handle product.
You trim excess material, cut to exact dimensions, and machine or grind edges for uniformity.
Bevels or rectified edges are added for installation consistency.
Quality checks measure tolerance and surface integrity, ensuring tiles fit patterns and grout lines without warping or chipping.
Step 4 Drying: techniques and common defects to avoid
With edges trimmed and dimensions locked in, you’ll need to dry tiles carefully to remove moisture without causing warping or cracks.
Use controlled, staged drying—low humidity and gradual temperature rises, plus airflow management.
Watch for common defects: warpage, crazing, blistering, and delamination.
Monitor moisture content, rotate batches, and adjust profiles to prevent stress buildup so tiles stay flat and durable.
Surface Treatment and Decoration
Now you’ll look at how tiles get their finished look, starting with glazing—single, double, and the increasingly common digital printing methods.
You’ll learn the difference between in-glaze and on-glaze decoration and why choice of method affects durability and appearance.
Then you’ll see how advanced inkjet/digital printing adds photo-real patterns and special effects like textures, metallics, and depth.
Glazing processes (single, double, digital printing)
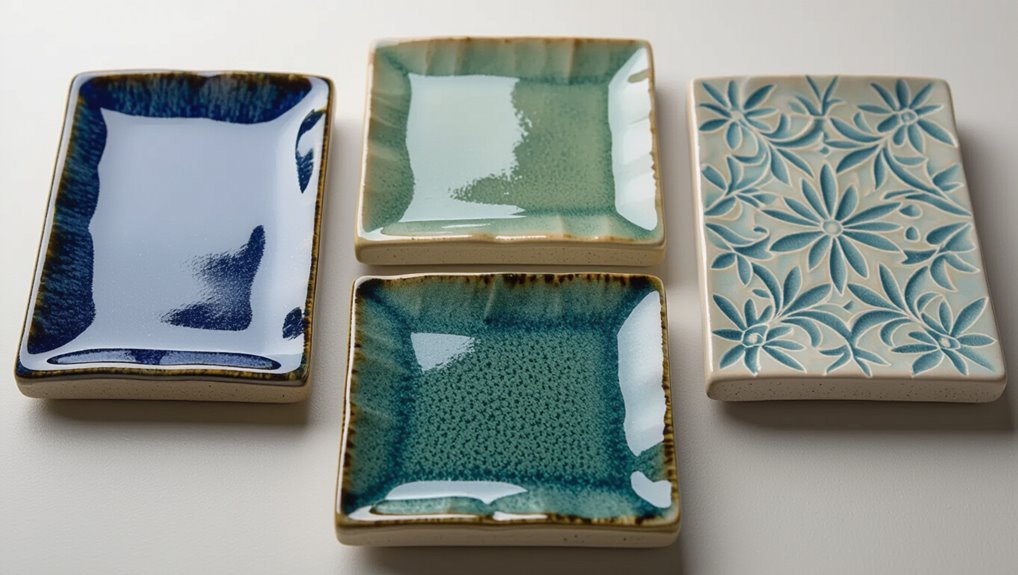
Although glazing may seem like a final flourish, it fundamentally changes a tile’s durability, color, and surface texture.
You’ll encounter three main approaches—single glazing, double glazing, and digital printing—each suited to different performance and aesthetic goals.
You’ll choose single glazing for cost-effective protection, double glazing for enhanced wear and depth, and digital printing when you need intricate, photo-realistic designs with precise color control.
In-glaze vs. on-glaze decoration methods
Because decoration affects both appearance and longevity, you’ll want to understand whether a design sits in the glaze or on top of it.
In-glaze decoration is applied before firing so patterns fuse with the glaze, improving durability and resistance to wear.
On-glaze is added after glazing and needs a lower-temperature firing or surface seal, so it’s easier to apply but can be less hard-wearing.
Advanced decoration: inkjet/digital printing and special effects
When you want complex patterns, photographic realism, or rapid customization, inkjet and other digital printing methods deliver far greater precision and flexibility than traditional techniques.
You can print high-resolution images, layered textures, and variable motifs directly onto tile bodies or glazes. Special effects—metallics, relief, matt/gloss contrasts, and reactive glazes—are added via digital controls, enabling short runs, personalization, and consistent quality.
Firing and Sintering
Now you’ll look at how firing and sintering transform a tile from fragile clay to a finished product, starting with the choice of kiln—roller, tunnel, or periodic—and the specific firing profile each uses.
You’ll see the physical and chemical changes that happen as temperatures rise and phases form, and you’ll learn why controlled cooling matters for strength, glaze fit, and thermal shock resistance.
Understanding these steps helps you predict final properties and troubleshoot production issues.
Kiln types and firing profiles (roller kiln, tunnel kiln, periodic)
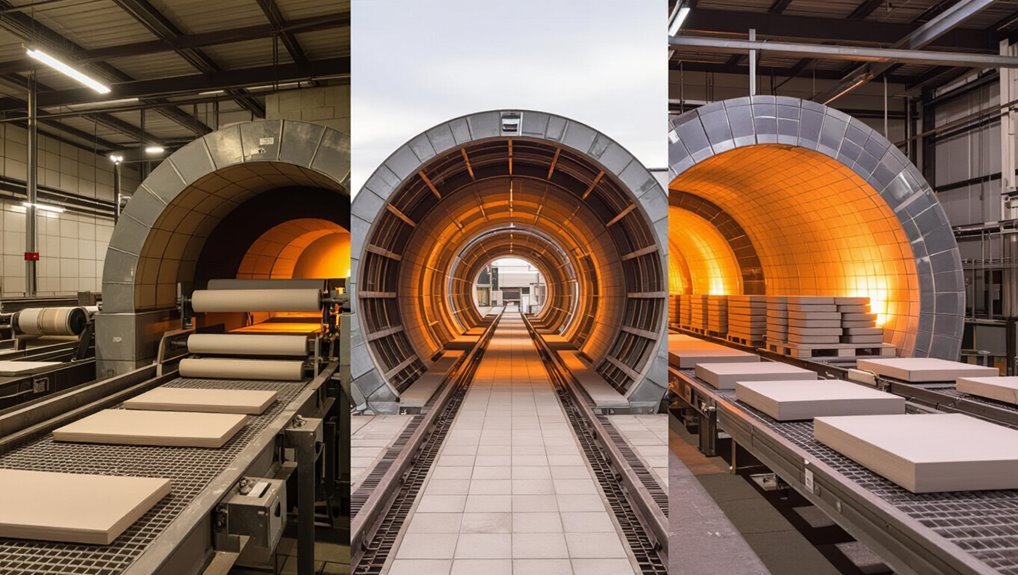
Kilns are the heart of ceramic firing, and choosing between roller, tunnel, or periodic designs determines how you control temperature, atmosphere, and throughput during sintering.
You select a roller kiln for continuous, gentle heating of fragile tiles, a tunnel kiln for high-capacity, consistent profiles, or a periodic kiln for flexible, batch-specific cycles.
Adjust zones and speed to match glaze and body requirements.
Physical and chemical changes during firing
Although the raw tile looks unchanged to your eye, firing drives a sequence of physical and chemical transformations that lock its shape, strength, and appearance.
As temperature rises, particles sinter, pores shrink, and glassy phases form from fluxes and feldspars. Crystalline phases recrystallize, impurities oxidize or reduce, and vitrification bonds the body, producing hardness, density, and the foundation for glaze adhesion.
Cooling stage and its impact on tile properties
When the kiln door opens and temperature falls, the cooling stage actively shapes the tile’s final microstructure and performance: crystals continue to grow or dissolve, residual stresses develop as different phases contract at different rates, and the glassy matrix gradually rigidifies.
All of which influence strength, fracture behavior, and glaze fit. You’ll control cooling rate to tailor toughness, shrinkage, and thermal compatibility, preventing warping and crazing.
Quality Control and Testing
Now you’ll check tiles for dimensional accuracy, strength, and water absorption to make sure they meet specs.
You’ll also perform visual inspections against grading standards to spot issues like warping, glazing defects, or color variation.
When defects show up, you’ll trace them to causes such as raw material inconsistency, firing problems, or handling damage.
Dimensional, mechanical, and water absorption tests
Because dimensional accuracy, strength, and porosity directly affect performance and durability, testing ceramic tiles for dimensions, mechanical properties, and water absorption is a core part of quality control.
You’ll measure size/tolerance, test breaking strength, assess abrasion and flexural resistance, and determine water absorption to classify tiles.
Typical tests you’ll perform include:
- Dimensional measurement
- Modulus of rupture
- Abrasion/PEI rating
- Water absorption percentage
Visual inspection and grading standards
Although you’ll rely on measurements and lab tests for objective data, visual inspection remains the first—and often decisive—step in tile quality control.
This is because surface defects, color variation, and finish inconsistencies are what end users notice first. You’ll grade tiles against established standards for color, gloss, pattern repeat and edge quality, separating acceptable lots, reworkable pieces, and rejects for traceability.
Common defects detected and their causes
Visual checks will catch many issues, but to understand why tiles fail you need to recognize specific defects and their root causes.
You’ll spot crazing (thermal stress), pinholes or blisters (gas release or glazing faults), warpage (uneven drying/firing), discoloration (impurities or kiln atmosphere), and chipping (handling or low mechanical strength).
Address raw mix, processing, and firing to prevent recurrence.
Packaging, Logistics, and Installation Readiness
Now that tiles have passed inspection, you’ll sort, pack, and label them according to size, finish, and destination to prevent damage and simplify inventory.
You’ll also plan storage, shipping, and handling precautions—like palletizing, cushioning, and moisture protection—to keep tiles intact in transit.
Before installation, you’ll perform pre-installation checks on site conditions, quantities, and batch uniformity so installers can work without surprises.
Sorting, packing, and labeling best practices
When tiles leave quality control, you’ll sort them by size, shade, and batch to prevent mismatches on site; this step reduces returns and keeps installers working efficiently.
Pack tiles on edge with protective spacers, wrap pallets to prevent movement, and use moisture-resistant cartons.
Label clearly with product code, batch number, tile orientation, quantity, and designated room to streamline installation and traceability.
Storage, shipping considerations, and handling precautions
After sorting and labeling, you’ll want to focus on packaging and storage that preserve quality and simplify logistics.
Use sturdy pallets, edge protectors, and moisture-resistant wrapping. Stack tiles flat, limit height to prevent crushing, and keep climate-controlled storage to avoid warping.
For shipping, secure crates against vibration, mark fragile sides, and train handlers on careful lifting to minimize breakage and delays.
Pre-installation checks for installers
1 clear checklist helps installers verify that packaging, logistics, and site conditions are ready before any tiles leave the boxes.
You inspect cartons for damage, confirm counts and batch numbers, check moisture and substrate readiness, verify grout and adhesive compatibility, and guarantee proper tools and spacers are on site.
You document discrepancies, reject compromised materials, and coordinate replacements before installation begins.
Environmental, Health, and Safety Considerations
As you examine tile manufacturing, consider emissions, waste management, and recycling practices in the plant and how they affect the surrounding environment.
You’ll also need to address worker safety and common hazards on the production line.
Finally, look at sustainable alternatives and energy-saving technologies that can reduce risk and lower the factory’s footprint.
Emissions, waste management, and recycling in tile plants
When you look at a tile plant, you’ll see that managing emissions, waste, and recycling is as important as controlling firing temperatures; these practices protect worker health, reduce environmental impacts, and keep operations compliant with regulations.
You’ll monitor kiln exhaust, capture particulates with filters, treat wastewater, segregate production scrap, and reclaim clays and glazes.
Continuous audits and documented disposal minimize liabilities and resource use.
Worker safety and common hazards
Beyond emissions and waste controls, you also need to protect the people who make the tiles.
You’ll manage dust from clay and silica, enforce respiratory protection, and control noise and heat near kilns.
Train workers on machinery lockout, ergonomic handling of heavy slabs, and chemical hazards like glazes.
Regular inspections, clear signage, and emergency plans reduce injuries and exposures.
Sustainable alternatives and energy-saving technologies
If you want to cut costs and reduce your facility’s environmental footprint, adopt sustainable raw materials, low-energy firing methods, and on-site energy recovery systems.
You can switch to recycled clay, industrial byproducts, and water-saving pressing.
Use electric or hybrid kilns, waste-heat recovery, and solar preheating to lower fuel use.
Monitor emissions, pursue certifications, and train staff to maintain efficiency and compliance.
Common Manufacturing Problems and How to Prevent Them
Now you’ll look at common issues like warping, cracking, and blistering—what causes them and how to prevent them through material control and firing profile adjustments.
You’ll also cover color inconsistencies, print defects, and troubleshooting steps to keep patterns and shades uniform.
Finally, you’ll address glaze crawling, pinholes, and overglaze problems with practical mitigation strategies for formulation and application.
Warping, cracking, and blistering causes and prevention
Warping, cracking, and blistering are common defects that can ruin batches of ceramic tiles during drying and firing, and you can prevent most of them by controlling raw material composition, moisture management, and kiln profiles.
Adjust clay recipe to reduce shrinkage, guarantee uniform pressing and cut edges, dry slowly with even airflow, avoid rapid temperature ramps, and maintain consistent kiln atmosphere to prevent gas pockets and thermal stress.
Color inconsistency and print defects troubleshooting
When color shifts or print defects show up on finished tiles, they usually point to issues in pigment preparation, application, or firing control that you can trace and fix; check pigment batch consistency, dispersion, and storage.
Verify printer calibration, screen tension and ink viscosity, and monitor kiln atmosphere and temperature profiles.
Implement statistical process control, sample testing, and corrective action logs to prevent recurrence.
Glaze crawling, pinholes, and overglaze issues mitigation strategies
After you’ve checked pigments, printing, and kiln profiles for color and print faults, you’ll want to tackle surface defects like glaze crawling, pinholes, and overglaze faults that can undermine appearance and durability.
Inspect cleanliness, adjust glaze viscosity and application thickness, guarantee proper frit maturity, eliminate trapped gases via optimized bisque firing, control cooling rates, and test adhesion.
Document fixes and run small trials before full production.
Best Practices and Tips for Manufacturers and Buyers
To get consistent, durable tiles you should optimize your raw material mix and tighten process control at each stage.
Set clear quality checkpoints—wet and dry pressing, glazing consistency, and final dimensional and strength tests—to catch defects early.
When buying, check specs for water absorption, PEI rating, rectification, and warranty to guarantee the product meets your application.
Optimizing raw material mix and process control
Although achieving consistent tile quality demands tight control, you can dramatically cut defects and costs by optimizing your raw-material mix and process parameters.
Analyze clay, feldspar and sand ratios, monitor particle size and moisture, and adjust binder and additive levels.
Calibrate mills, spray dryers, presses and kilns, log settings, and use SPC to spot shifts so you act before scrap rises.
Quality checkpoints to implement in production
Where should you focus inspection to prevent common defects and costly rework?
Check raw mix consistency, moisture and particle size before pressing.
Monitor pressing pressure, part density and edge formation.
Inspect green-body dimensions, glaze application uniformity and dry handling for cracks.
During firing, verify kiln temperature profiles and atmosphere.
Final checks should include flatness, water absorption, surface finish and batch traceability.
Buying tips: what specifications to check when selecting tiles
When you’re selecting tiles, focus on clear, measurable specifications that match the job: dimensional tolerance, water absorption, PEI/abrasion rating, slip resistance, frost resistance, and color/shade consistency.
Check certifications, sample batches, and test reports. Verify designated use (floor/wall), grading, and edge finish.
Compare warranty and installation guidelines.
- Use
- Report
- Grade
- Warranty
Case Studies and Real-world Examples
You’ll look at two case studies: one showing a high-volume porcelain production line and another highlighting small-batch artisanal methods and how they differ.
You’ll compare throughput, quality controls, and cost drivers to see what each approach teaches.
Then you’ll draw practical lessons about scaling, flexibility, and when to adopt each model.
Example 1 High-volume porcelain production process overview
Although the specifics vary by plant, a high-volume porcelain line typically runs as an integrated sequence of raw material blending, spray drying, pressing or casting, glazing, and high-temperature firing, all optimized for throughput and consistency.
You monitor automated quality checks, adjust slurry and kiln parameters, and coordinate continuous conveyors.
Waste recycling, digital controls, and statistical process control keep yields high while meeting tight dimensional and aesthetic tolerances.
Example 2 Small-batch artisanal tile production differences
Because artisanal workshops prioritize handcraftsmanship over throughput, you’ll notice small-batch porcelain and ceramic tiles follow very different rhythms and checkpoints than high-volume plants.
You’ll see manual mixing, hand-pressing or slab-rolling, individualized glazing, and slower kiln cycles. Quality checks focus on aesthetic variation and tactile finish rather than uniformity.
Lead times are longer, but you get unique, craft-driven pieces with tighter maker oversight.
Lessons learned and scalability considerations
When you scale from a cottage workshop to a mid-sized plant, the trade-offs become obvious: speed and consistency improve, but you risk losing the subtle variations that gave your tiles character.
You’ll need standardized recipes, quality checks, and training to retain signature looks.
Invest in flexible equipment, pilot runs, and feedback loops so growth doesn’t erase originality while meeting demand and margins.
Frequently Asked Questions (FAQ)
You probably have questions about timelines, material differences, and post-use options — like how long production takes, what separates porcelain from ceramic, and whether tiles can be recycled.
You might also wonder why some tiles change color after installation and how digital printing affects long-term durability.
Below are clear, concise answers to those common concerns.
How long does it take to make ceramic tiles from raw material to finished product?
Curious how long it takes to turn clay and minerals into a finished ceramic tile?
You’ll typically see a cycle of 1–7 days: batching and mixing (hours), forming and drying (up to 1–3 days), glazing/decoration (hours), and firing (several hours to a day including cooling).
Larger batches and complex finishes can extend total lead time to about a week or slightly more.
What is the difference between porcelain and ceramic tiles in manufacturing?
Although both are made from clay and minerals, porcelain and ceramic tiles differ mainly in clay composition, manufacturing pressure, and firing temperature.
Porcelain uses denser, purer clays, higher pressing force, and hotter, longer firing, producing a harder, less porous body.
Ceramic tiles use softer clays, lower pressure, and cooler firing, leading to a more porous, easier-to-cut product suited for indoor, low-traffic spaces.
Can ceramic tiles be recycled or reused after demolition?
Wondering whether ceramic tiles from a demo can go to waste? You can often reuse intact tiles for repairs or creative projects, and reclaimed tiles fetch resale or donation.
Crushed tile makes useful aggregate for landscaping or underlayment, while specialized facilities sometimes recycle ceramics into new materials.
Check local recycling rules and salvage options to maximize recovery and avoid landfill.
Why do some tiles change color after installation?
Why did your tiles darken or take on a different hue after installation?
You’re likely seeing effects from moisture, grout residue, or surface sealers absorbing dirt.
Unfired glaze variations, iron in clay, and kiln temperature differences can also alter color.
Natural light and viewing angle change perception.
Clean properly, allow drying, and use recommended sealers to stabilize appearance.
How does digital printing affect tile durability?
Because digital printing applies patterns and colors directly onto the tile surface, it can influence durability in several ways: the print quality, the type of ink and bonding process, and whether a protective glaze or wear layer is added all determine how well the design resists scratching, fading, and staining.
You should choose tiles with UV-stable inks, strong sintering or bonding, and a robust wear layer to guarantee longevity.