How to Lay Vinyl Plank Flooring on Concrete the Right Way
You can install vinyl plank flooring on concrete if the slab’s dry, clean, and level. Test for moisture, fix cracks or low spots, and remove loose paint or oil. Choose a product and method suited to concrete—click-lock for floating installs, glue-down for permanent adhesion, or loose-lay for quick jobs—and follow manufacturer instructions, acclimate planks, and leave expansion gaps. Roll seams after laying and trim connections for a finished look. Keep going to learn step-by-step prep and tips.
Quick Answer Can You Lay Vinyl Plank Flooring on Concrete?
Yes—you can lay vinyl plank flooring on concrete, and it’s a great choice when the slab is clean, dry, and relatively level.
You shouldn’t install it over damp, cracked, or uneven concrete without first fixing moisture issues and smoothing the surface.
Below we’ll cover when it’s appropriate and what to do when it’s not.
Short, direct recommendation
You can lay vinyl plank flooring on concrete as long as the slab is dry, clean, level, and free of major cracks; choose a product rated for concrete and follow the manufacturer’s moisture and subfloor prep guidelines.
For a solid result, test moisture, repair imperfections, install the recommended underlayment, and acclimate planks.
Follow instructions for adhesive or click-lock systems to guarantee a durable, watertight floor.
When it’s appropriate vs when it’s not
When the concrete slab is dry, level, and free of major cracks, vinyl plank flooring is a solid choice—pick a product rated for concrete and follow the manufacturer’s moisture limits, subfloor prep, and installation method.
Choose vinyl for basements, kitchens, or high-traffic rooms if moisture and flatness are acceptable. Avoid it over damp, uneven, crumbling concrete or where moisture exceeds the product’s tolerance; fix issues first.
Basic Understanding What Is Vinyl Plank Flooring and Why Choose It for Concrete?
Vinyl plank flooring comes in several types—LVP/LVT, click-lock, glue-down, and loose-lay—so you’ll want to pick the style that fits your skill level and the concrete surface.
It’s a popular choice for concrete because it’s durable, moisture-resistant, and cost-effective compared with hardwood or tile.
Be aware of limitations like height buildup, potential subfloor prep, and moisture testing before you install.
Types of vinyl plank (LVP/LVT, click-lock, glue-down, loose lay)
Most homeowners will choose among four common vinyl plank options—LVP/LVT, click-lock (floating), glue-down, and loose-lay—each designed for different concrete conditions and installation preferences.
You’ll pick LVP/LVT for realistic looks, click-lock for DIY floating installs, glue-down for permanent adhesion on smooth slabs, or loose-lay for fast, low-profile installs where adhesive or heavy prep isn’t ideal.
Advantages of vinyl on concrete (durability, moisture resistance, cost)
Durability, moisture resistance, and low cost make vinyl plank an especially smart choice for concrete subfloors you want to dress up without a long, expensive remodel.
You’ll get a tough, scratch- and dent-resistant surface that handles humidity and spills better than wood.
Installation is faster and cheaper, and maintenance is minimal—sweeping and occasional mopping keep it looking new for years.
Limitations and considerations (height buildup, subfloor issues)
While vinyl plank works well over concrete, you should watch for a few limitations before you start—chiefly the added floor height and any subfloor imperfections.
Measure door clearances, threshold changes, and appliance fits since underlayment and plank thickness raise floor level.
Inspect for cracks, unevenness, moisture, and soft spots; prep with leveling compound or vapor barrier as needed to guarantee a stable, long-lasting surface.
Pre-Installation Assessment Inspecting Your Concrete Subfloor
Before you start installing, inspect the concrete for moisture using calcium chloride tests, in-situ relative humidity probes, or a reliable moisture meter.
Check that the slab is flat within the manufacturer’s tolerances, and look for cracks, oil, paint, or other contaminants that can prevent proper adhesion.
Also measure finished floor height and plan connections to adjoining surfaces so your new vinyl lays and trims out correctly.
Moisture testing methods (calcium chloride, relative humidity, moisture meter)
Because concrete can trap moisture that ruins vinyl plank flooring, you’ll need to test the slab with reliable methods: calcium chloride (an external moisture vapor emission test), in-situ relative humidity probes (ASTM F2170), and a quality electronic moisture meter for spot checks.
Use these to confirm suitability, then address any excess moisture before installation.
- Calcium chloride for MVER
- RH probes per ASTM F2170
- Electronic moisture meter
- Document and retest
Surface flatness and level requirements (acceptable tolerances)
After you confirm moisture levels, check the slab for flatness and level so your vinyl planks will lay properly and the locking joints won’t gap.
Use a 6‑ft straightedge: maximum variation should be 1/8″ in 6 ft for rigid SPC/LVP, or follow manufacturer specs.
Fill low spots with a self-leveler and grind high spots.
Re-check before installing.
Checking for cracks, oil, paint, and contaminants
While you’ve already checked flatness, you now need to scan the slab for cracks, oil, paint, and other contaminants that will prevent adhesive bond or cause planks to pop or slide.
Mark hairline and larger cracks, remove oil and grease with degreaser, and strip loose paint.
Fill cracks and pits with suitable epoxy or patch, then re-clean and dry the surface before installing.
Determining floor height and transitions
Now that cracks and contaminants are addressed, check how the new vinyl height will meet adjoining floors, thresholds, and door clearances.
Measure finished height including underlayment, compare to adjacent floor levels, and note connections—T-molding, reducer, or ramp.
Trim doors if needed.
Plan slopes for moisture barriers and verify thresholds meet code and won’t create trip hazards or binding when doors open.
Materials and Tools Needed
Before you start, gather the right vinyl planks (click-lock, glue-down, or loose-lay), underlayment or moisture barrier, and any adhesives or primers specified for concrete.
You’ll also need tools and safety gear—trowel, seam roller, saw, spacers, tape measure, and protective equipment—and possibly a moisture test kit.
Finally, calculate square footage plus a 5–10% waste allowance so you order enough material and supplies.
Flooring materials (vinyl planks by type, underlayment, adhesives)
Once you’ve picked your vinyl plank style, gather the right materials so installation goes smoothly:
- Rigid core or SPC/LVP planks, choose thickness and wear layer for traffic
- Floating click-lock vs. glue-down planks, pick based on concrete condition
- Underlayment compatible with chosen plank (sound, thermal, slight moisture mitigation)
- Adhesive or pressure-sensitive glue specified by plank manufacturer, plus seam sealer
Tools and safety gear (trowel, roller, saw, spacers, moisture barrier, primer)
With your materials chosen, gather the tools and safety gear that’ll make the job accurate and safe: a notched trowel and adhesive roller for glue-down installations, a heavy-duty floor roller to seat planks, a wet or dust-reducing saw for cuts, spacers for expansion gaps, a moisture barrier or vapor retarder when required, and a primer or patching compound to prep uneven or porous concrete.
- Knee pads and gloves
- Safety glasses and ear protection
- Tape measure and chalk line
- Utility knife and pull bar
Estimating quantities and waste allowance
Start by measuring the room’s length and width and multiplying them to get the square footage you’ll actually cover.
Add 5–10% for straight cuts; use 10–15% for diagonal patterns or irregular rooms. Round up to whole boxes—never buy exact.
Check plank coverage per box, factor thresholds and connections, and keep extra sealed for repairs or mistakes.
Preparation Steps Getting the Concrete Ready
Before you lay any planks, make sure the concrete is spotless—sweep and vacuum out all dust and remove grease or loose debris.
Fix cracks and low spots with a patching compound or skim coat, grind down high spots and allow repair and grind areas to cure fully.
Finally, install an appropriate vapor/moisture barrier (follow product recommendations) to protect your vinyl from moisture.
Cleaning and debris removal
1 clear, clean surface makes installation easier and helps your vinyl planks last longer.
Sweep thoroughly, then vacuum to remove dust and grit. Use a stiff broom for stubborn debris and a damp mop with pH-neutral cleaner to remove oils or residue.
Let the slab dry completely. Remove paint chips, adhesive remnants, and loose particles—anything that could prevent adhesive contact or create bumps.
Repairing cracks and leveling low spots (patching compounds, skim coat)
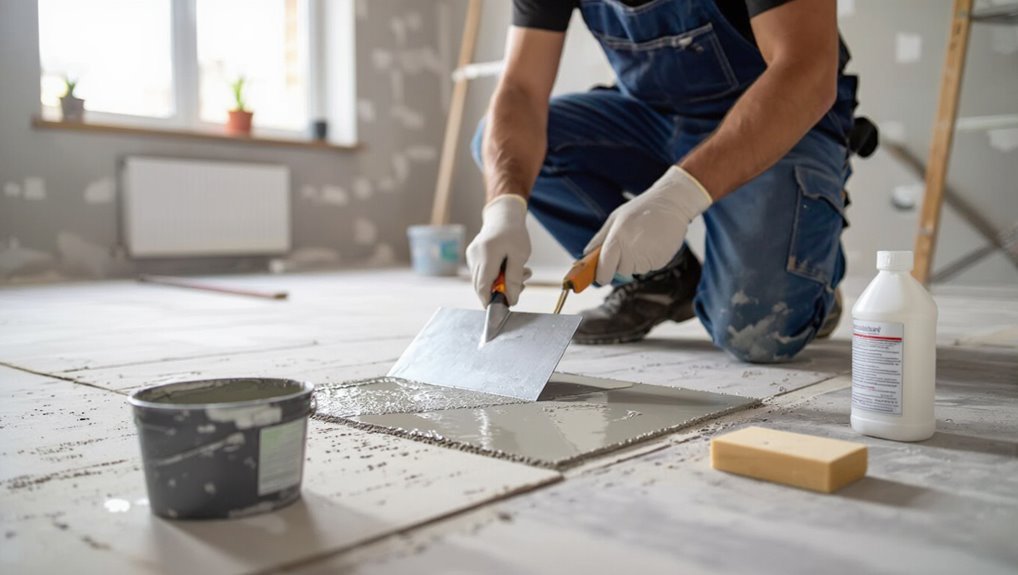
Once the slab’s clean and dry, inspect it for cracks, spalls, and low spots that can telegraph through vinyl or ruin adhesive bonds.
Remove loose concrete, widen hairline cracks, and vacuum debris.
Use manufacturer-recommended patching compound for deep defects and a feathering skim coat for shallow depressions.
Follow mixing, application, and cure instructions so the surface is flat, sound, and ready for primer or adhesive.
Addressing high spots (grinding) and curing times
If you find high spots or ridges in the slab, grind them down so the surface is uniformly flat; uneven elevations can cause gaps, telegraphing, or premature wear in vinyl plank installations.
After grinding, sweep and vacuum dust thoroughly.
Allow patched or ground concrete to cure per product instructions—typically 24–72 hours—so moisture and binders stabilize before proceeding with any underlayment or flooring.
Installing vapor/moisture barrier and recommended products
A vapor barrier is essential on concrete to stop subsurface moisture from damaging your vinyl planks, so lay it down after the slab is clean, dry, and any patches have cured.
Use 6‑mil polyethylene, waterproof membranes like Grace Ice & Water Shield, or specialized underlayments with built‑in vapor control.
Overlap seams 6 inches, tape with compatible seam tape, and extend up walls slightly.
Installation Methods Choosing the Right Method for Your Concrete
Now you’ll pick the installation method that fits your concrete and lifestyle: floating (click-lock) for easy DIY with expansion gaps, glue-down with the right adhesive and trowel for a permanent bond, or loose-lay/full-spread adhesive options for heavier traffic.
Consider subfloor prep needs and underlayment choices for sound, comfort, and thermal performance when required.
I’ll walk you through pros, adhesive types and open time, trowel selection, and underlayment recommendations next.
Floating (click-lock) installation: pros, subfloor prep, expansion gaps
Floating (click-lock) installations are one of the simplest ways to lay vinyl plank over concrete, because the planks snap together and rest on—rather than adhere to—the subfloor, letting you work faster and replace flooring later without damaging the slab.
You should:
- Inspect and level the concrete; fill cracks.
- Install an appropriate underlayment for moisture and cushion.
- Maintain manufacturer-recommended expansion gaps.
- Stagger seams and check locking for tight joins.
Glue-down installation: adhesive types, trowel selection, open time
If you want the most stable, low-profile finish over concrete, glue-down installations bond the planks directly to the slab using pressure-sensitive or wet-set adhesives.
Choosing the right adhesive and trowel size—and respecting the adhesive’s open time—ensures proper coverage, permanent hold, and trouble-free seams.
- Pressure-sensitive vs. wet-set: match to plank and traffic
- Trowel size: follow coverage specs
- Open time: don’t exceed working window
- Surface prep: clean, dry, smooth
Loose lay and full-spread adhesive options
While glue-down gives a low-profile, permanently bonded surface, loose lay and full-spread adhesive methods offer different balances of installation speed, stability, and removability for concrete subfloors.
You’ll choose loose lay for quick installation and easy replacement, relying on weight and friction, or full-spread adhesive for maximum bond and reduced movement.
Match method to traffic, moisture, and future removal needs.
Underlayment choices for sound/comfort/thermal (when required)
Because concrete can feel cold, hard, and echo-prone, choosing the right underlayment matters: it controls sound, adds cushioning, and can provide thermal insulation or a moisture barrier when required.
Pick closed-cell foam for moisture resistance and comfort, cork or rubber for superior sound dampening, and foil-backed foam for added thermal reflectivity.
Always match underlayment thickness to your plank manufacturer’s limits.
Step-by-Step Installation Guide
Before you start, acclimate the planks and plan a staggered layout so your starting wall and end cuts look balanced.
Begin by installing a straight first row with spacers, then lock in subsequent rows while staggering joints and measuring carefully.
Finish by cutting around doors, vents, and pipes, and install connectors, trims, and thresholds for a clean edge.
Step 1 Acclimation and layout planning (stagger pattern, starting wall)
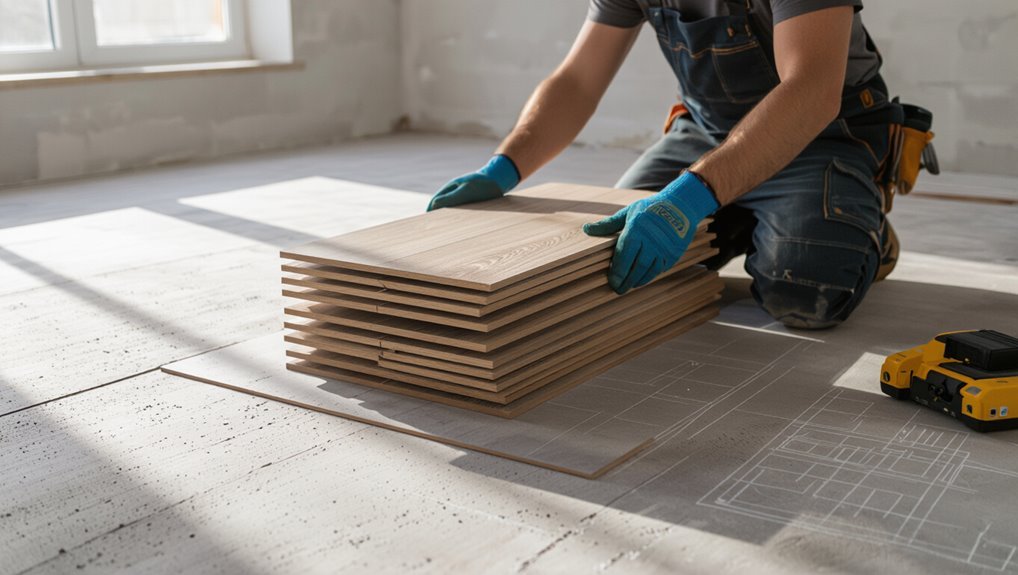
1–2 days of acclimation are usually enough: bring your vinyl planks into the installation room and let them sit flat, unopened, at room temperature so they adjust to the humidity and temperature they’ll be installed in.
Measure the room, mark a straight starting wall, and plan a staggered pattern with end joints offset at least 6–8 inches.
Dry-lay rows to confirm layout.
Step 2 First row installation (straight line, spacers)
Start your first row along the straightest wall, tongue facing the wall, and use spacers to maintain the recommended expansion gap (usually 1/4 inch) all along the edge.
Align each plank precisely, trim the last plank to fit, and keep spacers in place. Tap joints with a mallet and block for tight seams, checking alignment frequently before removing spacers.
Step 3 Subsequent rows and staggering joints (measurement tips)
Once you’ve locked the first row in place, work left to right (or right to left if that’s more comfortable) and stagger end joints by at least 6–8 inches to create a natural, stable pattern.
Measure and cut the leading plank of each new row so its short end is at least the minimum stagger distance from the row before. Snap a chalk line or use a straightedge to keep rows parallel, and always maintain the expansion gap with spacers as you go.
Trim starter pieces to balance final row widths, check alignment frequently, and tap seams gently to fully lock planks.
Step 4 Cutting planks and fitting around obstacles (doors, vents, pipes)
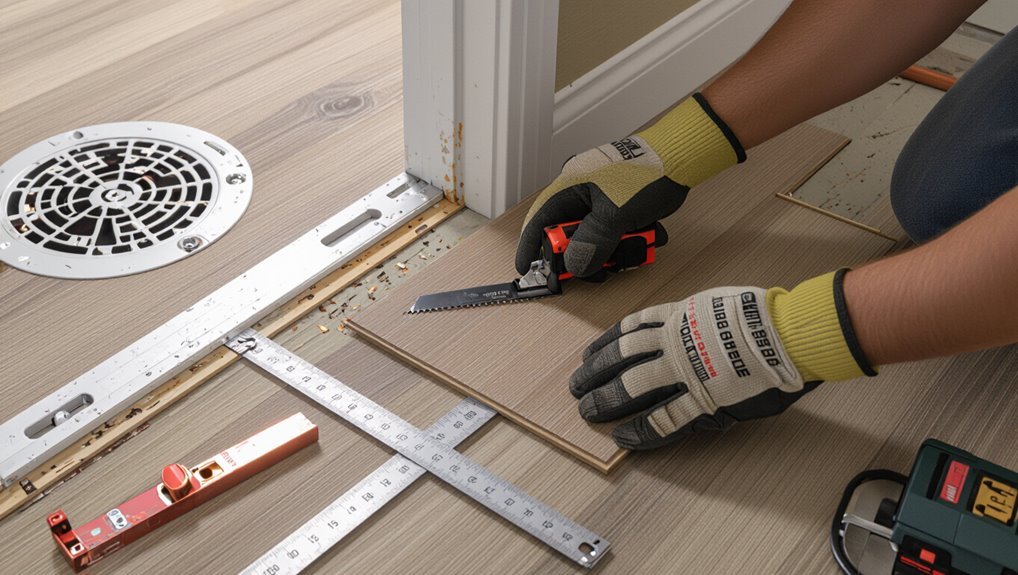
Cutting planks and fitting them around doors, vents, and pipes takes careful measuring and the right tools to get clean, tight seams without damaging the flooring.
Measure twice, mark cut lines, and use a straightedge and utility knife or jigsaw for curves.
For pipes, drill a hole in the plank oversized by about 1/8″ and use a trim ring or caulk to finish gaps.
Step 5 Handling transitions, trims, and thresholds
After you’ve fit planks around doors, vents, and pipes, finish the job by installing trims, thresholds, and edge pieces that bridge gaps and protect exposed edges.
Measure openings, cut connector strips to length, and test-fit before fastening. Use adhesive or screws recommended by the manufacturer, maintain expansion gaps under thresholds, and seal joins with matching trim or flexible caulk for a clean, durable finish.
Step 6 Rolling and final adhesion checks for glue-down floors
Grab a 100–150 lb. flooring roller and move methodically across the floor to press each plank into the adhesive, working in overlapping passes from one wall toward the exit to avoid stepping on freshly set areas.
After rolling, inspect seams and edges, feeling for voids or loose spots.
Re-roll any problem areas and cold-weld or reapply adhesive where needed for full contact.
Step 7 Cleanup and initial curing/wait times
When you’ve finished rolling and checked for loose spots, tidy the workspace and let the adhesive begin curing without disturbance.
Clean off excess glue with the manufacturer‑recommended solvent and dispose of rags safely. Sweep or vacuum dust and debris, and remove spacers and junction protectors so the floor can set evenly.
Keep traffic off for the recommended time, control temperature and humidity, and follow cure times before trimming or moving furniture.
Common Problems and Mistakes to Avoid
Before you start laying planks, watch for a few common mistakes that can ruin the job: installing over damp concrete without testing or a moisture barrier, leaving uneven surfaces or large cracks unaddressed, and skipping proper acclimation.
Also avoid using the wrong adhesive or underlayment for concrete, and make sure you plan correct expansion gaps and connections. Fixing these issues ahead of time will save you from buckling, gaps, and premature failure.
Installing over damp concrete without proper testing or barrier
If you skip proper moisture testing and lay vinyl planks over damp concrete, you’ll likely trap water that causes adhesive failure, warping, mold, and a shortened floor life.
Don’t guess—measure with a reliable moisture meter or perform a calcium chloride test.
If moisture’s high, install an approved vapor barrier or delay installation until concrete’s dry to prevent costly repairs and health hazards.
Failing to address uneven surfaces or large cracks
Because vinyl plank needs a flat, stable base, you can’t ignore uneven concrete or large cracks without inviting visible gaps, plank flexing, and premature failure.
You should assess and repair low spots, fill cracks with a suitable patch or epoxy, and level the slab with a self-leveling compound where needed.
Skipping these steps voids warranties and shortens floor life.
Improper acclimation leading to buckling or gaps
When you bring vinyl planks into a room and install them without letting them acclimate to the concrete’s temperature and humidity, the boards can expand or contract afterward, causing gaps, buckling, or peaking along seams.
You should store boxes flat, open cartons, and let planks sit 48–72 hours.
Check temperature and moisture; follow manufacturer acclimation guidelines to prevent movement and appearance issues.
Using the wrong adhesive or underlayment for concrete
Acclimating planks won’t help much if you then use an adhesive or underlayment that’s incompatible with concrete; wrong products can prevent proper bonding, trap moisture, or allow movement that leads to delamination, bubbles, or mold.
You should choose adhesives rated for concrete and vapor barriers or underlayments designed for porous slabs. Always verify manufacturer compatibility and test a small area before full installation.
Incorrect expansion gap and transition planning
If you skip or misjudge the expansion gaps and shifts, your vinyl planks can buckle, warp, or separate as they respond to temperature and moisture changes.
Plan consistent gap widths per manufacturer guidelines, allow perimeter and between-room movement, and install proper connections at doorways and thresholds.
Measure, mark, and use spacers; don’t rely on guesswork or tight fits that trap stress.
Best Practices, Tips, and Professional Recommendations
Set your room to the right temperature and humidity before you start, and keep conditions steady while the adhesive or click-locks settle.
Stagger planks for a natural look—use narrower boards or varied lengths in small rooms and broader, consistent patterns in large spaces—and follow maintenance routines like regular sweeping and protective pads to extend the floor’s life.
If you’re unsure about moisture testing, subfloor prep, or complex layouts, hire a pro; if the room is simple and you’re comfortable with tools, it’s a DIY-friendly project.
Ideal environmental conditions (temperature, humidity) during install
Because vinyl planks expand and contract with changes in temperature and moisture, you should install them only when the jobsite is within the manufacturer’s recommended range—typically 60–80°F (15–27°C) and 30–50% relative humidity—so adhesive, seams, and locking systems perform correctly and the floor settles without gaps or buckling.
Monitor conditions for 48–72 hours, use HVAC or dehumidifiers as needed, and avoid installing during weather extremes.
Staggering patterns and aesthetic tips for small/large rooms
When laying vinyl plank flooring, stagger your end joints thoughtfully to create a natural, stable look and prevent weak seams that can lead to movement or buckling.
Plan a random-seeming pattern, avoid repeating short pieces, and orient planks to lengthen tight spaces. Consider grain flow and boundary thresholds.
- Use varied plank lengths
- Keep minimum 6″ offsets
- Run planks along longest wall
- Mirror patterns at doorways
When to hire a professional vs DIY indicators
If your concrete subfloor is flat, dry, and level within 3/16″ over 10 feet and you’re comfortable with basic carpentry, you can probably install vinyl plank flooring yourself;
if the slab has moisture issues, significant height variations, cracks, or requires complex changes, call a pro.
Hire a pro for moisture mitigation, leveling, complicated layouts, or tight timelines.
DIY if tools, patience, and time match the job.
Maintenance and care tips to prolong flooring life
A few simple habits will keep your vinyl plank floor looking new and lasting longer: sweep or vacuum regularly to remove grit, place mats at entryways to catch moisture and dirt, and use felt pads under furniture to prevent scratches.
Wipe spills promptly with a damp mop, avoid harsh chemicals, trim pet nails, and follow manufacturer cleaning recommendations to preserve finish and warranty.
Cost, Timeframe, and ROI Considerations
You’ll want to budget for materials, tools, and any labor—each can vary widely depending on plank quality and room size.
Expect a few hours to a day for prep (moisture testing, leveling) and a day or two for installation in an average room.
Consider that durable vinyl can last 10–20 years and often boosts resale value, especially when professionally installed.
Typical cost breakdown (materials, tools, labor)
Because concrete prep and subfloor needs vary, your total expense for vinyl plank flooring can swing widely—but most budgets break down into three clear categories: materials, tools/consumables, and labor. You’ll pay for planks and underlayment, pick up tools and adhesives, and often hire installers. Estimate ranges help plan ROI.
| Category | Typical cost range |
|---|---|
| Materials | $1–$5/sq ft |
| Labor & tools | $0.50–$4/sq ft |
Estimated time for prep vs installation for average rooms
Now that you’ve seen how costs split between materials, tools, and labor, let’s look at how time factors into the equation: concrete prep often takes as long—or longer—than laying the planks.
For a typical 200–300 sq ft room, prep (cleaning, leveling, moisture testing, curing) can take 1–3 days; installation usually takes 4–8 hours, plus trim and settling time.
Longevity and resale value impact
When you choose quality vinyl plank and prepare the concrete properly, the floor can last 15–25 years with normal household wear.
That durability directly affects resale value and return on investment. Buyers value durable, low-maintenance floors; well-installed vinyl can boost appeal and asking price.
Track warranty, maintenance, and installation quality to maximize lifespan and ROI when selling.
FAQ
You’ll likely have quick questions like whether you can install vinyl plank over painted concrete and how to check for excess moisture.
You’ll also want to know if basements or below-grade spaces are suitable, how much expansion gap to leave, and whether underfloor heating changes the installation.
I’ll answer each so you can decide confidently.
Can I install vinyl plank directly on painted concrete?
Can you install vinyl plank directly over painted concrete? Yes, but only if the paint is fully adhered, smooth, and clean.
Remove loose or flaking paint, degrease surfaces, and sand glossy finishes for better grip.
Use a manufacturer-approved adhesive or floating system compatible with painted substrates.
Always follow vinyl maker guidelines and test adhesion in a small area before proceeding.
How do I know if my concrete has too much moisture?
How wet is too wet for vinyl plank? You’ll test concrete moisture with a moisture meter, calcium chloride test, or relative humidity probe per manufacturer specs.
If readings exceed the vinyl’s allowable moisture limit (usually specified as pounds/24 hrs, % RH, or pH), don’t install.
Fix moisture with vapor barriers, sealers, or repairs, then retest until levels meet the product’s requirements.
Can vinyl plank be installed in basements or below-grade?
Wondering whether vinyl plank works in basements or other below‑grade spaces? Yes—you can install vinyl there, but you must test and manage moisture, use a suitable underlayment or vapor barrier, and choose waterproof, low‑VOC products rated for below‑grade.
Confirm the concrete is level, clean, and dry per manufacturer specs. Follow installation guidelines to prevent warping, mold, or warranty issues.
How much expansion gap do I need around the room?
Need a gap? You should leave a 1/4-inch to 1/2-inch expansion gap around the room perimeter for most vinyl plank products.
Follow the manufacturer’s recommendation—some wider-plank or click-lock systems ask for up to 3/4 inch.
Keep gaps at doorways and against fixed objects. Cover them with trim or junction strips; don’t squeeze planks tight, or you’ll risk buckling.
Will underfloor heating affect vinyl plank installation?
You already plan for expansion gaps around walls and fixtures, and you’ll want to contemplate how underfloor heating interacts with those allowances.
Low-temperature electric or hydronic systems work with most vinyl planks if manufacturer limits (usually max surface temp ~27°C/80°F) are respected.
Guarantee subfloor flatness, follow adhesive or floating system guidelines, and use compatible underlayment to prevent heat-related buckling or adhesive failure.
Visual Guide and Quick Reference Resources
You’ll find step-by-step diagrams showing common cuts and layout patterns to make each stage visual and easy to follow.
Use the quick checklist to confirm pre-installation tasks (subfloor prep, moisture testing), key installation steps, and post-installation checks.
Keep a printed copy nearby so you can tick items off as you work.
Step-by-step diagrams and common cuts
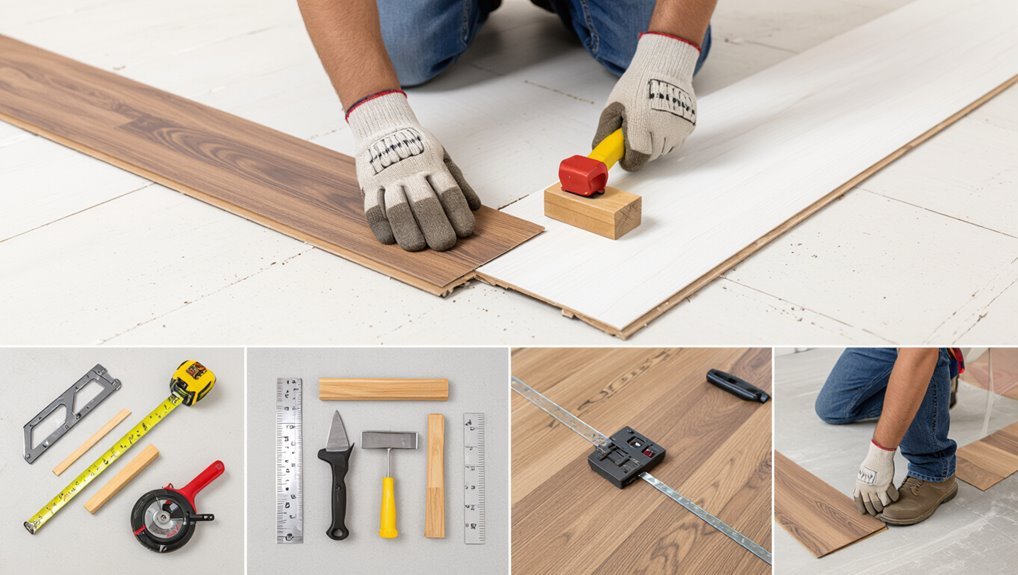
1 clear diagram can save hours of guesswork when laying vinyl plank flooring on concrete.
Use step-by-step visuals showing layout, stagger pattern, expansion gaps, and adhesive/locking sequences.
Include labeled cut types: straight, L-notch, tapered, and end piece trims.
Provide measurement callouts, cutting angles, and sequence numbers so you can replicate each move confidently without rereading dense instructions.
Quick checklist for pre-installation, installation, and post-installation
Before you begin, gather a simple, numbered checklist that covers pre-installation, installation, and post-installation tasks so you won’t miss any critical steps.
You’ll prep concrete, acclimate planks, install with correct spacing and stagger, and finish seams and trims.
Use this quick visual guide as a reference during the job:
- Moisture test and level check
- Acclimation and layout plan
- Staggered installation and spacing
- Sealing, trim, and cleanup