What Is Luxury Vinyl Tile Flooring and How Does It Compare?
Luxury vinyl tile (LVT) is a layered, waterproof flooring that realistically mimics wood or stone while staying affordable and low‑maintenance. You’ll get a durable wear layer, a high‑resolution design film, and a sturdy core (flexible vinyl, WPC, or SPC) with a backing for stability. It’s warmer and easier to install than tile, more water‑resistant than laminate, and cheaper than hardwood. It’s great for kitchens, baths, and rentals — keep going to see pros, cons, and buying tips.
Quick Answer What Is Luxury Vinyl Tile (LVT)?
Luxury vinyl tile (LVT) is a durable, layered flooring that mimics wood or stone with a waterproof core and wear layer.
You should consider LVT if you want an affordable, low-maintenance option that stands up to moisture and heavy foot traffic.
It’s a smart choice for kitchens, bathrooms, rental properties, and busy households.
One-sentence definition
While resembling natural stone or wood, luxury vinyl tile (LVT) is a durable, waterproof flooring made of layered synthetic materials with a printed design and protective wear layer, giving you the look of premium surfaces at a lower cost and maintenance.
In short, what’s luxury vinyl tile flooring? It’s a resilient, low-maintenance, realistic-looking option that resists moisture, stains, and daily wear while staying affordable.
Who should consider LVT and why
Who needs LVT?
You should consider luxury vinyl tile if you want durable, water-resistant flooring that still looks high-end.
It’s ideal for busy households, rentals, basements, and kitchens.
You’ll appreciate low maintenance, scratch resistance, and easier installation compared with hardwood or tile.
Choose LVT when budget, practicality, and realistic wood or stone visuals matter more than resale-focused authenticity.
Basic Understanding Materials, Construction, and Types
You’ll want to know what LVT is made of—typically a clear wear layer, a printed design film, a stable core, and a backing—because each layer affects durability and appearance.
You’ll also learn how LVT differs from LVP (tile-shaped vs. plank-shaped formats) and why core types matter.
Choosing between flexible vinyl, WPC, and SPC depends on your need for comfort, waterproofing, and rigidity.
What LVT is made of (layers explained: wear layer, printed film, core, backing)
Think of luxury vinyl tile as a layered system engineered for durability and style:
You get a clear wear layer resisting scratches and stains, a high‑resolution printed film that provides realistic wood or stone visuals, a rigid or flexible core for stability and impact resistance, and a backing layer that adds balance and moisture protection.
Each layer contributes to performance and longevity.
Differences between Luxury Vinyl Tile (LVT) and Luxury Vinyl Plank (LVP)
Having looked at how LVT is built from distinct layers, it helps to compare luxury vinyl tile (LVT) with luxury vinyl plank (LVP) so you can pick the right format for your space.
LVT mimics stone or ceramic tile shapes and grout lines; LVP imitates wood planks and lengthwise grain.
Both share similar layers and performance, so choose based on appearance, room size, and installation pattern.
Types of vinyl cores (flexible vinyl, WPC, SPC) and when to choose each
When you’re choosing LVT or LVP, the core material determines durability, feel, and where the floor performs best: flexible vinyl has a softer, more cushioned feel and works well in tight budgets or irregular subfloors; WPC (wood plastic composite) adds rigidity and comfort with better indentation resistance and is great for living areas; SPC (stone plastic composite) offers the stiffest, most dimensionally stable core, so it’s ideal for high-traffic, moisture-prone spaces.
| Core | Feel | Best use |
|---|---|---|
| Flexible vinyl | Soft, cushioned | Budget, uneven subfloors |
| WPC | Rigid, comfy | Living rooms, moderate traffic |
| SPC | Very stiff, stable | Commercial, wet areas |
How LVT Compares to Other Flooring Options
You’ll find LVT stands out for its water resistance and realistic visuals compared with laminate and hardwood, while often costing less than real wood.
Against ceramic or porcelain tile, LVT is warmer underfoot and easier to install, though tile can still win on extreme durability and heat resistance.
Compared with sheet vinyl, LVT usually offers thicker, more textured planks or tiles and a more authentic look, so you’ll weigh appearance and wear performance against price.
LVT vs. Laminate
Because both mimic real wood and come in plank formats, LVT and laminate often get lumped together, but they differ in construction, water resistance, and feel underfoot.
You’ll find LVT is waterproof, softer, and quieter, ideal for kitchens and bathrooms.
Laminate’s fiberboard core feels firmer, can swell with moisture, and usually costs less.
Choose based on room and budget.
LVT vs. Hardwood
How does LVT stack up against hardwood for style, durability, and long-term value?
You get realistic wood visuals at lower cost, superior water resistance, and easier maintenance with LVT.
Hardwood offers authentic warmth, refinishing potential, and higher resale appeal but demands more care and moisture control.
Choose LVT for practicality in busy or damp areas; pick hardwood for long-term investment and timeless character.
LVT vs. Ceramic/Porcelain Tile
Wondering which holds up better in wet rooms and heavy traffic—LVT or ceramic/porcelain tile?
You’ll find ceramic and porcelain are harder, more scratch- and heat-resistant, and nearly impermeable, making them ideal for bathrooms and busy kitchens.
LVT offers warmer feel, easier installation, and better sound absorption.
Choose tile for longevity and water resistance; pick LVT for comfort, design flexibility, and simpler upkeep.
LVT vs. Sheet Vinyl
Both LVT and sheet vinyl give you resilient, water-friendly flooring, but they differ in construction, appearance, and durability. You’ll choose LVT for realistic plank/tile visuals and greater scratch resistance; sheet vinyl suits tight budgets and seamless installs. Consider wear layer, texture, cost, and repairability when deciding.
| Feature | LVT | Sheet Vinyl |
|---|---|---|
| Look | High realism | Simple prints |
| Durability | Higher | Moderate |
| Price | Higher | Lower |
| Repair | Individual tile | Whole sheet |
Benefits and Drawbacks of LVT
You’ll find LVT offers big advantages—durability, attractive visuals, strong water resistance, and a lower price point than many alternatives.
At the same time, be aware of common limitations like surface indentations from heavy furniture, potential VOC emissions, and sensitivity to prolonged heat.
We’ll weigh these pros and cons so you can decide if LVT fits your needs.
Key advantages (durability, aesthetics, water resistance, cost)
Durability, style, water resistance and cost are the four reasons many homeowners choose luxury vinyl tile (LVT); together they tell you what LVT does well and where it may fall short.
You get scratch- and stain-resistant surfaces, realistic wood or stone visuals, reliable moisture protection for kitchens and baths, and affordable installation and replacement compared with natural materials—making LVT a practical, attractive choice.
Common limitations (indentation, VOC concerns, heat sensitivity)
While LVT handles everyday wear well, it does have some limitations you should know about:
- It can indent under heavy furniture or high heels without proper pads.
- Some products emit VOCs initially; ventilate after installation.
- Prolonged sun exposure may fade patterns.
- Excessive heat can warp or soften planks.
- Repairing deep gouges can be difficult; replacement may be needed.
Buying Guide How to Choose the Right LVT
When choosing LVT, you’ll want to match the product to the room’s use, traffic, moisture level, budget, and style.
Look at wear layer thickness and AC ratings, pick the right core (WPC, SPC, or flexible), and compare finishes, textures, and edge profiles.
I’ll also recommend specific specs for kitchens, bathrooms, basements, and commercial spaces so you can make an informed choice.
Key decision factors (room use, traffic, moisture, budget, style)
Because each room has different needs, you should weigh five key factors—room use, foot traffic, moisture exposure, budget, and style—before picking LVT.
Consider durability for busy zones, waterproof options for baths and basements, and budget limits that affect plank quality.
Match color, texture, and installation type to your décor and maintenance tolerance so the floor performs and looks right for years.
Interpreting wear layer thickness and AC ratings
Think of the wear layer and AC rating as a floor’s defensive shield: the wear layer thickness tells you how much protective material sits between traffic and the design layer, and the AC rating indicates its overall abrasion resistance under real-world use.
You’ll choose thicker wear layers (20–30 mil+) and higher AC ratings for busy areas; thinner layers suit low-traffic rooms to save money.
Selecting proper core type (WPC vs SPC vs flexible)
Which core suits your home and habits?
You’ll choose WPC for cushioned comfort and excellent warmth underfoot, ideal for living areas and basements.
Pick SPC for extreme rigidity, heavy-traffic durability, and better dent resistance in kitchens or entryways.
Flexible vinyl works for tight budgets and uneven subfloors or DIY installs.
Match core to traffic, subfloor conditions, and comfort preferences.
Finishes, textures, and edge profiles to consider
Now that you’ve matched core type to room and lifestyle, you’ll want to focus on the surface—the finish, texture, and edge profile determine look, grip, and how seams read in a space.
Choose matte or gloss for sheen; embossed textures for realism and slip resistance; and micro-bevel, beveled, or square edges to control seam visibility.
Test samples under your lighting before buying.
Recommended specifications for different rooms (kitchen, bathroom, basement, commercial)
When you pick LVT for a specific room, match durability, water resistance, and wear layer to the space’s demands:
- Kitchen: 20–22 mil wear layer, waterproof core, slip-resistant finish
- Bathroom: 20+ mil, fully waterproof, tight seams
- Basement: 12–20 mil, waterproof or moisture barrier, floating or glued
- Living areas: 12–20 mil, moderate wear layer
- Commercial: 28+ mil, heavy-duty wear layer, commercial warranty
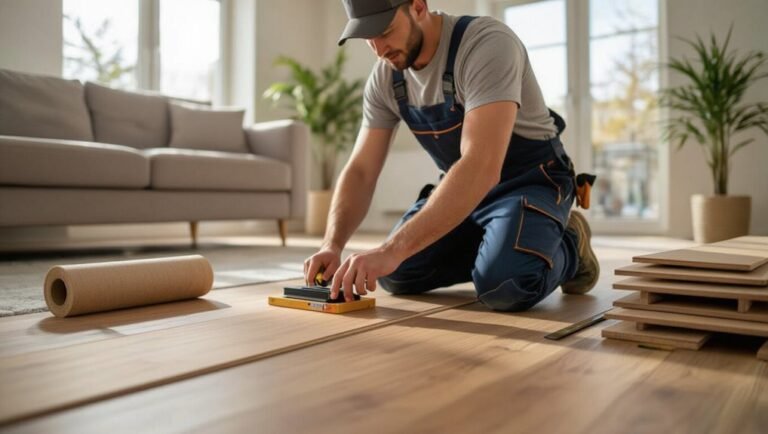
Installation Overview Methods, Steps, and Considerations
You’ll choose from several LVT installation methods—floating click-lock, glue-down, loose-lay, or peel-and-stick—based on room use and subfloor condition.
Follow a clear checklist (prep, acclimate, level, lay out, trim, finish) and have the right tools and materials on hand.
If your subfloor needs major repair, the layout is complex, or you’re not comfortable with precise cuts and adhesives, hire a pro; otherwise many homeowners can tackle a DIY install.
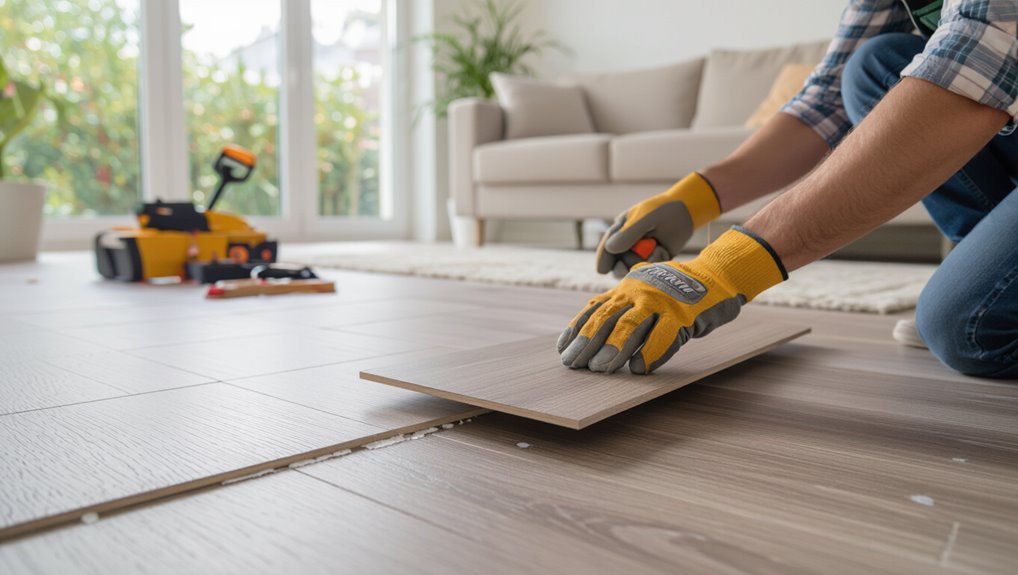
Installation options (floating click-lock, glue-down, loose-lay, peel-and-stick)
Choosing the right installation method for luxury vinyl tile (LVT) affects durability, comfort, and cost, so you’ll want to match the technique to your subfloor, traffic, and long-term plans.
Floating click-lock is DIY-friendly and tolerates minor subfloor imperfections.
Glue-down offers firm adhesion and sound control.
Loose-lay suits quick installs and rentals.
Peel-and-stick is cheapest for small areas but less durable.
Step-by-step installation checklist (preparation, acclimation, leveling, layout, trimming, finishing)
After picking the best installation method for your space, get organized with a clear step-by-step checklist so the actual installation goes smoothly and finishes correctly.
Clear and clean the subfloor, remove trim, and repair damage. Acclimate tiles per manufacturer’s time.
Check and level the substrate. Plan layout and chalk lines.
Cut and fit tiles, trim edges, install thresholds, and clean up for final inspection.
Tools and materials needed
Tools and materials form the backbone of a successful luxury vinyl tile installation, so gather them before you begin: utility knife with spare blades, straightedge, tape measure, chalk line, carpenter’s square, rubber mallet, tapping block, pull bar, spacers, adhesive or click-lock manufacturer-recommended products, primer/underlayment, moisture meter, level, floor patch/compound, caulk, threshold strips, safety gear (gloves, knee pads, eye protection), and a shop vacuum.
When to hire a professional vs. DIY
Now that you’ve gathered the right tools and materials, decide whether you’ll take this on yourself or hire a pro.
Assess your skill, time, budget, and room complexity. DIY saves money but risks mistakes; pros guarantee warranty, speed, and quality.
Choose based on confidence and project scale.
- Skill level
- Time available
- Budget constraints
- Room complexity
- Warranty needs
Maintenance, Repair, and Longevity
To keep your luxury vinyl tile looking its best, you’ll want a simple routine for cleaning, quick stain removal, and steps to prevent damage like using furniture pads, entry mats, and controlling humidity.
If scratches, dents, or loose tiles occur, you can often repair individual planks or use manufacturer-recommended kits.
Finally, understand typical lifespans and warranty terms so you know when repairs make sense versus replacement.
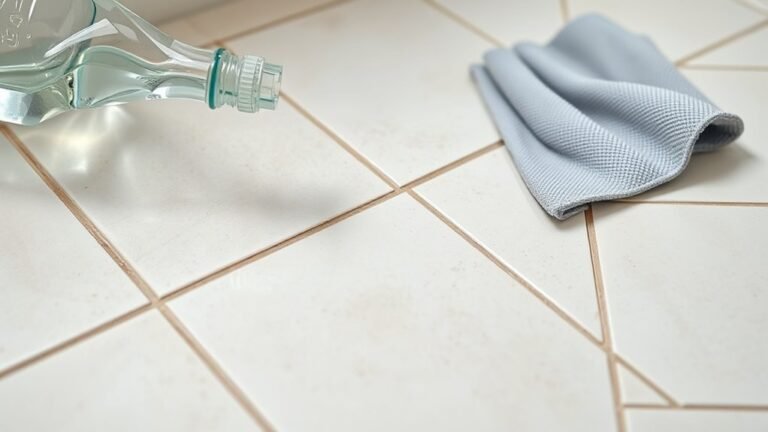
Routine cleaning and stain removal
Keep dirt and spills from becoming permanent by cleaning your luxury vinyl tile regularly and tackling stains as soon as they appear.
Sweep or vacuum weekly, damp-mop with a manufacturer-approved cleaner, and blot spills immediately.
For stubborn marks, use a soft cloth with a gentle, nonabrasive cleaner or a baking soda paste.
Rinse and dry thoroughly to prevent residue and dulling.
Preventing damage (furniture pads, mats, humidity control)
A few simple precautions will greatly extend your luxury vinyl tile’s life: use felt or rubber furniture pads to prevent scratches, place entry mats to trap grit, and control indoor humidity to avoid warping or loose seams.
Wipe spills promptly, avoid dragging heavy items, and use soft casters on chairs.
Monitor humidity with a hygrometer and use humidifiers or dehumidifiers as needed.
Repair options for scratches, dents, and loose tiles
Small scratches, dents, and the occasional loose tile are usually repairable without replacing your entire floor.
For scratches, use a vinyl repair kit, colored filler, or clear coat; buff fine marks gently.
For dents, warm the area and press back or use a filler.
For loose tiles, reapply adhesive or use click-lock repair methods.
Test products in an inconspicuous spot first.
Expected lifespan and warranty considerations
When properly installed and maintained, luxury vinyl tile (LVT) can last 10 to 25 years or more.
However, your actual lifespan will depend on traffic, sunlight exposure, maintenance habits, and the product’s wear layer.
Check warranties for coverage length, commercial vs. residential use, water and fade protection, and transferability.
Keep receipts, follow care instructions, and register your product to guarantee claims are honored.
Common Mistakes and How to Avoid Them
When installing luxury vinyl tile, you’ll want to avoid a few common mistakes that can shorten its life and performance.
Don’t skip proper subfloor prep, pick a wear layer that’s too thin for your traffic, install in spaces with unstable temperature or moisture, or use harsh cleaners that damage the finish.
Below I’ll explain how to prevent each of these problems.
Mistake 1: Skipping subfloor preparation
Although it might seem like an extra step, skipping proper subfloor preparation will cost you time and money down the road; you’ll face uneven tiles, loose seams, and premature wear if you don’t remove debris, level high or low spots, and verify moisture levels are within the manufacturer’s limits.
Inspect the substrate, repair damage, sand high spots, fill low areas, and confirm flatness and dryness before installation.
Mistake 2: Choosing insufficient wear layer for traffic
Traffic wear matters—pick a too-thin wear layer and your LVT will show scratches, dents, and fading far sooner than expected.
You should match wear-layer thickness to room use: heavier (20 mil+) for commercial or busy homes, 12–20 mil for active residential areas, and lower only for light-use spaces.
Check warranty and abrasion ratings to guarantee long-term durability.
Mistake 3: Installing in improper environments (temperature/moisture)
If you install LVT in a space with the wrong temperature or excess moisture, you’ll almost certainly face buckling, gaps, or adhesive failure down the line.
You should acclimate planks, verify subfloor moisture with a meter, and maintain manufacturer-recommended temperature and humidity ranges during and after installation.
Ignore these limits and you’ll pay for repairs; follow them and flooring will perform as designed.
Mistake 4: Using harsh cleaners or improper maintenance
When you clean LVT with bleach, ammonia, or abrasive scrubs, you’ll strip protective coatings and dull the finish, shortening the floor’s lifespan; instead use pH-neutral cleaners recommended by the manufacturer and soft tools like microfiber mops to keep the surface looking new.
Wipe spills promptly, avoid steam cleaners and waxes, and place felt pads under furniture to prevent scratches and long-term damage.
Cost, Value, and Return on Investment
You’ll want to know typical cost ranges for LVT, from budget planks to premium tiles and what you’ll pay to have them installed.
Compare those upfront costs plus expected lifespan and maintenance to alternatives like hardwood or ceramic to judge lifecycle value.
Also consider how LVT’s look and durability can boost staging appeal and potentially improve resale return.
Typical cost ranges (materials and installation)
Expect to pay roughly $2 to $7 per square foot for luxury vinyl tile (LVT) materials and another $1.50 to $5 per square foot for professional installation.
Total project costs commonly land between $3.50 and $12 per square foot depending on grade, plank size, underlayment needs, and site prep.
You’ll pay more for thicker wear layers, realistic visuals, and precision installation; DIY can cut labor but needs skill.
Comparing lifecycle cost vs alternatives
Although LVT can cost more upfront than basic sheet vinyl, it often delivers lower lifecycle costs than hardwood, ceramic tile, or high-end laminates because of its durability, low maintenance, and easier replacement of damaged planks.
You’ll save on refinishing, grout repair, and moisture mitigation. Over time, reduced maintenance, longer wear layers, and simpler spot replacement improve total cost of ownership and ROI.
How LVT affects home resale and staging
Having lower lifecycle costs makes LVT attractive to buyers and staging professionals, but its real impact shows up when you put a home on the market.
You’ll boost curb appeal with consistent, modern visuals that photograph well, helping listings stand out.
Because LVT’s durability minimizes visible wear, buyers perceive value and expect lower post-purchase expenses, often improving offers and reducing time on market.
Environmental and Health Considerations
When you’re choosing LVT, consider indoor air quality, recycling options, and the material’s overall sustainability.
Look for certifications like FloorScore and GREENGUARD to limit VOC exposure and verify performance.
Also check disposal pathways and responsible sourcing to reduce environmental impact.
VOCs, recycling, and sustainability of LVT
Because LVT is a synthetic product, you’ll want to understand how it affects indoor air and the environment over its life cycle: VOCs released after installation can impact indoor air quality, and end-of-life disposal or recycling determines its broader environmental footprint.
You should air spaces during and after installation, choose products with lower emissions, ask about recycled content, and plan for responsible disposal or take-back options.
Certifications to look for (FloorScore, GREENGUARD)
You’ve taken steps to limit VOCs and consider end-of-life impacts; now look for third-party certifications that verify those claims.
Check FloorScore for low indoor-air emissions and GREENGUARD for chemical emissions compliance. Both indicate independent testing and stricter limits than many standards.
Also note product-specific reports and certification scope—room, building, or product—to guarantee the label matches your installation and health priorities.
Disposal and responsible sourcing
As you plan for a new luxury vinyl tile installation, consider both how the product was sourced and where it’ll go at end of life—these choices shape its true environmental and health footprint.
Choose manufacturers using recycled content, transparent supply chains, and responsible PVC practices.
Ask about take-back programs, recycling options, and local disposal rules. Proper selection and end-of-life planning reduce landfill impact and potential toxin release.
Case Examples and Use Scenarios
When choosing LVT, you’ll want options that stand up to kids, pets, and heavy daily wear in high-traffic family homes.
For rentals and multi-family units, pick durable, low-maintenance products that are easy to repair or replace between tenants.
In commercial settings, LVT’s toughness and design versatility make it a smart choice for retail, offices, and hospitality spaces.
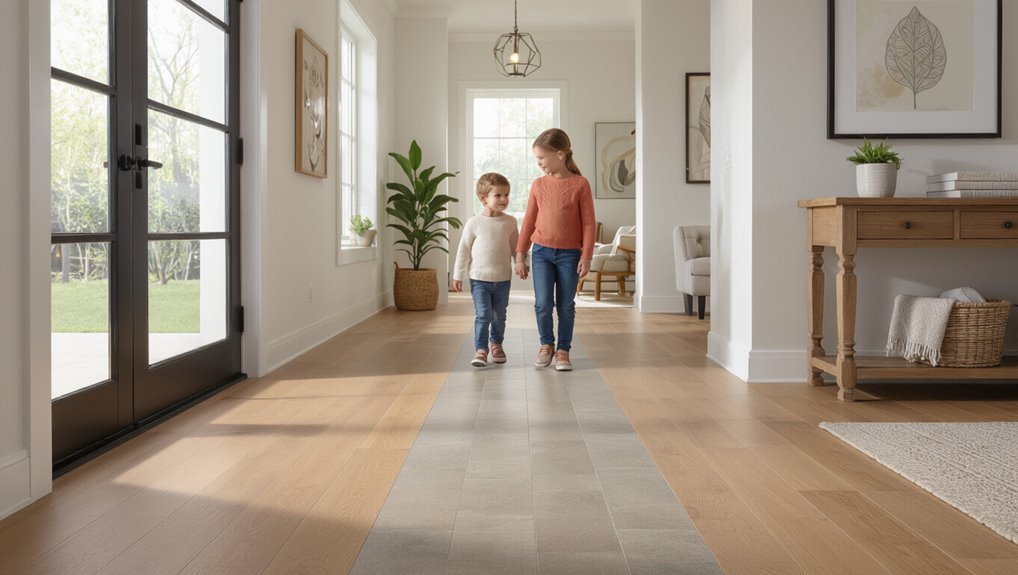
Best LVT solutions for high-traffic family homes
Families with busy lives need flooring that stands up to spills, pets, and constant foot traffic—Luxury Vinyl Tile (LVT) delivers durability, easy maintenance, and realistic aesthetics all in one.
Choose 20–30 mil wear layers, waterproof cores (WPC/SPC), and textured finishes for slip resistance. Opt for wide planks and neutral patterns to hide wear; pair with quality underlayment for sound control and comfort.
LVT in rentals and multi-family units
Consider LVT your go-to choice for rentals and multi-family units: it’s durable, waterproof, and easy to maintain, which cuts turnover time and long-term costs.
You’ll appreciate quick cleanups after tenants move, scratch resistance that survives pets and furniture, and design options that fit varied unit styles.
Installation is fast, reducing vacancy days, and repairs are simple without replacing whole floors.
Commercial applications that benefit from LVT
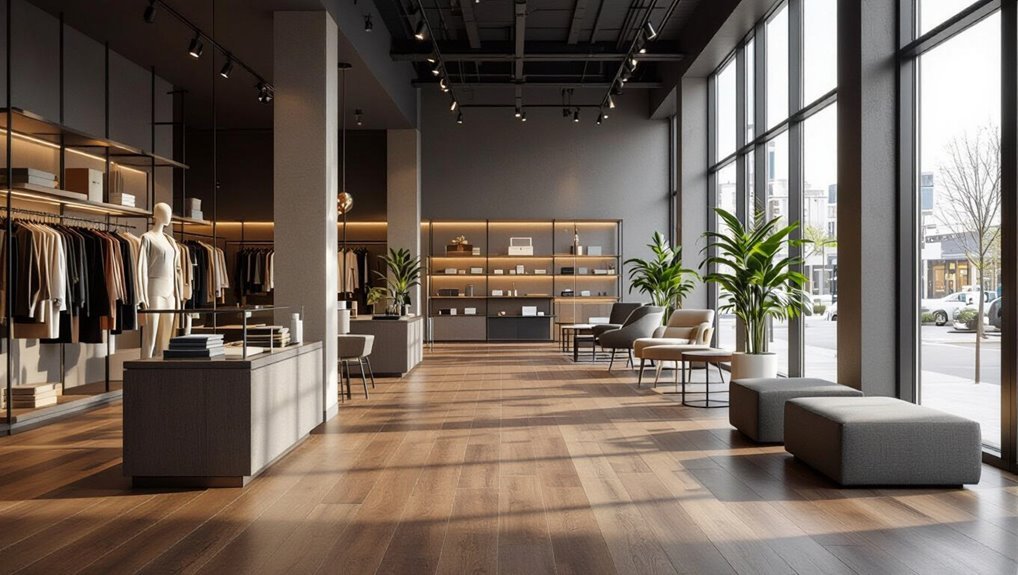
Rentals and multi-family units show how LVT handles heavy use, and that same resilience makes it a smart pick for many commercial spaces.
You’ll find it in retail, hospitality, offices, medical clinics, and schools — anywhere you need durable, low-maintenance flooring that still looks upscale.
It resists spills, cleans easily, and reduces downtime during installs or repairs, saving time and money.
FAQs
You’ve probably got questions about waterproofing, installation over existing floors, and how LVT’s lifespan compares to hardwood or tile.
You’ll also want to know if it’s suitable for bathrooms and basements and how to match color and texture to your decor.
We’ll answer each of these clearly so you can pick the right LVT for your space.
Is luxury vinyl tile waterproof?
Wondering if luxury vinyl tile (LVT) is waterproof?
Most LVT is water-resistant and many plank/tile products are fully waterproof thanks to sealed cores and waterproof wear layers.
That makes them suitable for kitchens, bathrooms, and basements.
You should still protect seams, use proper underlayment, and follow manufacturer installation and maintenance guidelines to prevent moisture intrusion and warranty issues.
Can LVT go over existing flooring?
If you liked that LVT handles moisture well, you’ll be glad to know it can often be installed over existing flooring—saving time and labor—provided the current floor is flat, dry, and securely attached.
You should remove loose tile, repair high or low spots, and confirm adhesives or seams won’t telegraph.
Some manufacturers require specific underlayments or height limits, so check installation guidelines first.
How long does LVT last compared to hardwood or tile?
How long LVT lasts compared to hardwood or tile depends on product quality, installation, and traffic—expect 10–25 years for residential-grade LVT and 20–30+ years for higher-end, commercial-grade planks when cared for properly.
You’ll find hardwood can last decades longer with refinishing, while ceramic or porcelain tile often outlasts both.
Routine cleaning, prompt repairs, and protective measures extend LVT’s lifespan.
Is LVT a good choice for bathrooms and basements?
Because it’s waterproof and durable, LVT often makes an excellent choice for bathrooms and basements; it stands up to moisture, resists stains, and provides a warmer, softer feel underfoot than tile.
You’ll want proper subfloor prep and a recommended underlayment for basements to control humidity and prevent movement.
Choose quality wear layers for high-traffic areas and routine cleaning to keep it looking new.
How do I match LVT color and texture to my decor?
Now that you know LVT works well in moisture-prone rooms like bathrooms and basements, you’ll want to match its color and texture to your overall decor so the floor feels like a designed element, not an afterthought.
Choose tones that complement walls and furniture—warm woods for cozy spaces, cool grays for modern rooms.
Test samples under your lighting and consider plank width and embossing for cohesion.