Should You Install Cabinets Before or After Flooring? The Right Order
You’ll usually install cabinets before flooring in new builds and many remodels because it makes plumbing, appliance placement, and a clean fit easier, but there are important exceptions. Floating floors, moisture-barrier warranty rules, and some frameless or full-overlay cabinet styles often require flooring first. Consider your floor type, cabinet method, and warranties, and coordinate trades to avoid gaps or voided guarantees—keep going to get the exact step-by-step guidance and scenario-specific tips.
Quick Answer Should You Install Cabinets Before or After Flooring?
For most kitchen projects, you’ll install cabinets first and then run flooring up to them for a cleaner look and easier cabinet placement.
There are exceptions—certain flooring types like floating floors and some cabinet styles with toe-kicks may mean you put flooring in first.
Consider your floor material and cabinet design to pick the right order for your job.
Short verdict for most situations
While some pros prefer installing cabinets first to set exact cabinet heights and avoid cutting finished floors, in most typical remodels you’ll install cabinets before laying flooring—then run the floor up to the cabinet toe-kick or use a removable filler strip so you can replace the floor later without rehabbing the cabinets.
Exceptions based on flooring type and cabinet style
Although most jobs call for cabinets first, certain floor types and cabinet styles change the rule — you’ll sometimes want to lay flooring first to protect delicate surfaces, match visible edges, or accommodate floating floors that need uninterrupted expanses.
For instance, sheet vinyl, stone, or intricate tile often go before cabinets, while floating laminate requires full-room continuity; tall base cabinets may allow floor-to-cabinet overlaps.
Basic Understanding Why Order Matters
You’ll want to understand how the installation order affects fit, finish, and long-term durability so cabinets and flooring meet properly.
It also influences warranties, moisture barriers, and how level the finished floor will be.
Finally, the order can change labor time and costs, so knowing the trade-offs helps you make a practical choice.
How installation order affects fit, finish, and longevity
Because the sequence you choose changes how components meet and age, installation order directly shapes fit, finish, and longevity.
If you install cabinets first, you get tight, stable joints and cleaner baseboard connections; flooring-first can allow seamless runs but risks awkward cabinet gaps.
Your choice affects movement tolerance, edge protection, and future repairs, so pick the approach that suits material behavior.
Impact on warranties, moisture barriers, and leveling
When you pick the installation order, you also shape warranty coverage, moisture protection, and how level the finished floor will be—so don’t treat those details as afterthoughts.
Choose flooring-first to maintain continuous moisture barriers and meet manufacturer clearance requirements, protecting warranties.
Choose cabinet-first only if you’ll level subfloor junctions carefully and document barrier overlaps, since incorrect sequencing can void guarantees and invite moisture issues.
Cost and labor implications
Budget and schedule hinge on the installation order, so decide early whether you want flooring or cabinets first.
Choosing cabinets-first can cut labor by letting installers set cabinet-to-floor alignment without trimming, but you may pay to protect flooring during work.
Flooring-first reduces trim work but may raise cabinet installation time and costs.
Factor contractor rates, sequencing, and potential rework into your budget.
Key Factors That Determine the Best Order
You’ll want to weigh several practical factors before choosing the order: the type of flooring and how it’s installed, the cabinet style and mounting method, and the condition and level of the subfloor.
Also consider whether this is a new build, full remodel, or spot replacement, along with local codes and manufacturer instructions that may mandate a specific sequence.
Balancing those points will help you pick the cleanest, most code-compliant approach.
Flooring types and their installation constraints
Which flooring you choose affects whether cabinets go on top or around them, so you’ll want to reflect on the constraints of each material.
Solid hardwood often needs expansion gaps and is usually installed after cabinets, while engineered hardwood can be more forgiving.
Floating laminate and LVP/LVT require perimeter space and often work best installed after cabinets are set.
Tile and sheet vinyl have different underlayment and edge requirements that can dictate if you run the floor under cabinets or stop at their base.
Hardwood (solid vs engineered)
When deciding whether to install cabinets before or after hardwood, know that solid and engineered planks behave differently and those differences affect sequencing. You’ll often install cabinets first with engineered for stability, but solid may need room for seasonal movement and full runs. Choose by moisture control, subfloor prep, and trim plan.
| Type | Movement | Cabinet timing |
|---|---|---|
| Solid | High | Often after |
| Engineered | Low | Often before |
Laminate and floating floors
If solid and engineered hardwood influence cabinet timing because of movement and attachment methods, laminate and other floating floors bring a different set of constraints you should weigh.
You’ll usually install floating floors after cabinets to run planks under toe kicks for a seamless look and consistent expansion gaps.
But you can fit cabinets on top if you want easier replacement; just plan connections and moisture protection.
Tile (ceramic, porcelain, natural stone)
Because tile is rigid and usually bedded in mortar, it changes the best cabinet-flooring order: you’ll typically install cabinets before laying ceramic, porcelain, or natural stone so you can set tile right up to or under cabinet edges, account for grout joints, and avoid cutting awkward junction pieces later.
You’ll also protect recessed toe kicks, run backerboard edges under cabinets, and plan changes and clearances precisely.
Vinyl (LVP/LVT, sheet vinyl)
Vinyl flooring—both luxury vinyl plank/tile (LVP/LVT) and sheet vinyl—usually gives you more flexibility than tile, so you can often install cabinets either before or after the floor depending on the product and your tolerance for visible seams.
If you want continuous flooring, run it under cabinets; for quicker cabinet installs or floating LVP, set cabinets first and butt the vinyl to the toe kick.
Cabinet types and installation methods
Whether you have framed or frameless cabinets will affect how snug they sit against walls and flooring, so you’ll want to factor that in.
Full-overlay doors, toe-kicks, and built-in units each have different clearances and finishing needs that can change whether cabinets should go before or after the floor.
Consider the cabinet style and installation method early so you can choose the installation order that minimizes cutting, gaps, and rework.
Framed vs frameless cabinets
When you’re deciding whether to install cabinets before or after flooring, the cabinet style—framed or frameless—plays a big role in that choice.
Framed cabinets offer forgiving installation; you can set them on the subfloor and float flooring to meet the face frame.
Frameless cabinets need precise floor-to-ceiling alignment and typically require flooring first to guarantee tight gaps and consistent reveal.
Full-overlay, toe-kick, and built-in units
Because cabinet face styles and base details affect how tightly they must meet the floor, full-overlay, recessed toe-kick, and built-in units each push you toward a different installation order.
You’ll install full-overlay after flooring for seamless reveal, set toe-kick cabinets on finished floors to align gaps, and fit built-ins to final floor heights so countertops, trim, and appliances sit flush without awkward shimming.
Subfloor condition and leveling requirements
If your subfloor is uneven, damaged, or soft in spots, you’ll want to address those issues before installing cabinets so the finished layout sits flat and functions properly.
Check for rot, squeaks, and deflection; replace or sister joists as needed. Level high and low areas with patching compound or plywood underlayment.
A stable subfloor prevents cabinet misalignment and future failures.
Renovation scope: new build, remodel, or partial replacement
Addressing subfloor problems first sets the stage for deciding whether you’ll install cabinets before or after flooring, but the overall project type—new build, full remodel, or partial replacement—largely determines the best order.
In a new build you can install cabinets before flooring for precise fit.
In full remodels you usually lay flooring first.
Partial replacements require case-by-case choices to match existing materials.
Local building codes and manufacturer recommendations
When you decide whether to install cabinets before or after flooring, check local building codes and manufacturer recommendations first, since they can dictate clear requirements—like minimum clearances, moisture barriers, or installation sequencing—that affect both safety and warranties.
You should follow code and product guidelines to avoid voiding warranties, failing inspections, or creating moisture and clearance issues, and document approvals before work begins.
Primary Recommendation Best Practices by Scenario
For new construction, you’ll usually install cabinets first so plumbers and electricians can finalize rough-ins and flooring can be fitted afterward for a perfect finish.
In a full kitchen remodel it’s often best to set cabinets before flooring to guarantee cabinet heights and appliance clearances are exact, while for partial remodels or when you’re only replacing floors you can lay new flooring up to the cabinet line to save time and money.
I’ll also explain when it makes sense to run flooring under cabinets versus butting it to the cabinet line based on budget, future flexibility, and resale considerations.
New construction: cabinets first vs flooring first
Because you’re starting from a clean slate in new construction, it usually makes the most sense to install cabinets first: that lets you set fixed lines for countertops, plumbing, and appliances, then run and finish flooring up to cabinet edges for a seamless look and simpler changes.
You’ll protect cabinets during flooring work, avoid tricky scribing, and guarantee precise appliance clearances and finished connections throughout the space.
Full kitchen remodel: recommended order and rationale
If you’re gutting and reconfiguring a kitchen, the best practice is to install cabinets first, then finish the flooring up to the cabinet bases—this approach lets you lock in precise appliance fits, set plumbing and electrical rough-ins to exact locations, and avoid the hassle of scribing or damaging finished floors during cabinet installation.
You’ll then float or tuck flooring against cabinets for a clean, durable finish.
Partial remodel or replacing flooring only
When you’re only replacing the floor or doing a limited kitchen update, installing new flooring before re-hanging or adjusting cabinets usually gives the cleanest, most economical result—this lets you run continuous planks or tiles under cabinets for future flexibility, avoids awkward reveal strips, and keeps finished flooring intact if you need to remove or shift cabinetry later.
Do the flooring first, then reinstall or trim cabinets to fit.
When to install flooring under cabinets vs up to cabinet line
Moving floor under cabinets usually makes sense for long-term flexibility, but there are clear situations where you should stop flooring at the cabinet line instead.
You’ll weigh cost, future layout changes, and moisture concerns. Choose under-cabinet when replacing subfloor or planning new cabinet positions; stop at line for short remodels, floating floors, or water-prone zones.
- Cost control
- Flex flooring
- Moisture risk
- Future layout
Step-by-Step Guides
Now you’ll get clear, step-by-step instructions for each approach: installing cabinets before flooring, installing flooring before cabinets, and a hybrid method that leaves flooring under perimeter cabinets.
I’ll walk you through the key prep, sequencing, and common pitfalls for each so you can pick the right method.
Follow the steps closely to avoid gaps, height mismatches, and costly rework.
Step-by-step: Installing cabinets before flooring
Start by prepping the room and marking cabinet layout so everything fits and plumbing/electrical lines are accessible.
Fasten and level the base cabinets securely to the wall and to each other, checking with a long level and shims as needed.
Finally, run your flooring up to the exposed cabinet edges, leaving the correct expansion gap before installing toe kicks or trim.
Prep and layout
Before you set anything in place, take time to prep the room and lay out your cabinet plan so installations go smoothly.
Clear the space, remove trim where needed, and mark stud locations and plumbing/electrical lines.
Snap chalk lines for base and upper cabinet placement, verify dimensions against your plans, and position cabinet boxes dry to confirm fit before proceeding to fastening and adjustments.
Securing cabinets and ensuring level
Level and secure your cabinets carefully to prevent gaps, uneven doors, and problems when the flooring goes in later.
Shim base cabinets to true, check with a long level and straightedge, and fasten to studs through the face frame or mounting rail.
Verify plumb on uppers, clamp adjoining cabinets, and screw through common rails for a continuous, stable run before proceeding.
Installing flooring up to exposed cabinet edges
With your cabinets squared, shimmed, and fastened, you can move on to fitting the flooring up to their exposed edges.
Measure gaps, cut planks precisely, and dry-fit pieces for tight seams.
Leave a small expansion gap against cabinet bases, cover it with quarter-round or a reducer later, and work outward to guarantee a clean shift and consistent pattern across the room.
Step-by-step: Installing flooring before cabinets
Start by prepping the room and laying out your flooring pattern so you know where cabinets will sit.
After the floor is down, protect finished surfaces with thick rosin paper or taped boards while you set and fasten cabinets.
Finally, plan to trim cabinet bases or toe kicks to match the finished floor height for a tight, professional look.
Prep and layout
Before you lay a single plank, map out the room and check surfaces so your flooring runs straight and meets cabinet lines cleanly.
Measure cabinet footprints, mark reference lines, and determine expansion gaps.
Remove trim and appliances, level subfloors, and repair low spots.
Plan threshold strips and door clearances.
Confirm material layout to minimize narrow edge cuts along visible cabinet faces.
Protecting finished flooring during cabinet install
If you’ve already installed the flooring, protect it during cabinet installation by creating a durable, low-profile barrier that keeps scratches, dents, and spills at bay.
Lay rosin paper or reinforced kraft sheeting taped at seams, add thin plywood or Masonite paths where heavy cabinets will move, and use felt pads under jacks and tool bases.
Remove debris frequently to prevent gouges.
Trimming cabinets for finished floor height
When your new floor is in place, trim the base of your wall and cabinet boxes so they sit squarely and leave the correct reveal for the finished flooring; measure final floor height, mark cabinet toe kick and base, remove material with a circular saw or plane, dry-fit cabinets, adjust shims for level, and verify clearances for doors, toe-kicks, and appliances before final fastening.
Hybrid approach: partial flooring under perimeter cabinets
A hybrid approach—installing full flooring throughout the room but tucking a slim strip or underlayment under perimeter cabinets—lets you combine clean sightlines with cabinet stability; you’ll get easier cabinet placement and a continuous floor appearance without wasting expensive material under heavy cabinetry.
Measure cabinet bases, leave a 1/8–1/4″ reveal for expansion, fasten cabinets to shims on subfloor, and lay trim to hide the joint.
Comparison Pros and Cons
You’ll want to weigh the trade-offs of each approach so you can pick what fits your budget and timeline. Below is a quick comparison to help you spot the major pros and cons at a glance. Use this to guide questions you’ll ask your contractor or to plan your DIY sequence.
| Option | Key points |
|---|---|
| Cabinets before flooring — Pros | Easier cabinet leveling; less trim work; protects floor edges |
| Cabinets before flooring — Cons | Flooring gaps behind cabinets; harder to replace floors later |
| Flooring before cabinets — Pros | Seamless floor under cabinets; cleaner final look |
| Flooring before cabinets — Cons | Risk of cabinet damage during installation; tricky cabinet height adjustments |
Pros of installing cabinets before flooring
Although some installers prefer laying flooring first, putting cabinets in before the floor gives you more control over layout and saves time during installation; contractors can set cabinet heights precisely and fasten them directly to the subfloor without worrying about trimming or undercutting finished planks.
You’ll reduce damage risk to new flooring, simplify plumbing and electrical rough-ins, and guarantee stable, perfectly aligned cabinetry from the start.
Cons of installing cabinets before flooring
While installing cabinets first can speed things up and protect new flooring, it also creates drawbacks you should weigh.
You’ll lose flexibility for future flooring upgrades, risk uneven junctions where cabinets meet finished floors, and face potential moisture or pest gaps under toe kicks.
Repairs or replacements become harder and costlier, and precise leveling for seamless flooring lines gets constrained.
Pros of installing flooring before cabinets
Because flooring runs uninterrupted beneath cabinets, installing it first creates a cleaner, more professional look and gives you flexibility for future remodels.
You’ll enjoy seamless changes, easier matching across rooms, and fewer visible seams. It also simplifies precise leveling and reduces trip hazards.
When cabinets go in afterward, installers can scribe and trim cabinets to fit perfectly over the finished floor.
Cons of installing flooring before cabinets
You’ll get that seamless look if you lay flooring first, but there are definite downsides to contemplate.
You’ll spend more on extra material for seams under cabinets, risk damage during cabinet installation, and complicate future cabinet replacement or repairs.
Connecting thresholds and appliance fits can be tricky, and installers may need precision cutting.
Common Mistakes and Problems to Avoid
Watch out for a few common mistakes that can cost time and money: cutting flooring too short, missing expansion gaps or shifts, and poor leveling that throws off cabinet alignment.
Don’t ignore manufacturer guidelines or you could void warranties, and always plan for moisture protection to prevent water damage.
Addressing these issues up front will save you headaches during installation.
Cutting flooring too short or leaving gaps
When installers cut flooring too short or leave inconsistent gaps, you’ll end up with visible seams, weak joints, and places where dirt and moisture can collect.
You should measure carefully, fit boards snugly without forcing them, and double-check cuts around cabinets.
Fix gaps with proper filler or replace miscut pieces; don’t rely on trim to hide structural mistakes that compromise durability and appearance.
Not accounting for expansion gaps and transitions
If you skip proper expansion gaps and shifts, your new floor can buckle, warp, or separate as humidity and temperature change.
You need to plan clear perimeter gaps and junction strips where flooring meets cabinets, thresholds, or different materials.
Don’t compress boards against fixed edges or trim. Allow movement, follow manufacturer specs, and install flexible junctions so floors can expand and contract without damaging cabinets or finishes.
Leveling errors that affect cabinet alignment
Because cabinets sit on or against the floor, even small leveling mistakes will throw off door gaps, drawer operation, and countertop alignment.
So you need to catch and correct uneven subfloors before setting cabinetry. Check with a long level and straightedge, shim low spots, and sister joists where needed.
Don’t assume small ripples won’t cause binding or uneven countertops.
Voiding warranties by ignoring manufacturer guidelines
Unless you follow the manufacturer’s installation guidelines exactly, you can easily void cabinet and flooring warranties—so read the specs, document conditions like moisture levels and acclimation times, and stick to recommended fasteners and clearances.
If you alter installation order, use non‑approved adhesives, or skip specified expansion gaps, the maker can deny claims.
Keep records, photos, and receipts to support any future warranty requests.
Moisture and water damage issues
When water reaches the wrong places, it can quickly ruin both cabinets and floors, so you need to spot and prevent moisture risks early.
Check plumbing, appliances, and seals before installing; route flooring to allow drainage and drying.
If you install cabinets first, leave gaps and vapor barriers.
If flooring goes in first, protect edges and raise cabinets off wet-prone areas.
Prevention and Best Practices
Before you start, run through a clear pre-installation checklist and mock up measurements to confirm cabinet and flooring fit.
Protect finished floors during cabinet work, keep the flooring and cabinet trades in close communication, and decide whether the job needs a pro or is a DIY match for your skills.
These steps cut mistakes, save money, and keep the project on schedule.
Pre-installation checklist for homeowners and contractors
Although you might be enthusiastic to start, take a moment to walk through a concise pre-installation checklist to avoid costly mistakes:
- Verify permits, plans, and cabinet layout match local codes and scope.
- Confirm subfloor condition, levelness, and moisture readings.
- Label deliveries, inspect cabinets for defects, and stage materials out of work paths.
- Coordinate trades, schedule sequencing, and agree on cleanup and protection responsibilities.
Measuring and mock-ups to confirm fit
Now that permits, plans, and materials are checked, confirm measurements and create simple mock-ups to catch fit issues early.
Measure wall lengths, appliance openings, and clearances twice. Build cardboard or plywood templates of cabinets, toe kicks, and appliances to test alignment and door swings.
Note plumbing, electrical, and vent locations. Adjust plans before final installation to avoid costly rework.
Protecting finished flooring during cabinet installation
When you’ve decided to install cabinets over finished floors, take proactive steps to shield the surface from scratches, dents, and spills.
Lay rosin paper or reinforced builder board, tape seams with low‑residue tape, and place plywood sheets where heavy cabinets rest.
Use felt pads under tools, avoid dragging items, and contain debris.
Clean spills immediately and inspect flooring daily for damage.
Communication between flooring and cabinet trades
Because misaligned schedules and misunderstood tolerances can cost time and money, you should establish clear communication between flooring and cabinet trades from day one.
Share drawings, measurements, finish schedules, and gap tolerances. Coordinate sequencing, protect completed work, and confirm who trims or shims.
Hold short coordination meetings, document decisions, and assign a single point of contact to prevent costly rework and delays.
When to hire a pro vs DIY
Deciding whether to hire a pro or tackle cabinet and flooring work yourself comes down to your skill level, project scope, and tolerance for risk.
If you’ve done carpentry and flooring before, have time, and can handle precise measurements, DIY saves money.
Hire a pro for complex layouts, plumbing/electrical changes, warranty requirements, or when mistakes would be costly or time-consuming to fix.
Cost and Time Considerations
You’ll want to weigh how installing cabinets before or after flooring affects labor and material costs, since one order can require more trimming, protection, or extra flooring pieces.
Think about project timing and sequencing to cut downtime—shorter remodels can save on labor but might limit flexibility.
Also consider cost-saving trade-offs like using connecting trim, refacing cabinets, or staged installation to balance budget and schedule.
Labor and material cost differences by order
Installing cabinets before or after flooring can noticeably shift both labor and material costs, so weigh the trade-offs carefully.
If you install cabinets first, expect slightly lower flooring material waste and simpler trim work, but installers may charge more for precision cutting.
Installing flooring first can reduce cabinet toe-kick work yet raise cabinet adjustment labor and risk floor damage during cabinet installation.
Time impacts and sequencing to minimize downtime
Because timing affects every trade on a remodel, plan the cabinet-and-floor sequence to keep crews working without long waits.
Coordinate deliveries, set clear start dates, and sequence tasks so installers, plumbers, and finishers overlap efficiently. You’ll avoid idle labor, compressed schedules, and rework.
Build buffer days for inspections and unexpected delays so one crew’s setback doesn’t stall the entire project.
Cost-saving alternatives and trade-offs
Coordinating schedules helps keep crews busy, but cost and time often pull projects in different directions.
So you’ll want to weigh savings against extra labor or future repairs. You can save by installing cabinets first to avoid floor damage and trimming later, or save on materials by laying flooring after cabinets.
Consider resale value, warranty impacts, and potential patchwork when choosing.
Visual Aids and Examples
You’ll find clear diagrams showing typical installation sequences to help you plan the order of cabinets and flooring.
Check before-and-after photos that compare outcomes when cabinets go in first versus after the floor.
Use template drawings for mock-ups and measurements so you can verify fit and clearances before work begins.
Typical installation sequences with diagrams
When planning cabinet and flooring work, it helps to visualize a few common sequences so you can weigh trade-offs like cost, finish quality, and future repairs.
Sketch three diagrams: cabinets-first (protect floors, easier cabinet placement), flooring-first (clean seams, continuous floor), and hybrid (floor under perimeter cabinets).
Label pros, cons, and clearance notes so you can choose the best fit for layout and budget.
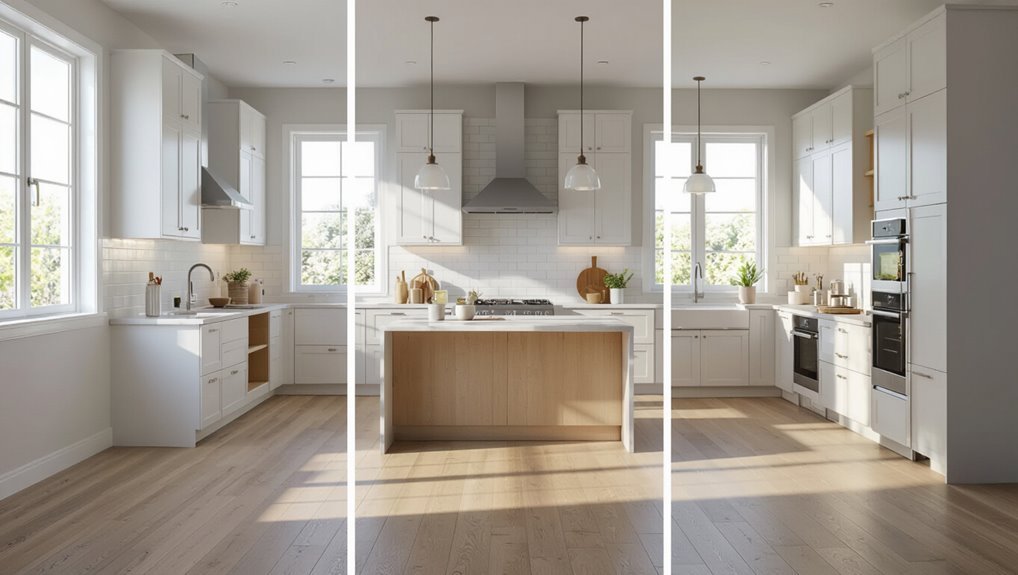
Before-and-after photos of different approaches

Whether you’re comparing completed jobs or planning yours, before-and-after photos make the trade-offs immediately clear: you’ll see toe-kick gaps, flush shifts, and flooring edge treatments that reveal which method was used.
Study shots showing cabinets installed first versus flooring-first installs to judge cleanup, seam alignment, and visual flow. Use these examples to choose the approach that matches your priorities and skill level.
Template drawings for mock-up and measurements
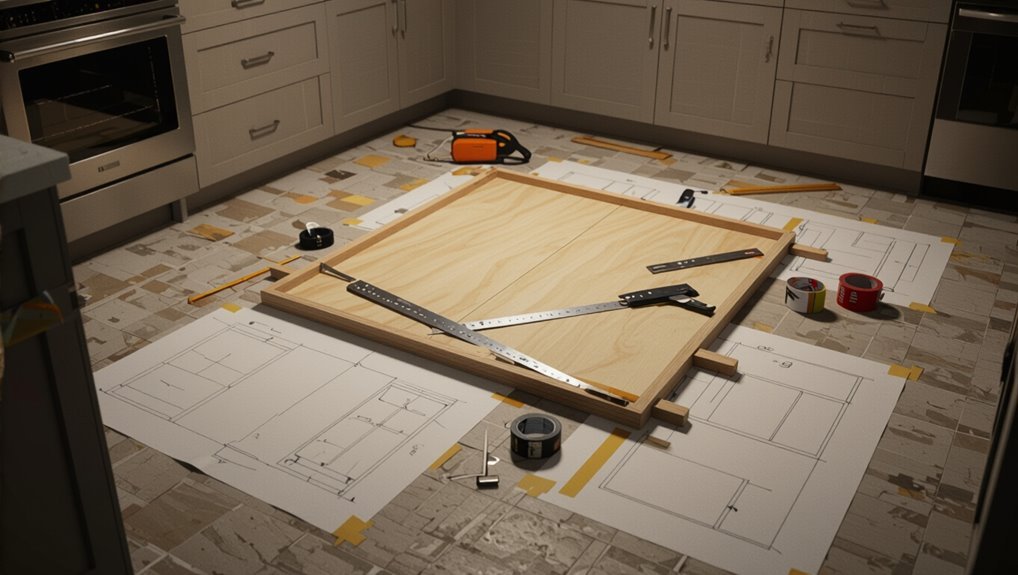
Start by creating full-size template drawings of your cabinet footprints and key measurements so you can mock up how flooring will meet each run and appliance void.
Cut templates from cardboard or kraft paper, mark toe kicks, clearances, and trim lines. Lay them out on the subfloor to verify fits, connections, and expansion gaps.
Adjust templates before final cabinet or flooring installation.
FAQ Common Questions
You probably have a few practical questions about cabinets and flooring, like whether hardwood should run under cabinets and if installing cabinets first saves money.
You’ll also want to know how much gap to leave, whether you can change flooring later with cabinets in place, and what manufacturers require for warranty compliance.
Let’s answer these FAQs so you can make an informed, cost‑effective choice.
Should hardwood go under cabinets?
If you want a cleaner look and the option to change cabinets later, run hardwood under them; it creates a seamless floor plane and avoids awkward trim lines.
You’ll pay more for extra flooring and installation, and you must protect wood from moisture under sinks.
For a cheaper, easier replacement later, some pros still install cabinets on top of finished flooring—consider your long-term plans.
Will installing cabinets first save money?
While running hardwood under cabinets gives a cleaner look and future flexibility, many homeowners ask whether setting cabinets first will save money.
It can cut immediate labor and material costs by reducing flooring area and simplifying install.
But you might pay later for replacements, uneven connections, or limited design options.
Weigh short-term savings against long-term value and resale implications.
How much gap should be left between cabinets and flooring?
A small gap of about 1/8″ to 1/4″ is typically left between cabinets and new flooring to allow for expansion and minor installation tolerances; if you’re using solid hardwood, plan on the larger end of that range or follow the flooring manufacturer’s specs.
Keep the gap consistent, cover it with toe-kick molding or quarter round, and guarantee cabinet base shims don’t reduce required expansion space.
Can I change flooring type later if cabinets are already installed?
You can change flooring after cabinets are installed, but expect extra work and added cost.
You’ll likely need to cut flooring to fit under cabinets, remove toe kicks, or install reducers and connection strips. Some floors require underlayment or height adjustments; cabinets may block a seamless look.
Plan for minor trim, potential cabinet adjustments, and contractor time to guarantee proper connections and finish.
What do manufacturers recommend for warranty compliance?
Because manufacturers set specific installation requirements to keep warranties valid, you should check their instructions before installing cabinets or flooring.
They often specify sequence, underlayment, expansion gaps, and fastening methods. If you ignore those rules you risk voiding warranty coverage.
Keep documentation, follow recommended installers, and get any approvals in writing so future claims won’t be denied due to improper installation.