How to Wash Ceramic Tile: The Safest and Most Effective Cleaning Method
Start by sweeping or vacuuming loose dirt, then mop with warm water and a pH-neutral cleaner or 1/4 cup mild dish soap per gallon; wring the mop so it’s damp, rinse with clean water, and dry with a microfiber cloth to avoid streaks. Spot-treat grime with baking soda paste or diluted vinegar for grease (not on stone). Scrub grout with a stiff brush, ventilate, wear gloves, and test cleaners on a hidden area—keep going to learn detailed steps and tips.
How to Wash Ceramic Tile and Best Practice Summary
For the safest, most effective wash, you’ll mop with warm water and a mild pH-neutral cleaner.
Scrub grout with a soft brush, then rinse and dry to prevent streaks.
Use a pro for deep-set grout stains, large areas, or if you spot damaged tile or persistent mold that DIY methods won’t budge.
Before you start, check for loose or cracked tiles, ventilate the space, and wear gloves and knee protection.
Direct answer: the safest, most effective method in one paragraph
Start by sweeping or vacuuming loose dirt.
Then mop with a warm solution of pH-neutral cleaner (or a few drops of dish soap) and water, wringing the mop until it’s damp rather than soaking wet.
Rinse with clean water and dry with a microfiber cloth to prevent streaks and grout darkening.
For how to wash ceramic tile effectively, repeat weekly and spot-treat stains promptly.
When to use professional cleaning vs DIY
Although you can handle routine tile care yourself, call a pro when stains, grout buildup, or damage go beyond simple mopping — especially if you’re dealing with deep-set stains, extensive grout discoloration, cracked tiles, or large areas that need heavy-duty steam or chemical treatment.
- DIY for regular sweeping, mopping, and spot cleaning.
- Pro for stubborn stains, structural damage, or wide grout redevelopment.
- Hire specialists for time savings, warranty work, or complex restorations.
Quick safety checklist before you start
Before you wet a mop or mix cleaners, take a quick safety check so you don’t damage the tile, harm yourself, or create extra work.
- Test cleaner on a hidden tile for colorfastness and grout effects.
- Ventilate the area, wear gloves and eye protection, and keep pets/kids away.
- Remove loose debris, note cracked grout, and seal or repair before deep cleaning.
Understanding Ceramic Tile and Grout
You’ll want to know the difference between glazed and unglazed tiles because finishes affect how much dirt they trap and what cleaners you can use.
Grout comes in sanded, unsanded, and epoxy varieties, each with weaknesses like staining, crumbling, or chemical sensitivity.
Knowing how different tiles and grouts react to moisture and cleaners helps you choose safe products and avoid damage.
Types of ceramic tile and finish (glazed vs unglazed)
When you pick ceramic tile, you’re choosing between glazed and unglazed surfaces that clean and wear very differently; glazed tiles sport a glassy protective layer that resists stains and makes wiping easy, while unglazed tiles show the natural clay and absorb more liquid, so they need sealing and gentler care.
| Type | Care | Durability |
|---|---|---|
| Glazed | Wipe, mild cleaner | High |
| Unglazed | Seal, gentle cleaners | Moderate |
| Porcelain | Low porosity, mop | Very high |
Common grout types and their vulnerabilities
Because grout sits between tiles and soaks up the mess that tiles resist, knowing the common grout types and their vulnerabilities helps you choose the right maintenance and protection.
Sanded grout resists cracking but traps dirt in rough texture; unsanded is smoother but can shrink and crack.
Epoxy grout is stain‑resistant yet rigid and harder to repair.
Seal porous cement grouts regularly.
How tile and grout react to cleaners and moisture
If you clean regularly and choose products wisely, your tile and grout will stay durable and attractive. Harsh cleaners or excess moisture, though, can dull glazes, etch natural stone, and weaken grout over time.
You should test cleaners, avoid acidic or abrasive formulas on sensitive surfaces, rinse thoroughly, and control humidity.
Prompt drying and proper sealers preserve appearance and prevent mold and deterioration.
Tools and Supplies You Need
You’ll need a few essential tools—mops, scrub brushes, buckets, and a squeegee—to make the job efficient.
Choose pH-neutral cleaners or simple homemade solutions like diluted vinegar for routine cleaning.
Avoid harsh acids, using bleach on certain grout, or abrasive pads that can damage tile and grout.
Essential tools (mops, brushes, buckets, squeegees)
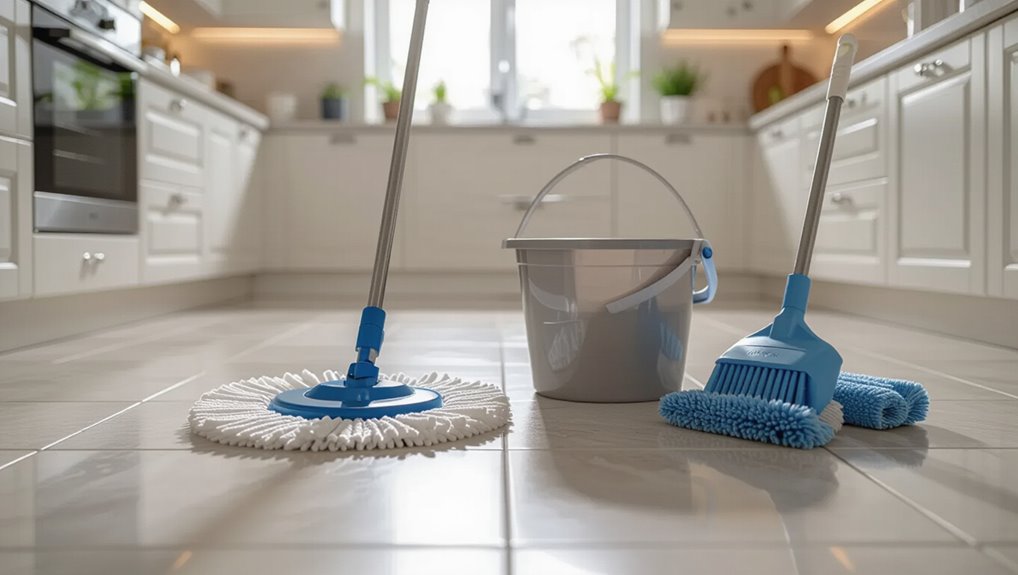
Start with a few reliable tools and you’ll make ceramic tile cleaning faster and more effective.
- A microfiber mop with a removable head for dusting and wet passes.
- A stiff-bristled scrub brush or grout brush for corners and grout lines.
- A sturdy bucket and a rubber squeegee to wring, rinse, and remove excess water quickly.
Recommended cleaning solutions (pH-neutral cleaners, homemade options)
Along with the right tools, choosing the proper cleaner makes all the difference for ceramic tile and grout care.
Use gentle, pH-neutral products or simple DIY mixes to avoid residue and protect finishes.
Try these options:
- Commercial pH-neutral floor cleaner diluted per label.
- Warm water with a few drops of mild dish soap.
- Vinegar-free bicarbonate paste for spot cleaning.
What to avoid (harsh acids, bleach on certain grout, abrasive pads)
Because harsh cleaners can permanently dull tile and eat into grout, avoid acids like muriatic or undiluted vinegar, strong bleach on colored or cement-based grout, and steel wool or abrasive pads that scratch finishes.
You’ll protect surfaces by choosing gentler options and testing first.
- Use pH-neutral cleaners.
- Test any cleaner on a hidden spot.
- Replace abrasive tools with soft brushes or microfiber.
Preparation: Assessing and Protecting the Area
Before you start washing, check each tile and the grout for cracks, loose pieces, or heavy staining so you know what repairs or gentler methods might be needed.
Do a small spot test with your chosen cleaner on an inconspicuous area to confirm it won’t discolor or damage the tile or grout.
Finally, clear the area, open windows for ventilation, and put on gloves and eye protection before you begin.
Inspecting tile condition and grout integrity
When you’re getting ready to clean, take a close look at each tile and the grout lines for chips, cracks, loose edges, or crumbling mortar—these flaws can trap dirt and let water cause bigger damage.
- Note damaged tiles to replace or repair before washing.
- Check grout for gaps, staining, or soft spots needing regrouting or sealing.
- Mark areas to avoid soaking and plan gentle cleaning or targeted repair.
Spot test procedure for cleaners
Wondering if a cleaner is safe for your tile and grout? Test first on an inconspicuous spot, wait 24 hours, then inspect for discoloration or etching.
- Apply a small amount to a hidden tile joint.
- Blot dry with a white cloth after 10 minutes.
- Check 24 hours later under good light; if unchanged, it’s safe to proceed.
Preparing the space (ventilation, protective gear, furniture removal)
After you’ve confirmed a cleaner won’t harm your tile, get the room ready so the work goes smoothly and safely.
Open windows and doors for ventilation, and run fans if needed.
Remove furniture and rugs, and protect remaining items with plastic or drop cloths.
Wear gloves and eye protection, and slip-resistant shoes.
Keep pets and children out of the area.
Step-by-Step Cleaning Method
Start by dry-prepping the area—sweep or vacuum thoroughly to remove loose dirt and grit.
Then pre-treat stains and grout lines, mix a safe cleaning solution with the right ratios, and choose the appropriate washing technique for floors versus walls.
Finish by scrubbing grout effectively and safely to restore grout lines without damaging the tile.
Step 1 Dry prep: sweeping or vacuuming thoroughly
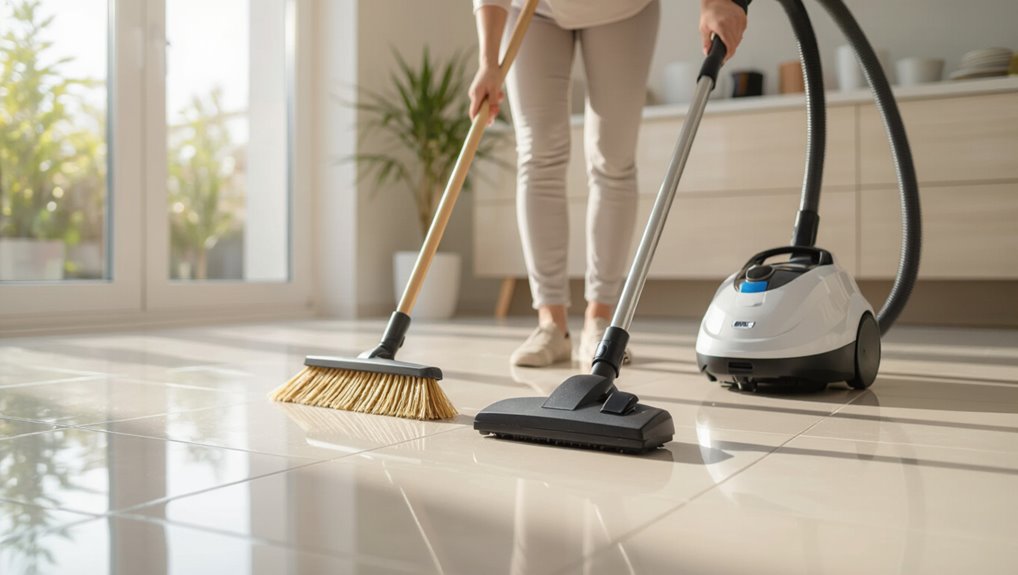
Kick dust, crumbs, and grit out of the way with a thorough sweep or a quick run of the vacuum so your tile gets cleaned, not scratched.
You’re prepping for wet cleaning: remove loose debris, pay corner edges, and check under mats. Use a soft-bristle broom or vacuum hard-floor setting to avoid scuffs.
- Sweep toward a central pile.
- Vacuum edges and grout lines.
- Empty debris before mopping.
Step 2 Pre-treating stains and grout lines (spot-specific techniques)
With loose dirt out of the way, tackle spots and grout next so your mop won’t just spread stains around.
- Apply a baking soda paste to grout, scrub with a stiff brush, rinse thoroughly.
- Blot spills immediately with a microfiber cloth; repeat gentle scrubbing for stubborn marks.
- Use a hydrogen peroxide spot treatment on organic stains, let sit briefly, then rinse and dry to prevent residue.
Step 3 Mixing safe cleaning solution (ratios and options)
Now you’ll mix a safe cleaning solution tailored to your tiles and grout—simple ratios make it easy to get effective, residue-free results.
- For routine cleaning, mix 1/4 cup mild dish soap with 1 gallon warm water.
- For greasy buildup, combine 1/2 cup white vinegar with 1 gallon water (avoid on stone).
- For stubborn grout, use 1 part baking soda to 3 parts water into a paste for spot treatments.
Step 4 Washing tiles: techniques for floors vs walls
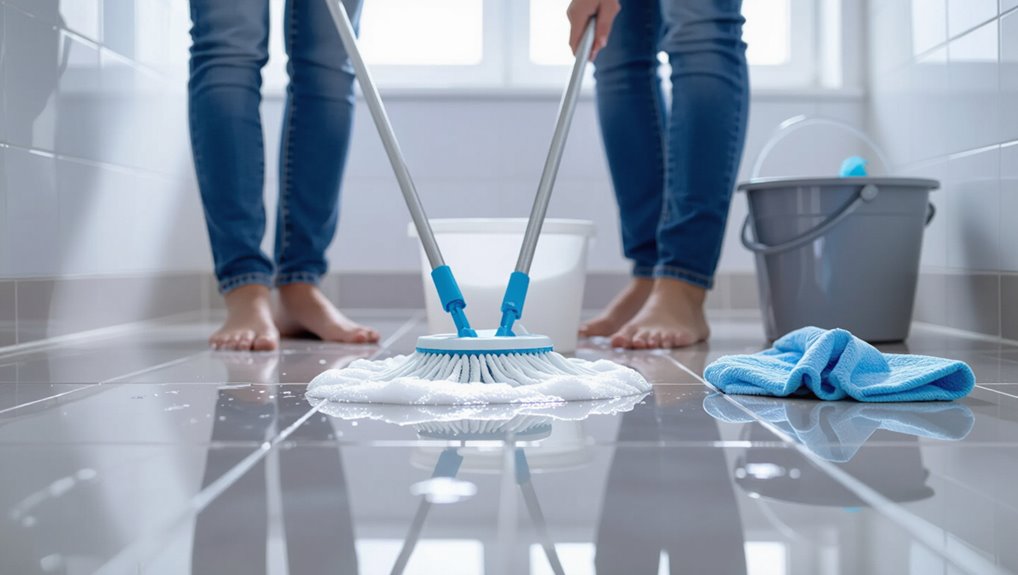
Start by working from the top down so dirt and rinse water flow away from areas you’ve already cleaned; for walls, start at the highest point and scrub downward, and for floors, begin in the farthest corner and move toward the exit.
- Use a soft mop or sponge, rinsing frequently to avoid streaks.
- Work in small sections to keep solution fresh.
- Dry floors with a clean towel or squeegee to prevent slips.
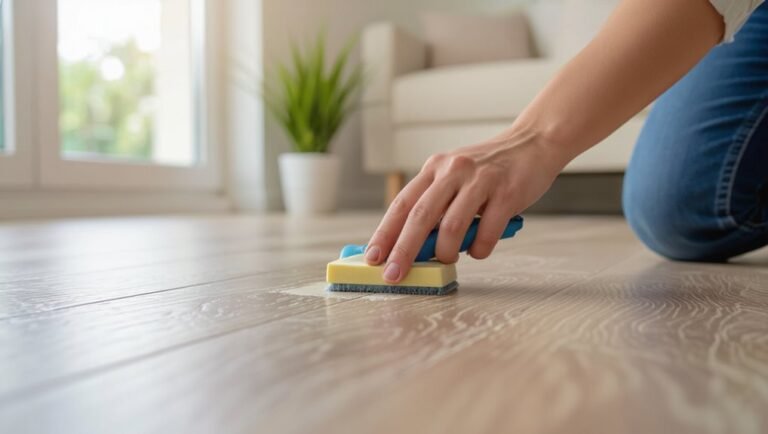
Step 5 Scrubbing grout effectively and safely
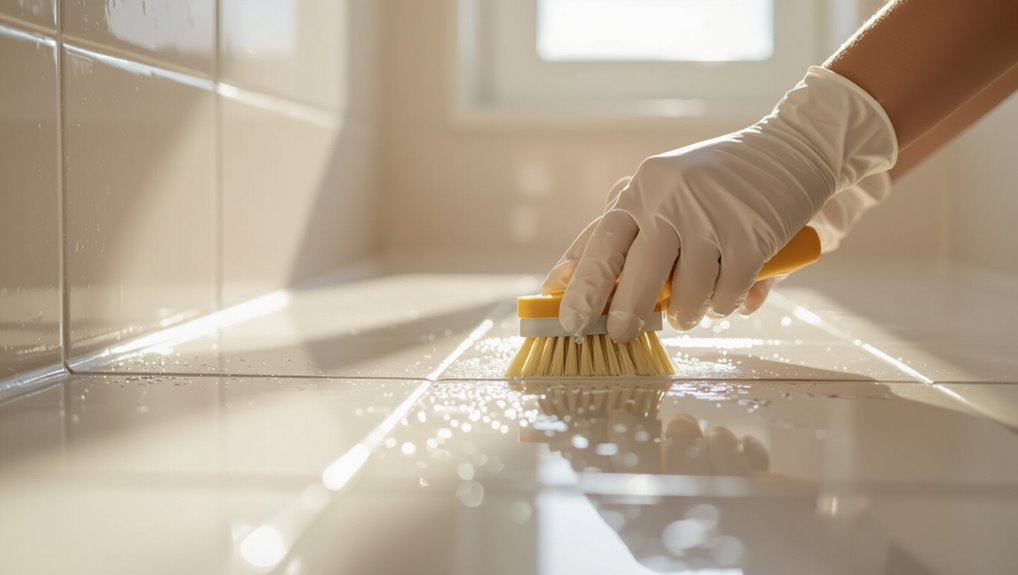
1 key to making your tile look fresh is tackling the grout—grab a stiff nylon brush, a mild cleaner suited to your grout type, and work in short, controlled strokes so you lift dirt without damaging the joints.
- Test cleaner in an inconspicuous spot and wear gloves.
- Scrub along grout lines, not across tiles, to prevent scratching.
- Blot loosened grime with a microfiber cloth; avoid overwetting.
Step 6 Rinsing and removing residue (multiple rinse tips)
After scrubbing, rinse thoroughly to remove cleaner and lifted grime so no residue dulls the tile or attracts dirt.
Use clean water and a mop or sponge, changing rinse water often to avoid spreading soil. Repeat until suds and film are gone.
- Rinse with fresh water twice.
- Change water after each pass.
- Inspect edges and grout lines.
Step 7 Drying and buffing for a streak-free finish
One quick, deliberate pass with a dry microfiber mop or towel will remove remaining moisture and prevent streaks, so work in small sections and blot rather than drag to avoid smearing dirt into grout lines.
- Buff tiles in circular motions to lift haze and restore shine.
- Change cloths when damp to avoid redepositing grime.
- Ventilate the area to speed drying and prevent water spots.
Deep Cleaning and Stubborn Stains
When soap scum, hard water deposits, or greasy residues won’t budge with regular cleaning, you’ll need stronger methods and the right cleaners.
You can use targeted de-greasers or adhesive removers, and a steam cleaner can lift grime fast—just mind its limits and safety precautions.
If stains are persistent or the tile/grout is damaged, don’t hesitate to call a professional deep-cleaning service.
Removing soap scum and hard water deposits
Because soap scum and hard water deposits bond tightly to ceramic, you’ll need targeted cleaners and a bit of elbow grease to get them off without damaging grout or glaze.
Use mild acid cleaners or vinegar solutions, test a hidden spot, then scrub gently with a nylon brush. Follow with a neutralizer and rinse thoroughly.
- Pre-test
- Scrub gently
- Rinse and neutralize
Tackling oil, grease, and adhesive residues
Grease, oil, and adhesive can cling to ceramic like glue, but you can remove them without harming glaze or grout by using the right solvents and techniques.
Use a plastic scraper, then:
- Apply a citrus or mineral spirits spot cleaner, blot and rinse.
- Gently scrub with a nylon brush and mild detergent.
- Finish with warm water and a microfiber cloth to avoid residue.
Using steam cleaners: benefits, limitations, and precautions
If you need a chemical-free way to lift deep grime and loosen stubborn stains, a steam cleaner can be very effective on glazed ceramic tile and grout.
You’ll remove dirt without harsh chemicals, sanitize, and speed cleaning.
Don’t use steam on unglazed, cracked, or sealed grout; test a small area first.
Wear gloves, avoid excessive heat near caulk, and follow manufacturer instructions.
When to call a professional deep-cleaning service
When stains won’t budge after you’ve tried scrubbing, steam cleaning, and spot treatments, it’s time to call a professional deep-cleaning service. They’ve got the tools, solutions, and expertise to revive heavily soiled or damaged grout and tile without risking further harm.
Call pros when mildew, grout erosion, or persistent discoloration remains, when odor lingers, or when you need sealant restoration and guaranteed results.
Maintenance Routine and Prevention
Now that stains are handled, set up a simple maintenance routine you can stick to with daily and weekly checklists to keep tile and grout looking fresh.
Schedule monthly and seasonal tasks like deep scrubs, resealing grout, and checking for damage.
Use preventive steps—apply sealers, place mats at entries, and enforce shoes-off rules—to reduce wear and future work.
Daily and weekly maintenance checklist
Because small messes are easiest to manage right away, keep a short daily routine to prevent dirt buildup and protect grout and tile finishes.
- Sweep or vacuum high-traffic areas and spot-mop spills immediately with a damp microfiber.
- Wipe sticky spots and bathroom splashes with a mild, pH-neutral cleaner.
- Weekly: mop with warm water, rinse thoroughly, and dry grout lines to avoid residue.
Monthly and seasonal maintenance tasks
Although daily care keeps dirt at bay, monthly and seasonal checks tackle buildup and wear you won’t see in everyday cleaning.
You should inspect grout lines, test drains for slow flow, and deep-clean high-traffic areas. Schedule repairs promptly to avoid escalation.
- Inspect grout and tiles for cracks or discoloration.
- Deep-clean with a pH-neutral solution.
- Check grout stability and reapply where needed.
Preventive measures to protect grout and tile (sealers, mats, entry rules)
Monthly checks and deep cleans help spot damage, but preventing wear prevents most repairs.
You should seal grout yearly, use door mats and runners to trap grit, and enforce no-shoe rules indoors to limit dirt and oils.
These habits extend tile life, reduce cleaning frequency, and cut repair costs.
- Seal grout annually
- Place entrance mats
- Enforce no-shoes policy
Common Mistakes and How to Avoid Them
Don’t grab any cleaner at random—using the wrong pH product can dull glaze or harm grout.
Don’t over-scrub or use abrasive tools that scratch the tile, and always rinse thoroughly to avoid residue and streaks.
Also check grout for cracks or trapped moisture so small problems don’t become big ones.
Using incorrect cleaners or wrong pH products
If you grab a cleaner without checking its pH, you could damage glazed or unglazed ceramic and the grout between tiles.
Always choose neutral pH cleaners for routine cleaning; use mild acidic solutions (vinegar diluted) sparingly on glazed tiles, never on unglazed or cement grout.
Test any product in an inconspicuous spot first, follow label instructions, and rinse thoroughly to prevent residue.
Over-scrubbing or using abrasive tools
One common mistake is scrubbing too hard or using abrasive pads, which can scratch glaze, dull tile surfaces, and wear away grout, leaving your floor more vulnerable to stains and damage.
Use soft microfiber mops or nonabrasive sponges, apply gentle circular motions, test tools on an inconspicuous spot, and tackle stubborn spots with appropriate cleaners rather than brute force to preserve finish and grout.
Improper rinsing leaving residue and streaks
When you skip a proper rinse or use too-weak a cleaning solution, soapy residue and mineral deposits can be left behind, leaving streaks and a filmy haze that dulls ceramic tile and traps dirt.
Rinse thoroughly with clean water, change rinse water often, and wipe surfaces dry with a microfiber mop or towel to remove streaks and prevent rapid re-soiling.
Ignoring grout damage and moisture issues
Because grout acts like the sealant and support for your tile, neglecting cracks, crumbling joints, or persistent dampness lets water penetrate beneath the surface and causes mold, tile loosening, and costly repairs.
Check grout regularly, repair cracks promptly, reseal porous grout annually, and dry wet areas after cleaning.
Address moisture sources to prevent deterioration and extend tile life.
Comparison: DIY Cleaners vs Commercial Products
You can often tackle tile grime with homemade mixes like vinegar, baking soda, or hydrogen peroxide, but they vary in effectiveness and can harm grout or finishes if misused.
Commercial cleaners tend to be formulated for specific jobs—heavy soap scum, mildew, or sealed vs unsealed tile—and usually work faster.
Consider cost, label safety warnings, and environmental impact when choosing between a DIY approach and a store-bought product.
Homemade solutions (vinegar, baking soda, hydrogen peroxide) effectiveness and risks
Although common DIY cleaners like vinegar, baking soda, and hydrogen peroxide can tackle many routine stains and grime on ceramic tile, they work differently and carry specific limits and risks you should know. You’ll want to test small areas, avoid mixing, and dilute properly.
| Cleaner | Strengths | Risks |
|---|---|---|
| Vinegar | Cuts soap scum | Can dull grout/sealant |
| Baking soda | Gentle abrasion | May scratch polished tile |
| H2O2 | Disinfects | Can lighten grout color |
Popular commercial cleaners strengths and best use cases
When you’re up against tough grout stains, heavy soap scum, or high-traffic wear, commercial tile cleaners deliver targeted chemistry and faster results than most DIY mixes. You’ll pick enzyme formulas for organic grime, acidic cleaners for mineral buildup, degreasers for kitchens, and sealant-restorers for worn grout.
| Cleaner Type | Strength | Best Use |
|---|---|---|
| Enzyme | Organic breakdown | Soap scum |
| Acidic | Mineral removal | Hard-water |
| Degreaser | Oil cut | Kitchen |
| Sealant-restorer | Protects grout | High-traffic |
Cost, safety, and environmental considerations
After weighing the strengths and use cases of commercial cleaners, it’s worth comparing their cost, safety, and environmental impact against DIY options.
- Cost: DIY (vinegar, baking soda) is cheaper, but commercial concentrates last longer.
- Safety: Commercials can irritate; you should use gloves and ventilation.
- Environmental impact: DIY is biodegradable; choose eco-certified products if you prefer ready-made solutions.
Safety, Environmental, and Pet-Friendly Considerations
When cleaning tile, wear basic PPE like gloves and eye protection and open windows or use a fan to keep air moving.
Choose eco-friendly cleaners or simple recipes (vinegar or baking soda solutions when appropriate) to reduce fumes and stray chemicals.
Keep children and pets out of the area until floors are dry and any residues are wiped up.
PPE and ventilation recommendations
1 simple step you shouldn’t skip is gearing up properly: wear gloves, eye protection, and a mask when using cleaners, and open windows or run an exhaust fan to keep fumes from building up.
- Use chemical-resistant gloves and splash goggles for concentrated cleaners.
- Wear an N95 or P100 mask if fumes persist.
- Ventilate for 15–30 minutes after cleaning and keep pets out until air clears.
Eco-friendly cleaner options and recipes
Now that you’ve covered PPE and ventilation, you can choose cleaners that lower hazards for you, your home, and the planet.
Use mild, biodegradable ingredients and avoid harsh fumes.
Try these simple recipes and options:
- Warm water + pH-neutral castile soap, mop and rinse.
- Vinegar (1 cup) + 1 gallon water for glazed tile only.
- Baking soda paste for grout spot treatment.
Safe practices around children and pets
As you clean, keep children and pets out of the work area and away from wet floors and cleaning solutions to prevent slips, skin irritation, or accidental ingestion.
Store chemicals high and locked, label sprays, and rinse mops thoroughly.
Use pet-safe, fragrance-free cleaners, ventilate the room, and wait until floors are fully dry before allowing access.
Supervise curious kids and animals closely.
Troubleshooting Guide: Problems and Remedies
If your tile still looks dull after cleaning, check for residue from cleaners or worn sealant and try a rinse with plain water or a polish designed for ceramics.
For grout that won’t whiten, you can test spot treatments like diluted bleach or oxygen bleach, and if stains persist consider regrouting.
If grout or tiles are loose or cracked, use a temporary adhesive or grout patch to prevent further damage, but plan for proper repair or replacement to restore durability.
Tile looks dull after cleaning causes and fixes
When your tile looks dull after cleaning, it’s usually a sign that something in the process left a residue, stripped the finish, or simply didn’t remove embedded grime; identifying which one will steer you to the right fix.
Check for film from soap or cleaner, rinse thoroughly, buff dry with a microfiber cloth, and try a pH-neutral cleaner or a diluted vinegar rinse for mineral buildup.
Persistent grout discoloration options (bleach, oxygen bleach, regrouting)
You’ve tried regular cleaning but grout still looks stained; now you need targeted options like household bleach, oxygen bleach, or regrouting—and each has trade-offs.
Use diluted household bleach sparingly for mildew, ventilate and protect surfaces.
Oxygen bleach whitens safely but may require scrubbing and repeat treatments.
Regrouting gives permanent results but costs time and may alter grout lines; hire a pro if unsure.
Loose or cracked grout/tile temporary fixes vs repairs
Loose or cracked grout and tiles are common—some fixes are quick and temporary, while others require full repairs to prevent water damage and further loosening.
You can use silicone sealant or epoxy caulk for small gaps and stabilize loose tiles with adhesive wedges temporarily.
For widespread cracking, hollow tiles, or water intrusion, remove and rebed tiles, replace grout, and address underlying substrate issues to avoid recurrence.
FAQs
You probably have a few quick questions about care, like how often to deep-clean tile and grout and whether vinegar is safe to use.
You’ll also want to know if steam cleaning works for your tiles, how to remove mildew or mold from grout, and whether sealing is needed for tile as well as grout.
We’ll answer each of these so you can pick the right methods for your floor.
How often should I deep-clean ceramic tile and grout?
How often you should deep-clean ceramic tile and grout depends on traffic, moisture, and whether you have pets or kids.
For low-traffic areas, deep-clean every 6–12 months.
Moderate-traffic spaces benefit from cleaning every 3–6 months.
High-traffic, moisture-prone, or pet/kid-heavy areas need deep cleaning every 1–3 months.
Adjust frequency if you notice staining, dull grout, or lingering odors.
Can I use vinegar on ceramic tile?
Curious whether vinegar’s a safe, effective cleaner for ceramic tile? You can use diluted white vinegar (about 1 part vinegar to 4 parts water) on glazed ceramic and sealed grout for routine cleaning.
Avoid straight vinegar on unglazed tiles, natural stone, or damaged grout—its acidity can etch surfaces or weaken sealants.
Rinse well and test a small area first.
Is steam cleaning safe for all ceramic tiles?
If vinegar works for routine wiping, you might wonder whether steam cleaning offers a deeper, chemical-free option for ceramic tile.
Steam’s safe on most glazed ceramic and porcelain—avoid unglazed, aged, or cracked tiles and some natural stone-look ceramics.
Check manufacturer guidance, test a small area, and use moderate steam settings to prevent grout loosening or surface damage.
How do I remove mildew or mold from grout?
Wondering how to get mildew or mold out of grout without scrubbing forever?
Use a bleach solution (1 part bleach to 10 parts water) or a commercial mildew cleaner, apply, let sit 10–15 minutes, then scrub with a nylon brush.
Rinse thoroughly and dry.
For stubborn stains, repeat or try a hydrogen peroxide paste.
Wear gloves and ventilate the area.
Do I need to seal ceramic tile or only the grout?
Do you need to seal ceramic tile or just the grout?
You usually only need to seal grout—porous grout absorbs stains and moisture—while most glazed ceramic tiles resist water and stains without sealing.
Seal unglazed or porous tiles, though.
Reapply grout sealer every one to three years, depending on traffic and exposure, to protect against staining and mildew.
Quick Reference Cheat Sheet
Use this quick cheat sheet to run through a single cleaning session step-by-step so you don’t miss anything.
Pick the right cleaner for stains, soap scum, or grout, and keep a short list of the best options on hand.
For emergencies, try fast fixes listed here and note local pro contacts if the problem needs expert help.
Step-by-step quick checklist for a single cleaning session
Try this simple, timed checklist to get your ceramic tile clean and dry in one session:
- Sweep/vacuum edges and corners (2–3 minutes), then spot-treat stains with your chosen cleaner.
- Mop with warm water and mild cleaner, working in small sections (10–15 minutes).
- Rinse with clean water, squeegee or microfiber mop, and dry thoroughly with towels (5–7 minutes).
Best cleaners for common problems
Here’s a quick cheat sheet to match common tile problems with the most effective cleaners so you can pick the right product fast and get back to your day. Use pH-neutral cleaner for regular wash, diluted vinegar for mineral deposits (avoid on natural stone), bleach for mold on grout, and baking soda paste for stubborn stains.
| Problem | Cleaner | Note |
|---|---|---|
| Regular dirt | pH-neutral | Safe for glaze |
| Mineral buildup | Diluted vinegar | Not for stone |
| Mold/grime | Bleach solution | Ventilate |
| Stains | Baking soda paste | Gentle scrub |
Emergency fixes and contact info for professional help
If a spill, crack, or sudden mold bloom threatens your tile, act fast with a few simple emergency steps before calling a pro:
- Blot spills, neutralize acids with baking soda paste, and rinse to prevent etching or staining.
- Contain cracks with clear epoxy or tape, avoid heavy use, and document damage with photos.
- For persistent mold or structural issues, call a licensed tile/restoration specialist and share photos.