How to Install Peel and Stick Floor Tiles in Any Room
You can install peel-and-stick tiles in most rooms if you pick the right product and prep the subfloor properly. Start by testing for moisture, cleaning and leveling the surface, and letting tiles acclimate. Lay a straight reference line, cut to fit, peel the backing, press firmly and roll each tile to secure. Use waterproof tiles and sealants in damp areas and spot-replace damaged pieces. Keep going to get step-by-step tips, tools, and troubleshooting.
Quick Answer Can You Install Peel and Stick Floor Tiles in Any Room?
Yes — you can install peel-and-stick tiles in many rooms, but they work best in dry or low-moisture areas.
Avoid high-moisture spaces like showers and poorly ventilated bathrooms unless you use a waterproof underlayment and specific tile rated for moisture.
You’ll need basic tools (utility knife, straightedge, roller) and can usually finish a small room in a few hours to a day.
One-sentence conclusion
While peel-and-stick tiles work in many rooms, you shouldn’t use them everywhere—avoid high-moisture areas like showers or uneven, poorly prepped floors unless you’re willing to take extra waterproofing and leveling steps.
You can confidently learn how to install peel and stick floor tiles for bedrooms, living areas, and low-moisture kitchens, but always evaluate substrate condition and moisture before committing to the install.
Short summary of room suitability (dry, low-moisture, high-moisture exceptions)
Peel-and-stick tiles suit dry and low‑moisture rooms—think bedrooms, living areas, hallways, and many kitchens—because they stick best to clean, flat substrates and don’t tolerate constant water.
You can use them in bathrooms or basements only if moisture is controlled, floors are level, and you pick water-resistant vinyl tiles with proper seams and perimeter sealing; avoid wet rooms like showers and exterior porches.
Tools and time estimate
Now that you know where these tiles work best, you’ll want the right tools and a realistic time estimate before you start.
Gather a utility knife, straightedge, roller, tape measure, broom, and adhesive primer if needed. Expect about 2–4 hours for a small room, 6–8 for a medium room.
Typical steps:
- Prep and measure
- Cut and fit
- Peel, stick, roll and trim
Basic Understanding What Are Peel and Stick Floor Tiles?
Peel-and-stick floor tiles are thin sheets—usually vinyl, luxury vinyl, or linoleum-style alternatives—with a printed surface and a pressure-sensitive adhesive on the back.
You stick them down by peeling the backing and pressing firmly, which makes installation quick but means surface prep and smooth subfloors are important.
They’re great for bathrooms, kitchens, and low-traffic areas for affordability and ease, but they can wear faster or lift in high-traffic or very wet locations.
Definition and materials (vinyl, luxury vinyl, linoleum alternatives)
Think of peel-and-stick floor tiles as a ready-to-install sheet of flooring: they’re thin, adhesive-backed tiles you remove a liner from and press into place.
You’ll find materials like vinyl (economical, water-resistant), luxury vinyl (thicker, realistic textures), and linoleum alternatives (eco-friendly, resilient).
Each offers different durability, finish, and thickness, so pick based on room traffic, moisture, and desired appearance.
How they adhere (adhesive backing, pressure-sensitive)
Along with material and thickness, how tiles stick to your floor determines performance and longevity.
Peel-and-stick tiles use a pressure-sensitive adhesive backing covered by a release liner. You peel the liner, press the tile down, and the adhesive bonds to clean, dry subfloors.
Some adhesives are repositionable briefly; others set quickly. Proper pressure and surface prep guarantee a durable hold.
Pros and cons overview
While they’re quick to install and budget-friendly, peel-and-stick floor tiles come with trade-offs you should evaluate: they’re ideal for DIY updates and light-traffic areas, but less durable than glued or floating floors and can struggle on uneven or moist subfloors.
You’ll want to contemplate:
- Cost and ease: cheap, fast to fit.
- Durability: wears faster, limited lifespan.
- Prep needs: flat, dry surface required.
Common room types and performance expectations
Because peel-and-stick tiles perform differently depending on traffic, moisture, and subfloor conditions, you should match the room to the product: use durable, wear-rated tiles for entryways and kitchens; choose water-resistant, high-adhesion options for bathrooms and basements; low-traffic rooms like bedrooms and closets can use thinner, decorative tiles; avoid exposed outdoor areas.
Always prep and level the subfloor for best adhesion and longevity.
Pre-Installation Planning
Before you start, check whether the room is suitable—bathrooms, kitchens, basements, and high-traffic areas each have different moisture and durability needs.
Measure the space carefully, calculate how many tiles you need (include 10% extra for cuts and waste), and pick tiles with the right thickness, wear layer, texture, and water resistance.
Finally, set a clear budget and timeline so you can buy materials and plan the work without surprises.
Assessing room suitability (bathroom, kitchen, basement, high-traffic areas)
Start by matching the peel-and-stick tiles to the room’s conditions and use: check moisture levels, temperature swings, and how often people will walk across the floor.
For bathrooms, pick water-resistant tiles and guarantee good ventilation.
In kitchens, choose durable, stain-resistant options.
Basements need moisture barriers; consider vinyl rated for damp spaces.
For high-traffic areas, use heavy-duty adhesive and wear-resistant finishes.
Measuring the room and calculating tile quantity
Now that you’ve matched tiles to the room’s conditions, you’ll want to measure and calculate how many tiles you’ll need so the installation goes smoothly.
Measure length and width, calculate square footage, then add waste. Follow these steps:
- Measure room dimensions and multiply (sq ft).
- Divide by tile coverage per piece.
- Add 10–15% for cuts and mistakes; round up.
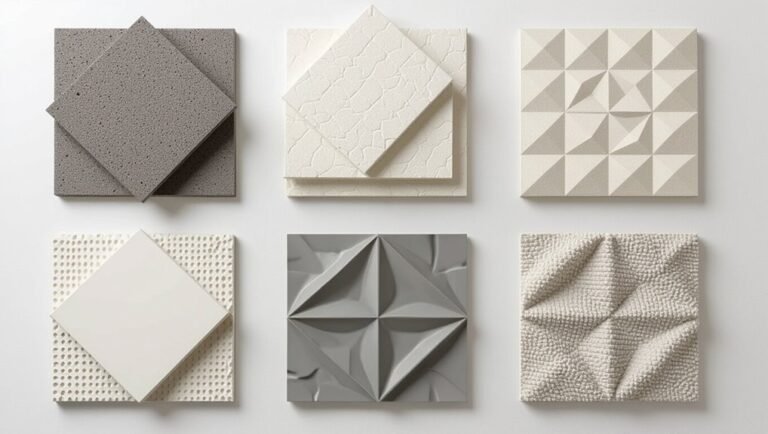
Choosing the right tile (thickness, wear layer, texture, water resistance)
Tile selection shapes both the look and performance of your floor, so pick tiles with the right thickness, wear layer, texture, and water resistance for the room’s use. Choose thicker tiles for uneven subfloors, higher wear layers for traffic, textured surfaces for grip, and waterproof types for wet areas.
| Feature | Benefit | Where to use |
|---|---|---|
| Thickness | Stability | Garage |
| Wear layer | Durability | Hallway |
| Water resistance | Protection | Bathroom |
Budget and timeline planning
A clear budget and realistic timeline keep your peel-and-stick project on track.
Estimate tile, underlayment, tools, and waste (add 10%–15%). Compare prices and prioritize quality where it matters.
Schedule prep, installation, and acclimation days, allowing extra time for unexpected repairs.
Track costs and milestones, adjust plans if needed, and avoid rushing — proper pacing saves money and yields better results.
Surface Preparation The Most Important Step
Before you stick anything down, you’ll want to identify your subfloor type—concrete, plywood, existing vinyl, or tile—so you can choose the right prep steps.
Fix low spots, sand rough areas, or use a self-leveling compound and patching where needed to create a flat, stable surface.
Clean thoroughly, prime when recommended, and perform moisture testing or add a vapor barrier if the subfloor is prone to dampness.
Checking subfloor types (concrete, plywood, existing vinyl, tile)
Since the success of peel-and-stick tiles depends on a stable, clean base, you’ll first identify what your subfloor is—concrete, plywood, existing vinyl, or ceramic tile—and note its condition, levelness, and moisture.
- Concrete: check for cracks, efflorescence, and damp with a moisture test.
- Plywood: inspect for rot, flex, and loose fasteners.
- Vinyl/tile: confirm adhesion, cleanliness, and flatness.
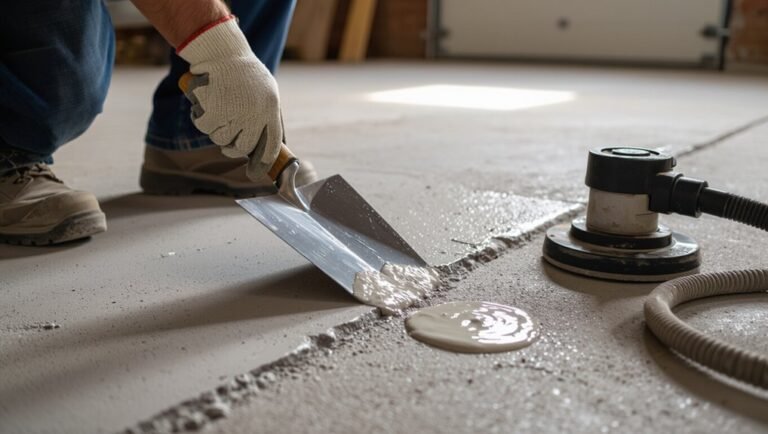
Repairing and leveling the floor (patching, sanding, self-leveling compound)
Start by evaluating and correcting any dips, high spots, cracks, or loose material so your peel-and-stick tiles will adhere and lie flat.
Patch holes with an appropriate filler, sand high spots smooth, and remove debris.
For uneven areas over 1/8″, apply a fast-setting self-leveling compound per instructions.
Allow proper cure time, then recheck flatness before proceeding with cleaning and priming.
Cleaning and priming recommendations
When your floor is level and dry, clean and prime it thoroughly so tiles will bond reliably and last.
Sweep and vacuum, then degrease with a pH-neutral cleaner and rinse. Remove residue and allow full drying.
Lightly sand glossy surfaces, vacuum dust, then apply a manufacturer-recommended primer or floor adhesive promoter.
Follow drying times before laying tiles to guarantee a strong, even bond.
Moisture testing and vapor barrier considerations
Although a clean, primed surface is essential, you also need to verify moisture levels before you lay peel-and-stick tiles because excess moisture will break the adhesive bond and cause warping or mold.
Test concrete with a moisture meter or simple tape test. If high, install a suitable vapor barrier or epoxy sealer.
Let the substrate fully dry and retest before installing tiles.
Step-by-Step Installation Guide
Before you start sticking tiles down, you’ll want to acclimate them and map out a layout so cuts and seams fall where they’ll look best.
Set reference lines, cut tiles for straight edges and obstacles, then peel, place, press, and roll each tile for a secure bond.
Stagger seams as you go and keep rows aligned to maintain a professional finish.
Step 1 Acclimate tiles and prepare layout
Start by letting the peel-and-stick tiles sit in the room for 24–48 hours so they can acclimate to the temperature and humidity; this prevents future shrinking, warping, or adhesive failure.
While they rest, clean and dry the subfloor, remove debris, and repair imperfections.
Lay out a few tiles dry to check pattern and fit, trimming edge pieces as needed for a smooth, even shift.
Step 2 Establish reference lines and starting point

With tiles acclimated and your layout checked, you’re ready to establish straight reference lines and pick a starting point so the pattern stays even across the room.
Snap a chalk line from the midpoint of one wall to the opposite wall, then perpendicular from the room’s midpoint.
Choose a main focal line—usually center or longest sightline—and begin along that line to keep rows straight and balanced.
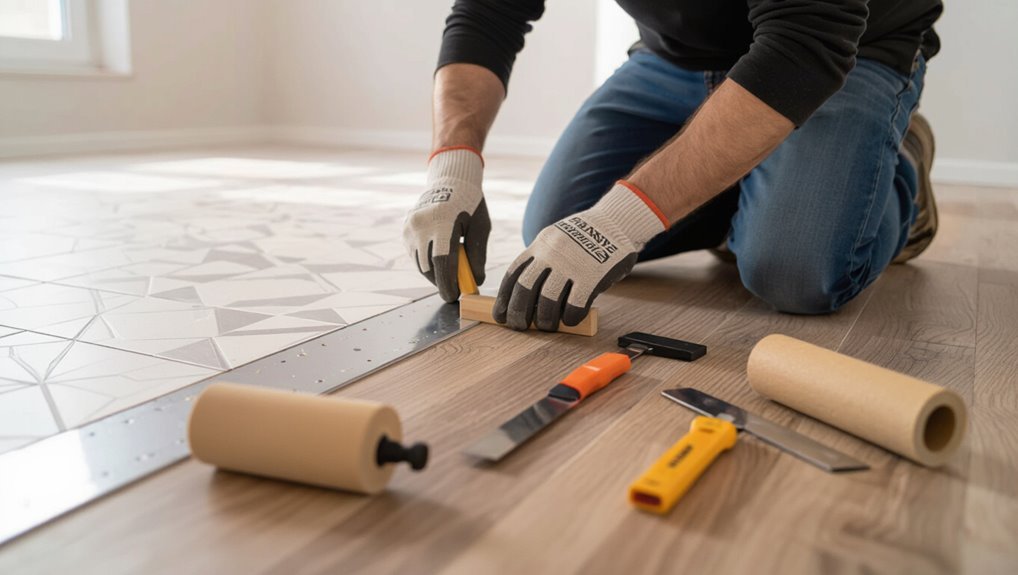
Step 3 Cutting tiles (straight cuts, L-shape, around obstacles)
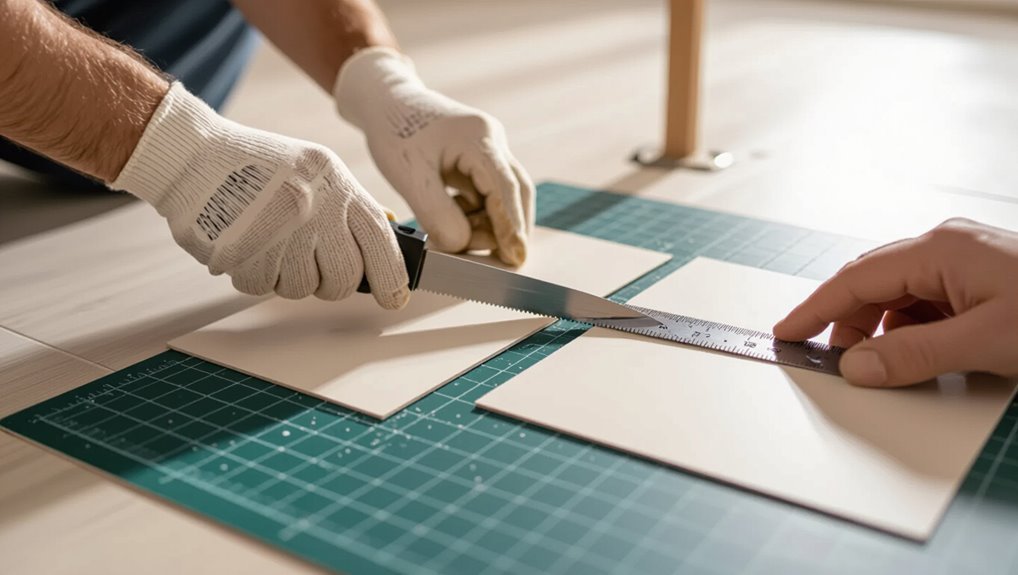
Measure and mark each tile carefully, then cut to fit straight lines, L-shapes, and obstacles so your layout stays tight and professional.
Use a straightedge and utility knife for clean straight cuts, snapping tiles along the score. For L-shapes or notches, cut slowly with a jigsaw or fine-tooth saw.
Transfer measurements precisely for vents, pipes, or door casings to avoid gaps.
Step 4 Peeling backing and placing tiles (pressure technique, rolling)
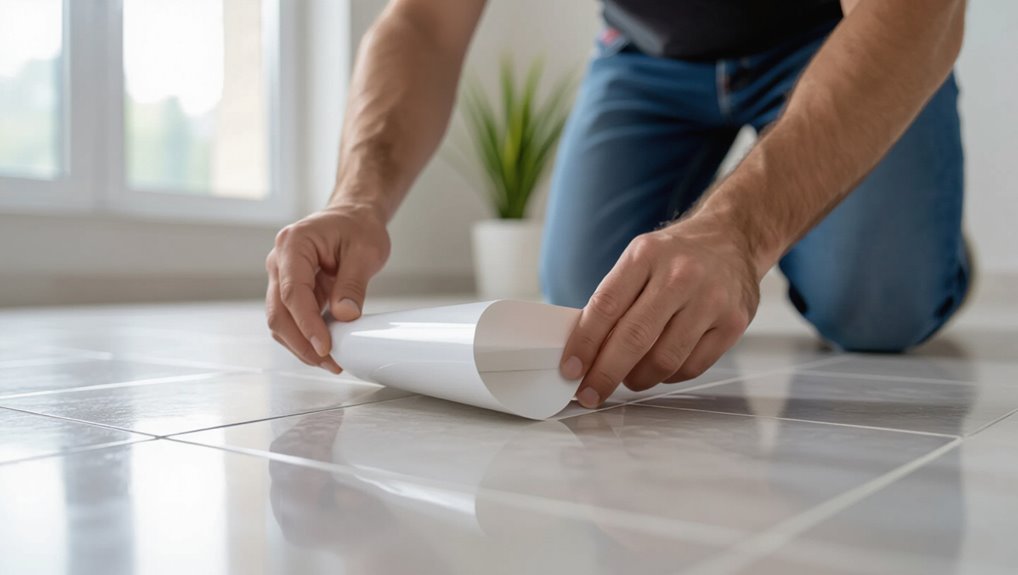
Peel a corner of the backing and align the tile with your layout lines, then press the exposed adhesive down firmly so the tile seats into place; don’t peel the entire backing at once—work gradually to maintain alignment.
Use a weighted roller or apply firm pressure from center outward to remove air pockets.
Repeat, overlapping edges slightly and wiping away adhesive squeeze‑out as needed.
Step 5 Staggering and aligning seams for best appearance

Once you’ve laid the first row, stagger the next rows so seams don’t line up—this breaks up patterns and hides cuts, giving the floor a more natural, professional look.
Offset by half a tile or use a consistent stagger (e.g., one-third).
Check alignment frequently, trim end tiles for uniform joint spacing, and keep seams straight using chalk lines or a long straightedge.
Step 6 Working around doorways, cabinets, and fixtures
Working around doorways, cabinets, and fixtures takes a bit more planning, but you can handle it with a few careful cuts and the right sequence.
Measure gaps, mark tiles, and dry-fit pieces. Trim tiles with a utility knife or snips for pipe and hinge clearances.
Remove doors or adjust hinges if needed. Press tiles firmly, ensuring adhesive contacts uneven surfaces for a secure fit.
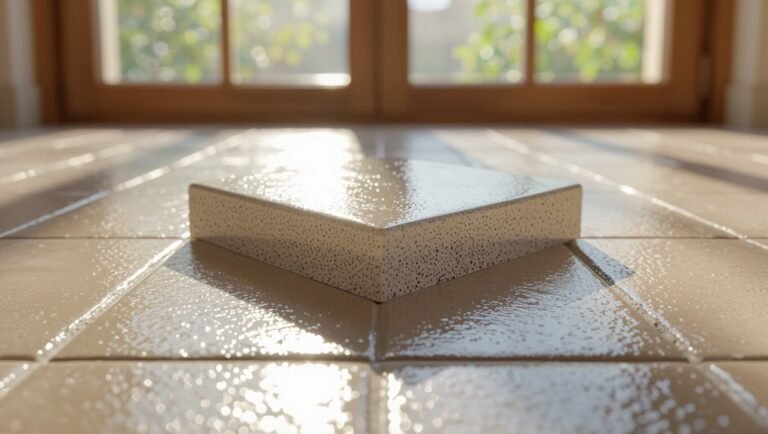
Step 7 Finishing edges, trim, and transitions to other flooring
After you’ve fitted tiles around doors and fixtures, finish the exposed edges and join the new floor to adjacent surfaces.
Trim excess tile flush with baseboards, install quarter-round or shoe molding where needed, and use connection strips at doorways or between different floor heights.
Caulk gaps near wet areas, secure thresholds with screws, and make certain connections are tight, level, and smooth for safe, attractive results.
Step 8 Rolling, weighting, and initial cure time
Step 8: Roll and weight the tiles immediately to guarantee full adhesive contact and reduce air pockets—use a 100-pound (45 kg) floor roller, sweeping it across the floor in overlapping passes.
Then add temporary weights to edges and seams as needed; allow the manufacturer-recommended initial cure time (usually 24–48 hours) before heavy traffic or furniture placement.
Check seams, remove excess adhesive, and avoid walking on tiles until cured.
Special Situations and Room-Specific Tips
When you work in bathrooms or other wet areas, use waterproofing and sealants to protect seams and edges.
In kitchens, consider tiles rated for heat and grease, and plan heavy-appliance placements on reinforced or underlayment sections.
For basements, stairs, and uneven thresholds, address moisture control, use suitable junctions, and choose safer alternatives where needed.
Bathrooms and wet areas waterproofing and sealants
Although peel-and-stick tiles make installation quick, bathrooms and other wet areas demand extra waterproofing and proper sealants to prevent moisture damage.
You should prep subfloor with a waterproof membrane or primer, use moisture-rated adhesive, and seal seams and edges with silicone or polyurethane caulk.
Flash around tubs, showers, and fixtures, slope floors for drainage, and follow manufacturer curing times before exposing tiles to water.
Kitchens grease, heat, and heavy appliance placement
Because kitchens concentrate heat, grease, and heavy appliances, you’ll need to take extra steps when installing peel-and-stick tiles to guarantee durability and safety.
Clean thoroughly, degrease, and let the floor dry.
Use heat-resistant, high-adhesion tiles near stoves and under-range areas.
Reinforce under heavy appliances with cement board or a plywood subfloor, and use threshold strips to prevent edges from lifting.
Basements and high-humidity rooms moisture control strategies
Kitchens demand extra prep for grease and heat, but basements and other humid rooms pose a different challenge: moisture.
You’ll test concrete for dampness, use a moisture barrier or primer, and choose tiles rated for high humidity.
Improve ventilation, run a dehumidifier, and slope toward drains if needed.
Allow adhesive to cure fully and recheck moisture before finishing.
Stairs and uneven thresholds alternatives and safety tips
When tackling stairs and uneven thresholds, plan for safety first and fit—peel-and-stick tiles can work, but you’ll often need alternatives like stair nosing, tread covers, or non-slip adhesive strips to protect edges and prevent tripping.
Measure carefully, use connector strips to bridge height differences, secure edges with adhesive or trim, add anti-slip treatments, and inspect regularly for wear to avoid hazards.
Tools, Materials, and Cost Checklist
Before you start laying tiles, gather your essential tools (tape measure, utility knife, straightedge, roller) and consider optional gadgets like a tile cutter or knee pads that speed the job.
Make a checklist of materials and consumables—tiles, underlayment, cleaner, and extra pieces for cuts and mistakes.
Finally, review a typical cost breakdown so you know how much you’ll spend on materials versus any labor you might hire.
Essential tools list
You’ll need a handful of basic tools and materials to get peel-and-stick tiles down quickly and cleanly—most homeowners already own the essentials, but a few specialty items will save time and improve results.
Gather these must-haves before you start:
- Utility knife, straightedge, measuring tape
- Roller (3–6 lb), floor cleaner, primer
- Pencil, spacers, knee pads
Optional tools and gadgets that speed the job
Although you can complete most peel-and-stick installs with basic tools, a few optional gadgets will speed the job and improve accuracy—think a snap-off tile cutter, a multi-position angle guide, and a heat gun for tricky edges.
Use these to work faster and neater.
- Snap-off tile cutter for clean straight cuts.
- Angle guide for precise corner fits.
- Heat gun for flexible edging and adhesion.
Materials and consumables checklist
Those optional gadgets speed things up, but you’ll also need a clear list of materials and consumables to keep the job moving without interruptions.
Gather tiles, underlayment or vapor barrier, and junction pieces. Have cleaners, primer, and seam sealer ready. Keep spare tiles and a quality utility knife on hand.
- Tiles and trim
- Surface prep supplies
- Cutting and finishing tools
Typical cost breakdown (materials vs labor)
Expect to spend far more on labor than on the peel-and-stick tiles themselves: while materials (tiles, underlayment, trims, adhesives and sealers) typically run $1–$6 per square foot, professional installation can add $2–$6 or more per square foot depending on site prep, layout complexity, and local rates. You’ll budget materials, labor, and unexpected prep costs.
| Item | Low | High |
|---|---|---|
| Materials | $1/ft² | $6/ft² |
| Labor | $2/ft² | $6+/ft² |
Common Installation Mistakes and How to Avoid Them
Before you start laying tiles, watch for common pitfalls that cause buckling, gaps, or sticky tiles and learn the quick fixes for poor subfloor prep.
Keep tiles aligned and seams tight with proper layout and cutters, pick a tile rated for the room’s moisture and traffic, and test adhesive contact before committing.
If a tile won’t stick or shows bubbles, you’ll need to troubleshoot adhesive issues or replace the tile with the correct type.
Poor subfloor prep (symptoms and fixes)
If you skip proper subfloor prep, the tiles won’t stick well and you’ll see lifting, uneven seams, or premature wear; fix it by cleaning, leveling, and repairing the surface before you lay any tiles.
Remove dust, grease, and old adhesive. Fill cracks and low spots with a floor patch, sand high areas, and guarantee the subfloor is dry and solid for lasting adhesion.
Misalignment and visible seams (prevention techniques)
When tiles get misaligned or seams become visible, the result is a floor that looks rushed and won’t wear evenly.
So take steps to prevent it from the start: dry-fit rows, snap chalk lines as guides, work from a focal point outward, press and roll seams immediately, stagger joints for stability, trim precisely, and check alignment frequently.
Fix small shifts before adhesive sets.
Using wrong tile type for the room (how to choose correctly)
Even with perfect alignment, choosing the wrong tile for a room will undo your work fast—peel-and-stick options vary by thickness, wear rating, and moisture resistance, and picking one that isn’t suited to the space leads to peeling, staining, or premature wear.
Check manufacturer ratings for traffic class and waterproofing, match thickness to changes, and pick tiles labeled for kitchens, bathrooms, or high-traffic areas.
Insufficient adhesive/contact issues (troubleshooting)
Poor adhesion is the single biggest reason peel-and-stick tiles fail, and you’ll notice it as tiles that lift at the edges, bubble, or shift underfoot.
To troubleshoot, clean and dry the subfloor, remove old adhesive, and prime porous surfaces.
Press tiles firmly with a roller, allow proper acclimation temperature, replace low-tack tiles, and spot-reapply adhesive where needed to secure edges.
Maintenance, Repair, and Longevity Tips
Keep your peel-and-stick floor looking great with regular sweeping and gentle mopping for routine cleaning and quick stain removal.
If a tile gets damaged you can usually spot-replace it, and protecting high-traffic areas with furniture pads and mats will extend the floor’s life.
I’ll also cover simple repair steps and how to decide when replacement is a better option than repair.
Routine cleaning and stain removal
When you stick with a regular cleaning routine, peel-and-stick tiles stay looking fresh and last longer; a few simple daily habits and the right cleaners prevent most stains and surface wear.
Clean spills promptly, avoid abrasive tools, and use pH-neutral solutions.
Follow this quick plan:
- Sweep/vacuum daily.
- Damp-mop weekly with mild cleaner.
- Blot stains immediately; rinse and dry.
Repairing damaged tiles and spot replacement
If a tile gets cracked, lifted, or stained beyond cleaning, you can replace it yourself without tearing up the whole floor; spot replacement is a quick, cost-effective way to keep your peel-and-stick surface looking seamless and functioning properly.
Remove grout or adhesive, heat stubborn tiles gently, peel up damaged pieces, clean the substrate, apply new adhesive or backing, align replacement tile, press firmly.
Extending life protection, furniture pads, and mats
Replacing a damaged tile keeps the floor functional, but protecting the rest of the surface will prevent future repairs.
Use felt pads under furniture legs, wide glides for heavy pieces, and casters rated for hard floors.
Place entry mats to trap grit and moisture, and use area rugs in high-traffic zones.
Clean spills promptly and avoid dragging items to reduce gouges and wear.
When to replace vs repair
Although small chips and loose edges can often be fixed with adhesive or a replacement tile, you’ll want to replace larger sections when damage affects appearance, safety, or waterproofing.
Inspect for curling, delamination, stains, or soft spots. Repair isolated issues; replace when seams gape, water has penetrated, or repeated repairs fail.
Prioritize areas with heavy traffic or moisture to prevent bigger problems.
Comparison Peel and Stick vs Other Flooring Options
Now that you know how to care for peel-and-stick tiles, it’s helpful to compare them with other flooring so you can choose what fits your needs.
You’ll see that sheet vinyl is similar on cost and ease of installation but offers fewer design options, while LVP is more durable and realistic-looking yet pricier.
Compared with ceramic tile and hardwood, peel-and-stick is the most budget- and DIY-friendly, though it trades off longevity and robustness.
Peel and stick vs sheet vinyl
When you’re choosing between peel-and-stick tiles and sheet vinyl, think about how you plan to install, maintain, and replace the floor: you’ll prefer tiles for easy spot replacement and pattern flexibility, while sheet vinyl suits seamless coverage and quick cleaning. Compare at a glance:
| Peel-and-Stick | Sheet Vinyl |
|---|---|
| Easy patching | Seamless surface |
| Pattern options | Faster full-room install |
| Thicker feel | Fewer seams |
| DIY-friendly | Needs careful measuring |
Peel and stick vs luxury vinyl plank (LVP)
If you’re weighing peel-and-stick tiles against luxury vinyl plank (LVP), focus on durability, installation style, and appearance.
Peel-and-stick is thinner, easier for quick DIY jobs, and offers bold patterns.
LVP generally feels sturdier, handles traffic and moisture better, and mimics real wood more convincingly.
Choose peel-and-stick for speed and budget, LVP for long-term performance and realism.
Peel and stick vs ceramic tile and hardwood (cost, durability, installation)
How do peel-and-stick tiles stack up against ceramic tile and hardwood on cost, durability, and installation?
You’ll pay far less upfront for peel-and-stick, install it yourself quickly, and tolerate moderate wear.
Ceramic resists scratches and moisture but costs more and needs skilled installation.
Hardwood offers warmth and longevity but demands higher cost, maintenance, and professional fitting—better for long-term value.
FAQs
You probably have a few practical questions about peel-and-stick tiles, like whether you can install them over existing tile or use them in a bathroom or basement.
You’ll also want to know if they’re waterproof, how long they last, and whether they’ll damage the subfloor when removed.
I’ll answer each of these clearly so you can make the right choice for your project.
Can peel and stick tiles be installed over existing tile?
Though it’s tempting to lay peel-and-stick tiles directly over your old floor, you’ll want to assess and prep the existing tile first to confirm proper adhesion and a long-lasting result.
Clean thoroughly, repair loose or cracked tiles, and roughen glossy surfaces with sanding or a degreasing solution.
Use a primer if recommended by the tile manufacturer, and ascertain a flat, stable substrate before installing.
Are peel and stick tiles waterproof?
Curious whether peel-and-stick tiles will stand up to water? Many vinyl peel-and-stick tiles resist spills and light moisture, so you can use them in kitchens and bathrooms if seams are tight and you clean up promptly.
They’re not fully waterproof like sheet vinyl or ceramic; prolonged standing water or flooded areas can seep beneath edges and cause lifting or damage.
How long do peel and stick floor tiles last?
If you keep spills wiped up and avoid standing water, peel-and-stick tiles will perform better—but lifespan depends on a few factors.
With normal foot traffic and good prep, expect 5–15 years. Quality, adhesive strength, installation, and subfloor condition matter most.
High-traffic areas or poor adhesion shorten life; premium vinyl tiles with proper installation can last toward the higher end of that range.
Can you install peel and stick flooring in a bathroom or basement?
Can you use peel-and-stick tiles in a bathroom or basement? Yes, with precautions.
You’ll need a waterproof or water-resistant product, fully cured and dry subfloor, and tight seams sealed with silicone or grout where moisture is likely.
For basements, address humidity and potential water intrusion first.
Proper prep and ventilation help prevent lifting, mold, and premature failure.
Do peel and stick tiles damage the subfloor when removed?
When you pull up peel-and-stick tiles, they can damage the subfloor—but the risk depends on the tile type, adhesive strength, and how they’re removed.
You can minimize harm by pulling slowly, using a heat gun or steam to soften adhesive, and scraping gently with a floor scraper.
For stubborn residue, use a recommended adhesive remover and sand or refinish any damaged spots before reinstalling flooring.
Closing Checklist Final Walkthrough Before Use
Before you walk on the new floor, check that all tiles are firmly stuck, seams are tight, and the surface is clean and dry.
Remember any manufacturer curing time—don’t place heavy furniture or rugs until that period has passed.
Set a simple post-installation care schedule for cleaning and inspections to keep the floor looking good.
Pre-use inspections and curing time reminders
Although the adhesive sets quickly, you should do a thorough final walkthrough to check tile alignment, seam tightness, and any adhesive squeeze-out before using the floor.
Perform these quick inspections and allow curing time so the bond fully stabilizes.
- Verify flatness and tactile seam feel.
- Remove any visible adhesive immediately.
- Wait manufacturer-specified cure time before heavy traffic.
Post-installation care schedule
Now that you’ve checked alignment, seams, and adhesive cleanup, follow a short post-installation care schedule to protect the bond and appearance as the floor cures.
For 48–72 hours, avoid heavy traffic and rugs; keep area dry and at recommended temperature.
After curing, gently clean with pH-neutral cleaner, trim edges, and recheck seams.
Address issues immediately to prevent long-term damage.