How to Install Vinyl Plank Flooring: A Step-by-Step Guide for DIYers
You can install vinyl plank flooring yourself in a weekend if you prep properly, measure carefully, and use basic tools like a utility knife, tapping block, spacers, and a pull bar. Acclimate planks 48 hours, verify the subfloor is clean, dry, and level, choose the right underlayment or vapor barrier, and stagger joints 6–8 inches for a natural look. Follow manufacturer instructions for click-lock or glue-down systems, and keep an expansion gap—more details ahead if you want them.
Can You Install Vinyl Plank Flooring Yourself?
Yes — you can install vinyl plank flooring yourself if you’re comfortable with basic DIY tasks.
The process usually involves prepping the subfloor, measuring and cutting planks, and snapping or gluing them in place. A typical room can take a weekend for one person or less with help.
At a glance you’ll need a utility knife or saw, spacers, a tapping block and pull bar, measuring tools, and any adhesive or underlayment specified by the product.
Short summary of process and typical time estimates
If you’ve got basic DIY skills and the right tools, you can install vinyl plank flooring yourself in most rooms; the process typically involves preparing the subfloor, laying underlayment if needed, snapping or gluing planks in place, trimming edges, and installing trim.
Expect a small room in a day, average room 1–2 days, and a full house several days.
Ask “how do you install vinyl plank flooring” as you plan.
Tools and materials needed at a glance
Tools and materials are the backbone of a smooth vinyl plank install, and you’ll want to have them organized before you start.
Gather quality planks, underlayment if needed, and the right tools to save time and avoid mistakes. Keep everything accessible and check quantities twice.
- Utility knife and replacement blades
- Tape measure and chalk line
- Spacers and tapping block
- Pull bar and rubber mallet
- Underlayment and adhesive (if required)
What Is Vinyl Plank Flooring and Why Choose It?
Vinyl plank flooring comes in types like rigid SPC, cushioned WPC, and thin luxury vinyl, and you’ll want to know which suits your project.
It’s popular because it’s durable, water-resistant, and looks like real wood or tile, making it great for kitchens, basements, and high-traffic areas.
Keep in mind limitations like moisture management and flat subfloors—those affect installation method and long-term performance.
Types of vinyl plank flooring (SPC, WPC, luxury vinyl)
There are three main types of vinyl plank flooring you’ll encounter—SPC, WPC, and luxury vinyl—each built differently to suit various needs. You’ll pick based on rigidity, thickness, and budget.
| Type | Quick note |
|---|---|
| SPC | Very rigid, thin core |
| WPC | Thicker, cushioned core |
| Luxury vinyl | Flexible, often softer surface |
| Installation | Click-lock or glue options |
Advantages and common use-cases
If you want durable, low-maintenance flooring that still looks like real wood, vinyl plank is a smart choice you can install in almost any room.
You’ll enjoy scratch resistance, easy cleaning, and budget-friendly replacement. It’s great for high-traffic living areas, kitchens, basements, and rental units.
You can DIY the floating click system or glue-down options to suit your project needs.
Limitations and considerations (moisture, subfloor requirements)
While vinyl plank handles moisture far better than hardwood, you still need to manage water exposure and a flat, stable subfloor to get long-lasting results.
Don’t install over uneven, soft, or contaminated substrates—repair, level, or replace as needed.
In flood-prone areas use waterproof glues or loose-lay systems rated for moisture, and allow proper acclimation, expansion gaps, and perimeter sealing to prevent warping and mold.
Preparing for Installation Planning and Measurements
Before you start laying planks, you’ll need to calculate material quantities plus a waste allowance and plan the layout to minimize visible seams and tricky changes.
Check and prepare the subfloor—whether concrete, plywood, or existing flooring—so it’s flat, clean, and dry.
Finally, acclimate the planks and control room temperature and humidity to the manufacturer’s specs before installation.
How to calculate materials and waste allowance
Start by measuring each room’s length and width and multiply to get square footage, then add up adjoining spaces to determine the total area you’ll cover.
Then:
- Add 5–10% waste for straight layouts
- Add 10–15% for diagonal or patterned installs
- Round up to whole boxes per manufacturer
- Include trim, connections, adhesives if required
- Verify plank dimensions and calculate box coverage
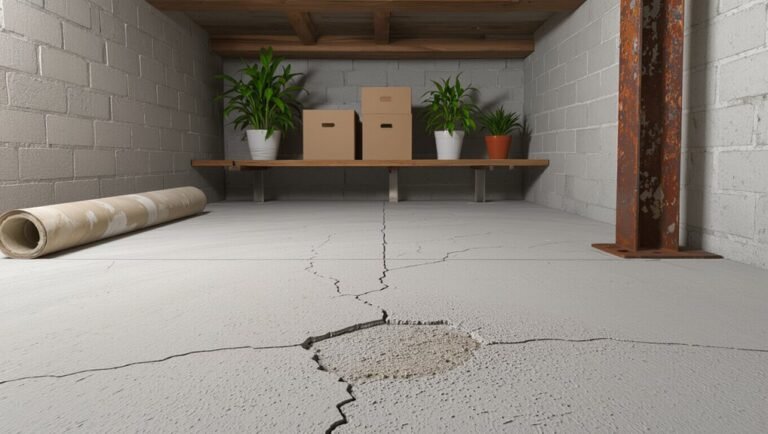
Assessing and preparing the subfloor (concrete, plywood, existing flooring)
Inspect the subfloor carefully to verify it’s clean, dry, level, and structurally sound—conditions that determine which prep steps you’ll need.
For concrete, check moisture and repair cracks; use a vapor barrier if required.
For plywood, secure loose boards and sand high spots.
If covering existing flooring, make sure it’s well-adhered, smooth, and compatible with vinyl.
Remove debris and vacuum thoroughly.
Acclimation and room conditions (temperature, humidity)
Because vinyl expands and contracts with temperature and moisture, you should acclimate your planks in the installation room for at least 48 hours (check the manufacturer’s recommendation).
Keep room temperature between 60–80°F and relative humidity 30–50% during acclimation and installation.
Remove cartons, stack boards flat, and avoid direct sunlight or heat sources.
Monitor conditions with a thermometer and hygrometer.
Layout planning and visualizing seams and transitions

Once your planks have acclimated and the room conditions are stable, plan the layout so seams fall in flattering, functional places and connections to other flooring are tidy.
Measure and mark starting lines, stagger end joints at least 6–8 inches, and visualize traffic flow.
Place joining strips where rooms meet or elevation changes occur.
Dry-lay rows to confirm appearance before cutting and fixing.
Tools, Materials, and Supplies Checklist
Before you start laying planks, make a checklist of the essential tools—cutting tools, a tapping block, and spacers—to keep the job precise.
Include materials and accessories like underlayment, trim, and any adhesives your specific product requires.
Don’t forget safety gear and consider optional professional tools if you want faster, cleaner results.
Essential tools (cutting tools, tapping block, spacers)
You’ve got the right materials, but the job won’t go smoothly without a few essential tools: reliable cutting tools, a tapping block, and spacers.
You’ll need sharp, precise cutters, something to protect plank edges when tapping, and consistent gaps for expansion. Gather quality, ergonomic tools to speed work and guarantee clean cuts and tight seams.
- Utility knife with extra blades
- Pull bar
- Tapping block
- Spacers (various widths)
- Straight edge/ruler
Materials and accessories (underlayment, trim, adhesives if needed)
Comfortable underlayment, matching trim, and the right adhesives keep your vinyl plank floor looking and performing its best.
You’ll pick underlayment for sound and moisture control, trim to finish edges, and adhesive only if planks require glue-down installation. Measure accurately and buy a little extra for mistakes.
- Underlayment (moisture barrier)
- Threshold strips
- Quarter-round/base shoe
- Vinyl-safe adhesive
- Adhesive trowel
Safety gear and optional professional tools
One essential set of items you’ll want on hand includes safety gear—gloves, eye protection, knee pads, and a dust mask—plus a few optional professional tools that speed the job and improve results.
Also bring a utility knife, straightedge, tapping block, pull bar, and mallet.
Consider a flooring cutter, carpet kicker, and work light for accuracy.
Store tools safely when not in use.
Step-by-Step Installation Guide
Now you’ll follow a clear step-by-step process starting with removing baseboards and preparing thresholds.
Next you’ll repair and level the subfloor, add underlayment or a moisture barrier if needed, and snap a chalk line to establish your starting row.
Finally, you’ll lay the first row—using the appropriate technique for click-lock or glue-down planks—to set a straight, secure foundation for the rest of the floor.
Step 1 Remove baseboards and prepare thresholds
Start by removing baseboards and prepping door thresholds so your new vinyl planks sit flush and the changes look professional.
Use a pry bar, putty knife, and block to avoid damage. Measure gaps for expansion and label removed pieces.
Clean exposed edges and check threshold height. Reinstall or replace trim after flooring is laid.
- Pry bar
- Putty knife
- Block
- Tape measure
- Cleaning brush
Step 2 Repair and level the subfloor
Inspect the subfloor carefully for damage, low spots, and debris before you lay any planks—vinyl needs a flat, clean surface to perform correctly.
Remove loose boards, nails, and adhesive. Fill gaps and low areas with a floor-leveling compound per manufacturer directions, sand high spots, and replace rotten plywood.
Check for squeaks and secure joists. Verify the surface is dry and smooth before proceeding.
Step 3 Install underlayment or moisture barrier (when required)

With the subfloor repaired, you’ll decide whether your installation needs an underlayment or a moisture barrier—this depends on the vinyl type and the room’s moisture conditions.
If required, roll out vapor barrier or foam underlayment, overlap seams per manufacturer instructions, tape edges, and trim to fit.
Make certain the surface is smooth, flat, and clean before laying planks to prevent telegraphing and moisture issues.
Step 4 Establish a starting line and chalk line for the first row
Before you lay a single plank, pick a straight reference line and snap a chalk line to guide the first row so your entire floor stays square and even.
Measure from the longest, most visible wall, account for expansion gaps, and mark both ends. Use a carpentered square to guarantee 90-degree alignment.
Keep the chalk line taut and re-snap if stretched or smudged.
Step 5 Installing the first row (click-lock or glue-down specifics)
1. Position the first plank with its tongue toward the wall, leaving the recommended expansion gap.
For click-lock, angle and snap each plank into the previous one, tapping gently with a mallet and block.
For glue-down, apply adhesive per manufacturer, press the plank firmly, and use a roller to guarantee full contact.
Check alignment frequently and trim end pieces as needed.
Step 6 Staggering joints and maintaining expansion gaps

Stagger joints by at least 6–8 inches between adjacent rows to create a natural look and prevent weak seams.
Offset end joints using varying plank lengths, keeping a random pattern.
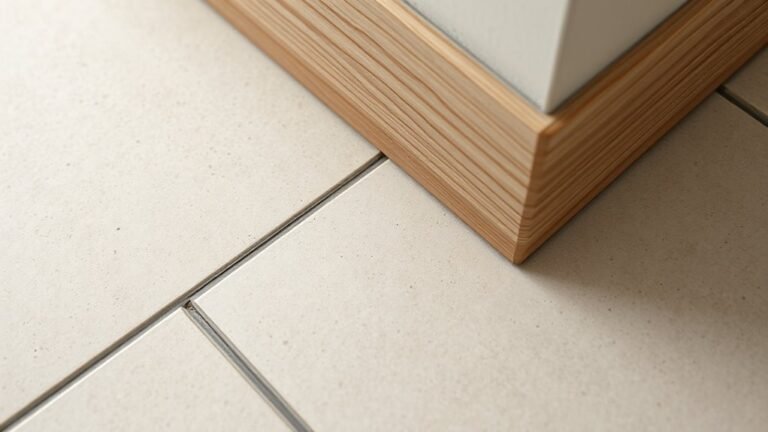
Maintain a consistent expansion gap (usually 1/4 inch) around walls, cabinetry, and fixed objects.
Use spacers as you work and check gaps frequently to allow for seasonal movement and prevent buckling.
Step 7 Cutting planks for edges, doorways, and vents (techniques and tips)
Measure and mark each plank carefully for cuts around walls, doorways, and vents, since precise fits make the installation look professional and prevent gaps or binding.
Use a straightedge and pencil for straight cuts, a jigsaw or coping saw for irregular shapes, and a utility knife with multiple scores for snap cuts.
Always cut slightly undersized to maintain expansion gaps and test-fit before final placement.
Step 8 Fitting around obstacles and inside corners

Work your way around obstacles and into inside corners by trimming and dry-fitting each plank so it seats cleanly against the obstruction without forcing the joints; you’ll want to cut precise relief notches for pipes, door trim, or irregular corner angles, then test the fit and adjust incrementally to preserve the plank locking mechanism and the required expansion gap.
Use a coping or jigsaw for tight shapes, mark accurately, and file edges.
Step 9 Installing final row and trimming to fit
Finish the job by preparing and installing the final row so it locks cleanly while maintaining the required expansion gap.
Measure each plank carefully, allowing the gap, and rip them lengthwise with a utility knife or saw.
Use a pull bar to engage the tongue and groove.
Trim around obstacles, check alignment frequently, and guarantee planks sit flat before proceeding to finishing touches.
Step 10 Reinstalling baseboards, transitions, and finishing touches
Once the planks are secure and the expansion gap is clear, you’ll reinstall baseboards and junctions to conceal edges and complete the look; take your time fitting each piece so it sits flush without pinching the floor.
Reattach trim, install connectors, and finish seams for a professional result.
- Refasten baseboards with finish nails
- Install reducer/thresholds
- Caulk gaps where needed
- Recut outlet plates
- Clean and inspect seams
Common Problems and How to Fix Them
You’ll likely run into a few common issues—gapping, buckling or peaks, uneven seams or click-lock failures, moisture problems, and occasional damaged planks—and you should know what causes each so you can fix them fast.
Check for improper acclimation, subfloor irregularities, poor locking engagement, or excess moisture as the usual culprits and follow targeted remediation steps like re-spacing, re-locking, leveling, or replacing planks.
I’ll walk you through simple troubleshooting and repair actions for each situation.
Gapping, buckling, or peaks causes and fixes
If your vinyl plank floor develops gaps, buckles, or sharp peaks, it’s usually a sign of moisture issues, improper acclimation, or installation errors like insufficient expansion space or tight seams.
You should check subfloor moisture, allow proper acclimation, relieve pressure by loosening boards and reestablishing expansion gaps, replace warped planks, and correct adhesive or locking issues to prevent recurrence.
Uneven seams or click-lock failures troubleshooting steps
When seams look uneven or the click-lock joints keep failing, start by isolating the cause—poorly aligned planks, damaged locking profiles, debris in the joints, or an out-of-flat subfloor are the usual suspects.
Realign rows, replace planks with damaged locks, clean channels thoroughly, and verify the subfloor is flat within manufacturer tolerances.
Use a tapping block and proper installation pressure to seat locks correctly.
Moisture-related issues and remediation
Because vinyl plank flooring is sensitive to moisture in both the subfloor and the environment, you’ll want to identify sources quickly and act to prevent warping, cupping, or mold growth.
Check for leaks, high humidity, and damp concrete; use a moisture meter.
Fix plumbing, improve ventilation, apply a vapor barrier or recommended primer, and allow subfloor to dry fully before installing.
Repairing damaged planks after installation
Spot damage can happen even after a careful installation, and you’ll want to address scuffs, gouges, lifting seams, or cracked planks quickly to prevent further problems.
For minor scratches, use a matching repair kit or filler; replace any cracked or warped plank by releasing nearby boards and swapping in a new one.
Reseal lifting seams and check underlayment for hidden moisture.
Best Practices, Tips, and Time-Saving Hacks
When you plan your layout, stagger seams and follow the grain to make the floor look professional and avoid weak spots.
Use accurate measuring and clean, steady cuts—measure twice, cut once—and keep a utility knife, straightedge, and miter saw handy to save time.
After installation, stick to simple maintenance like regular sweeping, using floor-safe cleaners, and felt pads on furniture to extend the life of your vinyl planks.
Best practices for layout and aesthetics (stagger patterns, grain direction)
If you want a professional-looking floor, plan your layout before you snap the first row: decide grain direction, establish a consistent stagger pattern, and balance short end joints so seams don’t line up across multiple rows.
Run planks parallel to the longest light source, vary plank lengths for natural rhythm, keep end joints at least 6–8 inches apart, and step back often to check visual flow.
Tips for accurate cutting and measuring
Accuracy matters: measure twice and cut once to avoid wasted planks and wasted time.
Use a reliable tape measure, square, and pencil; mark cuts on the tongue side. Score-and-snap for straight cuts, a fine-tooth saw or jigsaw for curves.
Clamp pieces, cut slowly, and test-fit before locking. Account for expansion gaps and trim baseboards for a clean, precise finish.
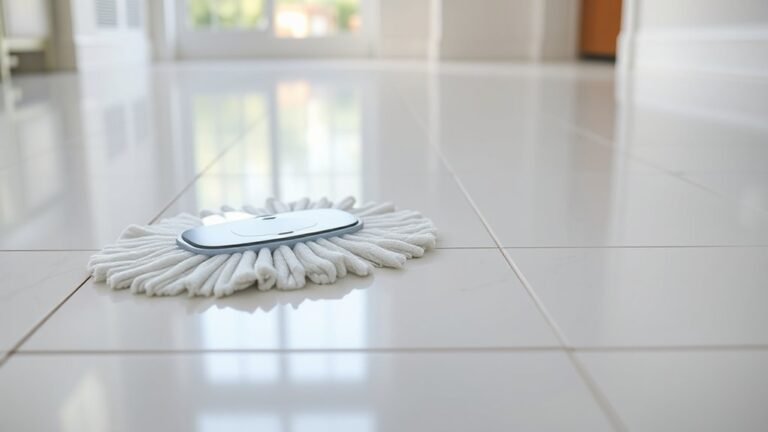
Maintenance tips to extend the life of vinyl plank flooring
Once your planks are cut and fitted, keeping them looking and performing like new requires regular care and smart habits.
Clean spills promptly, use soft brooms or microfiber mops, and avoid abrasive cleaners. Place mats at entries, use felt pads under furniture, and control indoor humidity to prevent gaps or buckling.
- Wipe spills immediately
- Sweep or vacuum regularly
- Use gentle cleaners
- Add entry mats
- Protect furniture
Cost, Time, and When to Hire a Pro
Expect to pay anywhere from budget-friendly materials to higher-end vinyl plus labor if you hire someone, and planning costs helps you choose wisely.
Estimate a weekend for a 150–300 sq ft room if you’re handy, but small rooms take less and complex layouts or inexperience will add hours.
If you spot uneven subfloors, extensive trim work, or plumbing/electrical obstacles, hire a pro to avoid costly mistakes.
Typical material and labor cost ranges
Materials and labor for vinyl plank flooring typically fall into clear price bands that help you budget and decide whether to DIY or hire a pro. You’ll see DIY material costs around $1–$5/sq ft; pros add labor. Higher-end planks cost more but cut install time.
| Item | Typical Range |
|---|---|
| Budget plank | $1–$2/sq ft |
| Mid-range plank | $2–$4/sq ft |
| Luxury plank | $4–$8+/sq ft |
| Pro labor | $1–$4+/sq ft |
Time estimates by room size and skill level
Knowing the price bands helps, but time is just as important when planning a vinyl plank install.
Small rooms (50–100 sq ft) take 2–6 hours for beginners, 1–3 hours for experienced DIYers.
Medium rooms (100–300 sq ft) require a day to a weekend for novices, 4–8 hours if skilled.
Allow extra for prep, complex layouts, and changes.
Signs you should hire a professional
Deciding whether to hire a pro comes down to three practical factors: cost, time, and complexity.
If your budget can absorb labor, tight deadlines exist, or you’re tackling stairs, irregular layouts, moisture issues, or old subfloors, bring in a pro.
Professionals minimize mistakes, warranty work, and finish faster. Save yourself stress and potential costly fixes by hiring when risks are high.
FAQ
You probably have a handful of quick questions before you start, like whether vinyl can go over existing floors and how long planks need to acclimate.
You’ll also want to know if underlayment is required, whether bathrooms or basements are suitable, and when it’s safe to put furniture back.
I’ll answer each of these so you can finish the job with confidence.
Can vinyl plank be installed over existing flooring?
Can vinyl plank go over your existing floor? Yes, often you can install vinyl plank over many substrates—tile, vinyl, or wood—if the surface is clean, dry, level, and firmly adhered.
Remove loose material, fill low spots, and make sure connections and thresholds are addressed.
Avoid installing over carpet, cushioned vinyl, or uneven floors; those require removal or substantial prep.
How long should vinyl planks acclimate before installation?
How long should vinyl planks acclimate before installation?
You should let unopened boxes sit in the room where they’ll be installed for 48–72 hours at normal living conditions (temperature and humidity). This reduces expansion or contraction after installation.
For large temperature or humidity differences, extend acclimation to a week.
Keep boxes flat, avoid direct sunlight, and follow manufacturer-specific guidelines.
Is underlayment always necessary with vinyl plank?
After acclimating your planks, you’ll often wonder whether underlayment is required; the short answer is: not always.
If your vinyl has attached underlayment or the subfloor is flat, clean, and moisture-free, you can skip it.
Use separate underlayment for sound absorption, cushioning, or minor levelling.
Always check manufacturer recommendations and local building codes before deciding.
Can vinyl plank be installed in bathrooms or basements?
Wondering whether vinyl plank works in bathrooms or basements? You can install many waterproof or water-resistant vinyl planks in bathrooms and basements, but choose products rated for wet areas and below-grade use.
Verify subfloor is dry, flat, and moisture-tested. Use proper perimeter expansion gaps and recommended adhesives or locking systems.
Follow manufacturer guidelines to maintain warranties and long-term performance.
How long before furniture can be placed on new vinyl plank flooring?
If you’ve installed vinyl planks in a bathroom or basement, you’ll also want to know when it’s safe to put furniture back in place.
Wait at least 24–48 hours for the adhesive or interlocking joints to settle, longer if humidity or temperature were extreme.
Use felt pads under legs, avoid dragging heavy items, and gradually reintroduce weight to prevent shifting or indentations.