How to Cut Laminate Flooring Cleanly Every Time
You’ll get clean, chip-free laminate cuts by measuring precisely, marking with a straightedge, and either scoring-and-snapping for straight runs or using a fine-tooth carbide blade on a miter or circular saw for smoother edges. Cut face-down to reduce tear-out, clamp the plank, support offcuts, and set blade depth just below the plank. Slow, steady feeds and fresh blades prevent burn marks. Follow the step-by-step tips ahead to master each tool and tricky cuts.
How to Cut Laminate Flooring Cleanly Every Time (& Hook)
You’ll get the cleanest cuts by using a fine-tooth blade on a miter saw or a quality laminate scoring tool, depending on the cut.
This quick guide is for DIYers and pros who want precise, chip-free edges without wasting boards.
Follow these steps and you’ll finish faster with tight seams and a professional look.
Best method summarized
When you want clean, consistent cuts with minimal tear-out, the best method is to score and snap for straight cuts and use a fine-tooth blade or a laminate-specific scoring tool for curves and detailed work.
To answer how do I cut laminate flooring: measure, mark, score firmly, snap cleanly, and finish edges with a file or light sanding.
Work slowly and clamp as needed.
Who this guide is for and what you’ll achieve
Anyone tackling a DIY room makeover or a pro fitter polishing their technique will find this guide useful—it’s written for homeowners, hobbyists, and contractors who want clean, repeatable cuts without wasted material.
You’ll learn safe tool choices, precise measuring and marking, and efficient cutting methods for straight, angled, and tricky edge cuts.
Follow steps and you’ll save time, reduce waste, and get professional results.
Basic Understanding Laminate Flooring & Cutting Basics
You’ll learn what laminate flooring is, the common types and tongue-and-groove profiles you’ll run into, and how those differences affect cutting.
Clean cuts matter because they guarantee a tight fit, a professional finish, and long-lasting joints.
Before you start cutting, get familiar with key measurements and terminology like plank width, thickness, undercut, and expansion gap.
What is laminate flooring? Types and profiles
Laminate flooring is a multi-layered, manufactured product that mimics wood or stone while staying more affordable and durable.
You’ll find it comes in several constructions and edge profiles that affect installation and cutting. You’ll encounter variations; know them so you cut correctly.
- HDF core vs. MDF core — density matters.
- Direct print vs. embossed texture — surface detail.
- Square, beveled, or micro-beveled edges — seam appearance.
Why clean cuts matter (fit, finish, durability)
Because edges and seams are the first things people notice, making clean cuts is essential to getting a professional-looking, long-lasting floor.
Clean cuts guarantee panels fit tightly, prevent gapping, and reduce visible seams. They preserve locking mechanisms and underlay integrity, limiting movement and moisture infiltration.
Neat edges also simplify trim installation and maintenance, improving durability and overall appearance.
Key measurements and terminology to know
Measurements and a few key terms will guide every cut you make, so get comfortable with them before you start. Measure plank length and width, expansion gap, and cumulative run.
Know tongue-and-groove orientation, miters, rip cuts, and crosscuts. Mark cut lines from the top side, account for saw kerf, and double-check measurements before cutting to avoid waste and guarantee snug, even seams.
Tools and Materials You Need
Before you start cutting, gather the right power tools—like a mitre saw, circular saw, and jigsaw—plus hand tools such as a utility knife, straightedge, clamps, and spacers.
Pick recommended blades and bits (higher tooth counts for cleaner cuts) and have safety gear ready—eye and ear protection, gloves, and a dust mask.
Prep a clean, well-lit workspace and secure the flooring before each cut to stay safe and get accurate results.
Essential power tools (mitre saw, circular saw, jigsaw)
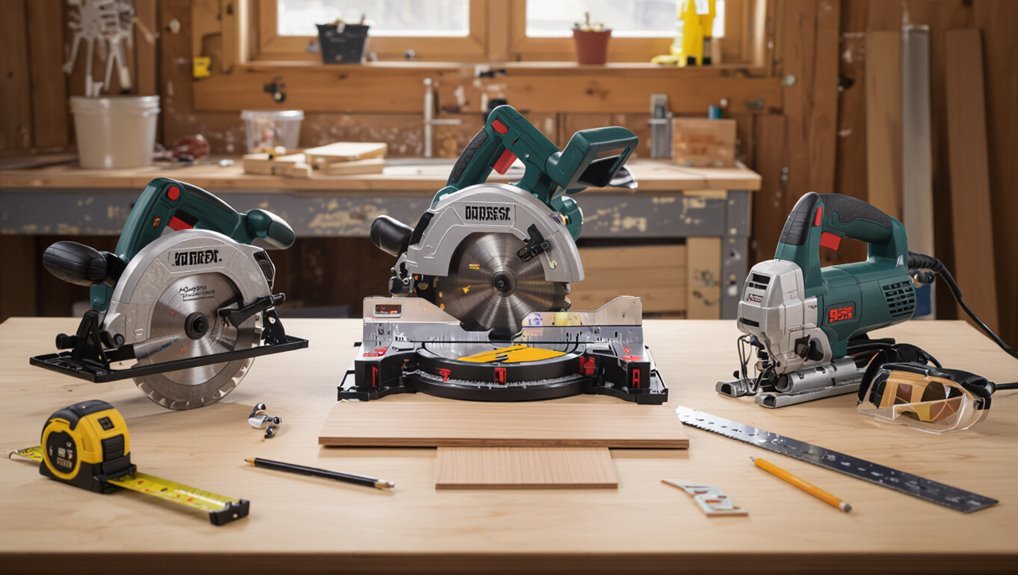
You’ll want three main power tools to get laminate flooring cut accurately and quickly: a mitre (miter) saw for straight, square end cuts and quick crosscuts, a circular saw for long rip cuts and trimming, and a jigsaw for curves, notches, and tricky cutouts around pipes or vents.
- Mitre saw — fast, precise crosscuts.
- Circular saw — straight rip and length cuts.
- Jigsaw — detailed curves and cutouts.
Essential hand tools and accessories (utility knife, straightedge, clamps, spacers)
Gather a few basic hand tools and accessories and you’ll speed up cuts, protect edges, and keep planks aligned as you work.
You’ll rely on a sharp utility knife for scoring, a straightedge for accurate lines, clamps to hold planks steady, and spacers to maintain expansion gaps while fitting pieces.
- Utility knife and extra blades
- Straightedge and pencil
- Clamps and spacers
Recommended blades, bits, and blades’ tooth counts
Once you’ve got your hand tools in place, pick blades and bits that match laminate’s composite core and wear layer so cuts stay clean and splinters stay minimal. Choose carbide-tipped circular blades (48–80 T), fine-tooth jigsaw blades, and brad-point or carbide router bits. Match tooth count to feed rate and finish.
| Tool | Type | Teeth/Size |
|---|---|---|
| Circular | Carbide | 48–80 T |
| Jigsaw | Fine-tooth | 10–20 T |
| Router | Carbide | 1/4″–1/2″ |
Safety gear and workspace prep
Safety gear and a tidy workspace keep you safe and make cutting laminate faster and cleaner.
You’ll don eye and ear protection, a dust mask, and work gloves.
Clear and well-lit space reduces mistakes and trip hazards.
Secure boards on sawhorses or clamps, and keep a broom, shop-vac, and push stick within reach.
- Safety PPE
- Stable supports
- Cleanup tools
Choosing the Right Cutting Method (Comparison)
You’ll want to match rip cuts, crosscuts, and notches to the job so each piece fits cleanly.
We’ll compare the pros and cons of common tools — mitre saw, track saw, circular saw, jigsaw, and snap cutter — so you can pick the best one.
Then you’ll see which tools suit small DIY jobs, larger installs, and different skill levels.
Rip cuts vs crosscuts vs notches when to use each
When cutting laminate flooring, you’ll choose between rip cuts, crosscuts, and notches based on the direction of the cut and how the piece fits. Rip for lengthwise trimming, crosscut for shortening boards, and notches to clear obstacles. Pick the right cut to avoid waste and frustration.
| Cut | Feeling |
|---|---|
| Rip | Confident |
| Crosscut | Precise |
| Notch | Relieved |
Pros and cons of common tools (mitre saw, track saw, circular saw, jigsaw, snap cutter)
Choosing the right tool for cutting laminate will save you time, improve finish quality, and reduce waste; each option—mitre saw, track saw, circular saw, jigsaw, and snap cutter—has clear strengths and trade-offs depending on accuracy, dust, mobility, and noise. You’ll pick based on precision, cleanup, portability, and speed.
| Tool | Strength | Trade-off |
|---|---|---|
| Mitre saw | Precise | Dusty, bulky |
| Track saw | Clean straight cuts | Costly |
| Snap cutter | No dust | Limited cuts |
Best tool choices by job size and skill level
Now match tool strengths to the scope of your project and your comfort with power tools.
For small patches or one-room installs, use a snap cutter or jigsaw if you prefer no dust.
For larger jobs, choose a circular saw or track saw for speed and straight cuts; a mitre saw’s accuracy helps repetitive crosscuts.
Beginners should start with manual or guided tools; advance as skills grow.
Step-by-Step Cutting Process
Start by planning your layout and measuring each run so you know exactly what cuts you’ll need.
Transfer those measurements to the planks, set up your tool with the right blade depth and a secure fence or clamp, then make straight rip cuts for clean edges.
Finish with precise crosscuts—use a backer board or zero-clearance setup to prevent chipping.
Step 1 Plan your layout and measure accurately
Before you cut a single plank, plan the layout and measure the room carefully so your seams fall in the least conspicuous places and you avoid awkward narrow strips at walls.
You’ll visualize plank runs, account for doorways, and note obstacles. Measure twice, note starting wall, and decide stagger pattern.
- Start wall and direction
- Doorways and trims
- Stagger/offset plan
Step 2 Marking and transferring measurements to the plank
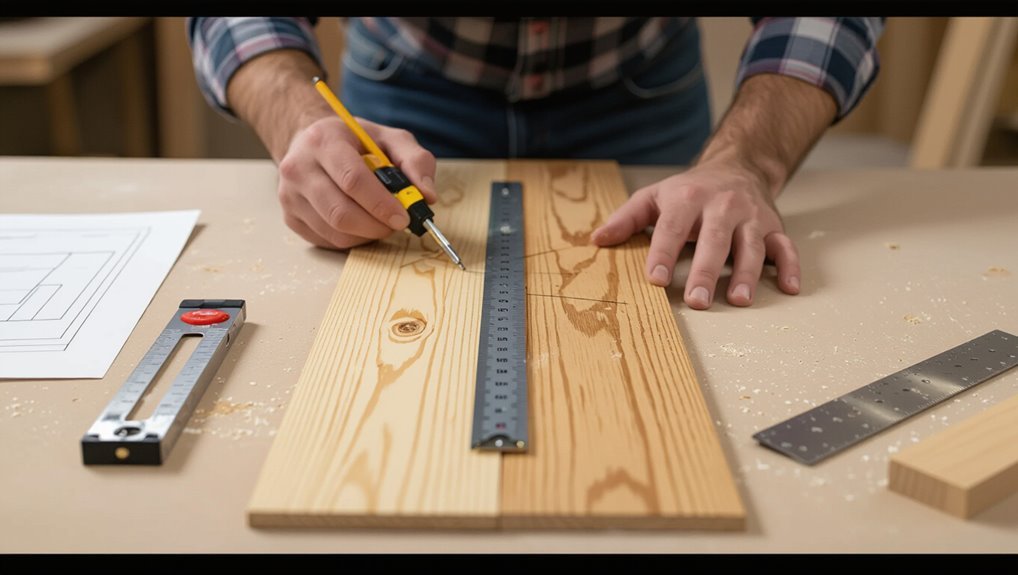
Measure twice and mark once: transfer your room measurements onto each plank carefully so cuts fit snugly against walls and around obstacles.
Use a carpenter’s pencil and a straightedge to mark cut lines on the plank’s face or tongue side as needed.
Account for expansion gaps, door jambs and vents, and mark notches for pipes or trim before cutting to avoid re-measuring.
Step 3 Setting up the tool, blade depth, and fence/clamp
With your cut lines transferred, get the saw and accessories ready so each cut is safe and accurate.
Clamp the plank firmly to a stable work surface, align the fence for consistent edge distance, and set blade depth to just clear the laminate—usually one tooth below the backing.
Check blade sharpness, wear eye and ear protection, and confirm the fence is square before cutting.
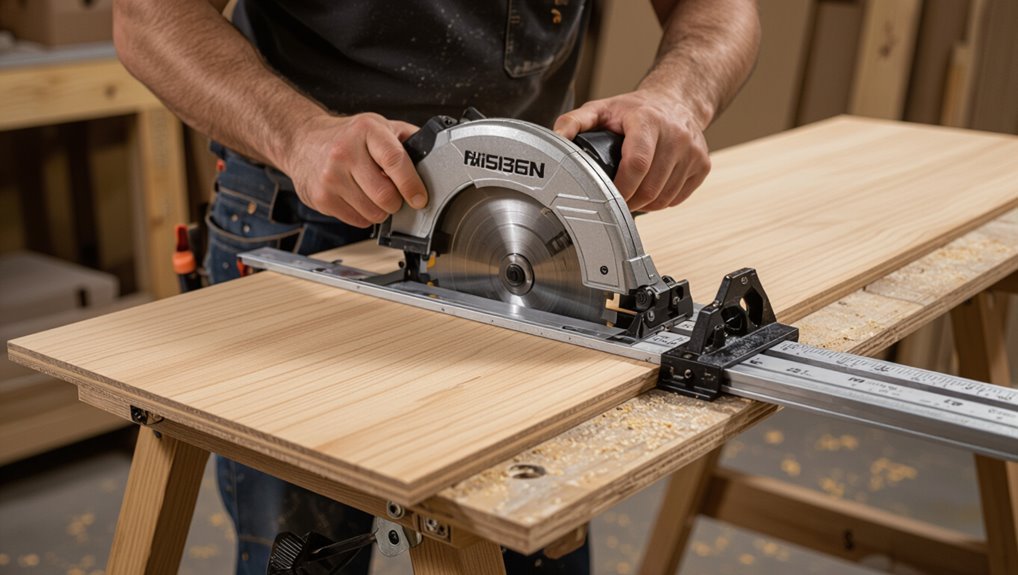
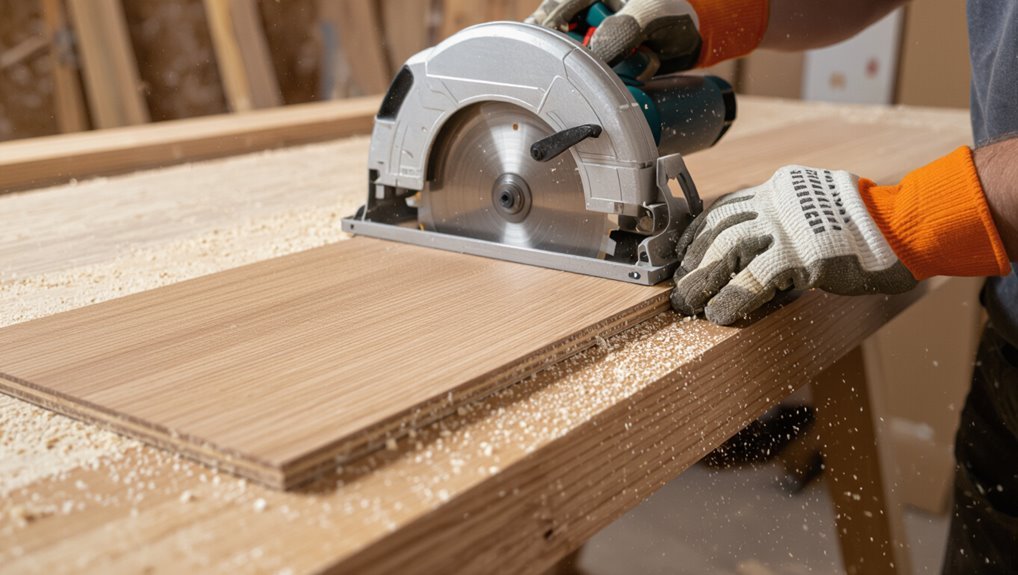
Step 4 Making straight rip cuts (technique for clean edges)
When you’re ready to rip the plank, feed it steadily against the fence so the blade slices along your marked line without wandering; keep a firm, even pressure and let the saw do the work rather than forcing the board through.
Use a steady feed rate, support long pieces, keep hands clear, and check alignment frequently.
Finish with a light pass to remove any tear-out.
Step 5 Making clean crosscuts (using backer board, zero-clearance)
Set up a backer board or zero-clearance insert to support the laminate fibers so your crosscuts come out clean and chip-free.
Mark the cut, clamp the plank and backer firmly, and use a fine-tooth blade or scoring blade.
Feed slowly, keeping the blade at full speed. Flip the piece for back-side cuts if needed to prevent tear-out, then sand or trim any minor burrs.
Step 6 Cutting notches, door jambs, and irregular shapes (jigsaw technique)
After you’ve handled clean crosscuts, you’ll often need to cut notches, fit around door jambs, or shape irregular pieces—tasks a jigsaw makes straightforward.
Mark the shape on the plank, clamp firmly, and use a fine-tooth blade. Cut slowly, following the line, and sand edges for a snug fit.
Test-fit before finishing to avoid gaps or overcuts.
Step 7 Cutting for transitions and around pipes (templates and hole saws)
1 You’ll handle changes and pipe penetrations with a few simple tools and precise templates. Trace alteration profiles and pipe locations onto scrap plywood, cut templates, and transfer shapes to planks.
Use a hole saw for pipes—start small, then enlarge. For thresholds, cut tongues or tails to fit metal strips.
Dry-fit pieces, adjust, then install for a snug, professional result.
Step 8 Finishing cut edges (sanding, sealing, touch-up)
Finish cut edges carefully to make your laminate installation look professional and last longer.
Sand any rough spots lightly with fine-grit sandpaper, following the grain. Wipe dust, then apply matching edge sealant or paint to prevent moisture damage.
Use colored filler or a marker for small gaps. Let everything dry fully, then inspect and trim excess for a seamless, durable finish.
Common Problems and How to Avoid Them (Mistakes & Fixes)
When you cut laminate, you’ll run into a few predictable problems—chipping, wobbly cuts, damaged click-lock edges, and burn marks—and knowing the causes lets you stop them before they start.
Use the right blade and feed rate to prevent chipping and burning, clamp and align boards to keep cuts accurate, and protect or repair click-lock edges if they get nicked.
I’ll cover quick fixes and simple prevention tips for each issue so you can finish clean, square cuts every time.
Chipping and splintering causes and preventive fixes
If you want clean edges, you’ll need to understand what causes chipping and splintering so you can prevent it — dull blades, improper cutting direction, unstable workpieces, and wrong blade types all contribute.
Use a sharp fine-tooth blade, score laminate first when using tools that tear, cut face-down on circular saws, support pieces fully, and feed material steadily to minimize tear-out.
Wobbly or inaccurate cuts alignment and clamping solutions
Clamp the board firmly and measure twice before you cut — shaky setups and poor alignment are the main reasons cuts wander or end up crooked.
Use straightedge guides, sacrificial fences, and non-slip pads to keep boards steady. Secure clamps on both ends, align the saw shoe to the cut line, and test with a scrap piece so your cuts stay true every time.
Damaged laminate click-lock edges repair and prevention
Damaged click-lock edges are one of the most common headaches you’ll face when installing laminate, and they’re usually avoidable with the right care.
Work slowly at joints, support planks beneath cuts, and use a fine-tooth blade or scoring knife to reduce chipping.
Repair minor nicks with clear epoxy or wood filler and sand lightly; replace severely crushed tongues to guarantee a tight, lasting fit.
Burn marks and melting blade speed and feed-rate tips
When you push a saw too slowly or force a dull blade, the friction generates heat that can scorch laminate edges or even melt the plastic wear layer.
Prevent burns by using a sharp, fine-tooth carbide blade and steady feed. Match blade RPM to material—don’t bog the motor.
Make shorter, confident passes, let the saw do the work, and cool with brief breaks if needed.
Best Practices and Pro Tips for Professional Results
To get clean, consistent cuts you’ll pick the right blade and keep a maintenance schedule so it stays sharp.
Use guide fences, track systems, or zero‑clearance inserts for square cuts and set up a repeatable workflow to crank through multiple planks fast.
Also store and acclimate boards properly and seal or protect cut edges until installation to prevent swelling or damage.
Blade selection and maintenance schedule
Anyone cutting laminate wants the right blade and a simple maintenance routine to get clean, chip-free cuts every time.
Choose a carbide-tipped, 60–80-tooth blade for circular saws or a fine-tooth blade for jigsaws.
Inspect teeth before each job, clean pitch buildup, and sharpen or replace when chips appear.
Schedule checks weekly during heavy use and after every transport or drop.
Using guide fences, track systems, and zero-clearance inserts
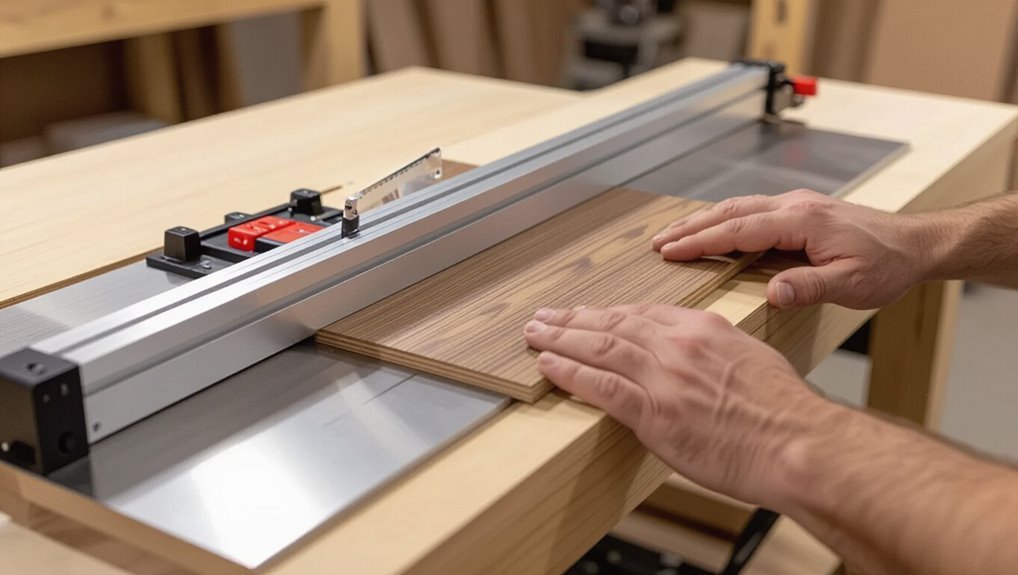
One reliable setup—guide fences, track systems, and zero-clearance inserts—lets you cut laminate straight, clean, and chip-free every time.
Clamp a fence to your saw or use a track for repeatable straight cuts. Fit a zero-clearance insert to support the laminate at the kerf, reducing tear-out.
Check alignment, secure the workpiece, and make controlled, steady feeds for crisp edges.
Workflows for cutting multiple planks quickly and consistently
After you’ve set up fences, tracks, and a zero‑clearance insert for clean cuts, streamline your workflow so you can handle dozens of planks without rechecking every measurement.
Set repeatable jigs, batch similar cuts, and mark stop points on the fence. Work efficiently and safely to maintain consistency.
- Pre-cut batches by length
- Use a stop block
- Inspect first and last cut
Storage, acclimation, and protecting cut edges before installation
Store your laminate flat and off the ground in the room where you’ll install it so planks can acclimate to the site’s temperature and humidity.
Keep them closed in original packaging for 48–72 hours, stacked evenly.
Protect cut edges with silicone sealant or edge trim to prevent moisture wicking.
Label and rotate boards by shade for consistent appearance during installation.
Tool-Specific Quick Guides (Short Reference)
Now you’ll get compact, tool-specific checklists to keep cuts clean and safe.
You’ll cover mitre/compound saw setup and cut checks, circular saw guides and anti-chip tricks, jigsaw blade choices and plunge-cut tips, plus when a laminate snap cutter is fast enough and where it falls short.
Use these quick references before you cut so you don’t waste material or time.
Mitre/compound saw setup and cut checklist
Set your mitre or compound saw up right before making any cuts so you get accurate, clean ends every time.
Check blade condition, alignment, and fence. Secure the plank and mark cut line clearly.
- Use fine-tooth carbide blade, confirm zero play.
- Set angle and depth, clamp board flat.
- Wear PPE, cut slowly with steady feed.
Circular saw with guide setup and anti-chip techniques
1 simple guide rail and a sharp blade will let you cut laminate with a circular saw that stays fast and chip-free.
Clamp the rail, set blade depth just below plank thickness, and score with painter’s tape.
Cut with steady feed, saw on the waste side, and support the offcut.
- Align and clamp guide
- Tape and shallow score
- Set depth, steady feed
Jigsaw blade selection and plunge-cut tips
When you need curved cuts, notches, or quick plunge cuts in laminate, pick a jigsaw blade designed for laminate or fine finish—high-TPI, reverse-tooth or clean-cut blades reduce chipping and tear-out.
Choose a slow speed, score the top with a utility knife, and support the plank to prevent vibration.
- Use 10–15 TPI reverse-tooth blade.
- Clamp and mark clearly.
- Plunge gently, steady feed.
Laminate snap cutter when it’s best and limitations
If your cuts are mostly straight runs, a laminate snap cutter gives you the fastest, cleanest results: you score the wear layer, clamp the plank in the cutter, and snap it across the built-in breaker for a nearly chip-free edge.
It’s quick, portable, and dust-free, but won’t handle curves, deep cuts, or very short pieces without support.
- Straight rip cuts
- Short crosscuts (supported)
- Not for curves or intricate shapes
Materials and Budget Guide
You’ll balance cost and performance when choosing blades and tools, since cheaper options can wear faster and affect cut quality.
Think about how often you’ll use each tool to decide whether renting makes more sense than buying. For occasional projects, rent high-end saws or specialty blades; for regular work, invest in durable pieces that pay off over time.
Cost vs performance of blades and tools
Because the right blade or tool can cut hours off your install and save material, it’s worth balancing upfront cost against long-term performance. You’ll pay more for carbide-tipped or fine-tooth blades, but they last and cut cleaner. Match blade type to saw and frequency. Cheap blades save now but can waste time and flooring.
| Tool/Blade | Expected Lifespan |
|---|---|
| Economy blade | Low |
| Mid-range carbide | Medium |
| Premium carbide | High |
| Specialty fine-tooth | Very high |
When to rent vs buy
When weighing whether to rent or buy tools for laminate flooring, consider how often you’ll use them and the total project cost; short-term jobs usually favor rentals, while frequent DIYers benefit from buying.
Rent specialty saws for one-offs to avoid storage and maintenance.
Buy if you’ll do multiple rooms or future projects—ownership saves money long-term and guarantees consistent blade quality.
Frequently Asked Questions (FAQ)
You’ve probably got a few practical questions—like whether a utility knife will do, how to stop top-surface chipping, which blade tooth count works best, whether you can cut in tight or outdoor spaces, and how to fix a bad cut after installation.
I’ll answer each clearly so you can pick the right tools and techniques.
If you still have a specific scenario, tell me and I’ll tailor the advice.
Can you cut laminate with a utility knife only?
Although a utility knife can trim laminate in some situations, it won’t cut through a full plank—it’s mainly useful for scoring and snapping thin, floating pieces or trimming edges after an initial rip.
You can use it for short straight cuts on thin boards, but for thicker planks or precise corners, you’ll need a saw (jigsaw, circular, or miter) to finish clean, accurate cuts.
How do I prevent the laminate from chipping on the top surface?
Scoring and careful sawing reduce edge splintering, but protecting the top surface requires a few more precautions.
Press painter’s tape over the cut line, score shallowly first, and cut slowly to minimize tear-out. Support the plank close to the blade to prevent vibration.
Use a sacrificial plywood strip under the cut area when routing or sawing from the top to keep the finish intact.
What blade tooth count is best for laminate flooring?
For clean, chip-free cuts on laminate flooring, pick a saw blade with a high tooth count—typically 80 to 100 teeth on a 10‑inch finish or combination blade—and use fine teeth (60–100) on portable circular saws to reduce tear-out and leave a smoother edge.
Match blade type to tool, cut slowly, and use a zero-clearance insert or masking tape to minimize splintering.
Can I cut laminate flooring outdoors or in a small space?
Can you cut laminate flooring outdoors or in a tight space? Yes.
Outdoors gives ventilation and dust control, but watch wind, moisture, and stable work surfaces.
In small areas, use compact tools (jigsaw, handsaw, or trim saw), clamp planks, and protect floors.
Always wear eye and hearing protection, use a dust mask, and plan cuts to minimize cleanup and movement.
How do I repair a bad cut after the plank is installed?
Working outside or in a tight space can help control dust and cleanup, but mistakes still happen once a plank’s locked in—like a crooked end, too-short cut, or chipped tongue.
You can trim slightly with a pull saw or rasp, replace the plank if necessary, or use a filler strip and matching putty for small chips.
Always test-fit before gluing.
Quick Checklist Before You Start
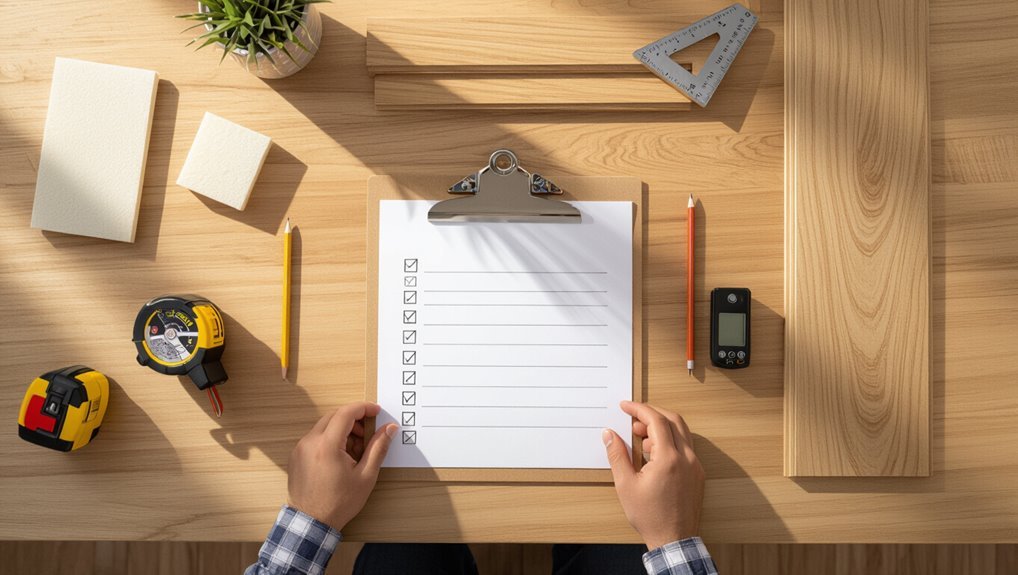
Before you cut a single plank, run through a quick checklist to make sure you’ve got the right tools, safety gear, and measurements—tape measure, pencil, square, saw, spacers, eye and ear protection, and a clean, supported work surface.
Check plank orientation, expansion gap, and cut line. Mark clearly, clamp securely, and wear protection.
- Measure twice
- Secure plank
- Verify gap