Can You Use Ceramic Tile in a Shower? What You Need to Know First
Yes — you can use ceramic tile in a shower if you pick low-absorption, slip-resistant pieces and install proper waterproofing. You’ll need moisture‑resistant backer board or cement board, a waterproof membrane, and adhesives rated for constant wet exposure. Seal grout promptly and inspect for cracks or mold regularly. Ventilation and routine maintenance prevent leaks and deterioration. With correct materials and techniques, a ceramic shower can last decades, and the sections below explain how to do it right.
Quick Answer Can You Use Ceramic Tile in a Shower?
Yes — you can use ceramic tile in a shower. It’s durable, affordable, and comes in many styles, but you’ll need proper waterproofing and grout maintenance to prevent leaks and staining.
With correct installation and upkeep, ceramic is a reliable shower surface.
Direct, one-sentence answer
If you choose proper ceramic tiles, a waterproof backer board, and correct grout and sealant, you can safely use ceramic tile in a shower.
You can use ceramic tile in a shower provided you install moisture-resistant backing, slope floors to drains, seal grout lines, and maintain caulked joints.
Follow manufacturer guidelines, use appropriate adhesives, and inspect periodically to prevent water intrusion and mold.
Short summary of pros and cons
You can safely use ceramic tile in a shower when you pair the right tile, waterproof backer, grout, and sealant, but weigh the pros and cons:
Advantages include durability, wide style choices, and easy cleaning; disadvantages include potential for grout maintenance, risk of water intrusion if poorly installed, and a harder surface that can be slippery or cold.
- Durable and stylish
- Easy to clean
- Grout upkeep
- Installation risks
Basic Understanding What Is Ceramic Tile?
When you’re choosing tile for a shower, it helps to know the basic types—glazed versus unglazed and porcelain versus ceramic—because they behave differently.
You’ll want to focus on water absorption, durability, and slip resistance since those properties determine how well the tile performs in wet conditions.
Understanding these differences makes it easier to pick a tile that lasts and stays safe.
Types of ceramic tile (glazed, unglazed, porcelain vs ceramic)
Although ceramic tiles all start from clay that’s been shaped and fired, they split into distinct types—glazed and unglazed, and the commonly confused categories of ceramic versus porcelain—that behave differently in a wet space. You’ll choose based on finish, appearance, and maintenance needs.
| Type | Finish | Typical Use |
|---|---|---|
| Glazed | Smooth/color | Walls |
| Unglazed | Textured | Floors |
| Porcelain | Dense | High-traffic |
Key properties relevant to showers (water absorption, durability, slip resistance)
After choosing between glazed or unglazed and weighing ceramic against porcelain, the next step is to focus on three performance traits that determine how well tile behaves in a shower: water absorption, durability, and slip resistance.
You’ll pick low-absorption tile or porcelain to limit moisture, choose durable bodies and appropriate PEI ratings for wear, and select textured or rated finishes to reduce slipping when wet.
Why Use Ceramic Tile in a Shower Benefits and Use Cases
You’ll appreciate how ceramic tile gives you wide aesthetic and design flexibility, from color and size to texture and pattern.
It’s often more affordable and widely available than natural stone or custom panels, so you can get the look you want without breaking the budget.
Plus, ceramic stands up well to moisture and is easy to maintain, which boosts longevity and lowers upkeep over time.
Aesthetic and design flexibility
When you pick ceramic tile for your shower, you get near-limitless design options that let you shape the look and mood precisely how you want it.
You can mix sizes, colors, textures, and grout lines to create patterns, focal walls, or seamless minimalism.
Tiles mimic stone, wood, or bold mosaics, letting you personalize style while matching fixtures, lighting, and overall bathroom themes.
Cost and availability comparison with other shower materials
While ceramic tile gives you nearly unlimited style choices, cost and availability often drive the final decision. You’ll find tiles range from budget to premium, widely stocked; compare that to stone, acrylic, or fiberglass for price and sourcing.
| Material | Typical Cost | Availability |
|---|---|---|
| Ceramic | Low–High | High |
| Porcelain | Mid–High | High |
| Natural Stone | High | Moderate |
| Acrylic/Fiberglass | Low | High |
Longevity and maintenance advantages
Because ceramic tile resists water, stains, and frequent wear better than many alternatives, it stays looking good for decades with basic care.
You’ll clean grout and tile quickly with mild cleaners, prevent mold by ensuring proper ventilation, and only need occasional resealing on grout.
Repairs are localized—replace a few tiles rather than entire walls—saving time and long-term expense.
When Not to Use Ceramic Tile Limitations and Concerns
You should avoid certain ceramic tiles in showers because some absorb more water and can trap moisture, leading to damage.
Don’t use delicate ceramic on floors where heavy foot traffic or slipping is a concern, and choose tiles rated for flooring when needed.
Also be cautious in steam-heavy or high-use showers, since constant moisture and heat can shorten the life of lower-grade tiles and grout.
Water absorption and moisture risk for certain ceramics
If you pick the wrong ceramic for a shower, moisture can soak in, cause staining, and eventually damage grout, adhesive, or the substrate beneath the tile.
You should choose low-absorption porcelain or glazed ceramics rated for wet areas.
Unglazed, porous tiles absorb water, promoting mold and bond failure.
Test absorption rates and follow manufacturer guidelines to avoid costly repairs.
Suitability for floors vs walls
When choosing tile for a shower, consider whether it’s rated for floors or walls, because tiles designed for vertical surfaces often can’t handle foot traffic and heavy wear.
You should pick floor-rated tiles with adequate PEI ratings and slip resistance for shower floors.
Save delicate, lightweight wall-only ceramics for walls and niches to avoid premature cracking, glazing wear, or safety hazards underfoot.
Performance in high-traffic or steam-heavy shower setups
Because high-traffic and steam-heavy showers push materials to their limits, ceramic tile isn’t always the best choice for these conditions.
You’ll face grout deterioration, increased slipping risk from glazed surfaces, and potential moisture migration behind tiles.
In steam rooms or commercial showering, consider porcelain, natural stone sealed for steam, or waterproof panels.
Regular maintenance won’t fully eliminate long-term vulnerability.
How to Choose the Right Ceramic Tile for a Shower
When choosing shower tile, you’ll want to focus on appropriate types and ratings—look for higher PEI for shower floors, low water absorption, and a suitable DCOF for wet conditions.
Think about size and shape plus grout line width, since smaller tiles or mosaics can improve slip resistance and accommodate slopes.
Finally, pick a finish that balances appearance with traction—matte or textured surfaces usually perform better than glossy ones.
Recommended tile types and ratings (PEI, water absorption, DCOF)
If you’re choosing tile for a shower, pick products rated for moisture and slip resistance—look at PEI for wear, water absorption for durability in wet areas, and DCOF for traction underfoot.
Choose vitrified porcelain or glazed ceramic with low absorption and PEI III+ for walls, IV+ for floors.
Verify DCOF ≥0.42 for wet areas.
- Pick material
- Check PEI
- Check absorption
- Check DCOF
Size, shape, and grout line considerations
Now that you’ve narrowed materials by performance ratings, think about how tile size, shape, and grout lines will affect both function and look in your shower.
Larger tiles mean fewer grout joints and easier cleaning but need flatter substrates. Smaller or mosaic tiles suit curbs and slopes, offering more grip.
Narrow grout lines look cleaner; wider grout can hide uneven edges—choose accordingly.
Finishes and slip resistance options
Wondering which finish will keep your shower both attractive and safe?
Choose matte or textured tiles on floors to improve slip resistance; glazed ceramic works fine on walls.
Check PEI and COF ratings—aim for COF ≥ 0.6 in wet areas.
Seal unglazed tiles and maintain grout to prevent water damage.
Test samples wet to guarantee footing before installation.
Step-by-Step: Installing Ceramic Tile in a Shower
Now you’ll walk through the key steps to tile a shower, starting with preparing the substrate and choosing between waterproof backer board or cement board.
You’ll learn waterproofing options, the right adhesives and mortars for wet areas, and practical tiling techniques like layout, cutting, and spacing.
Finally, you’ll finish with grouting and sealing grout lines to protect the installation.
Step 1 Preparing the shower substrate (waterproof backer board vs cement board)
Before you lay a single tile, decide whether you’ll use a waterproof backer board or traditional cement board, because that choice determines how you’ll handle waterproofing, fasteners, and joints.
Choose waterproof board for built-in moisture resistance and fewer coatings; pick cement board for proven durability and easier repairs.
Measure, square the studs, cut panels precisely, and fasten per manufacturer specs before tiling.
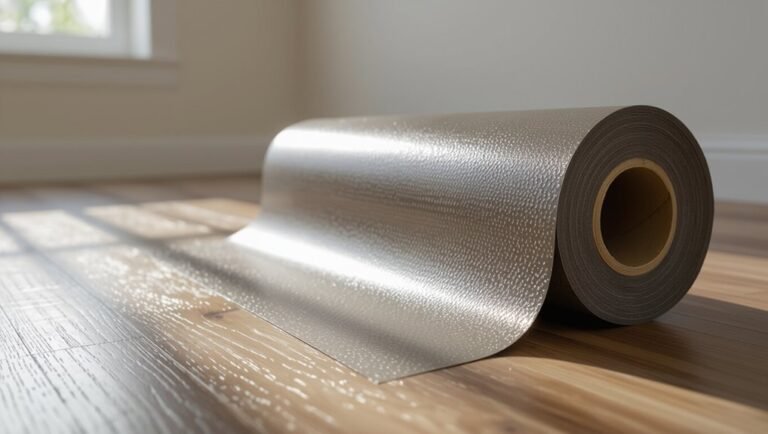
Step 2 Waterproofing methods (membranes, liquid-applied, surface systems)
Because tile and grout aren’t waterproof, you must install a reliable waterproofing system before tiling to protect the framing and substrate from moisture.
Choose based on skill, location, and budget:
- Sheet membranes (Peel-and-stick or bonded)
- Liquid-applied membranes (roll or brush-on)
- Drainage mats / surface systems (decoupling/drainage)
- Integrated shower kits (pre-sloped, waterproof pans)
Follow manufacturer instructions and seal all seams and penetrations.
Step 3 Choosing adhesives and mortars suitable for wet areas
With your waterproofing in place, pick adhesives and mortars rated for continuous wet exposure and bonding to your chosen substrate and tile.
Use polymer-modified thinset for ceramic on cement board or waterproof membranes; choose epoxy or urethane for high-moisture, steam, or frequent-use showers.
Follow manufacturer specs for cure time, open time, and trowel size.
Match product to tile porosity and expected movement.
Step 4 Tiling techniques (layout, cutting, spacing)
Start by planning a clear layout so your tiles sit square, cuts are minimal, and grout lines fall where they’ll be least noticeable; measure and snap reference lines, establish a balanced focal point at the shower’s main sightline, and dry-fit tiles to confirm spacing and edge treatments.
Use consistent spacers, score and snap or wet-cut for accuracy, stagger joints for strength, and trim tiles cleanly at edges and fixtures.
Step 5 Grouting and sealing grout lines
Mix the grout to a smooth, lump-free paste and work in manageable sections so you can tool joints before the mix skins over.
Use a rubber float at a 45° angle, pressing grout firmly into joints. After 10–20 minutes, scrape excess and shape joints with a rounded grout tool.
Once cured, apply a penetrating grout sealer to protect against stains and moisture.
Step 6 Flashing, joints, and connections to fixtures
Now that your grout’s cured and sealed, turn your attention to flashing, movement joints, and how the tile meets fixtures—areas that keep water out and allow the assembly to move without cracking.
Install metal or membrane flashing at horizontal shifts, use flexible silicone or polyurethane in perimeter and fixture gaps, and include control joints where tile fields change direction to prevent stress and leaks.
Step 7 Curing time and first-use considerations
Although the grout and sealant may look dry within a day, give the full assembly adequate cure time—typically 7 days for grout and 24–72 hours for most sealants—before exposing the shower to heavy water, steam, or regular use.
After curing, run a gentle water test, check for soft spots or leaks, and avoid heavy cleaning chemicals for two weeks to protect seals and grout integrity.
Common Mistakes and Problems When Using Ceramic Tile in Showers
When you cut corners on the substrate or skip proper waterproofing, the whole shower can fail.
Choosing the wrong tile or grout, installing an improper slope or misplacing the drain, and neglecting sealing and maintenance all lead to leaks, mold, or efflorescence.
I’ll walk you through how to spot and avoid these common problems.
Poor substrate or waterproofing choices
If you skip proper substrates or waterproofing, you’ll face costly failures that start behind the tile—soft spots, mold, and delamination are common outcomes.
You need a correctly sloped mortar bed or decoupling membrane, cement board or approved backer, and a continuous waterproofing layer at seams and penetrations.
Neglecting connections, drain integration, or flashing invites leaks that ruin framing and finishes.
Using wrong tile or grout for wet environments
Choosing the wrong tile or grout for a shower will turn a seemingly small aesthetic decision into recurring maintenance and moisture problems.
Pick non-waterproof or high-porosity tiles and cement grouts without sealant, and you’ll face staining, efflorescence, and mold.
Use tiles rated for wet areas, epoxy or sealed grout, and proper grout width to reduce water ingress and long-term upkeep.
Incorrect slope or drain placement
A misplaced slope or drain can turn even a beautifully tiled shower into a perpetually puddled, leaky mess, so you’ve got to get the pitch and drain location right from the start.
If the floor isn’t sloped toward the drain or the drain sits off-center, water pools, grout erodes, and tile edges loosen.
Plan slopes to code and test drainage before tiling.
Inadequate sealing and maintenance leading to mold and efflorescence
When you skip proper sealing or let routine maintenance slide, grout and tile joints trap moisture and invite mold, mildew, and salty efflorescence to form.
These issues not only stain surfaces but can weaken tile bonds and shorten the shower’s lifespan.
You should seal grout, replace cracked grout or caulk promptly, scrub with suitable cleaners, and guarantee good ventilation to prevent buildup and costly repairs.
Best Practices and Maintenance Tips
You should keep a regular cleaning routine and tend to grout with appropriate cleaners to prevent stains and mildew.
Check grout and tile seals periodically and reseal any worn areas before water can get behind the tiles.
Use good ventilation to control moisture and call a professional if you see persistent leaks, loose tiles, or extensive grout failure.
Routine cleaning and grout care
Because grout soaks up soap scum and mildew, regular cleaning keeps your shower sanitary and prevents long-term staining.
You should scrub grout weekly, rinse tiles after use, use pH-neutral cleaners, and dry surfaces to limit mold.
Follow these steps:
- Scrub grout with soft brush.
- Rinse tiles thoroughly.
- Use pH-neutral cleaner.
- Wipe dry after shower.
Inspecting and resealing grout and tile periodically
Check your grout and tiles every few months for cracks, gaps, discoloration, or loose tiles so small problems don’t become costly repairs.
When grout looks worn or absorbs water, remove damaged sections, clean thoroughly, and apply matching grout.
After curing, use a penetrating sealer on grout and porous tiles.
Reinspect annually and reseal sooner if water beads poorly or stains return.
Ventilation and moisture control strategies
When steam and humidity build up in a shower, they accelerate grout deterioration and mold growth, so you should control moisture with effective ventilation and routine habits.
Run a properly sized exhaust fan during and 15–20 minutes after showers, open windows or doors when possible, squeegee walls, dry surfaces, keep grout sealed, and wash and ventilate curtains or doors regularly to prevent mildew.
When to call a professional
If routine cleaning and simple repairs don’t stop persistent leaks, crumbling grout, or recurring mold, call a professional so small problems don’t turn into expensive water damage.
You should also hire a pro for major tile replacement, waterproofing failures, structural concerns, or uneven substrate issues.
A qualified contractor will diagnose hidden damage, recommend fixes, and guarantee proper waterproofing and tile installation to protect your home.
Alternatives and Comparisons
When choosing shower materials, you’ll want to compare ceramic to porcelain and to natural stone or acrylic/solid-surface panels to see which fits your needs.
Consider how cost, durability, and maintenance trade off—porcelain is harder and less porous than most ceramics, stone can be high-maintenance, and acrylic panels are low-upkeep but less durable.
I’ll walk you through the pros and cons so you can pick the best option for your budget and lifestyle.
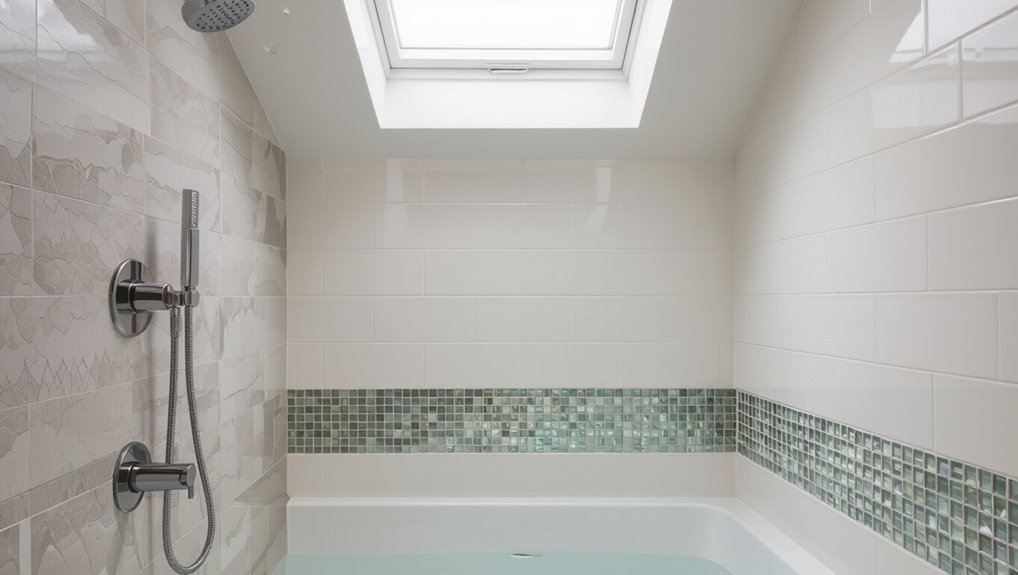
Ceramic vs porcelain tiles
Although they look similar at first glance, ceramic and porcelain tiles have key differences that affect durability, water resistance, and installation cost. You’ll choose porcelain for showers needing greater moisture resistance and durability; ceramic suits light-use, budget projects. Consider installation difficulty and price when deciding.
| Type | Water Resistance | Cost/Installation |
|---|---|---|
| Ceramic | Moderate | Lower |
| Porcelain | High | Higher |
Ceramic tile vs natural stone vs acrylic/solid-surface panels
Because showers face constant moisture and wear, choosing between ceramic tile, natural stone, and acrylic/solid-surface panels comes down to balancing looks, maintenance, and budget.
You’ll find ceramic offers vast style options and reliable water resistance with proper installation.
Natural stone gives unique beauty but needs sealing.
Acrylic/solid-surface panels simplify cleaning and install quickly but limit design variety compared with tile.
Cost, durability, and maintenance trade-offs
If you’re weighing cost, durability, and maintenance for shower finishes, focus on what you’ll live with day-to-day and over time: ceramic is affordable and repairable but needs grout care; stone feels luxurious yet demands sealing; acrylic is low-maintenance but less durable. Choose based on budget, time, and the look that makes you happy.
| Option | Feeling |
|---|---|
| Ceramic | Practical comfort |
| Stone | Luxurious worry |
| Acrylic | Easy relief |
| Cost | Budget tension |
Case Examples and Scenario Guidance
If you’ve got a small shower or niche, pick smaller-format tiles or mosaics to keep cuts minimal and grout lines manageable.
For wet-room or curbless installations, focus on slope, waterproofing, and anti-slip tile choices to prevent leaks and falls.
Decide whether your skill level and tools match the complexity—simple re-tiling can be DIY, but curbless or waterproofing work usually needs a pro.
Small shower or niche recommended tile choices
Small showers and recessed niches demand tiles that make the space feel larger and easier to maintain, so pick options that balance scale, grout lines, and slip resistance.
Use larger-format tiles or elongated subway tiles laid horizontally to reduce grout lines. Choose light tones and glossy finishes to reflect light.
For niches, consider mosaic bottoms for slope and contrast, keeping grout sealed.
Wet room or curbless shower special considerations
When you move from choosing tile for compact showers or niches to planning a wet room or curbless shower, you’ll face different challenges in waterproofing, floor slope, and drainage placement that affect tile choice and layout.
You’ll need impervious tile, smaller tiles or mosaics for grip and easier slope creation, linear drains positioned for consistent flow, and continuous waterproofing extending across the entire room.
DIY vs professional installation scenarios
Because installing tile in a shower varies so much in skill, time, and risk, you’ll want to match the project to your experience and the specific scenario: simple wall-only retiling or replacing damaged grout can be a doable DIY weekend for someone with steady hands and the right tools, whereas full-floor waterproofing, complex showers with multiple niches, or curbless/wet-room conversions call for a pro to guarantee proper slope, drainage, and watertight assemblies.
- Small wall repairs — DIY
- Full floor/waterproofing — pro
- Complex layouts/niches — pro
- Maintenance/grout refresh — DIY
FAQ
You’ve probably got practical questions like whether ceramic tile is waterproof enough for a shower or if you can use ceramic floor tile on the shower floor.
You’ll also want to know how often grout needs sealing, whether tiles crack from temperature changes, and how long a properly installed ceramic shower should last.
Below are clear answers to each of those concerns.
Is ceramic tile waterproof enough for a shower?
Is ceramic tile itself waterproof enough for a shower? Not entirely.
The glaze on many ceramic tiles resists water, but tiles and grout can absorb or allow moisture through joints.
You’ll need a proper waterproofing system—membrane, sealed grout, and correct installation—to protect the substrate.
Without those measures, water can penetrate and cause mold, rot, and structural damage over time.
Can I use ceramic floor tile on the shower floor?
Can you use ceramic floor tile on a shower floor? Yes—you can if you pick a slip-resistant, low-porosity tile rated for wet areas and install it properly.
Use a waterproof membrane, proper slope to the drain, and small tiles or textured finishes for traction.
Make certain grout and thin-set are suitable for showers to prevent water intrusion and maintain durability.
How often should shower grout be sealed?
How often should you seal shower grout?
Seal new grout after the 72-hour cure, then every six to twelve months depending on tile type, shower use, and sealer quality.
High-traffic or steam showers may need sealing twice yearly; low-use showers can go yearly.
Test by sprinkling water—if it soaks in, reseal.
Always follow sealer manufacturer instructions for best results.
Will ceramic tile crack with temperature changes?
Because ceramic tile is fired at high temperatures and is largely stable, it usually won’t crack from normal daily temperature changes in a home.
However, rapid or extreme shifts, uneven heating, or movement in the substrate can cause stress that leads to cracking or loose tiles.
You can minimize risk by using proper underlayment, flexible adhesive and grout, expansion joints, and controlling drastic temperature swings.
How long does a properly installed ceramic shower last?
If you follow proper installation practices—solid substrate, waterproofing, correct mortar and grout, and proper movement joints—a ceramic-tiled shower can serve you for decades.
With routine cleaning, prompt grout and seal repairs, and good ventilation, tiles and waterproofing often last 20–50+ years.
Replace damaged grout, re-seal porous tiles when needed, and address leaks quickly to avoid substrate failure and costly repairs.