Can You Stain Vinyl Flooring? What Actually Works and What Doesn’t
You can’t reliably stain vinyl like wood because vinyl won’t absorb traditional stains and the printed wear layer repels dyes. You’ll get beading, wiping off, or short-lived color at best. Instead, use products made for PVC—vinyl paints, epoxy or urethane coatings, or install overlays or peel-and-stick planks for lasting change. Prep is key: clean, scuff, test, then seal and cure. Keep going and you’ll find step-by-step options, pros and cons, and troubleshooting tips.
Can You Stain Vinyl Flooring? Quick Answer and Summary
Short answer: you can’t truly stain most vinyl like wood, though you can change its look with surface coatings, paint, or dye on certain thin, unsealed sheets.
The pros are low cost and easier DIY updates; the cons are limited adhesion, visible wear, and often temporary or uneven results.
Expect modest cosmetic changes rather than a durable, wood-like transformation.
Direct short answer: what works and what doesn’t
Yes—you can change the look of some vinyl floors, but you can’t “stain” traditional resilient vinyl the way you stain wood; most vinyl resists dyes and absorbs very little.
You can use paint, adhesive vinyl overlays, or specialized tintable surface coatings successfully, but not dyes on most types.
Test first, prep thoroughly, and expect variable durability depending on product and traffic.
One-paragraph summary of pros, cons, and realistic outcomes
While you can’t stain most resilient vinyl the same way you stain wood, you can still change its look with practical options: paints and specialty surface coatings give durable color and pattern choices when you prep and prime properly.
Adhesive vinyl planks or tiles let you overlay a new design without altering the substrate. You’ll get cost-effective refreshes, limited longevity versus real wood, and variable adhesion risks.
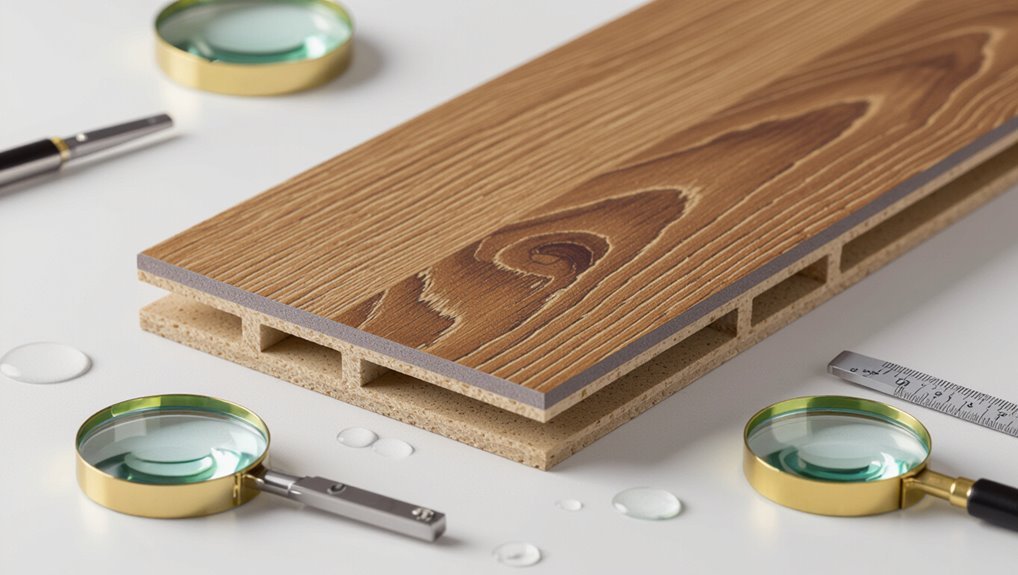
Basic Understanding What Is Vinyl Flooring and Why Staining Is Different
To decide whether staining vinyl is possible, you need to know what vinyl flooring actually is — from sheet and plank to tile, luxury vinyl and vinyl composition tile — and how their layers differ.
Vinyl has a printed design, a protective wear layer and a PVC core, so its surface chemistry and finish aren’t like wood or porous tile.
That’s why traditional wood or porcelain stains won’t penetrate or bond the same way on vinyl.
Types of vinyl flooring (sheet, plank, tile, luxury vinyl vs. vinyl composition tile)
Vinyl flooring comes in several distinct forms—sheet, plank, and tile—and those forms, plus construction differences like luxury vinyl (LVT/LVP) versus vinyl composition tile (VCT), change how the material reacts to surface treatments.
You’ll find sheet vinyl is continuous and flexible, planks mimic wood with click or glue installation, LVT/LVP offer thicker wear layers, while VCT is porous, designed for coatings rather than dyes.
Surface composition and finish: wear layer, printed vinyl, PVC core
Those different formats and constructions matter because they change what the surface is actually made of—and that determines whether you can alter its color.
You’ll find a transparent wear layer protecting a printed vinyl design over a PVC core; some luxury planks add textured coatings or urethane.
Those layers resist penetration, so any color change depends on the topcoat type and how deeply pigments can bond.
Why traditional wood/porcelain stains don’t work on vinyl
Because vinyl’s surface is a manufactured polymer layer rather than porous wood or glazed porcelain, traditional stains can’t soak in and chemically bind the way they do with those materials.
You’ll find wood stains sit on top, bead up, or simply wipe off. Porcelain glazes bond through firing; vinyl lacks that chemistry and heat tolerance.
You need coatings or dyes formulated for PVC.
What Actually Works: Alternatives to “Staining” Vinyl
You can’t reliably stain most vinyl, but you can change its color using vinyl-compatible paints and coatings like acrylic, epoxy, or urethane.
In rare cases, dye-based treatments or reactive chemical methods may slightly alter porous or damaged vinyl, though their effects are limited and often unpredictable.
More practical options are adhesive-backed vinyl, overlays, or peel-and-stick planks that give a true color change without risky chemistry.
Vinyl-compatible paint and coating options (acrylic, epoxy, urethane)
When you can’t actually stain vinyl, the realistic options are paints and protective coatings formulated to adhere to resilient flooring—typically acrylic, epoxy, and urethane systems—each offering different durability, application methods, and finish appearances.
You can use acrylic for easy application and moderate wear, epoxy for tougher, chemical-resistant surfaces, and urethane as a durable, glossy topcoat—each requires proper cleaning and primer for adhesion.
Dye-based treatments and when they can penetrate (limited scenarios)
Alongside paints and protective coats, dye-based treatments sometimes offer a closer look to a true “stain” on certain vinyl types, but their usefulness is limited.
You can get penetration on older, porous or unsealed vinyl planks with alcohol- or solvent-based dyes, but results vary.
Test first, expect subtle color shifts, limited durability, and seal with compatible clear coats to protect the finish.
Reactive chemical staining: myths vs. reality
Curious whether chemical stains can truly alter vinyl’s color? You’ll find most reactive stains target porous substrates; vinyl’s plasticized, nonporous surface resists chemical bonding.
Strong solvents can etch or dissolve layers, causing damage rather than a controlled color change.
In short, reactive chemical staining is largely myth for intact vinyl—it’s risky, unpredictable, and not a reliable color-change method.
Adhesive-backed vinyl, overlays and peel-and-stick planks as color-change solutions
If you want a predictable, low-risk way to change your vinyl floor’s look, adhesive-backed vinyl, overlays, and peel-and-stick planks deliver it without the headaches of chemical “staining.”
You can install or remove them, avoid surface damage, and choose endless patterns.
Consider:
- Adhesive-backed sheets for coverage.
- Thin overlays for texture.
- Peel-and-stick planks for realistic wood looks.
How to Change the Color or Refresh Vinyl Step-by-Step Guide
Before you start, you’ll want to check what kind of vinyl you have and inspect gloss, texture, and any damage so you know what’s workable.
Next, prepare the surface—clean, degrease, lightly scuff, and make repairs—then test your chosen product in a small area to confirm adhesion.
Finally, apply the recommended paint or coating with the right tools, then seal and allow proper curing time before returning foot traffic.
Step 1 Assess your vinyl type and condition (gloss, texture, damage)
When you’re preparing to change or refresh vinyl flooring, start by identifying the type and inspecting its condition: determine whether it’s solid vinyl plank, sheet, or luxury vinyl tile, note the surface finish (high-gloss, matte, or textured), and check for wear, scratches, lifting seams, or surface coatings that might prevent adhesion.
Then assess color stability, thickness, and any backing that affects treatments.
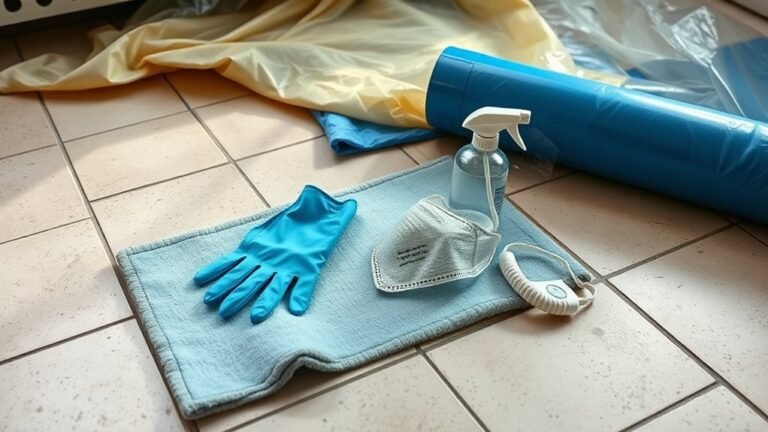
Step 2 Prepare the floor: cleaning, degreasing, light abrasion, repairs
Now that you’ve identified the vinyl type and checked for damage, get the surface ready so coatings will stick and look even.
Clean with a degreaser, rinse thoroughly, and let dry.
Lightly abrade with fine sandpaper or a scuff pad.
Repair seams or gouges with vinyl filler.
Follow this quick checklist:
- Clean/degrease
- Light abrasion
- Patch repairs
Step 3 Test area: how to test products and evaluate adhesion
How will you know a paint or sealer will hold up on your vinyl? Pick an inconspicuous spot, clean it, and apply the product per instructions.
Let it cure fully, then perform adhesion tests: fingernail scrape, tape pull, and water resistance.
Observe flexibility, cracking, or lifting over several days. Record results to decide whether to proceed or try a different product.
Step 4 Applying paint/coating: recommended products, tools, techniques
Tools and the right products make the difference between a durable finish and a flaky mess, so gather them before you start: a vinyl-specific bonding primer, a flexible acrylic or urethane paint formulated for vinyl or floors, quality brushes and short-nap rollers, fine-grit sandpaper, tack cloths, painter’s tape, and a respirator if recommended.
Sand lightly, wipe, prime thinly, apply two thin even coats, and allow proper flash time between coats.
Step 5 Sealing and curing: topcoats, drying times, traffic return
With your paint or coating applied and given proper flash time, you’ll move on to sealing and curing to protect the finish and determine when the floor can handle traffic.
Choose a compatible topcoat (polyurethane or waterborne acrylic), apply thin even coats, follow manufacturer dry and recoat times, and allow full cure before light then regular foot traffic to avoid scuffs or adhesion failure.
Step 6 Maintenance after coloring: cleaning and longevity tips
After you’ve sealed and cured the finish, maintain that fresh color by adopting a gentle cleaning routine and avoiding harsh chemicals that can break down the topcoat.
Sweep or vacuum regularly, mop with a pH-neutral cleaner, blot spills immediately, and use felt pads under furniture.
Reapply a compatible topcoat every few years or as wear appears, and test cleaners in an inconspicuous spot first.
Comparison Products and Methods Side-by-Side
You’ll find a clear side-by-side table comparing paint types, specialty coatings, and overlays for adhesion, durability, appearance, cost, and DIY difficulty.
Use it to quickly see trade-offs and decide whether a simple coloring job will do or if a full replacement makes more sense.
If you’re on a budget or doing it yourself, the table will help you pick the right method for your goals and skill level.
Table: paint types vs. coatings vs. overlays adhesion, durability, appearance, cost, DIY difficulty
When you’re weighing ways to change vinyl flooring—paint, specialty coatings, or overlay systems—this side‑by‑side table lays out how each option performs for adhesion, durability, appearance, cost, and DIY difficulty so you can pick the best match for your project.
| Option | Strength | Ease |
|---|---|---|
| Paint | Low adhesion, low durability | Easy |
| Coating | Medium adhesion, medium durability | Moderate |
| Overlay | High adhesion, high durability | Hard |
When to choose DIY coloring vs. full replacement
The table helps you weigh paint, coatings, and overlays by performance and effort, but deciding between a DIY coloring job and a full replacement depends on the floor’s condition, your budget, and how long you want the result to last.
Choose DIY if scratches are minor, budget’s tight, and you accept touch-ups; pick replacement for deep damage, long-term resale value, or if you need a different material or layout.
Common Problems and Why Projects Fail
When a staining project goes wrong, you’ll usually see adhesion failures from leftover finish, surface contaminants, or the wrong primer.
You might also get uneven color, streaking, or peeling from poor prep or improper application.
And don’t forget health risks—strong fumes and VOCs can be dangerous if you don’t ventilate and use proper PPE.
Adhesion failure causes (finish, contaminants, wrong primer)
If your new stain flakes, bubbles, or peels off vinyl, it’s usually because something prevented proper adhesion: an intact factory finish that repels coatings, grease or dust left on the surface, or a primer that wasn’t formulated for vinyl.
You must scuff or chemically etch the finish, thoroughly clean contaminants, and use a vinyl-compatible primer and coating.
Otherwise the finish will fail prematurely.
Uneven color, streaking, or peeling typical mistakes
Because vinyl won’t absorb stain like wood, you can end up with blotches, streaks, or thin spots unless you control surface prep, product choice, and application technique.
You should sand lightly, clean contaminants, and use products made for nonporous surfaces.
Apply thin, even coats with the recommended tool, work quickly to avoid lap marks, and test a small area first to prevent peeling or visible streaking.
Health and safety risks (fumes, VOCs, improper ventilation)
Although vinyl itself doesn’t off-gas like some materials, the stains, primers, and sealers you use can release strong fumes and VOCs that irritate your eyes, throat, and lungs.
You should work outdoors or with windows open, run fans, and wear an appropriate respirator.
Read labels for VOC content, allow full cure time, and keep children, pets, and poor ventilation out of the area until fumes dissipate.
Best Practices and Professional Tips
To get a lasting result you’ll need the right surface prep—think primers or adhesion promoters and the proper surface profile—before applying any coating.
Pick products that balance durability, flexibility, and abrasion resistance, and use a checklist to compare options.
If the floor is badly damaged, heavily textured, or you can’t afford a short-lived finish, hire a pro after weighing the cost versus expected lifespan and ROI.
Preparing a durable finish: primers, adhesion promoters, and surface profile
When you want a finish that lasts on vinyl flooring, your prep work has to create the right surface profile and bond—no shortcuts.
Clean thoroughly, degloss with fine abrasive, and remove contaminants.
Apply a manufacturer-recommended primer or adhesion promoter compatible with vinyl.
Feather edges, follow dry times, and test a small area.
Proper profile and bonding prevent peeling and extend finish life.
Product selection checklist: durability, flexibility, abrasion resistance
Pick products that balance toughness with flexibility—your finish needs abrasion resistance for foot traffic, enough elasticity to move with vinyl’s slight expansion, and proven long-term adhesion.
Check technical data: abrasion rating (TABER cycles), elongation and recovery percentages, and adhesion tests on similar vinyl.
Prefer low-VOC, UV-stable formulas and manufacturers with clear vinyl-specific application instructions and warranty coverage.
When to hire a pro: indicators you should not attempt DIY
How do you know if a job is beyond your skill set?
If the vinyl has deep structural damage, extensive seams or adhesive issues, or requires floor removal, hire a pro.
Also call a pro when you lack proper ventilation, specialized tools, or experience with primers and coatings.
Professionals minimize risk of peeling, off-gassing, and uneven results you can’t easily fix.
Cost vs. benefit: estimating lifespan and ROI
If you decide a professional is the right call, you should also weigh costs against how long the updated floor will last and what value it adds.
Calculate upfront price, expected lifespan extension, and potential resale bump.
Compare to replacement costs and maintenance needs.
Decide if staining/refinishing yields positive ROI over 5–10 years, factoring warranty, traffic, and future renovation plans.
Alternative Solutions If Coloring Fails or Is Unsuitable
If staining or coloring your vinyl doesn’t work or isn’t a good fit, you can opt for floating floor overlays or click-lock vinyl plank installation to give you a whole new surface without ripping out the subfloor.
You might also replace sections with peel-and-stick or luxury vinyl planks for a targeted update that’s fast and affordable.
For temporary or budget-friendly fixes, use area rugs, floor coverings, or other removable aesthetic treatments to hide imperfections and change the look.
Floating floor overlays and click-lock vinyl plank installation
When staining vinyl isn’t possible or doesn’t give the look you want, consider installing a floating floor overlay or click-lock vinyl planks to transform the space quickly and cleanly.
You can float engineered wood or rigid-core vinyl over existing floors without glue, minimizing mess and downtime.
Installation is DIY-friendly, offers realistic textures, and lets you change style later without damaging the substrate.
Peel-and-stick vinyl planks or luxury vinyl plank (LVP) replacement
Since staining vinyl sometimes won’t produce the look you want, swapping in peel-and-stick vinyl planks or luxury vinyl plank (LVP) is a straightforward replacement option that gives you durable, realistic flooring without the mess of refinishing.
You can install peel-and-stick yourself, replacing damaged sections. LVP offers superior wear layers and locking systems for longevity, matching wood, stone, or modern styles with minimal subfloor prep.
Area rugs, floor coverings, and temporary aesthetic fixes
Although staining or repainting vinyl can work, you might prefer quick, reversible solutions that don’t risk damaging the floor—area rugs, runners, floor mats, and temporary coverings let you change the look instantly, hide flaws, and protect high-traffic zones.
You can mix textures and patterns, anchor furniture, and swap seasonally.
Consider:
- Non-slip area rugs
- Peel-and-stick mats
- Protective runners
FAQ Frequently Asked Questions
You probably have specific concerns like whether textured sheet vinyl can be stained or if paint will make the floor slippery.
You’ll also want to know how long a painted or coated vinyl floor lasts, whether color changes will hold up in bathrooms or laundry rooms, and what the most affordable durable option is.
Below are clear answers to those common questions.
Can I stain sheet vinyl that has a textured surface?
How do you handle staining sheet vinyl with a textured surface?
You can’t reliably stain deep texture because pigments won’t penetrate evenly and will highlight highs and lows.
For mild texture, clean thoroughly, etch lightly if manufacturer allows, and use a thin, flexible vinyl-specific dye or coating.
Test a hidden area first—uneven color and poor adhesion are common risks.
Will painting vinyl make it slippery or unsafe?
Will painting vinyl make it slippery or unsafe?
Painting can alter traction—glossy paints and smooth topcoats reduce grip, especially when wet.
You can minimize slip by choosing low-gloss, slip-resistant paints or adding fine grit additives and non-slip sealers.
Verify coatings are fully cured before use, avoid high-traffic wet areas, and test a small patch to confirm safe traction before finishing the whole floor.
How long will a painted/coated vinyl floor last?
Although painted or coated vinyl can look great, its lifespan varies widely based on prep, product quality, and traffic.
With excellent surface prep, high-quality primers and topcoats, and light foot traffic, expect 5–10 years.
In busy areas or with poor adhesion, coatings can wear, chip, or peel within months to a couple years.
Plan for touch-ups or recoating over time.
Can I change the color of vinyl flooring in high-moisture areas (bathroom, laundry)?
Can you safely change the color of vinyl flooring in a bathroom or laundry room? You can, but moisture raises failure risk.
Use products rated for vinyl and wet areas—marine-grade or waterproof coatings—and guarantee flawless surface prep and ventilation.
Seams and edges are vulnerable; seal them. Regularly inspect for peeling or mold.
If unsure, consult a pro for suitable materials and techniques.
What is the cheapest durable way to change vinyl color?
Looking for the cheapest durable way to change your vinyl’s color?
You’ll get best results with a quality floor primer plus a durable water-based epoxy or acrylic floor paint formulated for vinyl.
Prep thoroughly—clean, scuff, and degrease—then apply primer, two coats of paint, and a clear polyurethane topcoat rated for floors.
This combo balances cost, durability, and moisture resistance.